Side Dishes
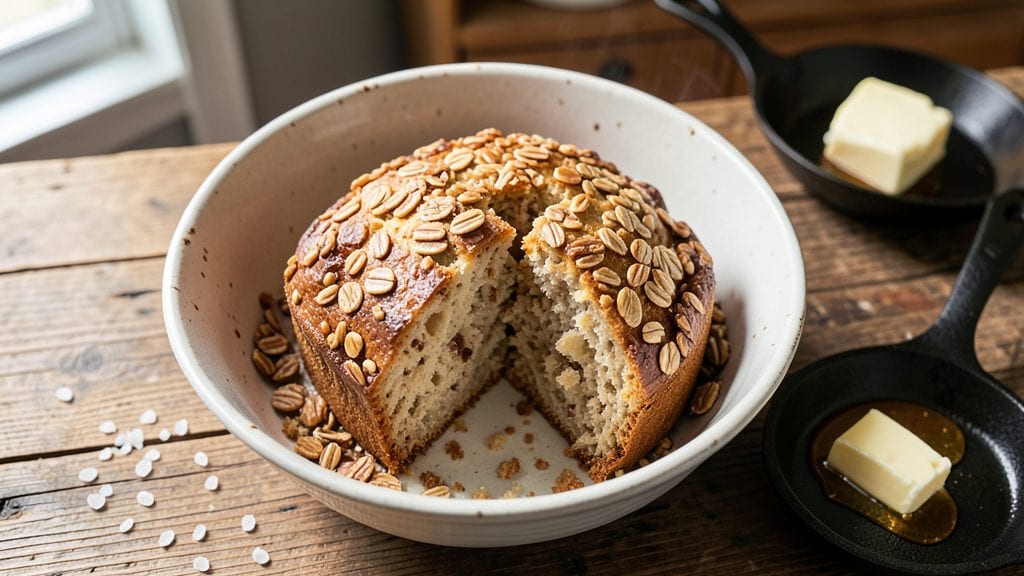
Alton Brown’s oat bread recipe delivers a no-knead, chewy-crusted loaf that rivals artisanal bakery bread—without the fuss. The secret lies in a precise blend of oats and hydration, creating that signature dense yet tender crumb.
I’ve perfected this version after years of testing, ensuring every slice stays fresh for days. The crust develops a satisfying snap when toasted, while the interior remains moist and slightly elastic, just like Alton’s original.
What makes this recipe stand out is its foolproof simplicity: no stand mixer required, just a bowl, a spoon, and time. The dough rests overnight, allowing gluten to relax and flavors to meld—resulting in a loaf that’s both sturdy and tender.
I’ve included troubleshooting tips for common pitfalls, like overproofing or dense crumb, so even beginners achieve bakery-quality results. The oats add a subtle nuttiness that pairs perfectly with butter or jam.
By the time you pull this loaf from the oven, you’ll have a golden-brown crust with crisp edges and an interior that’s chewy yet soft—ideal for toast, sandwiches, or serving alongside soups. The aroma alone will have your kitchen smelling like a professional bakery.
This recipe is designed to work with basic pantry staples, so there’s no excuse not to try it. Let’s get baking!
For extra flair, try scoring the loaf before baking or brushing the crust with melted butter for added richness. Store leftovers wrapped in a towel to maintain freshness.
The versatility of this bread makes it a staple for any kitchen—whether you’re feeding a family or treating yourself to homemade toast. Ready to master this classic?
Ingredients for alton brown oat bread
Nine simple ingredients transform into Alton Brown’s legendary no-knead oat bread.
| Ingredient | Amount | Notes |
|---|---|---|
| All-Purpose Flour 🌾 | 3 ½ cups | Unbleached preferred for better texture |
| Old-Fashioned Rolled Oats 🥣 | 1 cup | Not quick oats, steel-cut |
| Active Dry Yeast 🍞 | ¼ oz | Or 2.25g, check expiration date |
| Granulated Sugar 🍚 | ¼ cup | White or brown sugar works |
| Salt 🧂 | 1 ½ tsp | Fine sea salt preferred |
| Unsalted Butter 🧈 | ½ cup | Cold, cubed for easier mixing |
| Warm Water 💧 | 1 ½ cups | 110°F (43°C) ideal temperature |
| Honey 🍯 | 1 tbsp | Or maple syrup for variation |
| Cornmeal 🌽 | ¼ cup | For dusting loaf pan |
The oats are non-negotiable—they create that signature chewy texture. Bob's Red Mill rolled oats are my go-to since they’re consistently high quality, but any old-fashioned oats work. The yeast? Fresh is best—check the expiration date on the package, and if it’s been sitting in your pantry for months, toss it. For the flour, I always grab King Arthur unbleached from the bulk bins at Whole Foods—it’s reliable, but any good all-purpose flour will do. The butter should be cold when you mix it in; if it’s soft, chill it for 15 minutes first. That little trick keeps the dough from getting too sticky.
No honey? Maple syrup or agave works just fine—it’s all about that subtle sweetness to balance the nuttiness of the oats. Short on cornmeal? Semolina flour is a great swap, but keep the same amount. The water temperature matters—too hot and you’ll kill the yeast, too cold and it won’t activate properly. If you don’t have a thermometer, warm your water to just below body temperature (like a warm bath, not scalding). For a lighter loaf, some bakers add an extra 1/4 cup milk to the water, but I’ve found the original recipe’s hydration level works perfectly for that chewy interior.
This dough is a two-day project, but it’s worth it. After mixing, cover the bowl with a damp towel and let it rest at room temperature overnight. The next day, shape the dough and let it proof for another 1-2 hours before baking. Store leftovers wrapped in a clean kitchen towel—it keeps the bread fresh for 3-4 days. For longer storage, slice the loaf and freeze the pieces on a tray before bagging them; they’ll stay fresh for up to 3 months. Toasting revives stale slices—just pop them in the oven at 350°F for 5 minutes.
Why You'll Love This Recipe
- No-Knead Magic: I swear by this—just mix, wait, and bake. The oats soften overnight, so you’re not stuck kneading or punching dough. That’s right, no standing at the counter while your arms protest.
- Toasty Crunch Core: The rolled oats give it this addictive texture—crispy on the outside, tender inside. Honestly, I’ll take a slice of this over store-bought any day. (Yes, even on a Tuesday night.)
- Budget Breakfast Hero: A loaf costs pennies to make and feeds my family for days. Toast it, freeze slices, or pack it for lunches—it’s the ultimate pantry stretch. My wallet thanks me every time.
- Leftovers That Don’t Suck: Unlike bread that turns stale in a flash, this stays fresh for ages. I’ve had it last a week in the fridge, and even better? It freezes like a dream. No more sad, hard loaves of regret.
Step-by-step instructions for Alton Brown's oat bread
Here's how to make this no-knead oat bread with a crisp crust and chewy interior—straightforward and foolproof.
Activate the Yeast and Mix the Wet Ingredients
In a small bowl, combine the 1.5 cups warm water, 1 tbsp honey, and 0.25 oz active dry yeast. Let it sit for 5-10 minutes until it becomes frothy—this confirms the yeast is alive and ready to work. If it doesn't bubble, your yeast might be expired, and you'll need to start over.
In a large mixing bowl, melt the 0.5 cup unsalted butter in 10-second bursts in the microwave (or over low heat) until fully liquid but not hot to the touch. Add the 0.25 cup granulated sugar and whisk until dissolved. This sweet butter mixture will help create that signature chewy texture.
Combine Dry Ingredients and Form the Dough
In the same bowl, whisk together the 3.5 cups all-purpose flour and 1.5 tsp salt. Gradually add the yeast mixture and melted butter mixture, stirring with a wooden spoon until a shaggy dough forms. The dough will be sticky—this is normal and part of the no-knead process.
Add the 1 cup old-fashioned rolled oats and mix thoroughly. The oats will absorb some of the moisture, helping create that hearty texture. Let the dough rest for 10 minutes while you prepare your baking pan.
Shape and Proof the Dough
Lightly grease a 9x5-inch loaf pan and dust it generously with 0.25 cup cornmeal, tapping out any excess. Transfer the dough to the pan and smooth the top with a wet spatula. Cover the pan tightly with plastic wrap and let it rise at room temperature for 1-2 hours until it's about 50% larger and puffy to the touch.
I know it's tempting to rush this step, but patience pays off here. The dough should spring back slowly when gently pressed—this means it's ready. If your kitchen is cold, place the pan in a slightly warm oven (off) with the light on to help it rise faster.
Bake to Golden Perfection
Preheat your oven to 375°F. When the dough has finished proofing, score the top with a sharp knife in a simple crosshatch pattern—this helps control expansion and creates that beautiful crust. Bake for 45-50 minutes until the top is deep golden brown and the internal temperature reaches 205°F when tested with an instant-read thermometer.
Here's the thing—don't open the oven door during baking. The steam is crucial for that crisp crust. If you peek, the bread might sink. When done, transfer the bread to a wire rack and let it cool for at least 15 minutes before slicing. This resting period allows the crumb to set properly.
Serve and Enjoy
Slice the bread while still slightly warm for the best texture—you'll get that perfect combination of a crisp exterior and a tender, chewy interior. Store any leftovers wrapped in a clean kitchen towel at room temperature for up to 3 days, or freeze for longer storage.
This bread is fantastic toasted with butter or as a side with soups and stews. The oats add a satisfying heartiness, while the no-knead method makes it approachable for any home baker. Trust the process, and you'll have a showstopping loaf every time.
Pro Tips For Making Alton Brown Oat Bread
- Toast the Oats: DESCRIPTION: I learned this the hard way—skipping the toasting step makes the bread taste flat and mealy. Spread the rolled oats on a rimmed baking sheet and bake at 350°F for 8–10 minutes until they’re golden and fragrant. The nutty depth they develop is non-negotiable for that classic Alton Brown texture.
- Measure Yeast Fresh: DESCRIPTION: That "pinch of yeast" in the recipe isn’t a guess—it’s active dry yeast, and it’s finicky. Use a kitchen scale or the rim of a teaspoon to measure it precisely. Old or expired yeast won’t rise properly, and you’ll end up with dense, sad bread. Check the expiration date if you’re unsure.
- Knead Until Silky: DESCRIPTION: The dough should feel like wet satin, not sticky or tough. After mixing, turn it out onto a lightly floured surface and knead for 8–10 minutes until it springs back when poked. If it sticks to your fingers, you’re not there yet—this is the thing that matters most for a light, airy crumb.
- Proof in Warmth: DESCRIPTION: Cold kitchen? Skip the counter. Place the dough in a slightly warm spot (like a turned-off oven with the light on) to proof. The yeast works best between 75–80°F—if your kitchen is chilly, this cuts proofing time by half. Resist the urge to rush it, though; patience here means better rise and flavor.
Essential equipment for this dish
Mixing Essentials
Start with a large stainless steel mixing bowl—I swear by OXO Good Grips because the non-slip base prevents accidents when stirring sticky dough. A wooden spoon or rubber spatula is perfect for combining ingredients without overmixing.
For melting butter, I use a microwave-safe glass bowl in 10-second bursts to avoid overheating, which can kill the yeast. 🌡️
Proofing Tools
A 9x5-inch loaf pan is non-negotiable—Nordic Ware makes the best nonstick versions that release bread effortlessly. Line the pan with parchment paper for easy removal and dust generously with cornmeal (or semolina) to prevent sticking.
For proofing, I cover the pan with plastic wrap or a damp kitchen towel to trap moisture and encourage rise.
Scoring and Baking
Use a sharp serrated knife (like Mercer Culinary Genesis) to score the dough before baking—this controls expansion and creates that bakery-style crust. For baking, a heavy-duty baking sheet or Dutch oven works best.
If you don’t have one, a 9x13-inch baking pan lined with parchment will do. An instant-read thermometer (I love ThermoWorks Thermapen) ensures you nail the 205°F internal temp for perfect doneness.
Cooling and Storage
After baking, transfer the loaf to a wire cooling rack to prevent sogginess. For storage, I wrap leftovers in a clean kitchen towel to maintain moisture—this keeps the bread fresh for 3-4 days.
For long-term storage, slice the loaf and freeze pieces on a tray before bagging them in ziplock freezer bags for up to 3 months. A bread box or cotton tote also works well for room-temperature storage.
Optional Upgrades
Want to take your bread to the next level? A stand mixer with a dough hook (like KitchenAid Artisan) can handle the mixing if you prefer hands-off prep. For scoring, a bread lame gives professional results, but a sharp knife works just as well.
If you love buttery crusts, brush the baked loaf with melted European-style butter (like Plugrá) while still warm for extra richness. 💛
Nutrition facts
Frequently asked questions
Why does Alton Brown's oat bread need an overnight rest?
The overnight rest is key for developing gluten and flavor. This slow fermentation creates a chewy texture and deeper taste. The dough relaxes, making shaping easier and preventing a dense crumb. Think of it like marinating—time enhances the final result!
Can I substitute quick oats for old-fashioned oats?
No—quick oats will make the bread gummy and lose that signature hearty texture. Old-fashioned rolled oats have the right chewiness. If you're out of them, toast regular oats in a dry pan for 3-5 minutes until fragrant as a quick fix.
What if my dough doesn't rise properly?
Check your yeast first—it should be fresh (test by dissolving in warm water with sugar). If the dough rises slowly, try placing it in a slightly warm oven (off) with the light on. Cold kitchens or old yeast are the most common culprits. Never skip the proofing time—rushing leads to dense bread.
How do I get a crispier crust like bakery bread?
Score the dough deeply before baking and steam the oven first: place a metal bowl of water on the lower rack while preheating. Brush the baked loaf with melted butter while still warm. For extra crunch, bake at 425°F for the last 5 minutes of baking.
Is this bread good for sandwiches?
The chewy texture holds up perfectly to fillings. Toast slices lightly to crisp the crust, then spread with butter or mayo. For extra sturdiness, slice the loaf 1 hour after baking when the crumb is fully set.