
Snacks
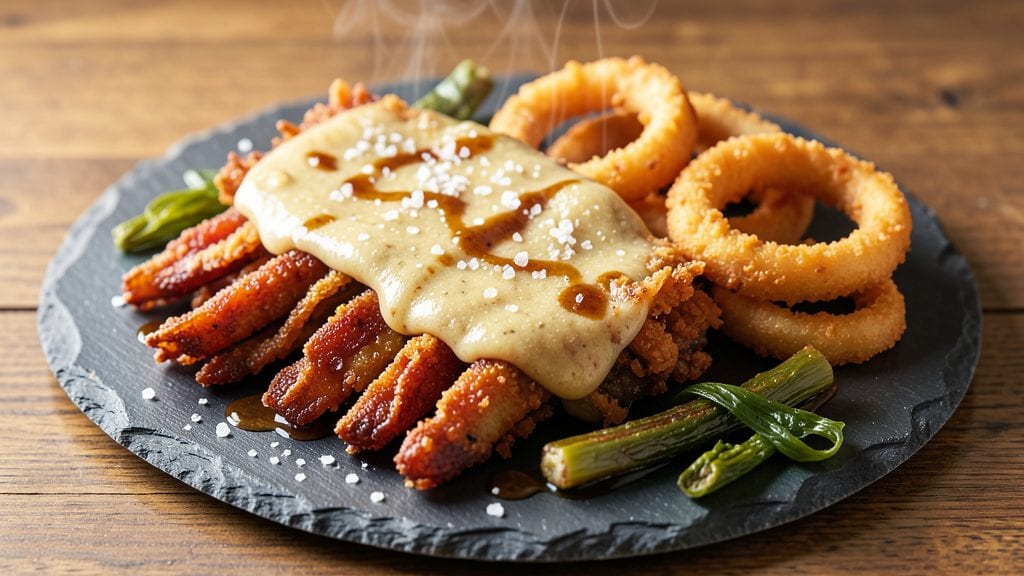
This fried pickle beer batter recipe delivers the perfect crunchy crust and tangy bite pairing that turns snack time into an experience. The secret lies in the crispy beer batter that clings perfectly to the pickles, creating a satisfying contrast between the salty, tangy pickle and the golden, airy crust.
I've tested countless variations to perfect the balance of crispiness and flavor.
The process is surprisingly simple, requiring just a few ingredients and about 20 minutes of active time. You'll need all-purpose flour, a cold beer (the bubbles are key for that light batter), and a few spices to enhance the flavor.
The pickles should be drained thoroughly before coating, ensuring they stay crispy on the inside while achieving that perfect golden crust on the outside.
What you'll end up with is a plate of irresistibly crispy fried pickles that are crunchy on the outside and tangy on the inside. The beer batter adds a subtle depth of flavor that pairs beautifully with classic dipping sauces like ranch or spicy mayo.
This dish is perfect for game day, parties, or just a satisfying snack when you're craving something crunchy and bold.
Once you try this recipe, you'll never go back to store-bought fried pickles again. The combination of the crispy beer batter and the tangy pickle creates a flavor profile that's impossible to resist.
Let's get started on making these delicious snacks that are sure to impress everyone at your next gathering.
Ingredients for fried pickle beer batter
Four ingredients transform pickles into crispy, golden beer-battered bites—game day magic in minutes.
| Ingredient | Amount | Notes |
|---|---|---|
| Dill Pickle Spears 🥒 | 1 ½ lb | Drained thoroughly, patted dry |
| All-Purpose Flour 🌾 | 1 ½ cups | Light, not self-rising |
| Cold Lager Beer 🍺 | 1 cup | Light or pale ale preferred |
| Large Eggs 🥚 | 1 whole | Room temperature |
| Vegetable Oil 🫒 | 2 cups | For frying, 350°F |
| Granulated Sugar 🍚 | 1 tbsp | Balances tangy flavor |
| Salt 🧂 | 1 tsp | Kosher or sea salt |
| Ground Black Pepper 🌶️ | ½ tsp | Freshly cracked preferred |
| Garlic Powder 🧄 | ½ tsp | Not garlic salt |
| Paprika 🌶️ | ½ tsp | Smoked for extra flavor |
| Ranch Dressing 🥛 | ½ cup | For dipping, optional |
The pickles are your canvas—drain them well and pat dry with paper towels (wet pickles = soggy batter). Trader Joe's has the best dill spears for this, but any dill pickle works. The beer? Coors Light or Budweiser are classic choices—they’re light enough to keep the batter crisp but flavorful enough to shine. Keep it cold until you’re ready to mix, or the bubbles will die out. The flour matters too: Bob’s Red Mill all-purpose is my go-to—it’s light and creates that perfect airy crust. If you’re short on time, you can use self-rising flour but cut the baking powder in half.
No cold beer? Substitute with sparkling water plus 1 tsp lemon juice—it mimics the bubbles, though the flavor won’t be identical. Short on ranch? Mix mayo with a splash of buttermilk and a pinch of dill for a quick fix. The spices are flexible—swap smoked paprika for regular if you’re out, or kick it up with a pinch of cayenne. For extra crunch, add 1 tbsp cornstarch to the flour mix. And if you’re feeling fancy, toss the fried pickles in tony chachere’s seasoning before serving—trust me, it’s a game-changer. Oh, and don’t skip the sugar; it balances the tangy pickle perfectly.
These stay crispy for about 10 minutes after frying, so work in batches if you’re serving a crowd. Reheat in a 375°F oven for 5 minutes to restore crunch. Store leftovers in an airtight container between layers of paper towels for up to 3 days—they’ll lose crispiness but still taste great. Freeze fried portions for up to 1 month by tossing them in flour before bagging. Pro tip: Double the batter if you’re frying for more than 4 people; it’s worth the extra effort.
Why You'll Love This Recipe
- Five-Ingredient Magic: I swear, this recipe is the kind of thing you’ll bookmark and forget exists until you’re craving something salty, crispy, and unexpectedly good. Flour, beer, eggs, pickles—just toss them in a bowl and go.
- Crispy-Creamy Crunch: That golden beer batter? It’s the star. The pickles stay juicy inside while the outside gets shatteringly crispy—like a perfect balance of tangy, crunchy, and just a hint of malty sweetness from the lager.
- Game Day Hero: Between us, this is my go-to for tailgates, Super Bowl parties, or even a lazy Sunday with friends. It’s the kind of snack that disappears fast but doesn’t require a fancy spread—just a plate and some napkins.
- Budget-Friendly Bite: Pickles are cheap, beer is cheap, and you’re not using fancy ingredients. Double the batter, freeze half, and reheat when you’re craving it again—no waste, all flavor. My wallet thanks me every time.
Step-by-step instructions for fried pickle beer batter
Here's how to create that perfect golden crust with a tangy, bubbly bite—every time.
🍳 Step 1: Mix the Beer Batter to Light and Airy Perfection
In a medium bowl, whisk together the 1.5 cups all-purpose flour, 1 tablespoon granulated sugar, 1 teaspoon salt, ½ teaspoon ground black pepper, ½ teaspoon garlic powder, and ½ teaspoon paprika. This dry blend forms the foundation of our crispy crust. I like to sift the flour first to eliminate any lumps—this ensures a smooth batter that won't clump during frying.
In a separate small bowl, beat the 1 whole large egg until just combined—no need to overbeat, just enough to blend. Then, slowly pour in the 1 cup cold lager beer while whisking continuously. The beer adds that authentic tangy flavor while creating bubbles that help the batter rise beautifully. Pour this wet mixture into the dry ingredients and whisk vigorously for about 1 minute until smooth. The batter should be thin but coat the back of a spoon—like heavy cream consistency. If it's too thick, add 1-2 tablespoons of cold beer to loosen it.
🥘 Step 2: Prepare the Pickles for Frying
Drain the 1.5 lb dill pickle spears thoroughly and pat them completely dry with paper towels—this is absolutely critical for a crispy crust. Any moisture left on the pickles will cause the batter to steam instead of crisp. Arrange the pickles on a wire rack set over a baking sheet to catch any excess drips while they air dry for 5 minutes. You want them bone dry before they hit the hot oil.
While the pickles dry, heat 2 cups vegetable oil in a deep skillet or Dutch oven to 350°F. Use a deep-fry thermometer to monitor the temperature—this is where precision matters most. If the oil isn't hot enough, the batter will absorb oil instead of creating that golden crust we're after. Let the oil heat for 5 minutes to ensure it's properly preheated before adding the pickles.
🔥 Step 3: Fry the Pickles in Batches for Maximum Crispiness
Working in batches to avoid overcrowding, carefully place 4-5 pickle spears at a time into the hot oil. The oil should sizzle immediately—if it doesn't, your oil isn't hot enough. Fry for 2-3 minutes per side, turning with tongs, until the batter turns a deep golden brown color. You'll see bubbles form on the surface as the beer in the batter cooks off, creating that perfect crispy texture. Don't rush this step—undercooked batter will be greasy, not crispy.
Transfer the fried pickles to a paper towel-lined plate to drain excess oil. I like to sprinkle them immediately with a pinch of salt while they're still hot—this enhances the flavors as they crisp up. Repeat with remaining pickles, maintaining the 350°F oil temperature between batches. The oil will cool slightly with each batch, so you may need to reheat it for 1-2 minutes between frying sessions.
⏰ Step 4: Serve Immediately with Ranch for the Ultimate Pairing
Serve the fried pickles immediately while they're still piping hot and crispy. The beer batter should be golden and crunchy with just a hint of chewiness—each bite should deliver that perfect balance of tangy pickle flavor, crispy crust, and subtle beer notes. For the ultimate experience, set out the ½ cup ranch dressing on the side. The cool, creamy ranch cuts through the heat of the fried batter while complementing the pickle's tang.
Here's the thing—these pickles are best enjoyed right away when the batter is at its crispiest. If you need to hold them for a few minutes, tent loosely with foil to keep them warm, but don't let them sit too long or they'll lose that perfect crunch. The beer batter recipe creates a light, airy crust that's addictive—once you try them, you'll want to make them again and again for game day, bar snacks, or just because they're that good.
Pro Tips For Making Fried Pickle Beer Batter
- PAT THE PICKLES DRY: Beer batter sticks like glue if your pickles are damp—even after soaking. Wrap them in a clean kitchen towel and press firmly for 30 seconds. I learned this the hard way when my first batch turned into a soggy mess.
- WHISK THE BATTER FAST: Cold beer and flour don’t mix easily, and overmixing makes the batter gummy. Whisk vigorously for 30 seconds, then let it sit for 2 minutes before frying. This gives the flour time to hydrate properly without overworking it.
- USE A THERMOMETER: Oil needs to be 350–375°F—hot enough to seal the batter but not so hot it burns before the inside cooks. I used to guess, and my pickles either came out greasy or raw inside. A cheap thermometer fixes that.
- FRIED IN BATCHES: Crowd the fryer, and the oil temp drops, leading to greasy, uneven cooking. Fry 2–3 spears at a time, and keep the rest in a single layer on a wire rack—not piled up. Your future self will thank you.
Serving suggestions for this recipe
Game Day Essentials
These fried pickles are a must-have for any sports gathering or tailgate. Arrange them on a wooden serving board or slate platter for rustic appeal, and scatter with crushed potato chips or pretzel bits for extra crunch.
I love setting up a DIY dipping station with small bowls of ranch, spicy mayo, and blue cheese dressing—let guests mix their own flavors. For a fun twist, skewer them on toothpicks and serve in a cauldron-style bowl filled with ice for a chilled presentation. 🏈
Bar Snack Perfection
Transform your fried pickles into bar food by pairing them with beer flight options—light lagers, IPAs, or even a Belgian witbier to complement the beer batter. Serve them alongside wings or sliders for a full bar experience.
For a savory-sweet combo, drizzle with honey mustard or sriracha mayo after frying. I like to arrange them on a black slate tray with pickle spears fanned out for maximum visual impact. Add mini bottles of hot sauce and pickle juice shots for a playful touch. 🍻
Party Platter Ideas
For holiday parties or appetizer spreads, create a build-your-own platter with fried pickles as the star. Pair them with mini corn dogs, cheese fries, and deviled eggs for a nostalgic snack board. Use mini muffin tins to portion individual servings—great for weddings or brunch buffets.
For a festive touch, dust with edible gold powder or sprinkle with paprika before serving. I’ve also seen creative setups where fried pickles are stacked like logs in a wooden trough with dipping sauces on the side. 🎉
Breakfast Twist
Who says fried pickles are just for snacks? Try them as a breakfast side—pair with biscuits and gravy or pancakes for a salty-sweet surprise. The beer batter adds a fun texture contrast to morning meals.
For a brunch spread, serve them alongside bloody marys or mimosas—the tangy crunch cuts through the richness. I like to arrange them on a copper tray with fresh herbs (like dill or parsley) for a gourmet breakfast vibe. ☕
Kid-Friendly Fun
Make snack time exciting for kids by turning fried pickles into a fun activity. Set up a mini fry station (with adult supervision) where they can dip their own pickles in batter and fry them in small batches.
Serve with colorful dipping sauces in squeeze bottles for easy use. For a party favor, package individual portions in small paper cones or mini baskets—kids love taking home their own crispy treats. 🧒
Gourmet Upgrade
Elevate your fried pickles with truffle oil drizzle or balsamic glaze for a restaurant-worthy touch. Garnish with microgreens or crumbled blue cheese for a sophisticated presentation. For a smoky flavor, add ½ teaspoon smoked paprika to the batter.
I’ve also seen creative pairings with charcuterie boards—the salty, crispy pickles balance rich meats and cheeses beautifully. Serve with a dry rosé or sparkling cider for a classy pairing. 🍽️
Nutrition facts
Frequently asked questions
Why does the batter need to be cold?
Cold beer creates tiny bubbles that help the batter rise beautifully when fried, giving you that perfect light, airy crust. If you use room-temperature beer, the bubbles dissipate, and your batter will turn out dense instead of crispy. Keep everything cold until you're ready to mix—it's worth the extra 5 minutes of patience!
Can I use any type of beer for the batter?
Light lagers like Coors Light or Budweiser work best—they're crisp and won't overpower the pickle flavor. Dark beers or stouts can make the batter heavier, but you can still use them if you prefer a deeper flavor. Just remember that the color of the beer will affect the final crust hue!
How do I keep the fried pickles crispy?
Pat the pickles completely dry before frying, and work in small batches to maintain oil temperature at 350°F. Transfer fried pickles to a paper towel-lined plate immediately, and serve them right away. If you need to hold them, keep them warm in a 200°F oven for no more than 10 minutes.
What's the best dipping sauce for these?
Classic ranch or spicy mayo are perfect, but don't be afraid to get creative! Try blue cheese dressing, honey mustard, or even a tangy sriracha aioli. The key is balancing the salty, crispy pickles with something cool and creamy or sweet and spicy.
Can I make this recipe ahead of time?
You can prep the batter mixture up to 24 hours ahead and store it in the fridge, but fry fresh for best results. The pickles themselves should be fried just before serving to maintain maximum crispiness. For make-ahead convenience, consider freezing the battered (unfried) pickles—just fry from frozen at 375°F for 3-4 minutes per side.