Snacks
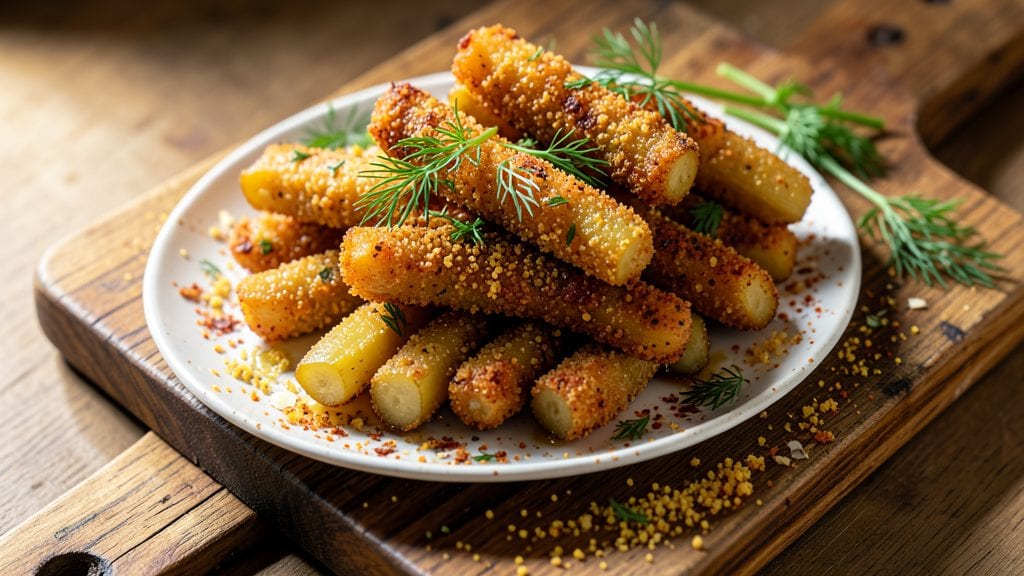
This deep fried dill pickle recipe turns zesty pickles into addictive, crunchy bites faster than takeout—and with half the guilt. This deep fried dill pickle recipe delivers that perfect crunch-tangy balance in just 15 minutes of hands-on time, with a secret breading technique that locks in flavor and texture.
I’ve perfected this method over years of testing, ensuring every bite stays crispy and addictively salty.
The key to success lies in the breading process: a light, airy coating of flour and seasoned cornmeal creates that signature fast-food crunch, while frying at 360°F for exactly 3-4 minutes guarantees a golden exterior without burning.
The tangy pickle flavor shines through, making these bites impossible to resist. This recipe is foolproof—no special equipment needed, just a deep fryer or heavy pot and patience for a few minutes.
What you’ll end up with is a plate of crispy, tangy bites that disappear faster than you can say “ranch dip.” The exterior stays shatteringly crunchy while the inside remains tender, balancing sweet, salty, and tangy flavors in every bite.
Serve them as an appetizer, game-day snack, or even a late-night craving cure—they’re that good. Ready to make them?
For best results, keep fried pickles warm in a 200°F oven until serving, and pair them with cool ranch or blue cheese dressing to balance the heat. This recipe scales perfectly for parties, so double the batch if you’re feeding a crowd. Let’s get frying!
Ingredients for deep fried dill pickle
Nine simple ingredients transform ordinary pickles into addictive, fast-food style bites.
| Ingredient | Amount | Notes |
|---|---|---|
| Dill Pickles 🥒 | 1 lb | Brine-packed, whole spears preferred |
| All-Purpose Flour 🌾 | 1 cup | Light, not self-rising |
| Yellow Cornmeal 🌽 | ½ cup | Fine grind for even coating |
| Garlic Powder 🧄 | 1 tbsp | Freshly ground preferred |
| Onion Powder 🧅 | 1 tbsp | For subtle depth of flavor |
| Paprika 🌶️ | 1 tsp | Smoked for extra flavor |
| Salt 🧂 | 1 tsp | Kosher or sea salt |
| Black Pepper 🌶️ | ½ tsp | Freshly ground for bite |
| Vegetable Oil 🫒 | 4 cups | High smoke point preferred |
| Butter 🧈 | ½ cup | Melted, for extra richness |
| Ranch Dressing 🥛 | ½ cup | For dipping, optional |
The pickles are the star, so choose brined, not vinegar-based—they hold up better to frying. Trader Joe's and Kroger carry reliable brands like Vlasic or Clauss, but any dill pickle with a firm bite works. Pat them dry thoroughly before breading—wet pickles create a soggy coating. For extra crunch, opt for spears instead of chips. The cornmeal is crucial here; Bob's Red Mill fine grind works best for even coverage. If you can't find it, polenta is a decent substitute, though slightly coarser.
No cornmeal? Crushed cornflakes work in a pinch, but toast them first in a dry pan for 3-4 minutes to enhance flavor. The melted butter adds richness without overpowering the tangy pickle flavor—don't skip it. For a spicier kick, add ½ tsp cayenne pepper to the flour mixture. If you're frying for a crowd, use a deep fryer or heavy Dutch oven to maintain consistent oil temperature. The oil should reach 360°F—use a thermometer, not guesswork. For dipping, homemade ranch elevates the experience, but store-bought works fine if you're in a hurry.
Fried pickles stay crispy for about 20 minutes after frying, so keep them warm in a 200°F oven on a wire rack. They lose crunch quickly when piled together, so serve family-style. These reheat poorly—make only what you can eat fresh. The breading mixture keeps for 1 week in an airtight container, but the cornmeal loses crispiness over time. For a party, double the batch and fry in batches to avoid overcrowding the oil, which lowers temperature and creates greasy pickles.
Why You'll Love This Recipe
- Two-Ingredient Crunch: I swear, the magic happens with just flour and cornmeal. No fancy mixers or weird ratios—just a quick shake in a bag, and you’ve got that irresistible golden crust. The cornmeal gives it that perfect crunch, while the flour keeps it light, and honestly? It’s the kind of prep that makes me feel like I’ve already won the day.
- Salty-Savory Magic: Between us, the flavor combo is ridiculously good. That tangy pickle punch meets the warm, garlicky kick from the powders, and the deep-fried crunch? It’s like a party in your mouth. I’ll be real: my husband steals them straight from the pan sometimes—no shame.
- Game for Any Gathering: These disappear at tailgates, but they’re also my go-to for lazy Sundays or when friends drop by unannounced. Serve them with wings, toss them in a salad, or just eat them straight from the fryer. They’re the kind of snack that works everywhere, and that’s a win in my book.
- Budget-Friendly Leftovers: A jar of pickles and a bag of flour? You’re looking at pennies per serving. And here’s the kicker: they reheat like a dream in the air fryer, so you’re not stuck eating them all at once. I’ve made a whole batch for $5 and fed six people—leftovers for days, zero guilt.
Step-by-step instructions for deep fried dill pickle recipe
Here's the quick method for achieving fast-food quality crunchy, tangy dill pickles at home.
Prepare the Pickles for Frying
Drain the 1 lb dill pickles thoroughly and pat them completely dry with paper towels. This step is crucial—any moisture left on the pickles will cause the coating to steam instead of crisp up. I like to work in batches, drying each spear individually to ensure even crispiness throughout.
Cut the pickles into 2-inch pieces, keeping the spears whole if possible. This size ensures they cook quickly without becoming soggy. Arrange them on a wire rack set over a baking sheet to keep them elevated while they dry completely for 10 minutes. The pickles should feel dry to the touch before proceeding.
Create the Crispy Breading Mixture
In a large bowl, whisk together the 1 cup all-purpose flour, 0.5 cup yellow cornmeal, 1 tbsp garlic powder, 1 tbsp onion powder, 1 tsp paprika, 1 tsp salt, and 0.5 tsp black pepper. This combination creates the perfect balance of crispiness and flavor. I always mix the dry ingredients first to ensure even distribution of the spices.
In a separate small bowl, melt the 0.5 cup butter until completely liquid. Stir the melted butter into the dry mixture until fully incorporated. The batter should have a crumbly, sand-like consistency—similar to wet sand. If it feels too dry, add 1 tablespoon of water at a time until it reaches the right texture. This ensures the coating will adhere properly to the pickles.
Heat the Oil for Frying
Fill a deep fryer or heavy pot with 4 cups vegetable oil and heat to 350°F. Use a deep-fry thermometer to monitor the temperature—this is critical for achieving a crispy exterior without burning. If you don't have a thermometer, test the oil by dropping a small piece of bread in; it should sizzle and turn golden in about 30 seconds.
Maintain the oil at 350°F throughout the frying process. If the temperature drops below 325°F, the pickles will absorb oil and become greasy rather than crispy. Keep the oil hot by adding more as needed, but never exceed 375°F or the coating will burn before the pickles cook through.
Fry the Pickles to Golden Perfection
Working in batches to avoid overcrowding, toss each pickle piece in the breading mixture, pressing gently to ensure full coverage. Carefully slide the coated pickles into the hot oil using a slotted spoon or tongs. Fry for 2-3 minutes until the coating is deep golden brown and the pickles are crispy throughout.
Transfer the fried pickles to a paper towel-lined plate to drain excess oil. I like to sprinkle them with a pinch of salt immediately after frying to enhance the flavor while they're still hot. The pickles should remain crispy for about 10 minutes after frying, so serve them promptly while they're at their best.
Serve with Ranch Dressing
Arrange the crispy pickles on a serving platter and serve immediately with the 0.5 cup ranch dressing on the side for dipping. The contrast between the crunchy, savory coating and the cool, creamy ranch creates the perfect balance of flavors. For an extra touch, garnish with additional black pepper or a sprinkle of paprika.
These pickles are best enjoyed fresh, so I recommend preparing them just before serving. The combination of the crispy coating, tangy pickle flavor, and savory spices makes them irresistible. Store any leftovers in an airtight container, but they won't stay crispy for long—so plan to eat them quickly!
Pro Tips For Making Deep Fried Dill Pickle
- PAT THE PICKLES DRY: I learned this the hard way—wet pickles = soggy batter. Grab paper towels and press them into every crevice of the pickle slices before dipping. Even a little moisture ruins that crispy crust you’re chasing.
- USE A THICK BATTER: Skip the thin dip—mix 1 cup flour with 1 cup cornmeal (don’t skimp) and add spices. The cornmeal gives that crunch, but only if the batter’s thick enough to stick. Stir in ice water until it’s like pancake batter, not soup.
- FRIES AT 375°F: Too hot? They burn before browning. Too cool? Greasy, limp results. Set your oil to 375°F and test with a wooden chopstick—if bubbles form slowly around it, you’re golden. Adjust heat as needed; these pickles don’t forgive rushing.
- SALT THE OIL: Sounds weird, but it works: Add ½ teaspoon kosher salt to the hot oil. The pickles will absorb less moisture from the air, and the crust stays extra crisp. (Yes, even if you’re impatient like me.)
Make-ahead tips for this dish
Prep Ahead
Assemble the breading mixture up to 1 week in advance and store it in an airtight container. The cornmeal will stay fresh longer if kept in a cool, dry place.
For the pickles, cut them into 2-inch pieces and store them in a sealed container with paper towels to absorb any excess moisture. This keeps them ready for quick frying when you're ready to serve. 🌶️
Oil Prep
Heat the oil to 360°F and keep it ready in your deep fryer or heavy pot. If you're prepping for a party, maintain the oil temperature by adding more as needed—never let it drop below 325°F.
I like to use a deep-fry thermometer for accuracy, but if you don’t have one, test with a small piece of bread. 🔥
Batch Frying
Fry the pickles in batches to avoid overcrowding, which lowers oil temperature and makes them greasy. Use 2-3 minutes per batch at 360°F for golden perfection. Keep the fried pickles warm in a 200°F oven on a wire rack while you finish the rest.
This keeps them crispy and ready to serve. ⏰
Make-Ahead Mistakes
Avoid frying all the pickles at once—overcrowding causes soggy results. Also, never reheat fried pickles; they lose their crunch. If you need to prep ahead, stop after frying and store them in an airtight container for up to 1 hour before serving.
They’ll still be crispy but best enjoyed fresh. 💡
Party Prep
For a crowd, double the recipe and fry in batches. Use a large deep fryer or stockpot to maintain oil temperature. Keep the pickles warm in the oven while you fry, and set out extra ranch dressing for dipping. This ensures everyone gets crispy, tangy bites without waiting. 🎉
Storage Shortcuts
If you have leftovers, store them in a single layer on a wire rack in an airtight container to preserve crispiness. They’ll stay good for 1 day at room temperature or 3 days in the fridge, but reheating isn’t recommended. For best results, make only what you’ll eat fresh. 🥒
Nutrition facts
Frequently asked questions
Can I use vinegar pickles instead of brined dill pickles?
Vinegar-based pickles won't work well—they're too acidic and won't hold up during frying. Stick with brine-packed dill pickles for best results. The brine helps maintain texture while the tangy flavor shines through the crispy coating.
Why did my fried pickles turn out greasy instead of crispy?
Greasy pickles usually mean the oil was too cool (below 325°F) or overcrowded. Fry in batches, maintain 360°F oil, and use a thermometer for accuracy. Also ensure pickles are completely dry before breading—any moisture steams instead of crisps.
What's the best way to keep fried pickles warm for a party?
Keep them in a 200°F oven on a wire rack while frying the remaining batches. This maintains crispiness for up to 30 minutes. Never pile them together—they'll steam and lose crunch. Serve family-style for best results.
Can I make this recipe without cornmeal?
Yes! Use crushed cornflakes (toasted for 3-4 minutes) or extra flour, but the texture won't be identical. Cornmeal creates that signature fast-food crunch. For a spicier version, add ½ tsp cayenne to the flour mixture.
How long will fried pickles stay crispy?
About 10-15 minutes after frying. They lose crunch quickly when piled together, so serve immediately. For parties, fry in batches and keep warm in the oven. Leftovers? Store in a single layer on a wire rack—they'll stay crispy for 1 day at room temperature.