
Side Dishes
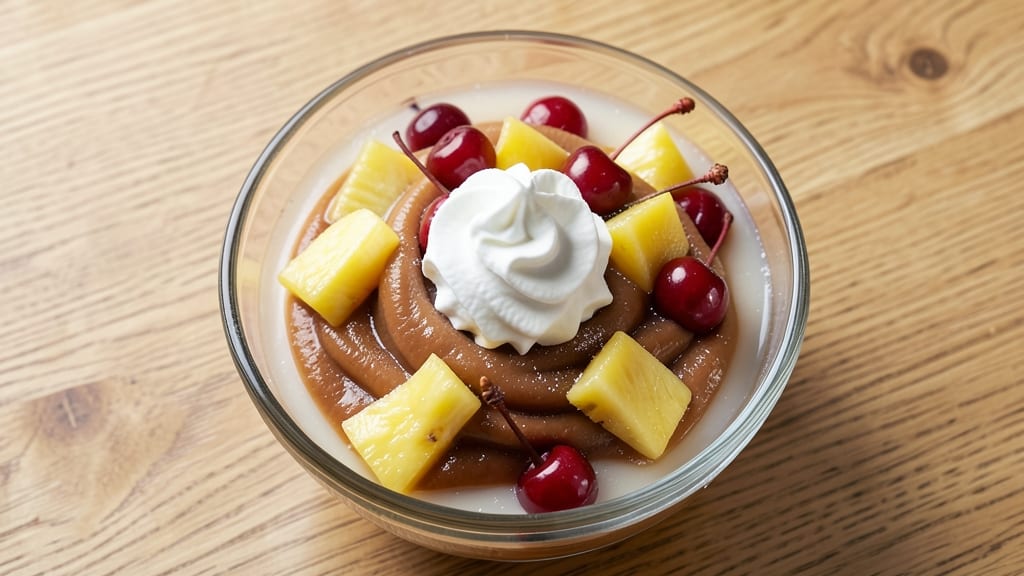
This applesauce Jello salad recipe brings back childhood nostalgia with its perfect balance of creamy applesauce, fruity gelatin, and fluffy whipped topping—all in one comforting dish. The layered texture and sweet-tart flavor make it a classic dessert or side that never goes out of style.
I’ve perfected the technique to ensure the gelatin sets just right while keeping the applesauce smooth and the fruit fresh.
The magic happens in the layering: a firm gelatin base supports the applesauce and fruit mixture, while the whipped topping adds a light finish. This recipe delivers restaurant-quality texture without requiring fancy equipment—just a few simple steps and patience for the gelatin to chill.
The result is a dessert that’s as satisfying as it is nostalgic, with every bite offering a mix of tangy, sweet, and creamy flavors.
Whether you’re serving it at a family gathering, potluck, or as a retro treat for yourself, this salad is foolproof and universally loved. The combination of cool gelatin and warm applesauce creates a contrast that’s both refreshing and indulgent.
Plus, it’s easy to customize with different fruits or toppings to suit your taste.
Ready in under 30 minutes (plus chilling time), this dessert is perfect for meal prep or last-minute surprises. The key is letting it set properly in the fridge for that ideal firm-yet-creamy texture. Let’s bring back this timeless classic with a modern twist!
Ingredients for applesauce jello salad
Twelve ingredients, one nostalgic masterpiece. Creamy, fruity, and perfectly balanced—this retro classic comes together effortlessly.
| Ingredient | Amount | Notes |
|---|---|---|
| Unflavored Gelatin 🍬 | 3 tbsp | Diamond Crystal preferred for clarity |
| Hot Water 💧 | 1 cup | Boiled, not simmered |
| Unsweetened Applesauce 🍎 | 2 cups | Smooth, no added sugar |
| Canned Pineapple Chunks 🍍 | 1 cup | Drained, no syrup |
| Red Maraschino Cherries 🍒 | 1 cup | Chopped, pitted |
| Heavy Whipping Cream 🥛 | 1 cup | Cold, full-fat for stability |
| Granulated Sugar 🍚 | 2 tbsp | For whipped topping sweetness |
| Vanilla Extract 🍦 | 1 tsp | Pure, not imitation |
| Lemon Juice 🍋 | 1 tbsp | Freshly squeezed |
| Mini Marshmallows 🍫 | 1 cup | For optional topping |
| Crushed Graham Crackers 🍪 | ½ cup | For optional garnish |
| Salt 🧂 | ¼ tsp | Fine sea salt |
The gelatin is where this dish shines. Diamond Crystal is my go-to because it dissolves cleaner than others, giving that crystal-clear layer you remember from childhood. Grab it near the Jell-O at Walmart or Target—it’s the same shelf as the boxed gelatin, but worth the hunt. If you’re using boxed gelatin, make sure it’s unflavored—any fruity packets will throw off the delicate balance. The applesauce? Store-brand works fine, but if you’ve got Mott’s unsweetened, that’s the ticket. It’s the base flavor, so don’t skimp on quality here. For the fruit, canned pineapple and cherries keep things classic, but if you’re feeling adventurous, swap in mandarin orange segments or diced peaches.
No gelatin on hand? Agar-agar powder works in a pinch—use half the amount and follow package instructions for setting. Running low on cherries? Dried cranberries add a tangy twist, or go for fresh berries if you’ve got them. The whipped topping is non-negotiable for that cloud-like finish, but if you’re watching calories, light whipped topping with a splash of cream still delivers. For extra flair, toss in chopped pecans or walnuts—they add crunch without overpowering. And if you’re making this ahead, assemble everything except the whipped topping and chill for up to 4 hours before adding the final layer. It’s a game-changer for texture.
This salad is all about patience—4-6 hours in the fridge is ideal for that perfect set, but if you’re in a hurry, 2 hours in the freezer (covered tightly) speeds things up. Store leftovers in an airtight container for up to 3 days, though it’s best enjoyed fresh. For serving, I love adding a sprinkle of crushed graham crackers on top—it’s a retro touch that adds texture. If you’re prepping for a crowd, double the recipe and use a large glass bowl. It’s a showstopper that always gets rave reviews, especially when you pull it out for holidays or potlucks.
Why You'll Love This Recipe
- No-Fuss Layering: I swear by this recipe because it’s three ingredients, one bowl—just bloom the gelatin in hot water, fold in the applesauce, then stir in the pineapple and cherries. The texture is silky-smooth, and the prep takes less time than boiling water for pasta.
- Sweet-Tart Magic: Honestly, the combo of unsweetened applesauce and pineapple chunks is chef’s kiss—creamy, slightly tangy, with those bright cherry bursts cutting through. It’s nostalgic but grown-up, like a picnic in dessert form.
- Potluck Hero: Between us, this is my go-to for church gatherings or summer barbecues. It’s always a hit with kids (thanks to the cherries) and adults who want something light but satisfying. Plus, it holds up in the heat—no soggy sides here.
- Budget Meal Prep: I make a big batch on Sundays because it’s ridiculously affordable—gelatin and canned fruit stretch forever, and leftovers keep perfectly for days. My lunchbox gets a protein boost when I toss it with yogurt or nuts.
Step-by-step instructions for applesauce Jello salad recipe
This nostalgic dessert delivers the perfect balance of creamy texture and fruity brightness—every layer matters.
Bloom the Gelatin for Maximum Clarity
In a medium bowl, sprinkle the 3 tbsp unflavored gelatin evenly over the 1 cup hot water. This creates a thin layer that blooms evenly rather than clumping. Let it sit for 5 minutes—you'll see the gelatin transform from powder to translucent flakes as it absorbs the water. If you rush this step, you'll end up with cloudy patches in your finished salad.
While the gelatin blooms, prepare your workstation. I like to place a fine-mesh strainer over a separate bowl to filter out any stubborn gelatin particles later. The smoother the base, the more professional your finished texture will look. Keep the bloomed gelatin mixture at room temperature for now—it won't set until we heat it later.
Create the Applesauce-Gelatin Base
In a large mixing bowl, combine the 2 cups unsweetened applesauce with the bloomed gelatin mixture. Stir gently but thoroughly to distribute the gelatin evenly throughout the applesauce. The applesauce should be completely smooth with no visible gelatin clumps. This is your foundation layer, so take your time here—uneven distribution leads to inconsistent texture.
Add the 1 cup canned pineapple chunks and 1 cup chopped red maraschino cherries (with juices) to the applesauce mixture. Fold them in gently to avoid breaking up the fruit. The fruit should be evenly distributed but still visible—this is what gives the salad its classic retro appearance. Set this mixture aside while you prepare the whipped cream topping.
Whip the Cream to Soft Peak Stage
In a separate chilled mixing bowl, combine the 1 cup heavy whipping cream, 2 tbsp granulated sugar, 1 tsp vanilla extract, 1 tbsp lemon juice, and 0.25 tsp salt. Using a stand mixer fitted with the whisk attachment, beat on high speed until soft peaks form. This typically takes about 2-3 minutes—you're looking for cream that holds its shape when the whisk is lifted but still spreads slightly at the tip.
Here's the thing—overwhipping turns your cream into butter. I like to test the consistency by lifting the whisk: if the cream forms a peak that flops over slightly, it's perfect. The lemon juice brightens the flavor while the salt enhances the sweetness, creating that perfect balance of tang and richness that defines this dessert.
Layer and Chill for Perfect Texture
Pour half of the applesauce-gelatin mixture into the bottom of a 9x13-inch baking dish, spreading it evenly. Then spoon half of the whipped cream over the first layer, creating gentle swirls with a rubber spatula. Repeat with the remaining applesauce mixture and whipped cream, finishing with a final layer of whipped cream on top. This layering creates the signature marbleized effect that makes this salad so visually appealing.
Smooth the top with a spatula and press the 0.5 cup crushed graham crackers lightly into the surface. Sprinkle the 1 cup mini marshmallows evenly over the top for that classic retro presentation. Cover the dish with plastic wrap and refrigerate for at least 4 hours or until completely set. The longer it chills, the firmer the texture becomes—this is when the gelatin fully sets and creates that perfect wobbly yet firm consistency.
Serve with Confidence and Nostalgia
Once fully set, run a knife around the edges to loosen the salad before inverting onto a serving platter. The gelatin should release cleanly, revealing that beautiful marbled pattern. Cut into squares or diamonds—either way, each serving delivers that perfect balance of creamy, fruity, and crunchy textures that make this dessert so beloved.
Serve immediately with a dollop of whipped cream on top if desired. The contrast between the cool, set gelatin and the room-temperature whipped cream creates an experience that's pure comfort. This salad isn't just food—it's a taste of childhood nostalgia made perfect with modern precision.
Pro Tips For Making Applesauce Jello Salad
- Bloom the Gelatin Properly: Sprinkle that dry gelatin over cold water first—yes, even if the recipe says hot. Let it sit for 5 minutes to fully bloom, or it’ll clump like overworked dough. I learned this the hard way when my first batch turned into a gelatinous glue mess.
- Drain Pineapple Chunks: Skip the syrup—drain and rinse those canned pineapple chunks before adding them. The extra liquid dilutes the gelatin, making your salad turn to mush instead of holding shape. (Trust me, your grandma’s recipe wasn’t lying about this.)
- Chill the Mold Slowly: Don’t shove the bowl into the fridge right after pouring—let it sit at room temp for 10 minutes first. A quick cold shock causes cracks, and nobody wants a wobbly salad. Patience here guarantees clean slices later.
- Fold in Cherries Last: Toss those cherries in after the gelatin mixture has thickened slightly, not at the start. If you add them too early, they’ll sink to the bottom like a sad, cherry-laden anchor. Stir gently so they float—it’s the only way to get that classic retro look.
Serving suggestions for leftovers
Classic Presentation
Serve this nostalgic treat in square slices using a sharp knife to create clean, even edges. I recommend a 9x13-inch glass dish for the perfect retro look—it shows off the marbled layers beautifully.
For an extra special touch, dust the top with powdered sugar just before serving to mimic that old-school diner style. 🍽️
Use a serving spatula to lift each slice from the dish, keeping the layers intact. The contrast between the firm gelatin base and the soft whipped cream topping makes every bite exciting.
For a dramatic presentation, arrange slices on a white platter with a few extra mini marshmallows and crushed graham crackers scattered around.
Family-Style Serving
This dish is perfect for potlucks and holiday gatherings—it feeds a crowd and always gets rave reviews. I like to serve it in individual glass bowls (about 6-8 ounces each) for easy portion control.
The layers stay intact when scooped, making it look just as impressive in smaller servings. 👨👩👧👦
For a fun twist, offer mini spoons as part of the serving setup. The kids (and adults!) will love digging into the creamy layers with a tiny spoon. You can even label the dish with a cute sign like "Retro Comfort in Every Bite" to set the nostalgic mood.
Pairing Ideas
Serve alongside warm apple cider or hot chocolate for a cozy dessert spread. The warmth of the drink contrasts perfectly with the cool, creamy salad. For a lighter option, pair with sparkling apple cider—the bubbles cleanse the palate between bites. 🍎
If you're serving this as a side dish, pair it with grilled chicken or ham for a retro-style dinner. The sweet-tart flavors balance the savory proteins beautifully. For a purely nostalgic meal, serve with vanilla ice cream on the side—it’s a classic combo that never fails.
Make-Ahead Serving
This salad is perfect for meal prep—assemble it up to 24 hours ahead and store it in an airtight container in the fridge. The flavors deepen as it sits, making it even more delicious.
When ready to serve, simply remove it from the fridge 30 minutes before to let it soften slightly for easier slicing. ❄️
For a freezer-friendly version, assemble the layers (without the whipped cream topping) and freeze in a single layer for up to 1 month. Thaw in the fridge overnight, then add the whipped cream and chill for 2 hours before serving. This is a lifesaver for last-minute gatherings!
Nutrition facts
Frequently asked questions
Why does my gelatin layer turn out cloudy?
Cloudiness usually happens when gelatin clumps or isn't fully dissolved. Always bloom the 3 tbsp unflavored gelatin evenly over 1 cup hot water for 5 minutes before mixing. Strain the mixture through a fine-mesh sieve to remove any undissolved particles. Using Diamond Crystal gelatin helps prevent cloudiness better than boxed brands.
Can I make this without whipped cream?
For a lighter version, substitute with 1 cup light whipped topping or even Greek yogurt mixed with 1 tsp vanilla. The texture will be slightly denser but still delicious. If avoiding dairy, coconut whipped cream works too—just reduce the sugar slightly since it's naturally sweet.
How do I fix if the gelatin doesn't set properly?
If your salad is too runny, return it to the fridge for 2-3 additional hours. For a firmer texture, mix 1 tsp extra gelatin with 2 tbsp hot water, let it bloom, then stir into the warm applesauce mixture before chilling. Avoid overmixing once chilled—this can weaken the gelatin structure.
What fruits can I substitute for pineapple and cherries?
Try diced peaches, mandarin orange segments, or blueberries for a fruity twist. For tartness, add 1 tbsp lemon juice to balance sweeter fruits. Avoid overly watery fruits like strawberries—they can make the gelatin too soft.
Is this dessert safe for kids with allergies?
Check all ingredients: gelatin is typically dairy-free, but whipped cream contains dairy. For allergies, use dairy-free whipped topping and ensure no cross-contamination with nuts (like graham crackers). The basic applesauce-gelatin mixture is safe for most common food allergies. Always verify with parents when serving to children.