
Side Dishes
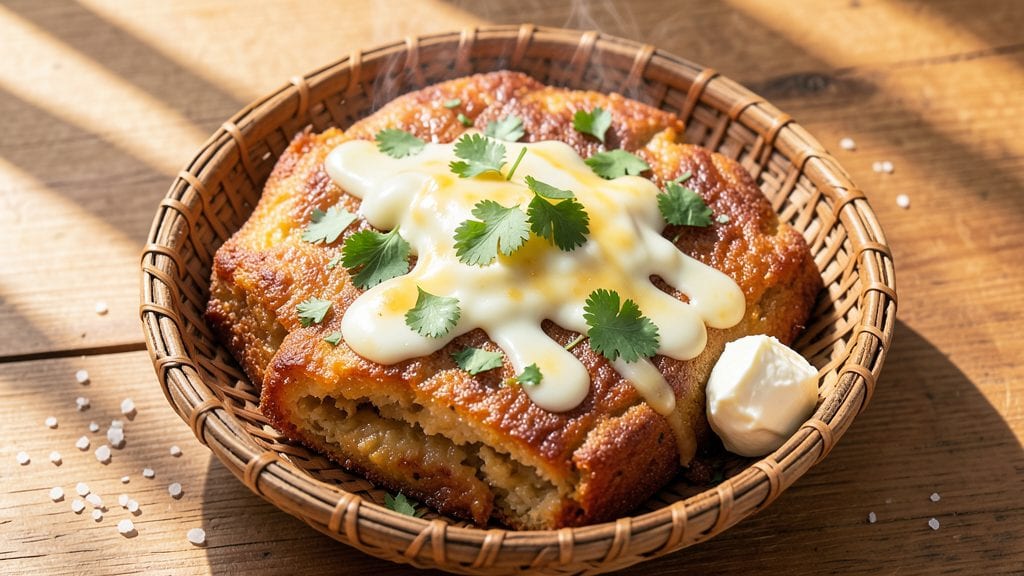
This arepa bread recipe delivers the perfect balance of crispy crust and tender, herby filling—just like the ones you'd find at a Venezuelan street market stall. The secret lies in using pre-cooked cornmeal (masarepa) for a sturdy dough that holds its shape while developing that signature golden crust when griddled.
I've made these countless times for family gatherings, and they always disappear faster than you can say "queso fresco."
The traditional method involves shaping the dough into thick, round patties before cooking them on a hot griddle until crispy on the outside and just soft enough inside to hold fillings like cheese, beans, or shredded meat.
What sets this recipe apart is the herby filling—fresh cilantro, scallions, and a touch of lime zest brighten every bite, making these arepas far more than just a side dish. They're a flavor-packed centerpiece.
By the time you're done, you'll have perfectly golden arepas with crisp edges and a tender interior that's ready to be stuffed with your favorite fillings. The aroma alone will have everyone gathering around the table, and the first bite delivers that satisfying crunch followed by herby, cheesy goodness.
These are the kind of dishes that turn ordinary meals into special occasions.
Serve them as a side with stews, or turn them into handheld meals by stuffing with cheese and meat. The beauty of arepas is their versatility—whether you're cooking for a crowd or just craving something comforting, this recipe delivers restaurant-quality results at home. Let's get started!
Ingredients for arepa bread
Six ingredients for the dough, plus a handful of fresh herbs to make these crispy arepas shine.
| Ingredient | Amount | Notes |
|---|---|---|
| Pre-Cooked Cornmeal (Masarepa) 🌽 | 2 cups | Panda brand preferred for texture |
| Warm Water 💧 | 1 ¼ cups | 100-110°F for best dough |
| Salt 🧂 | 1 tsp | Kosher or sea salt |
| Butter 🧈 | ¼ cup | Unsalted, softened slightly |
| Shredded Cheese 🧀 | 1 ½ cups | Queso fresco or mild cheddar |
| Fresh Cilantro 🌿 | ¼ cup | Stems removed, chopped fine |
| Scallions 🧅 | ¼ cup | Green parts only, chopped |
| Lime Zest 🍋 | 1 tbsp | From 1 medium lime |
| Lime Juice 🍋 | 1 tbsp | Freshly squeezed |
| Vegetable Oil 🫒 | ½ cup | For griddle cooking |
| Freshly Ground Black Pepper 🌶️ | ½ tsp | Adjust to taste |
| Optional Filling 🍗 | 2 cups | Beans, meat, or extra cheese |
The masarepa is non-negotiable—Panda brand is the gold standard, but any pre-cooked cornmeal works. Grab it at Latin markets or the international aisle at Walmart or H-E-B. If you can't find it, soak regular cornmeal in hot water for 30 minutes, but trust me, the texture won't be the same. The water needs to be warm (100-110°F)—not boiling, not cold. Think lukewarm bathwater. And yes, you can use a thermometer if you're feeling fancy. The butter here is for binding, so don't skip it—Land O'Lakes unsalted melts just right.
No fresh cilantro? Dried cilantro works at half the amount, but it's not the same. Scallions too pricey? Green onions from the freezer section thawed and chopped do the trick. Lime zest can be swapped for lemon zest, but lime's brightness is key. The cheese? Queso fresco is traditional, but mild cheddar or Monterey Jack melts beautifully too. For the filling, I usually do half beans (black or pinto) and half shredded chicken, but leftover pulled pork or sausage works just as well. Pro tip: Toast your beans first—they hold up better to the griddle.
These arepas keep well for 3 days in an airtight container, but they're best fresh off the griddle. Reheat in a dry skillet for 2-3 minutes per side to restore that crisp. Freeze extras by wrapping them individually in foil—they reheat like a dream. I like to make a double batch and freeze half, so I always have a quick snack or side ready. The dough can be made ahead too—just cover it and refrigerate for up to 24 hours. Let it sit at room temp for 30 minutes before shaping.
Why You'll Love This Recipe
- No-Fuss Assembly: I swear by this recipe because it’s the kind of meal that lets you multitask—just mix masarepa and warm water, shape it, and let the butter and cheese work their magic while you handle the rest of dinner.
- Cheese-Crusted Magic: That moment when you bite into a golden, buttery arepa with melted cheese stretching just right? It’s the kind of simple indulgence that makes you forget it only takes five ingredients.
- Weeknight Workhorse: Between us, this is my secret weapon for busy nights—stuff them with leftovers, serve them as sides, or even toss them in a lunchbox. The dough keeps for days, so I never run out of excuses to make them.
- Budget Breakfast Win: Honestly, I make a batch every Sunday because it’s cheaper than toast, fills everyone up, and turns into something totally different depending on what’s in the fridge. (Yes, even on a Tuesday night.)
Step-by-step instructions for crispy-crusted corn pockets
Here's how to make perfectly crispy arepas with a golden crust and herby filling every time.
Mix the Dough for Ideal Texture
In a large mixing bowl, combine the 2 cups pre-cooked cornmeal (masarepa) with the 1.25 cups warm water (about 100-110°F). I like to use my hands to gently work the mixture until it forms a soft, slightly sticky dough—it should hold together when pressed but still feel moist. The warm water helps activate the cornmeal properly, creating that perfect tender interior.
Add the 1 tsp salt, 0.25 cup softened butter, 0.5 tsp freshly ground black pepper, 1 tbsp lime zest, and 1 tbsp lime juice. Mix everything together until the butter is fully incorporated and the dough is smooth. Here's the thing—don't overwork it. You want a cohesive dough that's just slightly tacky to the touch, not dry or crumbly. This ensures your arepas will be light and fluffy inside while maintaining that crispy exterior.
Shape the Arepas for Even Cooking
Divide the dough into 6 equal portions (about ⅓ cup each). I like to use a kitchen scale for accuracy here—this ensures each arepa will cook at the same rate. Roll each portion into a ball, then flatten slightly into a ½-inch thick patty. The key is to keep the thickness consistent—this prevents some from cooking faster than others and creates that perfect crispy crust.
Real talk: don't worry if they look imperfect. Arepas are rustic by nature, and the slight irregularities actually help create those crispy edges. Press gently to create a slight indentation in the center of each patty—this will be where you'll add your filling later. Cover the shaped arepas with a damp towel to prevent them from drying out while you prepare the filling.
Cook Until Golden and Crispy
Heat 0.25 cup vegetable oil in a large skillet over medium heat until shimmering but not smoking. Add 3-4 arepas at a time, spacing them about 1 inch apart. Cook for 3-4 minutes per side until the bottoms develop a golden-brown crust. You'll know they're ready when the edges look crispy and the bottom releases easily from the pan with a gentle nudge.
Don't walk away during this step—the oil temperature is crucial. If it's too hot, they'll burn before crisping; if too cool, they'll steam instead of develop that perfect crust. I press down gently on the arepas during the first minute of cooking—this prevents them from curling and ensures even contact with the pan. Transfer cooked arepas to a paper towel-lined plate to drain excess oil.
Add Filling and Complete the Crisp
Once all arepas are cooked on one side, carefully open each one by gently pressing down on the indentation. Add ⅓ cup of your chosen optional filling (beans, meat, or extra cheese) to the center of each arepa. I like to use a spoon to press the filling down slightly—this helps it stay contained when you close the arepa. Sprinkle each with ¼ cup of the shredded cheese and 1 tbsp of the chopped fresh cilantro and scallions mixture.
Close each arepa by pressing the edges together firmly. Return them to the skillet over medium heat for 1-2 minutes per side until the cheese melts and the edges become crispy again. The cheese should be bubbly and slightly golden, indicating it's perfectly melted. Here's where it gets fun—watch the edges turn golden brown and crispy once more. This final step creates that restaurant-quality texture we're after.
Pro Tips For Making Arepa Bread
- Press Hard, Twice: After shaping your arepa, press it down firmly with your palm—really press—then flip and press again. I used to think one press was enough, but the second one seals the edges so they don’t crack open while cooking. (Yes, even if your hands get tired.)
- Use Warm, Not Boiling Water: Cold water makes the dough tough; boiling water turns it gummy. Heat your water to about 160°F (just off-boil) so the masarepa absorbs it evenly without turning mushy. I learned this the hard way after making a batch that fell apart like wet sand.
- Salt the Butter, Not the Dough: Mix the salt directly into the melted butter before adding it to the dough. Skipping this step means uneven flavor—some bites taste bland, others too salty. (Your taste buds will notice.)
- Cook on Medium-High, Then Lower: Start your arepa on medium-high heat to get a good crust, then drop to medium when the bottom browns. Rushing it burns the outside before the inside cooks through. I was skeptical until I tried it—now I never skip this step.
Serving suggestions for leftovers
Classic Serving Style
Serve your crispy arepas just like you'd find them at a Venezuelan street cart—hot off the griddle with a side of black beans and avocado slices. The contrast of creamy avocado with the crispy corn crust is unbeatable.
I like to arrange them on a wooden board with lime wedges for squeezing over the top. This presentation makes them feel like a special occasion dish, even when it's just a weeknight dinner. 🌿
Stuffed Arepa Bar
Turn your arepas into a fun build-your-own bar by setting out small bowls of fillings: shredded chicken, black beans, queso fresco, diced ham, and pickled onions. Let everyone customize their own with their favorite toppings.
I often include a bowl of spicy mayo (mayo mixed with hot sauce) for dipping—it's a crowd-pleaser at parties. This interactive approach makes the dish feel festive and personal. 🍗
Breakfast Arepas
Transform your arepas into a hearty breakfast by filling them with scrambled eggs, crumbled chorizo, and a sprinkle of crumbled cotija cheese. Serve with salsa verde or hot sauce for dipping.
The combination of crispy arepa and savory eggs makes for a satisfying morning meal. I like to make these ahead and reheat them in a skillet to restore that perfect crunch. 🍳
Dessert Twist
For a sweet variation, mix masarepa with ½ cup powdered sugar and ¼ cup melted butter to make a sweet dough. Shape into small patties and cook until golden. Fill with Nutella, whipped cream, or fresh fruit like strawberries and mango.
This dessert version is a hit with kids and adults alike—it’s like a Latin-inspired beignet! 🍓
Meal Prep Hack
Make a batch of empty arepa shells ahead of time and store them in an airtight container for up to 3 days. When ready to eat, reheat in a dry skillet for 1-2 minutes per side and fill with your choice of ingredients.
This is perfect for busy weeknights when you want a quick, satisfying meal. I often prep a big batch on Sundays so I can assemble them in minutes during the week. ⏰
Garnish Like a Pro
Elevate your arepas with simple but effective garnishes. A sprinkle of toasted sesame seeds adds texture, while a drizzle of crema mexicana or sour cream adds richness. Fresh cilantro leaves and a squeeze of lime juice brighten the flavors.
For an extra touch, add a pinch of smoked paprika or chili powder to give them a subtle smoky kick. These finishing touches take your arepas from homemade to restaurant-worthy. ✨
Nutrition facts
Frequently asked questions
What's the difference between arepas and corn tortillas?
Arepa dough is made from pre-cooked cornmeal (masarepa) mixed with butter and warm water, creating a thick, sturdy texture perfect for stuffing. Corn tortillas use fresh masa harina (dried corn dough) and are much thinner, designed for wrapping or dipping—not filling. Arepas have a crispy crust and tender interior, while tortillas stay soft and pliable.
Can I make arepas without a griddle?
Use a heavy skillet or nonstick pan over medium heat with a little oil. The key is to keep the heat steady and avoid overcrowding—cook 2-3 at a time for even browning. A cast-iron skillet works best for that signature crispy texture. Just press gently with a spatula during cooking to prevent curling.
Why did my arepas turn out dense instead of crispy?
Dense arepas usually happen from overworking the dough or using cold water. The dough should be soft and slightly sticky—like wet sand. Also, ensure your oil is hot enough (but not smoking) and cook them at medium heat. Pressing down gently during the first minute helps create that crispy crust.
What's the best way to store leftover arepas?
Store filled arepas in an airtight container for up to 3 days. To reheat, place them in a dry skillet over medium heat for 1-2 minutes per side until crispy again. For longer storage, freeze unfilled arepas (wrapped individually) for up to 2 months. Thaw overnight in the fridge before reheating.
Can I make arepas gluten-free?
Yes! This recipe is naturally gluten-free since it uses cornmeal. Just ensure your butter and other ingredients are certified gluten-free. The texture will be slightly different from wheat-based breads but still delicious. For extra crispiness, brush the cooked arepas with melted butter after cooking.