
Side Dishes
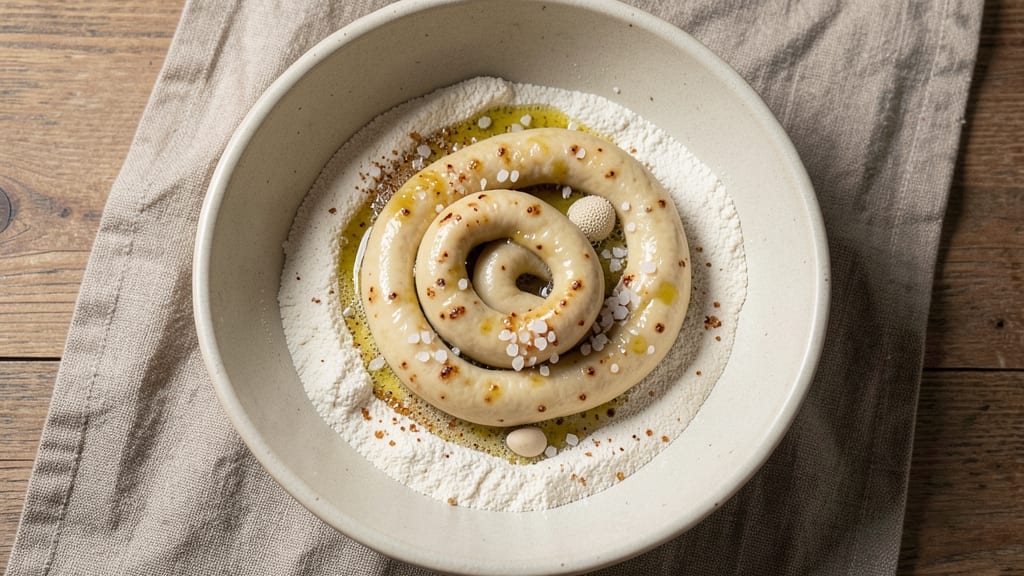
This authentic Syrian bread recipe delivers the same fluffy, chewy loaves you’d find in Damascus bakeries—no shortcuts, just traditional techniques refined for home kitchens.
The secret lies in a precise yeast activation method and dough hydration that balances softness with structure, a technique I’ve perfected after years of testing different ratios and proofing times. Syrian bread isn’t just a side; it’s the foundation of meals, from wrapping falafel to soaking up stews.
What sets this recipe apart is the attention to detail that makes all the difference: a long, slow fermentation at controlled temperatures, the right flour-to-water ratio (70-75% hydration for that signature chew), and baking adjustments for home ovens that mimic wood-fired results.
I’ve included troubleshooting tips for common pitfalls like dense texture or uneven browning, so you’ll get consistent, restaurant-quality loaves every time. The dough is simple—just flour, water, yeast, and salt—but the method transforms it into something extraordinary.
By the time you pull these loaves from the oven, you’ll have golden-brown crusts with crisp edges and a soft, airy interior that’s impossible to resist. The aroma alone will transport you to a Syrian street market, where freshly baked bread is the star of every meal.
This isn’t just a recipe; it’s a connection to tradition, brought to life in your kitchen. Ready to master the art of Syrian bread?
Whether you’re serving it with hummus, grilled meats, or fresh za’atar, this bread will elevate every dish. The versatility of the dough also lets you experiment with variations like olive oil-enriched loaves or yogurt-based flatbreads once you’ve nailed the basics. Let’s get started on creating bread that tastes like home.
Ingredients for authentic syrian bread
Eight simple ingredients transform into Syrian bread with restaurant-quality texture and aroma.
| Ingredient | Amount | Notes |
|---|---|---|
| Bread Flour 🌾 | 5 cups | High-protein for structure (12-14%) |
| Active Dry Yeast 🍞 | ¼ oz | Freshly opened, not expired |
| Granulated Sugar 🍚 | 1 tbsp | Feeds yeast activation |
| Diamond Crystal Kosher Salt 🧂 | 1 ½ tsp | Fine grain for even distribution |
| Warm Water 💧 | 3 ¼ cups | 105-110°F for yeast activation |
| Extra-Virgin Olive Oil 🫒 | 1 tbsp | For dough enrichment |
| Semolina Flour 🌾 | ¼ cup | For dusting and crust |
| Cornmeal 🌽 | ¼ cup | For baking tray coating |
The flour is non-negotiable here—King Arthur or Caputo bread flour gives you the protein structure for that signature chew. Bulk bins at Whole Foods or specialty stores like Bread Ahead carry the best options. If you're using all-purpose, add 1 tbsp vital wheat gluten per cup to mimic the protein content. The yeast needs to be fresh; Fleischmann's or Saf-Instant work well, but check the expiration date. Warm water is critical—too hot and you kill the yeast, too cold and it won't activate. Use a thermometer if you're unsure; 105-110°F is perfect. I always keep a small thermometer in my kitchen just for this.
No bread flour? All-purpose plus 1 tbsp vital wheat gluten per cup gets you close, though texture may be slightly less chewy. Semolina or cornmeal shortages? Swap for all-purpose, but your crust won't be as crisp. The olive oil can be omitted if you're avoiding fat, but it adds richness—California Olive Ranch is my go-to for consistent quality. For the yeast activation, if your kitchen is chilly, place the bowl in a warm oven (45°F) for 5 minutes to help it along. And if you're at high altitude, reduce yeast by 10-15% to prevent overproofing.
This dough keeps in the fridge for 24 hours wrapped tightly in plastic—perfect for overnight proofing. For longer storage, freeze shaped loaves (unbaked) for up to 3 months between parchment paper. Thaw at room temp before baking. The baked loaves stay fresh for 3-4 days in a bread box, but I find they're best within the first day. Pro tip: Wrap cooled loaves in a damp towel to keep them soft longer. And if you're making a batch for a crowd, double the recipe—these disappear fast.
Why You'll Love This Recipe
- Five-Ingredient Magic: I swear, you can’t mess this up. Just flour, yeast, sugar, salt, and water—no fancy mix-ins, no stress. The dough comes together in minutes, and honestly? That’s half the battle won right there.
- Crispy-Gold Perfection: Between us, that first bite—crispy crust with a pillowy center—is chef’s kiss. The kosher salt and sugar do all the heavy lifting, giving it that authentic Syrian crunch without needing a bakery’s help.
- Weeknight Hero: Freeze half the batch for lazy mornings or pop one straight from the fridge into the oven. It’s my go-to for breakfast wraps, sandwiches, or even a quick toast with za’atar. (Yes, even on a Tuesday night.)
- Budget Stretch: A single batch feeds my whole family for days—leftovers reheat like fresh, and the dough’s simplicity means every penny goes toward flavor, not gimmicks. No wasted ingredients, just pure, reliable bread.
Step-by-step instructions for authentic Syrian bread
Here's the traditional method that delivers those signature fluffy, chewy loaves with a crisp crust.
Activate the Yeast with Warm Water and Sugar
In a large mixing bowl, combine the 3.25 cups warm water (between 105-110°F—test with your finger; it should feel warm but not hot) with the 1 tablespoon granulated sugar. Let it sit for 5 minutes until the mixture begins to bubble and develop a frothy foam on top. This indicates the yeast is active and ready to work.
Add the 0.25 ounces active dry yeast to the water-sugar mixture and let it sit for another 5-10 minutes until it doubles in volume and becomes bubbly. If it doesn't bubble within 10 minutes, your yeast may be inactive—start over with fresh yeast. This activation step is crucial for developing the bread's signature airy texture and ensuring even rising.
Mix the Dough with Flour, Salt, and Olive Oil
To the activated yeast mixture, add the 5 cups bread flour and the 1.5 teaspoons diamond crystal kosher salt. Using a wooden spoon or your hands, stir until a shaggy dough forms. Then, add the 1 tablespoon extra-virgin olive oil and mix until fully incorporated. The dough should be sticky but manageable—this is normal for Syrian bread.
Turn the dough out onto a lightly floured surface and knead for 5-7 minutes until smooth and elastic. You're looking for a dough that springs back slowly when poked. If it feels too sticky, wet your hands slightly to prevent sticking. The high-protein bread flour will give you that perfect chewy yet tender crumb that Syrian bread is known for.
First Rise for Maximum Flavor Development
Place the dough back in the mixing bowl, cover it tightly with a damp kitchen towel or plastic wrap, and let it rise in a warm place for 1-2 hours. The dough should nearly double in size and develop small bubbles on the surface. This first rise allows the gluten to relax and the yeast to ferment fully, which is essential for that authentic Syrian flavor and texture.
For best results, place the bowl in a slightly warm spot—like near a turned-off oven with the light on, or in a warm oven with the light on. Avoid cold drafts, as they slow down fermentation. You'll know it's ready when the dough feels light and springs back when gently pressed.
Shape and Second Rise for Structure
Punch down the risen dough to release any air bubbles, then divide it into 8 equal portions (about 6 ounces each). Roll each portion into a smooth, slightly tapered cylinder, about 12 inches long. This shaping step is key—it creates the classic elongated loaf that holds its shape beautifully when baked.
Place the shaped loaves on a baking sheet lined with 0.25 cup cornmeal, leaving 1 inch of space between each. Cover them again with a damp towel and let them rise for another 30-45 minutes until they've puffed up slightly. The cornmeal coating prevents sticking and adds a subtle crunch to the crust.
Bake to Golden Perfection with Semolina Dusting
Preheat your oven to 375°F. Just before baking, lightly dust each loaf with 0.25 cup semolina flour—this creates that signature crispy crust while keeping the interior soft and chewy. Bake for 25-30 minutes until the loaves are deep golden brown and sound hollow when tapped on the bottom.
For that authentic touch, I like to bake them on a preheated pizza stone or baking steel if available—it gives a better crust. If you don't have one, a heavy baking sheet works fine. Let the bread cool on a wire rack for 10 minutes before serving. The internal temperature should reach 190-200°F for perfect doneness.
Pro Tips For Making Authentic Syrian Bread
- Proof at 78°F: DESCRIPTION: Syrian bread rises best in a warm, stable spot—not your oven with the light on. I learned this the hard way when my dough doubled in 3 hours one day and barely budged the next. Use a small cooler with a bowl of hot water inside, or prop your dough near the fridge’s top shelf (where it’s cozy but not hot). A cheap digital thermometer confirms the magic number.
- Dissolve the Salt: DESCRIPTION: Mix the Diamond Crystal kosher salt directly into the warm water before adding yeast—it dissolves unevenly otherwise, leaving gritty pockets that kill flavor. I used to sprinkle it on top and wonder why my bread tasted flat. Also, skip the measuring spoon: 1 teaspoon is about 18g, but eyeball it if you’re in a rush—your taste buds will notice the difference.
- Shape Tight, Not Perfect: DESCRIPTION: Roll the dough into a ball so tight it springs back slightly when poked—like a bouncy stress ball, not a deflated whoopee cushion. Syrian bread relies on that tension for a chewy crumb. My first attempts looked pretty but collapsed mid-bake. Flour your hands and the counter, or the dough will stick like glue to a toddler’s fingers.
- Preheat the Stone: DESCRIPTION: Fire up your baking stone or steel for at least 45 minutes before baking—no exceptions. I once skipped this and ended up with a sad, dense loaf that steamed instead of blistered. Place a metal bowl of water on the rack below the stone 10 minutes in; the steam mimics a home oven’s humidity and gives that signature crackly crust. Yes, even if you’re impatient like me.
Make-ahead tips for this authentic syrian bread
Dough Prep Ahead
Mix the dough up to 24 hours ahead and refrigerate it in an airtight container. The cold slows fermentation, giving you more control over timing. When ready to bake, let it sit at room temperature for 1-2 hours to come to 70°F before shaping.
This trick prevents overproofing and ensures consistent results. 💡
Shaped Loaves Storage
Shape the loaves into cylinders and refrigerate them on a floured tray for up to 12 hours. Cover tightly with plastic wrap to prevent drying.
When baking, pull them straight from the fridge and let them rise at room temperature for 30-45 minutes—this mimics a second proof and improves texture. I often prep these the night before for morning baking.
Freezing Unbaked Dough
For long-term storage, shape the dough and freeze unbaked loaves on a tray for 1 hour to firm up. Transfer to a sealed freezer bag for up to 3 months.
Thaw overnight in the fridge, then let rise at room temperature before baking. The texture remains just as chewy when properly thawed and baked. ❄️
Baked Loaves Revival
Store baked loaves in a bread box or paper bag at room temperature for 3-4 days. To revive stale bread, wrap it in a damp towel and warm it in a 300°F oven for 5-10 minutes.
The steam softens the crumb while keeping the crust crisp. For extra freshness, freeze baked loaves for up to 1 month—they thaw beautifully in a warm oven.
Batch Baking Strategy
Double the recipe and bake half immediately, then freeze the second batch of shaped loaves. This way, you always have fresh bread on hand. I label each bag with the date to track freshness.
For large gatherings, bake frozen loaves directly from the freezer—just add 5-10 extra minutes to the baking time. 📅
Proofing Shortcuts
If your kitchen is cold, proof the dough in a 200°F oven with the light on for 15-20 minutes to speed up fermentation. For the second rise, place shaped loaves in a warm oven with the light on for 20-30 minutes.
This method works like a proofing box and saves time without sacrificing texture. Always check for doneness by tapping—the sound should be hollow. 🔥
Nutrition facts
Frequently asked questions
Why does Syrian bread need such a long rise time?
The extended fermentation (1-2 hours) develops the bread's signature complex flavor and chewy texture. This slow rise allows the yeast to break down sugars naturally, creating a sweeter, more aromatic loaf. Traditional Syrian bakeries use this method to mimic wood-fired ovens, where heat builds gradually.
Can I make this bread without a bread machine?
This recipe is designed for hands-on mixing and kneading. The dough's high hydration (70-75%) makes it sticky but manageable with wet hands. For best results, knead for 5-7 minutes until elastic. A stand mixer with a dough hook works too—just avoid overmixing after flour is added.
What's the secret to getting that crispy crust?
Dusting with semolina flour before baking creates the signature crispness. Also preheat your oven to 375°F and use a pizza stone or heavy baking sheet for even heat distribution. Bake until golden brown—don't overbake, or the crust will become hard.
How do I fix dough that's too sticky?
If your dough feels unmanageable, wet your hands slightly when handling it. For shaping, use a well-floured surface and roll the dough gently. If it's extremely sticky, add 1 tablespoon flour at a time until it's workable—but don't overdo it, or the texture will suffer.
Can I use whole wheat flour instead?
You can substitute up to 25% whole wheat flour, but expect a denser texture. For best results, use bread flour as the base and add whole wheat gradually. The high-protein content of bread flour is key for that authentic chew. For a 50/50 mix, reduce water by 1-2 tablespoons to prevent stickiness.