
Desserts
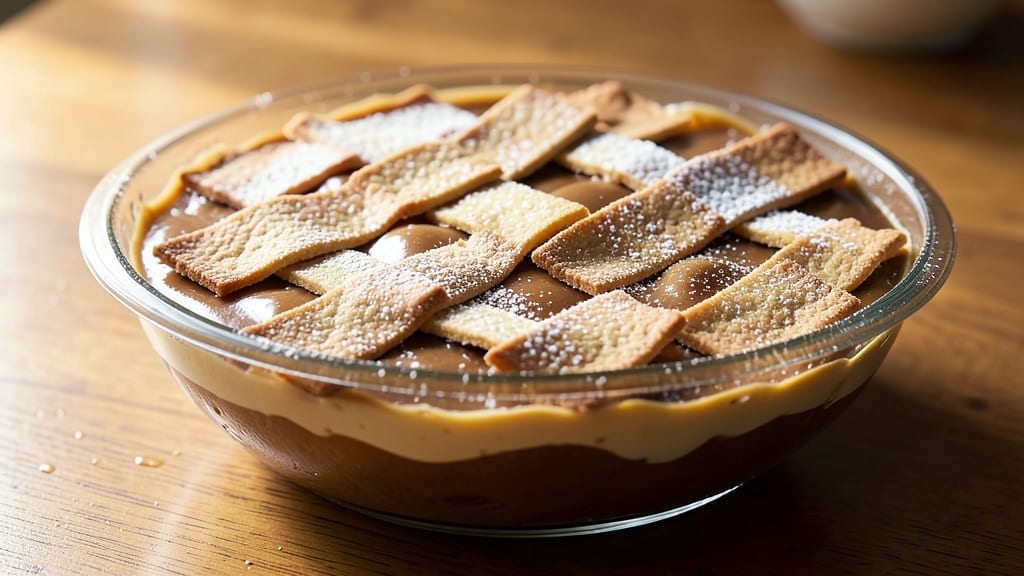
This banana cream pudding with Nilla wafers recipe delivers the nostalgic comfort of childhood desserts with a professional twist—creamy vanilla custard layered with ripe bananas and crispy Nilla wafers, all ready in under an hour.
The secret lies in a smooth, foolproof custard that sets perfectly, balanced by the buttery crunch of wafers and the natural sweetness of bananas. I developed this version after years of testing—no one wants a pudding that’s too thin or wafers that turn soggy.
The custard forms the heart of this dessert, where cornstarch creates that signature silky texture without graininess, while vanilla extract and a touch of cinnamon deepen the flavor profile. Sliced bananas add freshness, and the Nilla wafers provide the perfect contrast—crisp edges that stay that way even after chilling.
This isn’t your grandmother’s pudding; it’s a restaurant-quality dessert that’s surprisingly simple to assemble.
What you’ll end up with is a showstopping layered dessert that’s creamy, crunchy, and perfectly balanced in every bite. The custard stays luscious, the bananas retain their sweetness, and the wafers hold their structure—no mushy middle here.
Serve it chilled for the best texture, or add a drizzle of caramel or a dollop of whipped cream for extra indulgence. This recipe is foolproof, elegant, and guaranteed to impress.
Whether you’re hosting a dinner party or craving a no-fuss treat, this banana cream pudding delivers in under an hour with minimal effort. The layers keep beautifully, so you can prep ahead and enjoy the applause when it’s served. Let’s get started on creating this layered vanilla bliss.
Ingredients for banana cream pudding with nilla wafers
Pantry staples plus a few specialty touches create this showstopping layered dessert.
| Ingredient | Amount | Notes |
|---|---|---|
| Large Ripe Bananas 🍌 | 2 whole | Sliced into 1/4-inch pieces |
| Granulated Sugar 🍚 | ¾ cup | White or light brown |
| All-Purpose Flour 🌾 | ½ cup | Sifted for smooth custard |
| Cornstarch 🌾 | ¼ cup | For silky texture |
| Pure Vanilla Extract 🌿 | 2 tsp | High-quality, not imitation |
| Ground Cinnamon 🍃 | ½ tsp | Freshly ground preferred |
| Salt 🧂 | ¼ tsp | Fine sea salt |
| Whole Milk 🥛 | 4 cups | Full-fat for creaminess |
| Large Egg Yolks 🥚 | 4 whole | Room temperature preferred |
| Nilla Wafers 🍪 | 12 whole | Crushed into fine crumbs |
| Unsalted Butter 🧈 | ¼ cup | Cold, cubed for crispness |
| Heavy Whipping Cream 🥛 | 1 cup | Chilled for stability |
| Whipped Cream 🍦 | ½ cup | Optional garnish |
The bananas and vanilla extract are non-negotiable for authentic flavor. Ripe bananas—those with brown spots—pack the most sweetness and texture. Grab the pure vanilla extract from Trader Joe's or Williams Sonoma if you want the best quality. The custard’s magic lies in the cornstarch and flour combo—this creates that signature silky texture without graininess. For the wafers, Nilla’s original is the only way to go; no substitutes here. The milk should be whole, not skim, to ensure that luscious creaminess the custard needs to shine.
No cornstarch? Arrowroot powder at the same amount works in a pinch, though the texture will be slightly different. Short on vanilla extract? Vanilla bean paste gives you the same depth of flavor. The wafers can be crushed by hand, but a food processor makes it easier—just pulse until you get fine crumbs. For the custard, egg yolks at room temperature blend smoother, so take them out 10 minutes before mixing. The butter should be cold and cubed for that perfect buttery crunch between layers. If you’re feeling fancy, add a sprinkle of cinnamon to the crushed wafers for extra warmth.
This dessert keeps beautifully in the fridge for 3-4 days, though the wafers stay crispest for the first two. For make-ahead prep, assemble the layers in a glass dish, cover, and refrigerate—it’ll taste even better the next day. To serve, let it sit at room temperature for 10 minutes before slicing. The whipped cream should be added just before serving—it softens quickly. If you’re prepping for a crowd, double the recipe; the layers hold up perfectly in a larger dish.
Why You'll Love This Recipe
- No Special Skills Needed: I swear, this recipe is for anyone who can stir a pot. Mash those bananas, toss in the sugar and flour mix—it’s basically a grown-up version of making pudding from a box, but way better. The cornstarch thickens it just right without any guesswork, and the vanilla? Pure magic in a bottle.
- Creamy Crunch Magic: That first spoonful of banana custard with the crunch of Nilla wafers? It’s like dessert hugged comfort food. The bananas add natural sweetness, the flour-cornstarch blend gives it that velvety texture, and the wafers? They’re the perfect textural contrast—soft pudding, crispy crunch, repeat.
- Weeknight Dinner Hack: Honestly, this is my secret weapon when I need something impressive but fast. Serve it chilled as a dessert, or warm it up slightly for a breakfast bowl with a scoop of ice cream. Kids love it, adults love it, and it’s always a hit—no one ever asks, “What is this?”
- Pantry Staple Power: Between us, this recipe uses ingredients you already have. Ripe bananas? Use them up before they turn brown. Sugar, flour, cornstarch—basic stuff. And the leftovers? They keep for days in the fridge, so you can make a big batch and enjoy it all week. Budget-friendly and foolproof.
Step-by-step instructions for banana cream pudding with Nilla wafers
This layered dessert comes together faster than you'd think—creamy custard meets crispy cookie crumbs in perfect harmony.
Prepare the Banana Custard Mixture
In a medium saucepan, whisk together the 4 cups whole milk, 0.75 cup granulated sugar, 0.5 cup all-purpose flour, 0.25 cup cornstarch, 4 whole large egg yolks, 2 teaspoons pure vanilla extract, 0.5 teaspoon ground cinnamon, and 0.25 teaspoon salt until completely smooth. I like to use a whisk for this step to avoid any lumps—especially important with the cornstarch.
Place the saucepan over medium heat and cook, stirring constantly with a wooden spoon, until the mixture thickens enough to coat the back of the spoon (about 5-7 minutes). You'll notice the custard will bubble gently and pull away from the sides of the pan. Remove from heat immediately once it reaches this consistency—overcooking will make it grainy.
While still warm, stir in the 2 whole large ripe bananas that have been sliced into ¼-inch pieces. The warmth of the custard will help the banana slices soften and meld beautifully into the mixture. Let this sit at room temperature for 5 minutes to allow the flavors to meld completely.
Prepare the Nilla Wafer Crust
In a food processor or by hand using a rolling pin, crush the 12 whole Nilla wafers into fine crumbs. I prefer using a food processor for this because it gives you perfectly even crumbs without any large chunks. Spread half of the crushed wafers evenly across the bottom of a 9-inch round baking dish or similar-sized dish.
Melt the 0.25 cup unsalted butter in a small saucepan over low heat until completely liquid but not browned. Drizzle this melted butter evenly over the crushed wafer layer in the baking dish. This step is crucial—it creates a crispy, flavorful base that holds the custard beautifully.
Press down gently on the wafer crumbs with the back of a spoon to help them settle into the dish. This ensures an even layer that won't shift when you add the custard later. The butter will help bind everything together and create that perfect crunch.
Assemble the Layers and Chill
Pour half of the banana custard mixture over the prepared wafer layer in the baking dish. Use a spatula to spread it out evenly. Then, sprinkle the remaining half of the crushed Nilla wafers evenly over the custard layer. Press down lightly again to help them adhere.
Finally, pour the remaining banana custard mixture over the wafer layer. Use the spatula to create gentle swirls in the custard—this gives that classic layered look. The contrast between the creamy custard and crispy wafer crumbs is what makes this dessert so special.
Cover the baking dish tightly with plastic wrap and refrigerate for at least 4 hours, or preferably overnight. This chilling time is essential—it allows the flavors to meld completely and the layers to set properly. The longer it chills, the more pronounced the banana flavor becomes.
Serve with Whipped Cream
Before serving, whip the 1 cup heavy whipping cream to stiff peaks. You can do this with an electric mixer or by hand—just make sure it's chilled first for best results. The cream should hold its shape when you lift the beaters.
Remove the pudding from the refrigerator and let it sit at room temperature for 5-10 minutes before serving. This makes it easier to slice and prevents the custard from being too cold. Scoop portions into bowls and top each serving with a generous dollop of the whipped cream and a sprinkle of the remaining crushed Nilla wafers.
The first bite should deliver that perfect combination of creamy banana custard, crispy cookie crumbs, and light whipped cream. The texture contrast is what makes this dessert so satisfying—each layer plays its part beautifully. Serve immediately with vanilla ice cream on the side for an extra indulgent experience.
Pro Tips For Making Banana Cream Pudding With Nilla Wafers
- Mash Bananas Thoroughly: I learned this the hard way—lumpy banana pudding is a crime. Use a fork to break up the flesh first, then press through a fine-mesh sieve or strainer to remove skins and fiber. The smoother the base, the creamier the final texture.
- Whisk Dry Ingredients First: Combine flour, cornstarch, and sugar before adding liquids—this prevents clumping like glue in your pudding. Stir with a whisk for 30 seconds until no dry spots remain, or you’ll end up with a grainy mess.
- Avoid Overmixing the Pudding: Once you add the milk (or cream), stir just until the mixture thickens—about 2 minutes. Overworking it turns the pudding gummy, and no one wants to eat rubbery banana cream.
- Toast Nilla Wafer Crumbs: Pulse crushed wafers in a food processor, then lightly toast them in a dry pan for 1–2 minutes until golden. This adds a crisp texture that cuts through the richness—skip this, and you’ll get soggy layers.
Flavor customization for this dish
Spiced Vanilla Twist
Boost the custard’s depth with an extra ½ teaspoon ground nutmeg or ¼ teaspoon cardamom alongside the cinnamon. These warm spices complement the banana’s natural sweetness while adding complexity. For a tropical vibe, replace cinnamon with ½ teaspoon grated ginger or ¼ teaspoon allspice.
I’ve found that 1 teaspoon orange zest (finely grated) brightens the flavor profile beautifully—just add it with the vanilla extract. 🌿
Chocolate Banana Fusion
Turn this into a decadent chocolate-banana dessert by adding ¼ cup unsweetened cocoa powder to the dry ingredients (flour and cornstarch). For extra richness, fold in 2 tablespoons melted dark chocolate (at least 60% cocoa) into the warm custard.
Top with crushed Nilla wafers mixed with 2 tablespoons mini chocolate chips for a marbled effect. Serve with a drizzle of chocolate ganache for a restaurant-worthy finish. 🍫
Caramelized Banana Layers
Elevate the banana flavor by caramelizing them before layering. Slice 1 ripe banana into ¼-inch pieces, then sauté in 1 tablespoon butter over medium heat for 3-4 minutes until golden.
Fold these into the custard or use them as a separate layer between the wafer crumbs. For extra drama, drizzle 2 tablespoons caramel sauce over the top before chilling. 🍯
Coffee-Infused Custard
Add a mocha twist by whisking 1 tablespoon instant espresso powder or 1 teaspoon finely ground coffee into the warm milk before combining with other ingredients. This deepens the custard’s flavor without overpowering the banana.
Pair with a dusting of cocoa powder on top and serve with a scoop of vanilla ice cream for the ultimate coffee lover’s dessert. ☕
Citrus Zest Brightness
Cut through the richness with 1 teaspoon lemon zest or orange zest added to the custard mixture. The citrus acidity balances the sweetness while adding a refreshing twist. For a tangier profile, stir in 1 tablespoon lemon juice after the custard cools.
Garnish with thin citrus slices or a sprinkle of freeze-dried raspberries for a pop of color and flavor. 🍋
Boozy Upgrade
Infuse the custard with 2 tablespoons bourbon, rum, or vanilla liqueur (like Godiva) for an adult-friendly version. Add the alcohol with the vanilla extract and let it steep for 5 minutes before mixing into the custard.
For a layered effect, drizzle 1 tablespoon amaretto over the top before chilling. Serve with a sprinkle of crushed pistachios for a sophisticated touch. 🍸
Nutrition facts
Frequently asked questions
Can I make this dessert without a food processor?
Crush the Nilla wafers by placing them in a sturdy plastic bag and using a rolling pin or heavy pan. Press firmly until you get fine crumbs. For even finer texture, pulse them in batches in a blender or use a mortar and pestle. The key is to avoid large chunks so the wafers stay crispy between layers.
How do I prevent the wafers from getting soggy?
Use cold butter for the wafer layer and press it gently but firmly into the dish. Chill the assembled dessert for at least 4 hours (overnight is best) to let the custard fully set. For extra insurance, add a thin layer of whipped cream between the wafer crumbs and custard—it acts as a moisture barrier. The butter should be melted but not hot when drizzled.
Can I use store-bought pudding instead of homemade custard?
Yes, but with adjustments! Use 2 cups instant vanilla pudding mix prepared with 4 cups milk (as directed) and fold in 2 sliced bananas. The texture will be slightly lighter, so add an extra 1 tablespoon cornstarch to thicken. For best results, chill for 6 hours to mimic the homemade custard's firmness. The wafer layers will still work perfectly.
What's the best way to serve this dessert?
Serve chilled in individual portions with a dollop of whipped cream and extra crushed wafers on top. For a restaurant-style presentation, drizzle with caramel sauce or chocolate ganache. Pair with vanilla ice cream on the side for a classic banana split vibe. The contrast of warm ice cream with the cool custard is unbeatable!
Can I make this dessert ahead of time?
This is one of the best make-ahead desserts! Assemble the layers in a glass dish up to 2 days in advance. Cover tightly and refrigerate. The flavors actually improve with time, and the wafers stay crispier than most layered desserts. Let it sit at room temperature for 10 minutes before serving to make slicing easier.