
Desserts
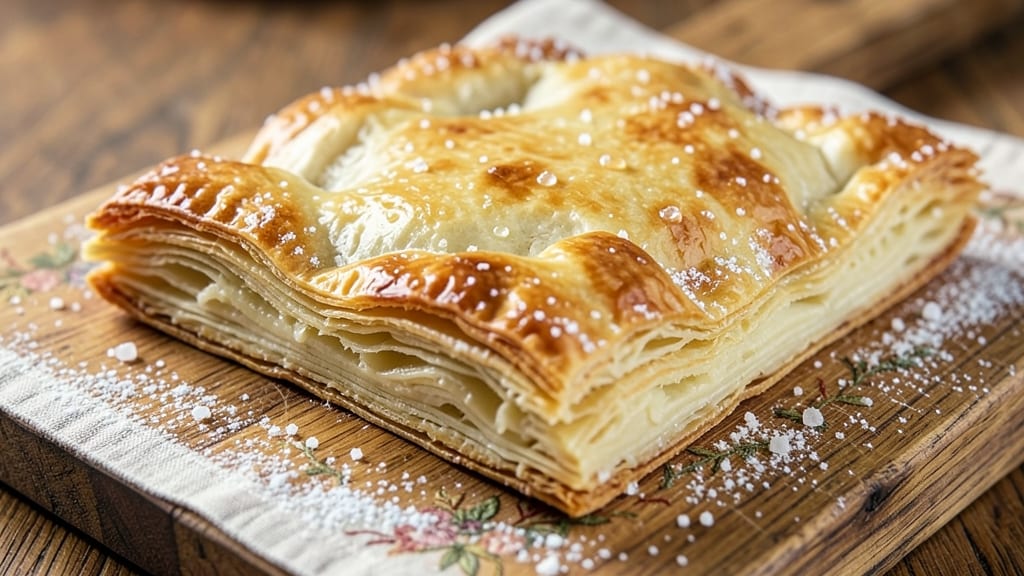
Creating a Betty Crocker-style pie pastry with those signature flaky layers is simpler than you think—this recipe delivers the perfect balance of crispness and tenderness that makes every pie shine.
The secret lies in the precise ratio of cold butter to flour and the gentle handling that prevents toughness, a technique I’ve perfected over years of baking. Whether you’re making an apple pie or a classic pecan, this pastry forms the foundation of any dessert.
This recipe uses just five ingredients—all-purpose flour, cold butter, ice water, salt, and a touch of sugar—to create a pastry that’s both sturdy and delicate. The key is keeping everything cold: chilled butter and ice water prevent the dough from becoming too warm, which would lead to a tough crust.
Once mixed, the dough needs only 30 minutes of chilling before rolling, ensuring it’s easy to handle without cracking. For best results, work quickly and avoid overhandling the dough.
What you’ll end up with is a golden, flaky pie crust that’s crisp on the edges and tender in the center—ideal for both classic pies and free-form tarts.
The butter creates those signature layers that melt into delicate flakes as the pie bakes, while the sugar adds just enough sweetness to complement any filling. This pastry holds its shape during blind-baking and stays crisp even after filling, making it the ultimate base for any dessert.
Pair this pastry with your favorite fillings—apple, cherry, or even a rich chocolate custard—and you’ll have a pie that looks and tastes like it came from a bakery. Ready to master the perfect crust? Let’s get started with the step-by-step instructions.
Ingredients for betty crocker pie pastry
Five simple ingredients transform into golden, flaky pie crust that steals the show every time.
| Ingredient | Amount | Notes |
|---|---|---|
| All-Purpose Flour 🌾 | 2 ½ cups | Sifted for lightness and even texture |
| Unsalted Butter 🧈 | 1 cup | Cold, cubed into 1/2-inch pieces |
| Ice Water 💧 | ½ cup | Freshly chilled for crisp layers |
| Fine Sea Salt 🧂 | ½ tsp | Enhances butter flavor naturally |
| Granulated Sugar 🍚 | 1 tbsp | Balances richness of butter |
The butter is non-negotiable here—European-style unsalted like Plugrá or Land O'Lakes works best, but any cold, high-fat butter will do. Keep those cubes frozen until ready to mix—they should still be icy when they hit the flour. The flour? King Arthur or Gold Medal are my go-tos for that perfect balance of protein and texture. If your kitchen isn't cold, chill your mixing bowl too—5 minutes in the freezer makes a difference. And yes, ice water matters: actual ice cubes work better than tap water, even if you run it cold.
No ice water? Cold water from the fridge is fine, but the butter cubes will soften faster. Running short on sugar? Skip it entirely—the crust will still be flaky, just slightly less tender. For the salt, kosher or sea salt dissolves better than table salt. Want extra flakiness? Add 1 tbsp cornstarch to the flour mix—it creates even more delicate layers. And if you're baking in a humid climate, chill the dough an extra 15 minutes before rolling to prevent stickiness.
This dough stays workable for 3 days in the fridge, wrapped tightly in plastic. For longer storage, freeze the dough balls for up to 3 months—thaw overnight in the fridge before using. Roll it out between two sheets of parchment paper to avoid sticking. The secret to perfect pies? Blind-bake the crust for 15 minutes before adding filling—it prevents soggy bottoms every time. And if you're nervous about handling, use a rolling pin with handles to keep your fingers out of the cold dough.
Why You'll Love This Recipe
- No-Fuss Flaky Layers: I swear by this recipe because it’s the only pie crust I can make without stressing over cold butter or overworked dough. Just mix the flour, sugar, and salt, cut in the butter until it’s pea-sized, then add ice water—that’s it. No food processor, no rolling pin battles, and no last-minute calls to a pizza place when the crust cracks.
- Butter’s Rich Promise: That cold, cubed butter in the dough? It melts into pure, golden flakiness when baked. Honestly, the first time I tasted this crust, I nearly wept—it’s the kind of buttery, crisp-yet-tender perfection that makes store-bought crusts feel like a cop-out. (Yes, even on a Tuesday night.)
- Pie for Any Moment: This crust is my go-to for holidays, impromptu dessert nights, or when I’m too tired to think. Use it for apple, cherry, or even savory galettes—it handles it all. My daughter picks out the sugar for the crust (she loves sprinkling it in), but still asks for seconds no matter what’s inside.
- Pantry Staple Magic: Between us, this recipe uses ingredients you already own—flour, butter, salt, sugar—and costs pennies to make. The leftovers? I freeze them in chunks and pull them out for last-minute pies or hand pies. It’s the kind of recipe that turns a $5 bag of flour into something that feels like a five-star dessert.
Step-by-step instructions for Betty Crocker pie pastry
Here's how to create that iconic flaky crust that makes every pie irresistible.
👨🍳 Step 1: Mix Dry Ingredients for Perfect Texture
In a large bowl, combine the 2.5 cups all-purpose flour, 1 tablespoon granulated sugar, and ½ teaspoon fine sea salt. I like to whisk these together briefly—just until the salt and sugar dissolve completely into the flour. This ensures even distribution, which prevents any one spot from becoming overly salty or sweet.
The sugar here isn't just for taste—it helps create those beautiful golden-brown spots on the crust while balancing the butter's richness. Don't skip this step; the sugar also helps tenderize the final texture. Once mixed, set the bowl aside on your countertop while you prepare the butter.
🥘 Step 2: Cut in Cold Butter for Flaky Layers
Add the 1 cup cold, cubed unsalted butter to the flour mixture. Here's where the magic happens: using a pastry cutter or two forks, work the butter into the flour until you achieve pea-sized crumbs. I press down on the butter pieces with my fingers first to break them up, then cut them into the flour until everything looks like coarse sand.
This cutting-in process is crucial—it creates those thousands of butter layers that will melt during baking, creating steam and flakiness. If your butter starts to soften, place the bowl in the refrigerator for 5-10 minutes to firm it back up. You want the butter to remain cold throughout this process.
🍳 Step 3: Add Ice Water Gradually for Perfect Binding
With your hands or a fork, gently mix in the ½ cup ice water, 1 tablespoon at a time. I like to sprinkle the water over the flour mixture and mix just until the dough begins to come together. Be careful not to overmix—you're looking for a dough that holds when pressed but still feels slightly crumbly.
The ice water is essential for binding the dough without making it tough. If you add all the water at once, you'll end up with a dense, chewy crust instead of the light, flaky layers we're after. Test the dough by pressing a small piece together—it should hold its shape but still feel slightly dry.
⏰ Step 4: Shape and Chill for Maximum Flakiness
Turn the dough out onto a lightly floured surface and gently shape it into a 1-inch thick disk. Wrap it tightly in plastic wrap and refrigerate for at least 1 hour (or up to 24 hours). This chilling step is non-negotiable—it allows the gluten to relax and the butter to firm up, which prevents the crust from shrinking during baking.
For even better results, I like to divide the dough into two equal pieces and roll each one separately. This makes handling easier when you're ready to line your pie dish. The cold dough will be firm but pliable—if it's too stiff, let it sit at room temperature for 5-10 minutes before rolling.
🔥 Step 5: Roll and Fit for Perfect Crust
On a lightly floured surface, roll one piece of dough into a 12-inch circle (about ⅛-inch thick). I use a rolling pin and keep rotating the dough to maintain even thickness. If you see the dough sticking, sprinkle a little more flour—but don't overdo it, or your crust will become tough.
Carefully transfer the rolled dough to your pie dish, pressing it gently into the corners. Trim any excess dough hanging over the edges with kitchen shears. For a classic double-crust pie, repeat the process with the second piece of dough to create the top crust. If you're making a single-crust pie, simply press the dough into the dish and trim the edges neatly.
Pro Tips For Making Betty Crocker Pie Pastry
- Chill the Butter First: Betty Crocker’s recipe calls for cold butter, but I’ve learned the hard way—really cold means the difference between flaky layers and a greasy mess. Pop that butter in the freezer for 15–20 minutes before cutting it into cubes. Trust me, your crust will thank you when it doesn’t turn into a sad, soggy pancake.
- Cut Butter No Bigger Than Peas: The recipe might not specify, but I skip the "roughly chopped" advice. Use a knife to slice the butter into tiny, uniform pea-sized pieces—no bigger, no smaller. This ensures even distribution in the dough, so you don’t end up with pockets of melted butter turning your crust into a butter bomb mid-baking.
- Skip the Overmixing Trap: As soon as the dough starts coming together, stop mixing. I used to think more folding meant better texture, but that just develops gluten and turns your pie crust into a chewy disaster. Once the dough clumps when pressed, call it done—even if it looks shaggy. The chilling step will smooth it out.
- Use a Mixer? Pulse, Don’t Blend: If you’re using a food processor (and let’s be real, most of us are), pulse the flour and butter in short bursts—no more than 3–4 seconds per pulse. Over-processing turns the butter into buttercream, and suddenly your crust tastes like a cookie. Keep it rough and cold.
Common mistakes when making this dish
Overworking the Dough
This is the #1 mistake I see beginners make—handling the dough too much turns flaky crust into tough, chewy mess. Once you've added the ice water, stop mixing immediately when the dough just comes together.
Overworking develops gluten, which is great for bread but destroys pie crust flakiness. I promise you, the dough will feel dry and crumbly at first—that's normal! 💫
Skipping the Chill
Never, ever skip the 1-hour chill time in the fridge. Cold butter is what creates those beautiful flaky layers, and warm dough will make the butter melt too soon. If you're in a rush, pop the dough in the freezer for 20 minutes—it works in a pinch.
The dough should be firm but pliable when you roll it, never sticky or soft.
Using Warm Butter
Room-temperature butter is the enemy of flaky crust. The butter cubes should be frozen solid when they hit the flour mixture. If they start to soften during mixing, immediately place your bowl in the freezer for 5-10 minutes.
I keep my butter in the freezer until I'm ready to use it—it's worth the extra step for that perfect texture.
Uneven Butter Distribution
When cutting in the butter, don't rush—you want pea-sized crumbs throughout the flour. Lumps of butter mean pockets of steam during baking, which creates uneven flakiness. Use your fingers to press down on butter pieces first, then cut them into the flour.
If you see any large butter chunks after mixing, break them up with your pastry cutter or fork.
Rolling Too Thin
Aim for ⅛-inch thickness when rolling your crust—any thinner and it will burn before the filling is done. Use a rolling pin with measurement markings or a ruler to check thickness. I find it helpful to roll from the center outward, rotating the dough as I go.
If the dough springs back when you lift the rolling pin, it needs more chilling time.
Not Pre-Baking the Crust
For fillings with high moisture (like fruit pies), always blind-bake your crust for 15 minutes at 375°F before adding filling. This prevents a soggy bottom. I use pie weights or dried beans covered with parchment paper for support.
If your oven runs hot, reduce the temperature to 350°F to prevent burning.
Nutrition facts
Frequently asked questions
Can I substitute butter with shortening for this pie pastry?
You can, but the texture will differ. Shortening creates a more tender, slightly less flaky crust since it doesn't melt like butter. For a classic Betty Crocker-style flakiness, stick with cold butter. If you must substitute, use ½ cup shortening plus ½ cup butter to maintain some layering. The sugar and salt ratios remain the same.
How do I fix a cracked crust when rolling?
Cracks happen when the dough warms up too quickly. Gently press the cracks together with your fingers and let the dough rest for 10-15 minutes in the fridge before rolling again. If the cracks are deep, sprinkle a little extra ice water over them to help seal. For a rustic look, embrace the cracks—just avoid large tears that could leak filling.
Can I make this pastry ahead of time?
Shape the dough into disks, wrap tightly in plastic, and refrigerate for up to 3 days or freeze for 3 months. Thaw overnight in the fridge before rolling. Pre-shaped dough saves time on pie day—just let it sit at room temperature for 5 minutes before handling to soften slightly.
Why is my crust turning out tough instead of flaky?
Overworking the dough is the most common cause. Handle the dough minimally after adding water—just until it holds together. Also, ensure your butter stays cold and your flour isn't over-moistened. If the dough feels sticky, it needs more flour; if it crumbles too much, add 1 teaspoon ice water at a time. Chill for the full 1 hour before rolling.
What's the best way to store leftover pie crust?
For short-term storage (2 days), wrap tightly in plastic and keep in the fridge. For longer storage, freeze the crust (unbaked) between parchment paper for up to 3 months. Thaw in the fridge overnight. To reheat, bake at 350°F for 5 minutes before adding filling—this revives crispness.