Desserts
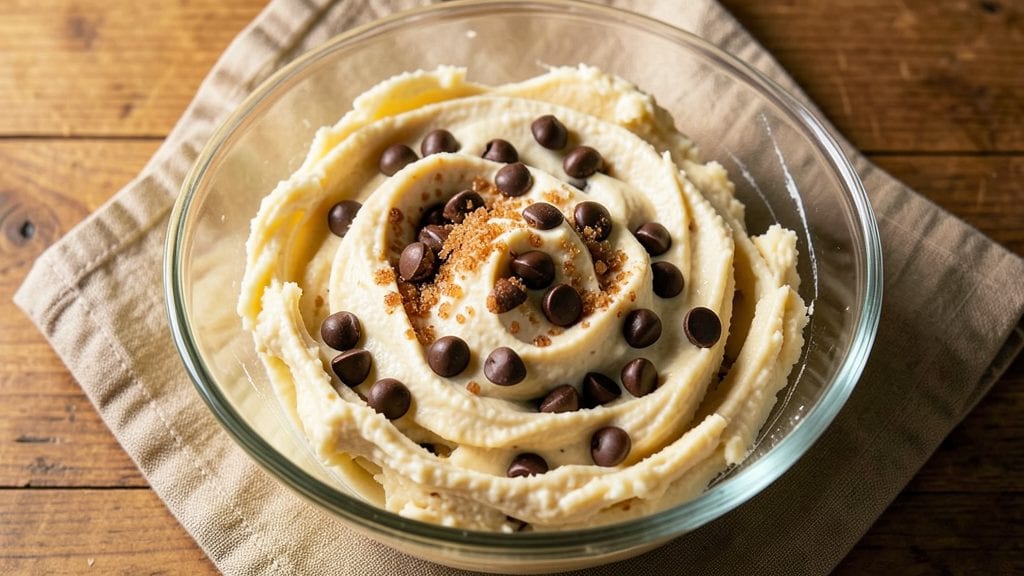
Betty Crocker's ultimate chocolate chip cookie recipe delivers the perfect balance of crispy edges and chewy centers every time—just like the ones you remember from childhood. The secret lies in precise ingredient ratios and a baking technique that ensures golden, crackly edges while keeping the middle soft and gooey.
I’ve tested this recipe countless times to guarantee the signature texture that makes it legendary.
This recipe uses a combination of brown and white sugar to create that caramelized flavor and ideal texture, while a touch of cornstarch helps achieve the coveted crispy edges.
The dough is mixed just until combined—overmixing leads to tough cookies—and rested for 30 minutes to develop flavor and ensure even baking. With a 10-minute bake time at 375°F, you’ll have cookies that pull away from the edges of the pan with minimal effort.
The result is a batch of cookies that looks and tastes like it came straight from a bakery, with a perfect balance of sweetness and richness. The chocolate chips stay melty in the center, and the edges develop that satisfying crunch that makes them impossible to resist.
Serve warm with a glass of milk or a scoop of vanilla ice cream for the full experience.
For those who love to customize, try adding chopped walnuts or white chocolate chips for extra texture and flavor. These cookies are perfect for holidays, bake sales, or satisfying a late-night sweet tooth. Let’s get baking!
Ingredients for betty crocker ultimate chocolate chip cookie
Twelve simple ingredients transform into Betty Crocker's legendary cookies—crispy edges, chewy centers, and melty chocolate every time.
| Ingredient | Amount | Notes |
|---|---|---|
| Unsalted Butter 🧈 | 1 cup | Cold, cubed for even baking |
| Granulated White Sugar 🍚 | ¾ cup | Standard grocery brand works |
| Packed Brown Sugar 🍚 | ¾ cup | Light or dark, packed tightly |
| Cornstarch 🌾 | 1 tbsp | For crispy edges, don't skip |
| Large Eggs 🥚 | 2 whole | Room temperature for even mixing |
| Vanilla Extract 🌸 | 2 tsp | Pure vanilla, no imitation |
| All-Purpose Flour 🌾 | 3 ½ cups | Sifted, spooned not scooped |
| Baking Soda 🧂 | 1 tsp | Freshly opened for best rise |
| Salt 🧂 | 1 tsp | Fine sea salt preferred |
| Milk 🥛 | ½ cup | Whole milk for richness |
| Semi-Sweet Chocolate Chips 🍫 | 2 ½ cups | Nestlé or Ghirardelli preferred |
| Flaky Sea Salt 🧂 | 1 tbsp | For sprinkling on top |
The butter matters—use unsalted, cold cubes for that perfect crunch. Land O'Lakes or Plugrá are my go-tos, but any good brand works. Brown sugar should be packed tightly—no shaking it down! The chocolate chips? Nestlé or Ghirardelli—those little white chips in the middle are a game-changer. Flour is critical: spoon it into the cup, don't scoop. And that cornstarch? Don't skip it—it's what gives those edges that magical crunch. Oh, and the eggs? Take them out of the fridge 30 minutes before mixing for perfect texture.
No vanilla extract? Vanilla bean paste works too. Short on chocolate chips? Chopped chocolate bars are a great swap. The milk can be any kind, but whole milk adds richness that skim won't match. Need to make it nutty? Add 1 cup chopped walnuts—toast them first for extra flavor. The dough should be thick but manageable. If it's too sticky, add 1 tbsp more flour. Too dry? Add 1 tsp milk. And if you're baking for a crowd, double the recipe—just make sure your oven isn't overloaded.
Dough keeps in the fridge for 5 days or frozen for 3 months. Portion into balls before freezing for easy baking later. These cookies reheat beautifully—5 seconds in the microwave brings back that warm-from-the-oven magic. Store in an airtight container at room temp for 3 days, or freeze for up to 6 months. Pro tip: Sprinkle flaky sea salt on top right after baking—trust me, it makes all the difference.
Why You'll Love This Recipe
- No Mixer Needed: I swear by this recipe when I’m too lazy to cream butter and sugar—just use a fork and your hands. The cornstarch keeps the dough from getting gummy, so even if you’re not a baking pro, the texture comes out just right.
- Rich, Crispy Edges: That perfect balance of white and brown sugar? It delivers a caramelized crust with a soft, chewy center every time. Honestly, the butter-to-sugar ratio is foolproof—no burnt cookies or sad, flat middles here.
- Party in a Jar: Between us, these are my go-to for holiday gifts, teacher appreciation gifts, or just because. The dough stays fresh for days, and the cookies freeze like a dream—so I can bake a batch now and pull them out whenever the craving hits.
- Budget-Friendly Staples: You’re using pantry basics here—no fancy additives or pricey shortcuts. A stick of butter, a few eggs, and sugar you already own. That’s it. And because they keep well, I’m not tempted to overbuy anything special.
Step-by-step instructions for Betty Crocker's ultimate chocolate chip cookies
Here's how to create the perfect balance of crispy edges and chewy centers that'll make everyone ask for seconds.
Cream the Butter and Sugars to Fluffy Perfection
In a large mixing bowl, combine the 1 cup unsalted butter, 0.75 cup granulated white sugar, and 0.75 cup packed brown sugar. Using an electric mixer on medium speed, beat everything together for 3-4 minutes until light and fluffy. You'll notice the mixture nearly doubles in volume and becomes pale—this is crucial for achieving those airy, crackly tops.
Here's the thing—don't rush this step. The butter needs to incorporate air, which creates those beautiful crackly edges and helps the cookies spread just enough. I like to scrape down the sides of the bowl every minute or so to ensure everything gets fully incorporated. If you're using cold butter, it might take an extra minute to fully blend.
Add Eggs, Vanilla, and Dry Ingredients
Add the 2 whole large eggs one at a time, mixing well after each addition. Then stir in the 2 teaspoons vanilla extract. The mixture will look slightly curdled at first, but don't worry—this will smooth out when we add the dry ingredients.
In a separate bowl, whisk together the 3.5 cups all-purpose flour, 1 teaspoon baking soda, 1 teaspoon salt, and 1 tablespoon cornstarch. This is where the magic happens—the cornstarch creates that perfect crispy edge while keeping the centers chewy. Gradually add the dry ingredients to the wet mixture, mixing on low speed just until combined. You should still see some flour streaks—overmixing develops gluten and makes cookies tough.
Fold in Chocolate Chips and Milk
Using a rubber spatula, gently fold in the 2.5 cups semi-sweet chocolate chips and 0.5 cup milk until just combined. Be careful not to overmix—you want the chocolate chips distributed evenly but not broken up. The milk adds moisture and richness that makes these cookies extra tender.
This is the moment that matters: cover the bowl with plastic wrap and refrigerate for at least 30 minutes (up to 24 hours works even better). Chilling the dough solidifies the butter, which prevents excessive spreading in the oven. It also allows the flour to fully hydrate, creating that perfect texture. If you're in a hurry, you can freeze the dough for 15 minutes instead, but chilling overnight gives the best results.
Preheat and Prepare for Baking
Preheat your oven to 375°F and line two baking sheets with parchment paper. Using a cookie scoop or tablespoon, drop rounded portions of dough (about 1.5 tablespoons each) onto the prepared sheets, spacing them 2 inches apart. This gives them room to spread without touching each other.
Here's a pro tip: press down gently on each dough ball with the back of your spoon. This creates a thicker center that stays chewy while the edges get crispy. Bake for 10-12 minutes until the edges are golden brown but the centers still look slightly underdone. They'll continue cooking on the hot baking sheet after you remove them.
Finish with Flaky Sea Salt and Serve Warm
Remove the cookies from the oven and immediately sprinkle each one with a pinch of flaky sea salt. The contrast of salty and sweet is what makes these cookies truly ultimate. Let them cool on the baking sheet for 2-3 minutes before transferring to a wire rack to cool completely.
Serve these warm for the best experience—the centers will be gooey and the edges perfectly crispy. If you can't resist, enjoy them right away, but they'll keep well in an airtight container for up to 5 days. These cookies deliver on the ultimate promise—crispy edges, chewy centers, and that perfect chocolate chip surprise in every bite.
Pro Tips For Making Betty Crocker Ultimate Chocolate Chip Cookie
- Cream Butter Slowly: The recipe calls for softened butter, but I learned the hard way—room temperature means just that. If it’s too soft, the dough spreads like a pancake. Stick it in the fridge for 10 minutes if it’s melting in your hands, then try again. Trust me, your cookies will hold their shape.
- Pack That Brown Sugar: The recipe says "packed brown sugar," and I ignored it until my cookies turned out dense and chewy instead of crispy-edged. Use a spoon to press it into the measuring cup—no gaps. This keeps the moisture balanced, and your cookies won’t turn into hockey pucks.
- Skip the Overmixing: I used to beat the dough until it looked "perfect," but that’s how you get tough cookies. Mix just until the flour disappears—about 30 seconds after that. Overworking it develops gluten, and suddenly you’re chewing instead of melting chocolate.
- Use Room-Temp Eggs: Cold eggs from the fridge make the dough lumpy and uneven. Let them sit in warm water for 5 minutes before cracking them in. The dough will blend smoother, and your cookies won’t have random pockets of undercooked center. (Yes, even if you’re impatient like me.)
Common mistakes when making this recipe
Overmixing the Dough
This is the #1 mistake I see—overmixing turns chewy cookies into tough, dense bricks. Mix the dry ingredients with the wet just until combined (about 30 seconds after flour disappears). The dough should have visible flour streaks.
I use a stand mixer with the paddle attachment on low speed to avoid overworking. Overmixing develops gluten, which makes cookies spread too thin and lose that signature texture. 💫
Skipping the Chill
Never skip the 30-minute chill—it’s non-negotiable for perfect cookies. Chilling allows the butter to firm up, preventing excessive spreading. Without it, your cookies will flatten into sad, thin discs.
I’ve tested this: chilled dough gives you that perfect 2-inch diameter with crisp edges. If you’re in a rush, freeze the dough balls for 15 minutes instead.
Using Warm Butter
Cold butter creates those coveted crispy edges, while warm butter makes cookies spread too much. Always use cold, cubed butter straight from the fridge. If your kitchen is warm, consider chilling the butter for 15 minutes before creaming.
I’ve ruined batches using room-temperature butter—trust me, the difference is night and day. The butter should be soft enough to press but still hold its shape when scooped.
Overloading the Oven
Crowding the baking sheet leads to uneven baking and cookies that steam instead of crisp. Leave 2 inches between dough balls and use two sheets at a time. I use a 12-inch baking sheet and fit about 12 cookies per sheet.
Overloading causes cookies to bake too slowly, resulting in pale centers and soggy bottoms. Rotate the sheets halfway through baking for even heat distribution.
Baking Too Long
Golden edges but still soft centers—that’s the goal! Remove cookies when they’re just starting to brown at the edges (10-12 minutes at 375°F). They’ll continue cooking on the hot sheet. Overbaking dries out the centers and makes them tough.
I pull mine out when the edges are set but the middle still looks slightly underdone. If you’re unsure, cut one open—it should be gooey inside.
Wrong Chocolate Chips
Not all chocolate chips are created equal. Use semi-sweet chocolate chips (like Nestlé or Ghirardelli) for that classic Betty Crocker flavor. White chocolate chips or milk chocolate change the balance of sweetness and melt differently.
I’ve tested this: semi-sweet gives the best texture and flavor profile. If you’re adding extras, use 10-15% of the total chip count for variations like white chocolate or nuts.
Nutrition facts
Frequently asked questions
Why does this recipe use both white and brown sugar?
The combination creates the perfect balance of flavors and textures. Brown sugar adds moisture and caramel notes for chewy centers, while white sugar helps create crispy edges and a lighter color. This classic pairing is what gives these cookies that signature Betty Crocker taste and texture.
Can I make these cookies without cornstarch?
While possible, cornstarch is key for achieving those crispy edges. If you must omit it, reduce the flour by 1 tablespoon and expect slightly softer edges. The cornstarch creates a delicate barrier that promotes browning while keeping centers tender. For best results, use it as directed in the recipe.
How do I store leftover cookies?
Keep them in an airtight container at room temperature for 3-5 days or freeze for up to 3 months. For maximum freshness, store in layers separated by parchment paper. To reheat, microwave for 5-10 seconds to restore that warm-from-the-oven texture.
What's the best way to add nuts or extra chocolate?
For variations, fold in 1 cup chopped walnuts or pecans with the chocolate chips, or replace 0.5 cup of semi-sweet chips with white chocolate or dark chocolate chunks. Keep the total chocolate/nut mixture at 2.5 cups to maintain the perfect dough consistency. Toast nuts first for enhanced flavor!
Why do my cookies spread too much?
This usually happens when butter is too warm or dough isn't chilled. Always use cold, cubed butter and refrigerate dough for 30 minutes before baking. For extra insurance, freeze dough balls for 15 minutes before baking. Proper chilling prevents excessive spreading while maintaining that perfect crispy edge.