Salads
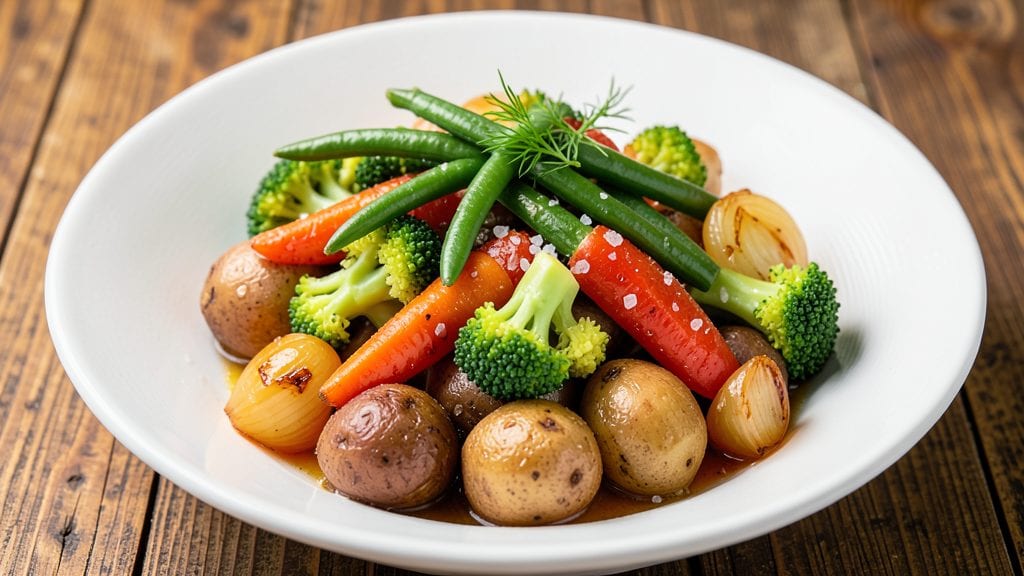
Transforming simple vegetables into a vibrant, nutrient-packed side dish takes just minutes with this foolproof boiling method. My grandmother used to say fresh vegetables taste best when cooked just enough to soften their edges while keeping their natural color and nutrients intact.
The key is timing and temperature control—no more mushy, overcooked vegetables that lose their appeal.
This recipe works with any combination of vegetables—carrots, green beans, potatoes, or even broccoli—and delivers consistent results every time. A simple saltwater bath enhances flavor while maintaining texture, and optional herbs or citrus zest add bright, fresh notes that elevate the dish.
The method is straightforward: bring water to a rolling boil, add vegetables, and cook until tender but still vibrant.
What you’ll end up with is a side dish that’s as beautiful as it is nutritious—brightly colored, perfectly tender, and ready to pair with everything from grilled meats to hearty soups.
The versatility of boiled vegetables makes them a staple in any kitchen, whether you’re preparing a quick weeknight meal or a more elaborate dinner. Let’s get started!
For those who prefer their vegetables with a bit more character, a splash of lemon juice or a sprinkle of fresh herbs after boiling adds an extra layer of flavor. This technique ensures your vegetables stay crisp-tender and full of color, making them a standout addition to any plate.
Ready in just 15 to 20 minutes, this recipe proves that simple cooking methods can deliver exceptional results.
Ingredients for boiled vegetables
Bright, crisp vegetables require just twelve ingredients to transform into a vibrant side dish.
| Ingredient | Amount | Notes |
|---|---|---|
| Carrots 🥕 | 1 ½ lb | Medium-sized, whole and unpeeled |
| Green Beans 🌱 | 1 lb | Trimmed, whole and fresh |
| Yellow Onions 🧅 | 1 whole | Quartered, skin on for flavor |
| Russet Potatoes 🥔 | 1 ½ lb | Cut into 1-inch cubes |
| Broccoli Florets 🥦 | 1 lb | Cut into even-sized pieces |
| Diamond Crystal Kosher Salt 🧂 | 2 tbsp | For flavorful saltwater bath |
| Extra-Virgin Olive Oil 🫒 | 1 tbsp | For finishing drizzle |
| Fresh Lemon Juice 🍋 | 2 tbsp | Brightens finished vegetables |
| Fresh Parsley Leaves 🌿 | ¼ cup | Chopped for garnish |
| Garlic Cloves 🧄 | 3 cloves | Minced for infused water |
| Bay Leaves 🍃 | 2 whole | Optional aromatic enhancement |
| Ice Cubes ❄️ | 1 cup | For immediate cooling |
The quality of your vegetables is paramount—opt for farmers market produce when possible, as it retains more natural sweetness and color. Carrots should be firm with vibrant orange hues, while green beans must be crisp with bright green pods. Potatoes should feel dense and heavy for their size, indicating high starch content. Whole Foods or local organic markets often carry the freshest selections, though standard grocery stores will suffice if the vegetables meet these quality markers. Broccoli florets should be tightly packed with a deep green color, avoiding any yellowing stems or wilted leaves. The garlic and bay leaves should be fragrant and free of moisture—damp herbs indicate they've been stored improperly.
No fresh parsley? Fresh cilantro or chives work equally well for garnish, though parsley offers the mildest flavor profile. Short on lemon juice? Lime juice at a 1:1 ratio provides a similar bright acidity, though lemon's slightly sweeter notes are preferable. The olive oil can be substituted with avocado oil for a neutral flavor, though extra-virgin olive oil adds subtle fruity undertones that complement the vegetables beautifully. For those avoiding garlic, asafetida powder at 1/8 tsp mimics its savory depth without the distinct aroma. The bay leaves are entirely optional but contribute subtle earthy notes—omit if you prefer a cleaner vegetable flavor profile.
Vegetables retain optimal texture when cooled immediately after boiling. Prepare an ice bath by filling a large bowl with ice cubes and cold water, then transfer the cooked vegetables directly into this bath for 2-3 minutes to halt further cooking. Store in airtight containers in the refrigerator for up to 4 days, though they're best enjoyed within the first 2 days for peak freshness. For meal prep, portion vegetables into individual containers with a light drizzle of olive oil and lemon juice to maintain moisture. Reheat gently in a steamer basket or microwave with a damp paper towel to prevent drying.
Why You'll Love This Recipe
- Five-Ingredient Magic: I swear by this combo—carrots add sweetness, potatoes bring heartiness, and the onions? They’re the secret flavor glue. No fancy spices needed, just simple, satisfying crunch and color.
- One-Pot Wonder: Honestly, it’s the easiest side dish I’ve ever made. Toss everything in a pot with water, salt, and a splash of vinegar—no chopping like a fine-diner, no fuss. Twenty minutes later, dinner’s ready.
- Lunchbox Hero: Between us, these veggies reheat like a dream. Pack them cold for work or school, and they’ll still taste fresh hours later. My kids actually eat their greens this way—call me a genius.
- Budget Booster: Russet potatoes and carrots stretch a meal without breaking the bank. Double the batch, save half for tomorrow’s soup or stir-fry. Zero waste, maximum value—my wallet thanks me every time.
Step-by-step instructions for boiled vegetables
Here's the method for vibrant, perfectly cooked vegetables that retain their color and nutrients.
Prepare the Vegetables for Even Cooking
Begin by thoroughly rinsing all vegetables under cold water to remove any dirt or debris. Peel the carrots if desired, but I prefer to leave them unpeeled for added texture and nutrients. Cut the carrots into even 2-inch pieces, the russet potatoes into 1-inch cubes, and trim the green beans by snapping off the ends. Quarter the yellow onions, leaving the skin on for added flavor during cooking.
For the broccoli florets, cut them into even-sized pieces about 1-inch across. This ensures they all cook at the same rate, preventing some pieces from becoming mushy while others remain undercooked. Arrange each vegetable type in separate bowls for organized cooking. The goal is to maintain their distinct textures and vibrant colors throughout the process.
Create the Infused Cooking Water
In a large stockpot, combine 8 cups of cold water with the 2 whole bay leaves, 3 minced garlic cloves, and the 2 tablespoons of diamond crystal kosher salt. Bring the water to a boil over high heat, then immediately reduce to a gentle simmer. The water should be flavorful but not overly salty—taste it to confirm the seasoning is balanced.
While the water heats, I like to add the potatoes first since they require the longest cooking time. This allows me to layer in the other vegetables as they become ready. The aromatic bay leaves and garlic will infuse the water, adding subtle depth to the vegetables without overpowering their natural flavors. Keep the water at a steady simmer to prevent it from boiling vigorously, which can cause the vegetables to break apart.
Cook Vegetables in Stages for Perfect Texture
Add the 1.5 pounds of russet potatoes to the simmering water and cook for 10 minutes. They should be tender when pierced with a fork but still hold their shape. Remove the potatoes with a slotted spoon and set them aside in a bowl. Next, add the 1.5 pounds of carrots and cook for 5 minutes, until they're tender but still firm with a slight bite.
After removing the carrots, add the 1 pound of green beans and cook for 3 minutes. They should remain crisp-tender with a vibrant green color. Finally, add the 1 pound of broccoli florets and cook for 2 minutes. The broccoli should retain its bright green hue and crisp texture. The staggered cooking ensures each vegetable reaches its ideal doneness without becoming overcooked.
Shock and Finish with Bright Flavors
Prepare an ice bath by filling a large bowl with 1 cup of ice cubes and enough cold water to cover the vegetables. Once all vegetables are cooked, immediately transfer them to the ice bath. This rapid cooling stops the cooking process and helps preserve their vibrant colors and crisp textures. Let them sit for 2 minutes to fully chill.
Drain the vegetables and transfer them to a large serving bowl. Drizzle with the 1 tablespoon of extra-virgin olive oil and toss gently to coat. Add the 2 tablespoons of fresh lemon juice and the 0.25 cup of chopped fresh parsley leaves, tossing again to distribute evenly. The lemon juice brightens the flavors, while the parsley adds a fresh, aromatic finish. Serve immediately while the vegetables are still crisp and vibrant.
Pro Tips For Making Boiled Vegetables
- START WITH COLD WATER: Fill your pot halfway, then add the veggies—no need to wait for boiling. The temperature shock keeps broccoli bright and green beans crisp, while potatoes and carrots absorb heat faster without turning mushy. (Yes, even if you’re impatient like me.)
- CUT POTATOES UNIFORM: Russets need consistent size—aim for 1.5-inch chunks. I learned this the hard way: uneven pieces mean some end up rock-hard while others fall apart. Use a knife with control, not speed, for cleaner cuts.
- SALT THE WATER LATE: Wait until the water’s boiling and veggies are submerged before adding salt. Early salting toughens potatoes and leaches flavor from onions and carrots. A pinch of salt in the pot at the end? That’s the move.
- STOP AT AL DENTE: Pull veggies when they’re just tender—broccoli should snap, green beans bend slightly, and potatoes yield to a fork. Overcooking turns them into mush. Taste-test the potato first; it’s the slowest to cook.
Dietary considerations for this recipe
Gluten-Free Adaptations
This recipe is naturally gluten-free since it relies solely on vegetables, water, and basic seasonings. The key is ensuring all added ingredients—like the Diamond Crystal kosher salt and bay leaves—are certified gluten-free.
I always double-check labels on spices and herbs, as some brands may process their products in facilities that handle gluten-containing ingredients. The extra-virgin olive oil and fresh lemon juice are inherently safe, but store-bought citrus juices occasionally contain additives, so opt for fresh-squeezed whenever possible. 🌱
Low-Carb Options
For a lower-carb version, reduce or eliminate the russet potatoes and yellow onions, which are higher in carbohydrates. Swap them for cauliflower florets (cut into similar sizes) and zucchini slices—both cook quickly and add volume without significantly impacting carb counts.
Cauliflower requires just 2 minutes of cooking time, while zucchini needs about 2 minutes as well. The carrots can stay in moderation since they're lower in carbs compared to potatoes. This adaptation keeps the dish light and nutritious while still satisfying. 🥦
Allergen-Friendly Swaps
If you're avoiding garlic, replace the 3 minced garlic cloves with ½ teaspoon of asafetida powder (hing), which adds a similar savory depth without the strong aroma. For those with citrus allergies, skip the lemon juice and use ½ teaspoon of apple cider vinegar instead for brightness.
If olive oil is an issue, avocado oil or sunflower oil work as neutral alternatives. Always verify that all herbs and spices are free from cross-contamination if allergies are severe. These small adjustments ensure everyone at the table can enjoy the dish safely. 💡
Nutrient Boosting
To maximize nutritional benefits, add nutrient-dense extras like 1 tablespoon of nutritional yeast (for a cheesy, B-vitamin boost) or 1 teaspoon of turmeric powder (for anti-inflammatory properties). For extra protein, stir in ½ cup of cooked chickpeas or white beans after boiling.
These additions enhance the dish's health profile without altering the core boiling method. I often add a sprinkle of hemp seeds for omega-3s and crunch—just 1 tablespoon adds a satisfying texture. 💪
Kid-Friendly Tweaks
For picky eaters, serve the vegetables separately instead of mixed to avoid overwhelming textures. Cut the green beans into 1-inch pieces and the broccoli florets into smaller, bite-sized clusters.
A light drizzle of honey (just 1 teaspoon) after tossing with lemon juice can make the dish more appealing to children. Let them dip the vegetables in a small bowl of melted butter or ranch dressing for added fun.
The key is keeping the vegetables vibrant and slightly crisp—kids prefer textures they can recognize! 🌟
Nutrition facts
Frequently asked questions
What's the secret to keeping boiled vegetables bright and crisp?
Use an ice bath immediately after boiling to stop the cooking process and lock in vibrant colors. Also, cook vegetables in stages—potatoes first, then carrots, green beans, and broccoli—to prevent overcooking. The key is timing: never exceed 5 minutes for most veggies unless they're starchy like potatoes.
Can I boil frozen vegetables instead of fresh?
Fresh vegetables are ideal for this recipe, but you can use frozen if needed. Just don't thaw them first—add them directly to the boiling water and reduce cooking time by 20-30%. For example, frozen green beans only need 2 minutes instead of 3 minutes. The texture will be slightly softer, but still delicious!
How do I adjust the recipe for fewer servings?
This recipe scales perfectly! For 2 servings, halve all ingredients and use 4 cups of water. For 6 servings, double everything and use an 11-inch stockpot. The cooking times remain the same as long as you maintain the same vegetable-to-water ratio (about 1 pound of veggies per 4 cups of water).
What if my vegetables turn out mushy?
Overcooking is the most common mistake! Always use a timer and test doneness with a fork. For broccoli and green beans, 2-3 minutes max is perfect. If you accidentally overcook, try reheating them with a splash of water in the microwave for 10 seconds to restore some crispness, then finish with fresh lemon juice.
Can I make this ahead of time for meal prep?
Store cooked vegetables in airtight containers in the fridge for up to 4 days. For best texture, reheat them in a steamer basket over boiling water for 2-3 minutes or microwave with a damp paper towel. To keep them vibrant, add a squeeze of lemon juice right before serving.