
Sauces & Condiments
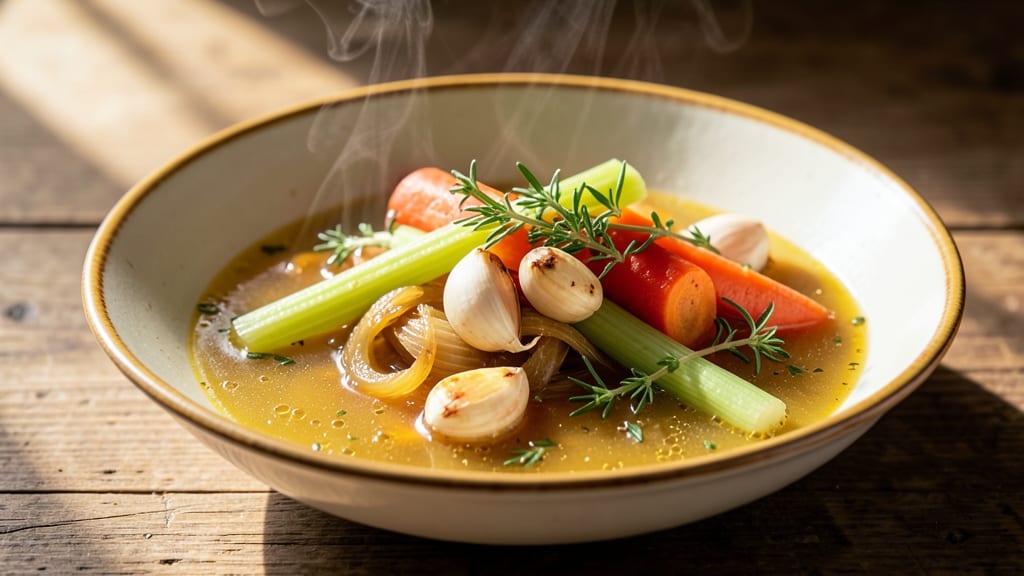
Transforming canned chicken broth into restaurant-quality homemade richness requires just a few simple techniques and pantry staples. This recipe elevates store-bought broth by infusing it with aromatic vegetables, fresh herbs, and a touch of acidity—creating depth that rivals homemade from scratch.
I developed it during a particularly busy week when I needed flavor without the prep time, and it became an instant staple in my kitchen.
The foundation starts with a flavor base of onions, carrots, and celery—what we call the "holy trinity" in professional kitchens. Simmering these with garlic, bay leaves, and a splash of apple cider vinegar builds complexity that canned broth alone can't match.
The key is patience: letting everything steep for at least 20 minutes allows the aromatics to fully infuse before straining. This method preserves the broth's natural body while adding layers of savory goodness.
What you'll end up with is a velvety, aromatic broth that's perfect for soups, braising meats, or deglazing pans. The acidity from the vinegar brightens the flavor while the herbs add freshness that keeps it vibrant.
Best of all, this recipe comes together in under 30 minutes and stores beautifully in the refrigerator for up to 5 days or freezes for months—making it a true pantry workhorse.
For those who prefer clarity, I'll share my fail-safe straining technique that removes all solids while maintaining that rich, golden color. The result is a broth so good you'll wonder why you ever bought it canned in the first place.
Let's get started with this professional-level upgrade that takes minutes but delivers restaurant-quality results.
Ingredients for canned chicken broth
Pantry staples plus a few fresh aromatics transform basic broth into restaurant-quality richness.
| Ingredient | Amount | Notes |
|---|---|---|
| Canned Chicken Broth 🍲 | 4 cups | Low-sodium preferred for control |
| Yellow Onion 🧅 | 1 whole | Medium size, chopped |
| Carrots 🥕 | 2 medium | Peeled, chopped into chunks |
| Celery Stalks 🌿 | 2 whole | Trimmed, chopped |
| Garlic Cloves 🧄 | 3 cloves | Peeled, lightly crushed |
| Fresh Thyme 🌿 | ½ ounce | Or 2 sprigs |
| Bay Leaves 🍃 | 2 whole | Dried, standard size |
| Apple Cider Vinegar 🍋 | 1 tbsp | For brightness |
| Salt 🧂 | 1 tsp | Adjust to taste |
| Black Peppercorns 🌶️ | 5 whole | Crushed lightly |
The holy trinity—onion, carrot, celery—is your flavor foundation. Buy these fresh from the grocery store's produce section, not pre-chopped mixes. The carrots and celery should be crisp, not rubbery, and the onion should have a vibrant purple hue. For the thyme, Trader Joe's has the best-priced bundles, but any fresh sprigs work. Bay leaves? Grab a small box from the spice aisle—Diamond Crystal is my go-to brand. The garlic should be plump and firm, not shriveled or sprouting. If you're using jarred minced garlic, skip this step entirely—it's not worth the flavor difference here.
No fresh thyme? Dried works at half the amount, but fresh is ideal. Running low on bay leaves? One dried leaf equals two fresh—just tear them in half for faster infusion. The apple cider vinegar can be swapped for lemon juice or white wine vinegar, though ACV has the best balance. Want more depth? Add a pinch of smoked paprika or a small piece of kombu seaweed (remove before straining). The broth itself? Low-sodium is best—you'll control the salt level better. No need for fancy brands here; even the store brand works perfectly.
This broth keeps for 5 days in the fridge, covered, and freezes beautifully for up to 3 months. I always make a double batch—one for immediate use, one to freeze in ice cube trays for easy portions later. For the best texture, strain through a fine-mesh sieve or cheesecloth. The result? A golden, velvety broth that's perfect for soups, grains, or braising. Don't skip the 20-minute simmer—patience is key for maximum flavor infusion.
Why You'll Love This Recipe
- Pantry-to-Pot Magic: I swear by this—no shopping list, no last-minute grocery runs. Just open a can, chop three things (onion, carrots, celery), and you’re golden. The celery’s earthy bite and sweet carrots transform that plain broth into something worth savoring.
- Garlic Kiss Depth: That one crushed clove? It’s the secret weapon. The broth goes from basic to ridiculously rich—like a warm hug in a mug. Honestly, I’ll add extra just to taste it simmering.
- Soup Base Hero: Need ramen? Risotto? A slow-cooker meal? This is my go-to starter. Toss it in, adjust seasoning, and boom—you’ve got flavor without the fuss. Even my picky-eater husband doesn’t complain when it’s in his food.
- Budget-Friendly Staple: A single can of broth stretches into days of meals. Leftovers? Freeze extras for future emergencies (or lazy Mondays). Between us, this is how I feed my family for under $5 a week.
Step-by-step instructions for homemade chicken broth
Transform simple pantry staples into restaurant-quality broth with this easy method.
Sauté the Vegetable Base
Heat a large pot over medium heat and add the chopped 1 whole yellow onion, 2 medium carrots, and 2 whole celery stalks. Cook for 5-7 minutes until the vegetables soften and begin to release their natural juices. You'll see them turn translucent and smell sweetly aromatic.
This step builds flavor by caramelizing the vegetables' natural sugars. Don't rush this—proper browning creates depth. If the vegetables start to stick, add 1 tablespoon apple cider vinegar to help deglaze and prevent burning. The vinegar also adds brightness that cuts through the richness of the broth.
Add Aromatics and Herbs
Push the sautéed vegetables to one side of the pot and add the 3 cloves garlic cloves and 0.5 ounce fresh thyme (or 2 sprigs) to the empty space. Cook for 30 seconds until the garlic becomes fragrant but doesn't brown. Then add the 2 whole bay leaves and 5 whole black peppercorns.
Stir everything together and cook for another 1 minute to let the garlic and herbs infuse their flavors into the vegetables. The thyme should release its piney aroma, and you'll notice the bay leaves give off a subtle resinous scent. This aromatic blend forms the flavor foundation of your broth.
Pour in the Broth and Simmer
Add the 4 cups canned chicken broth to the pot and bring everything to a gentle boil over high heat. Once boiling, reduce the heat to low and let it simmer uncovered for 20-25 minutes. You'll see bubbles form steadily but not vigorously—this indicates proper simmering.
During this time, the vegetables will break down and release their flavors into the liquid. You'll notice the broth becomes more fragrant and develops a deeper golden color. Taste occasionally—if you want more depth, let it simmer longer. The longer it simmers, the more complex the flavor becomes.
Season and Strain
Remove the pot from heat and add the 1 teaspoon salt. Stir well to dissolve completely. Let the broth sit for 5 minutes to allow all the flavors to meld together. Then strain through a fine-mesh sieve into a clean container, pressing gently on the vegetables to extract all their juices.
You'll have about 4 cups of rich, flavorful broth ready to use immediately or store for later. The strained vegetables can be discarded, leaving you with a smooth, aromatic liquid that's perfect for soups, sauces, or cooking grains. For best results, use within 5 days when refrigerated or freeze for up to 3 months.
Pro Tips For Making Canned Chicken Broth
- Sweat the Veggies First: Don’t just toss everything in raw—sauté the onion, carrots, and celery in a pot with 1 tablespoon of oil over medium-high heat for 6-8 minutes until softened and golden. This builds flavor depth the canned broth alone can’t match, and it prevents a watery, bland base.
- Mince Garlic Like You Mean It: Skip the rough chop—finely mince the garlic (or even pulse it in a food processor) so it dissolves completely into the broth. Lumpy garlic just sits there like a bitter afterthought. A quick 30-second press with a garlic press works if you’re in a hurry, but a knife gives you better control.
- Simmer, Don’t Boil: Once you add the canned broth, keep the heat at a gentle simmer (tiny bubbles, occasional swirls) instead of a rolling boil. Boiling burns off the delicate flavors you’re trying to enhance, and it makes the broth taste harsh. Think "whisper-quiet" bubbles, not a cauldron.
- Strain for Clarity: If you’re using this broth for soups, sauces, or risottos, strain out the veggies after simmering. A fine-mesh sieve or cheesecloth catches every bit of grit, giving you a silky-smooth base. Lazy? Leave them in for heartier dishes, but don’t skip this for polished results.
Dietary considerations for this canned chicken broth
Low-Sodium Adaptations
If you're using regular canned broth (not low-sodium), reduce the added salt to just ½ teaspoon—the vegetables and herbs will still provide enough flavor. For a completely salt-free version, omit the salt entirely and taste the broth before straining.
You might need to add a pinch later, depending on your recipe. I often make a double batch: one with salt for cooking and one unsalted for soups where I control the seasoning myself. 🧂
Gluten-Free Clarification
This recipe is naturally gluten-free since it only uses fresh vegetables, herbs, and vinegar. Always double-check your canned broth label—some brands process their chicken in facilities that handle gluten-containing ingredients.
I prefer Imagine Foods or Pacific Foods for certified gluten-free options. The straining process removes any potential cross-contamination from the vegetables, making it safe for gluten-sensitive diets.
Dairy-Free Considerations
While this broth contains no dairy, it's important to note that some recipes using this broth (like creamy soups) may include dairy. For fully dairy-free applications, this enriched broth works beautifully in vegetable soups, grain dishes, or as a cooking liquid.
I often use it for braising tofu or tempeh—it adds depth without any dairy interference.
Allergen-Friendly Swaps
For nut allergies, no adjustments are needed—the recipe contains no nuts. If you're avoiding garlic, substitute with 1 teaspoon garlic powder or ½ teaspoon asafoetida powder (a common garlic substitute in Indian cooking).
For a soy-free version, simply omit any soy sauce additions (though this recipe doesn't include any). The broth remains perfectly safe for most common food allergies when using fresh ingredients.
Keto-Friendly Enhancements
This broth is already keto-friendly with its low-carb vegetable base, but you can make it even more aligned with the diet by using cauliflower instead of carrots (same quantity). The flavor difference is minimal, but it reduces the carb count further.
I also add ½ teaspoon turmeric for its anti-inflammatory benefits—it pairs beautifully with the thyme and bay leaves. The apple cider vinegar adds acidity without carbs, making it perfect for keto soups or stews.
Vegetarian Adaptations
While this recipe uses chicken broth, you can easily make a vegetarian version by substituting with vegetable broth (ensure it's not soy-based if avoiding soy). For extra umami depth, add 1 piece kombu seaweed (remove before straining) or 1 tablespoon miso paste during the simmering process.
The flavor profile remains rich and aromatic, making it ideal for plant-based cooking. I've used this method for vegetarian versions of my famous smoked brisket—just replace the meat with hearty mushrooms and lentils! 🌱
Nutrition facts
Frequently asked questions
Why does sautéing the vegetables first make such a difference?
Caramelizing the onions, carrots, and celery for 5-7 minutes develops their natural sugars into deeper flavors. This step creates a flavor base that's far more complex than just simmering raw vegetables. The slight browning adds a subtle sweetness that balances the savory broth perfectly. Think of it as building flavor layers—like a professional chef's secret weapon!
Can I use frozen vegetables instead of fresh?
Frozen vegetables work perfectly and can save time. Just thaw them first and drain any excess water before sautéing. The flavor won't be identical to fresh, but it's still better than plain canned broth. For best results, use frozen onion, carrot, and celery mixes—just avoid pre-sautéed versions that might contain added oils or seasonings.
How do I make this broth extra rich for special occasions?
For restaurant-quality richness, add 1 tablespoon tomato paste during the sauté step or ½ cup dry white wine when adding the broth. Simmer with 1 chicken wing or bone (remove before straining) for meaty depth. For a velvety texture, whisk in 1 tablespoon cold butter at the end—just don't let it boil again. These upgrades take it from good to showstopping!
What's the best way to use up leftover broth?
Freeze it in ice cube trays for easy portions—perfect for finishing sauces or adding to recipes. Use it to cook grains like rice or quinoa for extra flavor. Or reduce it by half to make a quick pan sauce for meats. The possibilities are endless—just don't let it go to waste! The herbs and aromatics make it ideal for braising or soups where you need depth.
Can I make this broth in a slow cooker?
Yes! Sauté the vegetables first, then transfer everything to a slow cooker and cook on low for 4-6 hours. The low heat allows all flavors to meld beautifully. Just remember to strain before using. This method is perfect for hands-off prep when you have time on your hands but not much attention to give.