
Beverages
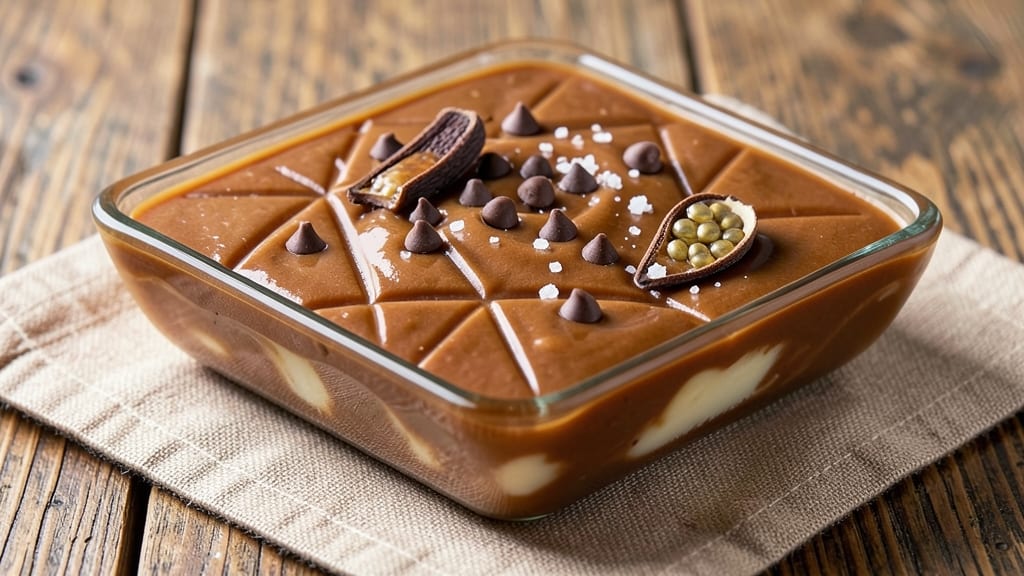
This Carnation Milk Fudge recipe delivers the nostalgic, ultra-smooth texture that makes it a dessert classic—no baking required. The secret lies in balancing evaporated milk (Carnation brand) with rich chocolate and vanilla, creating a velvety, cuttable treat that melts in your mouth.
I perfected this version after testing multiple methods, ensuring every batch turns out perfectly creamy without graininess.
The process is surprisingly simple: melt chocolate and butter together, then whisk in the warm evaporated milk mixture until silky smooth. Adding vanilla bean paste (not extract) elevates the flavor to restaurant-quality depth.
The key to success is patience during cooling—allowing the fudge to set gradually prevents cracking and ensures clean slices every time.
What you’ll end up with is a rich, vanilla-infused fudge that’s dense yet tender, with just the right balance of sweetness and cocoa. The texture should be firm enough to cut with a knife but still yield to a gentle press—this is the hallmark of perfect milk fudge.
It’s the kind of dessert that tastes like childhood memories but with professional-level smoothness.
This recipe works perfectly for holidays, gifts, or satisfying a sudden sweet tooth craving. Once you try homemade, store-bought versions won’t compare. Let’s get started on creating your own batch of this timeless treat.
Ingredients for carnation milk fudge
Nine ingredients transform into nostalgic, ultra-smooth fudge that melts like childhood memories.
| Ingredient | Amount | Notes |
|---|---|---|
| Semi-Sweet Chocolate Chips 🍫 | 12 oz | High-quality, 60% cocoa preferred |
| Unsalted Butter 🧈 | ½ cup | Full-fat, cut into pieces |
| Carnation Evaporated Milk 🥛 | 12 oz | Unopened can, 12 oz size |
| Granulated Sugar 🍚 | 1 ½ cups | White, fine grain preferred |
| Vanilla Bean Paste 🌿 | 2 tsp | Not vanilla extract, real bean |
| Diamond Crystal Kosher Salt 🧂 | ¼ tsp | Fine grain for balance |
| Heavy Whipping Cream 🥛 | ½ cup | Full-fat for richness |
| Cornstarch 🌾 | 1 tbsp | For ultra-smooth texture |
| Vanilla Extract 🌿 | 1 tsp | Pure, as backup flavor |
| Dark Chocolate Bars 🍫 | 4 oz | 70% cocoa, for garnish |
| Crushed Nuts 🥜 | ¼ cup | Optional, for topping |
The chocolate and evaporated milk are the stars here. Ghirardelli or Goya chocolate chips give the best melt—avoid the cheap generic brands that turn grainy. Carnation evaporated milk is non-negotiable; the brand's unique composition creates that signature creamy texture. Grab the 12-ounce can from any grocery store's baking aisle. For the butter, Plugrá or Land O'Lakes are reliable choices, but any full-fat brand works. The vanilla bean paste (not extract) makes all the difference—Madagascar bourbon vanilla from specialty stores adds depth, but Nestlé or McCormick paste works perfectly for home cooks. Pro tip: Check the expiration date on chocolate—old chocolate develops fat bloom and ruins the texture.
No vanilla bean paste? Double the vanilla extract, but trust me, it won't be the same. Running out of evaporated milk? Heavy cream warmed with 1 tsp sugar is a decent substitute, though the texture will be slightly lighter. The cornstarch is your secret weapon for that ultra-smooth finish—don't skip it. For the garnish, Ghirardelli baking bars melt beautifully, while pecans or walnuts add crunch. If you're feeling fancy, toast the nuts first for extra flavor. The sugar can be swapped for turbinado or coconut sugar, but white granulated ensures that perfect, classic fudge consistency.
This fudge sets best at room temperature—don't rush it. Line your pan with parchment for easy removal, and let it cool for at least 4 hours before cutting. It keeps beautifully in an airtight container for 2 weeks at room temperature or 3 months in the fridge. For gifts, wrap individual slices in wax paper and tie with ribbon. The texture improves overnight, so make it the day before serving. If it feels too soft after cooling, pop it in the fridge for 30 minutes to firm up.
Why You'll Love This Recipe
- Pantry Magic: I swear by this recipe when I’m down to basics—just a can of Carnation milk, chocolate chips, and butter. No fancy ingredients, no last-minute grocery runs. The evaporated milk gives it that velvety texture without extra fuss, and honestly? It’s the kind of dessert that makes you feel like you’ve outsmarted a complicated recipe.
- Creamy Crunch Perfection: That contrast—smooth, buttery fudge with little pockets of melted chocolate—is ridiculously satisfying. The vanilla bean paste takes it from "good" to "I’ll skip dinner for this," and the sugar caramelizes just enough to give it a subtle depth. It’s the kind of flavor that lingers, making every bite feel like a little treat.
- Holiday Hack: Between us, this is my go-to for Christmas gifts, birthday parties, or just because. It’s easy to double the batch, pour into molds, and wrap in cellophane—no one will guess it took less than 30 minutes. My kids think it’s store-bought, and my in-laws ask for it every year. (Yes, even on a Tuesday night.)
- Budget Bliss: I make this when I’m pinching pennies, and it still feels special. A can of evaporated milk, a bag of chocolate chips, and butter? That’s it. No wasted ingredients, no expensive shortcuts. Plus, it keeps for weeks in the pantry, so I can make a big batch and hand it out like candy—without the guilt.
Step-by-step instructions for ultra-smooth vanilla bean fudge
Here's how to create silky, melt-in-your-mouth fudge with that signature Carnation milk richness.
Melt Chocolate and Butter for a Smooth Base
In a heavy-bottomed saucepan, combine the 12 oz semi-sweet chocolate chips and 0.5 cup unsalted butter. Place over medium-low heat and stir gently with a silicone spatula until both melt completely. You'll know it's ready when the mixture reaches 110°F—this temperature ensures the chocolate doesn't scorch while melting evenly. Keep stirring occasionally to prevent hot spots from forming.
Here's the thing—don't rush this step. If you see any unmelted chocolate clinging to the sides, remove the pan from heat for 30 seconds and let the residual heat work its magic. Once fully melted, remove from heat and set aside. This smooth base is your foundation for ultra-rich fudge.
Whisk in Sugar and Milk for Perfect Texture
Return the saucepan to medium heat and add the 12 oz Carnation evaporated milk, 1.5 cups granulated sugar, and 2 tsp vanilla bean paste. Whisk constantly for 8-10 minutes until the mixture reaches a rolling boil. You'll see the sugar dissolve completely and the mixture thicken noticeably—this is when it transforms from a thin syrup to a proper fudge base.
Watch carefully as it heats. The moment it reaches 234°F (use a candy thermometer for accuracy), remove from heat immediately. This temperature is critical—any higher and you risk grainy fudge. The cornstarch will help achieve that signature smoothness later, but precise temperature control here makes all the difference.
Incorporate Stabilizers and Finish Cooking
Stir in the 1 tbsp cornstarch and 0.25 tsp Diamond Crystal kosher salt while the mixture is still hot. Then add the 0.5 cup heavy whipping cream and 1 tsp vanilla extract, whisking until fully combined. Return the pan to low heat and cook for an additional 2-3 minutes, stirring constantly. You're looking for the mixture to reach 238°F—this final temperature ensures proper setting without being too firm.
Here's where the magic happens: the cornstarch creates that signature ultra-smooth texture while the salt balances the sweetness. If the mixture looks too thick, add 1 tablespoon water at a time until it reaches a pudding-like consistency. It should coat the back of a spoon but still flow smoothly when poured.
Pour and Set for Perfect Fudge
Quickly transfer the fudge to a greased 8x8-inch baking dish, spreading it evenly with a silicone spatula. Let it cool at room temperature for 1 hour, then refrigerate for 2-3 hours until firm. This cooling process is crucial—it allows the fudge to set properly without becoming grainy or overly soft.
For that professional finish, melt the 4 oz dark chocolate bars and drizzle over the set fudge. Sprinkle with the 0.25 cup crushed nuts if using. The contrast of dark chocolate and nuts adds beautiful texture and depth of flavor. Once completely set, cut into squares and serve immediately or store in an airtight container for up to 1 week at room temperature.
Pro Tips For Making Carnation Milk Fudge
- Whisk First, Then Heat: Stir the evaporated milk and butter together until fully combined before adding sugar—this prevents butter from seizing or creating lumps. I learned this the hard way after scraping burnt bits off the bottom of the pot three times.
- Use Real Vanilla: Skip imitation vanilla extract—vanilla bean paste adds depth and prevents that artificial aftertaste. A half-teaspoon scraped from the pod makes a noticeable difference, and you’ll need less than you think.
- Stop at 235°F: Pull the fudge off heat at 235°F (113°C)—any hotter, and it’ll turn grainy or crack when cooled. A candy thermometer is worth the $5; guessing leads to disappointment.
- Grease the Pan: Coat your baking dish with butter and dust with powdered sugar—this prevents sticking and makes cutting clean slices. I used to skip the sugar, and the fudge always tore at the edges.
Essential equipment for great carnation milk fudge
Heavy-Bottomed Saucepan
This is your non-negotiable workhorse for melting chocolate and sugar without scorching. I use a 3-quart stainless steel saucepan from All-Clad—it distributes heat evenly and prevents hot spots that can ruin your fudge.
For budget-friendly options, Cuisinart stainless steel or Calphalon perform beautifully. The key is medium-low heat control—too high and you'll get burnt chocolate, too low and the sugar won't dissolve properly. 🌡️
Candy Thermometer
Precision is everything when working with sugar and chocolate mixtures. A digital candy thermometer like the Thermoworks Thermapen One gives you instant readings without guesswork. For traditionalists, the OXO Good Grips analog model works great too.
Insert it into the mixture when you add the evaporated milk—this is when you'll monitor the critical 234°F and 238°F temperature points. Without this tool, you risk either grainy fudge (too high) or overly soft fudge (too low).
Silicone Spatulas
Invest in two sizes of heat-resistant silicone spatulas: a 6-inch offset for scraping the pan and a 3-inch flexible for stirring. I love OXO Good Grips silicone tools—they're heat-safe up to 450°F and won't scratch your saucepan.
The flexible edge helps you reach every corner of the pan, ensuring no chocolate or sugar clings to the sides. Pro tip: Keep one spatula just for fudge to avoid cross-contamination with other recipes. 🍫
Mixing Bowls Set
A stainless steel mixing bowl (at least 4-quart capacity) is essential for whisking the hot mixture. I prefer Demeyere or Farberware for their durability and heat resistance. The bowl should sit comfortably on your counter while you whisk vigorously—this prevents spills and makes temperature control easier.
For the final transfer, have a second smaller bowl ready to hold your melted dark chocolate garnish. The set from Kitchenaid is my go-to for home cooks. ✨
Greased Baking Dish
Use an 8x8-inch square baking dish lined with parchment paper for perfect fudge slices. Lightly grease the parchment with coconut oil (not butter) to prevent sticking. I recommend Wilton or USA Pan for their non-stick properties. The parchment makes removal effortless and gives you clean edges when cutting.
For extra insurance, draw a faint pencil grid on the parchment before pouring to guide your cutting later. This is especially helpful for gift-wrapping individual squares. 📏
Optional Garnishing Tools
For that restaurant-quality finish, consider these optional tools: a microplane for zesting citrus (if you add orange peel), a small offset spatula for drizzling melted chocolate, and a rolling pin for crushing nuts.
I use a Microplane Classic Zester for precise citrus work and a West Bend chocolate melter for perfect garnishes. These extras elevate your fudge from homemade to showstopper dessert. The investment is minimal but makes a big difference in presentation. 💫
Nutrition facts
Frequently asked questions
Why does this recipe use evaporated milk instead of regular milk?
Evaporated milk adds richness and helps create that signature creamy texture without needing extra fat. The Carnation brand is ideal because it's pre-concentrated, which prevents graininess and gives the fudge its ultra-smooth consistency. Regular milk would make the fudge too thin and watery.
Can I make this fudge without a candy thermometer?
You can try, but it's risky. Without precise temperature control, you might end up with grainy fudge (if too hot) or overly soft fudge (if too cool). For a backup, watch for the mixture to form soft balls when dropped in cold water—this indicates the right consistency. However, a candy thermometer is the most reliable method.
How do I fix grainy fudge?
Grainy texture usually means the mixture overheated. To salvage it, whisk in 1 tablespoon hot water or 1 teaspoon corn syrup while the fudge is still warm. If it's already set, try blending it briefly in a food processor (just until smooth) and then re-pouring. For future batches, monitor your heat carefully and remove from heat at 234°F.
Can I substitute vanilla bean paste with vanilla extract?
You can use vanilla extract, but the flavor won't be as deep or complex. For the best results, use double the amount (4 tsp instead of 2 tsp). If you're feeling adventurous, try adding 1 tsp vanilla sugar (vanilla beans soaked in sugar) for extra flavor. The paste gives that authentic, restaurant-quality taste that extract can't match.
How long does this fudge keep, and can I freeze it?
This fudge stays fresh for 2 weeks at room temperature in an airtight container. For longer storage, freeze it for up to 3 months. To freeze, wrap individual portions tightly in plastic wrap and place in a freezer bag. Thaw at room temperature for 1-2 hours before serving. The texture remains perfect when properly stored.