
Desserts
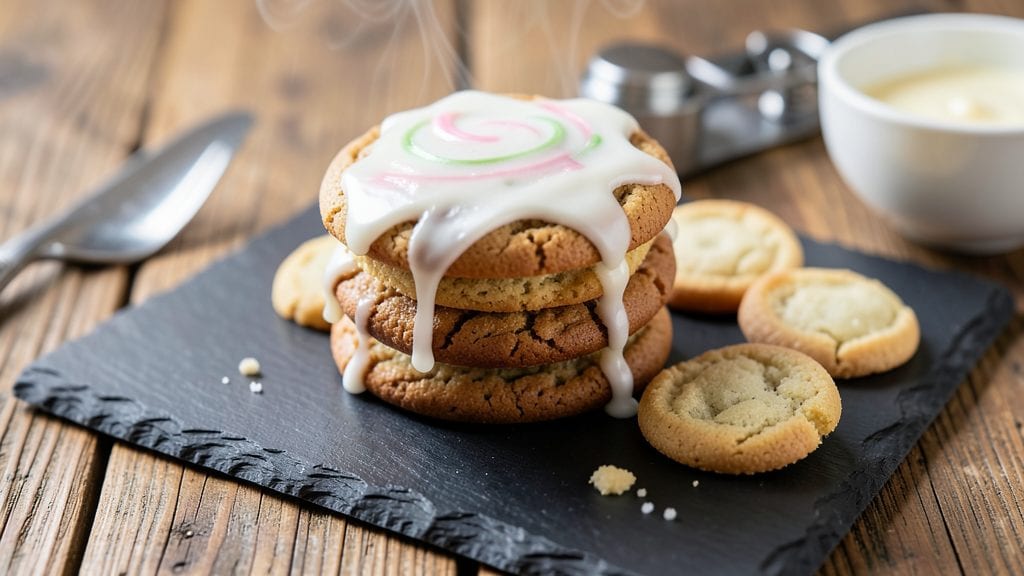
This copycat recipe for Cheryl’s cookies with icing delivers that signature buttery swirl and creamy frosting—easier than you’d expect and just as irresistible.
My first attempt at this recipe came during a baking marathon with Emma when we needed cookies for her school bake sale, and it became our new favorite.
The secret lies in the precise balance of butter, sugar, and vanilla, baked just until the edges are golden yet still soft in the center.
What makes these cookies special is the professional-quality icing that transforms them from good to extraordinary. The recipe uses a simple three-ingredient icing that spreads smoothly and sets perfectly, creating that classic Cheryl's look.
With just 15 minutes of prep and 12 minutes in the oven, you'll have warm cookies ready for decorating in no time. The dough is forgiving, making it perfect for beginners while still delivering restaurant-quality results.
By the time you're done, you'll have a plate of cookies with perfectly swirled butter patterns and a glossy, creamy frosting that's impossible to resist. The texture is just right—crisp at the edges, tender in the middle, with that signature buttery flavor that makes these cookies legendary.
These are the kind of cookies that disappear quickly, so be prepared to make another batch.
Whether you're baking for a special occasion or just treating yourself, this copycat recipe delivers the same magic that made Cheryl's cookies famous. The best part? You can customize the icing with sprinkles or colored sugar for a festive touch. Let's get baking!
Ingredients for cheryl's cookies copycat recipe with icing
Buttery swirls and creamy icing—just 12 ingredients for that iconic Cheryl’s magic.
| Ingredient | Amount | Notes |
|---|---|---|
| Unsalted Butter 🧈 | 1 cup | Cold, cubed for swirling |
| Granulated Sugar 🍚 | 1 ½ cups | White sugar preferred |
| Packed Brown Sugar 🍚 | ½ cup | Light or dark brown |
| Large Eggs 🥚 | 2 whole | Room temperature preferred |
| Pure Vanilla Extract 🍯 | 2 tsp | Imitation-free vanilla |
| All-Purpose Flour 🌾 | 2 ½ cups | Sifted for light texture |
| Baking Soda 🧪 | ½ tsp | Ensures proper rise |
| Salt 🧂 | ½ tsp | Fine sea salt |
| Powdered Sugar 🍚 | 3 cups | For icing, sifted |
| Heavy Whipping Cream 🥛 | ½ cup | Full-fat for stability |
| Milk 🥛 | 1 tbsp | Adjusts icing consistency |
| Vanilla Extract 🍯 | 1 tsp | For icing flavor |
The butter is non-negotiable here. Crisco or shortening won’t give that signature swirl, so grab a stick of Land O’Lakes unsalted butter from the dairy case—it’s the most reliable brand for this. Cold cubes are key; they create those perfect golden swirls. If your butter’s been sitting out, pop it in the freezer for 10 minutes first. The vanilla? Pure extract, not imitation—trust me, it makes a difference. For the powdered sugar, Domino brand is my go-to because it’s consistently fine and sifts smoothly. If you’re baking in a dry climate, add an extra tablespoon of milk to the icing to keep it from drying out.
No vanilla extract? Vanilla bean paste works in a pinch, but it’ll be richer. Short on powdered sugar? Sifted granulated sugar with 1 tsp cornstarch mimics the texture. The heavy cream must be full-fat—whipped cream from a can won’t hold up. For the dough, if you’re at high altitude, reduce the sugar by 2 tablespoons to prevent spreading. The baking soda is crucial—don’t swap it for baking powder unless you adjust the amount. And if you’re feeling fancy, add a pinch of almond extract to the dough for depth, but keep it subtle.
Butter swirls stay fresh for 3 days in an airtight container, but the icing hardens after that. Store the cookies separately and frost them right before serving. For longer storage, freeze the unfrosted cookies for up to 3 months—thaw at room temperature, then refrost. The icing sets best at room temp, so plan ahead if you’re decorating. Pro tip: Use a pastry brush to spread the icing evenly, and sprinkle with colored sugar while it’s still wet for that bakery look. These disappear fast, so make extras—you’ll want them.
Why You'll Love This Recipe
- No Mixer Needed: I swear by this recipe because it’s three bowls and a spoon—no stand mixer, no food processor, just good old-fashioned creaming. That butter-and-sugar combo? It’s the kind of dough you can shape even when your hands are flour-dusted and tired.
- Butter-Sugar Magic: Here’s what sold me—the balance of crisp edges and chewy centers from that cold butter cut into the sugars. Add the vanilla? Pure satisfaction. It’s the kind of cookie that makes you pause mid-bite and think, “Wait, I made this?”
- Party in a Jar: Between us, these are my go-to for holidays, teacher gifts, or just because. The icing? Thick, buttery, and not too sweet—it sticks to the cookies like they’re meant to be together. (Yes, even on a Tuesday night.)
- Leftovers? More Like Zero: Honestly, they disappear so fast I rarely have any. But if they do linger? Toss them in the freezer, and they’re just as good reheated with a glass of milk. Budget-friendly? Absolutely. But honestly, the cost is worth every bite.
Step-by-step instructions for Cheryl's copycat cookies with icing
Here's how to recreate those iconic buttery swirls and velvety icing at home.
Cream the Butter and Sugars to Light and Fluffy
In a stand mixer fitted with the paddle attachment, combine the 1 cup unsalted butter with the 1.5 cups granulated sugar and 0.5 cup packed brown sugar. Beat on medium speed for 3-4 minutes until the mixture is light in color and nearly doubles in volume. You'll see ribbons form when you lift the paddle—this is your signal the butter is properly aerated.
I like to scrape down the sides of the bowl with a silicone spatula every 30 seconds to ensure even mixing. The butter should be completely smooth with no grainy texture, and the sides of the bowl should be almost clear. This step creates the signature tender crumb that makes these cookies so special. Don't rush it—proper creaming makes all the difference in texture.
Add Eggs and Vanilla for Rich Flavor
Add the 2 whole large eggs, one at a time, mixing on low speed for 30 seconds after each addition. This gradual addition prevents the eggs from breaking. Then add the 2 teaspoons pure vanilla extract and mix for another 10 seconds until fully incorporated.
The mixture might look slightly curdled at first, but don't worry—it will come together beautifully when you add the dry ingredients. I always use room temperature eggs for this recipe; they blend more smoothly and help create a lighter cookie. If your eggs are cold, let them sit at room temperature for 20-30 minutes before using.
Combine Dry Ingredients and Create the Dough
In a separate bowl, whisk together the 2.5 cups all-purpose flour, 0.5 teaspoon baking soda, and 0.5 teaspoon salt. Gradually add this mixture to the wet ingredients, mixing on low speed for 30-45 seconds until just combined. You should still see a few small flour streaks—overmixing develops gluten and makes cookies tough.
Once the flour is incorporated, remove the bowl from the mixer and fold in the 1 cup cold, cubed unsalted butter by hand using a silicone spatula. Press the butter pieces into the dough until they're completely coated. The cold butter will create those beautiful swirls when baked. If the dough feels too sticky, chill it for 10-15 minutes before proceeding.
Chill the Dough for Perfect Swirls
Divide the dough into two equal portions and flatten each into a 6-inch round on a piece of parchment paper. Wrap each round tightly with plastic wrap and refrigerate for at least 2 hours or up to 24 hours. This chilling step is crucial—it firms up the butter so it doesn't spread too much in the oven and creates those signature swirled patterns.
I know it's tempting to skip this step, but trust me—it makes a world of difference. The longer you chill the dough, the more pronounced the swirls will be when baked. You can even freeze the dough rounds for up to 3 months if you want to prep ahead.
Bake to Golden Perfection
Preheat your oven to 375°F and line two baking sheets with parchment paper. Working with one dough round at a time, unwrap it and use a pizza cutter or sharp knife to make 8-10 cuts from the outer edge toward the center, stopping about ½ inch from the center. Then make cuts in the opposite direction to create a crisscross pattern.
Starting from the outer edge, gently pull the dough apart into 8-10 wedges and twist each wedge slightly. Place the wedges on the prepared baking sheets, spacing them about 2 inches apart. Bake for 10-12 minutes until the edges are golden brown and the tops look slightly underdone in the center. They'll continue cooking as they cool on the baking sheet.
Prepare the Icing While Cookies Cool
While the cookies are baking, combine the 3 cups powdered sugar, 0.5 cup heavy whipping cream, 1 tablespoon milk, and 1 teaspoon vanilla extract in a medium bowl. Beat with an electric mixer on high speed for 2-3 minutes until smooth and fluffy. The icing should be thick enough to hold its shape when piped but still spreadable.
If the icing is too thick, add 1 teaspoon milk at a time until you reach the desired consistency. For a more intense vanilla flavor, you can add an extra ½ teaspoon vanilla extract. The icing should coat the back of a spoon smoothly without being runny.
Frost and Decorate the Cookies
Let the cookies cool on the baking sheet for 5 minutes before transferring them to a wire rack to cool completely. Once cooled, use a piping bag fitted with a star tip to pipe the icing onto each cookie, spreading it to the edges. For a classic look, create a crisscross pattern with the icing.
Work quickly but carefully—these cookies are delicate when warm. The icing should create a smooth, glossy finish that contrasts beautifully with the buttery cookie texture. For extra flair, you can sprinkle each cookie with a pinch of powdered sugar right after piping while the icing is still wet.
Pro Tips For Making Cheryl'S Cookies Copycat Recipe With Icing
- Cream Butter Slowly: Dump cold butter into the sugar mix and pulse your mixer—you’ll end up with butter chunks and a lumpy mess. Instead, soften the butter to room temp (it should dent when pressed, not be greasy) and add it in stages. This ensures a smooth dough that bakes evenly and doesn’t spread into sad pancakes.
- Pack That Sugar: The recipe calls for packed brown sugar, and skipping this step means your cookies turn out drier and less chewy. Use a spoon to press the sugar firmly into the measuring cup—no shaking, no tapping. If you’re in a rush, chill the cup in the freezer for 5 minutes first; the sugar will pack itself.
- Chill the Dough: I used to skip this, thinking I’d save time, but the dough spreads like wildfire in the oven. Wrap it in plastic and refrigerate for at least 2 hours (overnight is better). Cold dough = thicker cookies with crisp edges and a soft center. Pro move: freeze the dough balls for 30 minutes if you’re short on time.
- Bake in Batches: Overcrowding the tray leads to flat, sad cookies that bake unevenly. Leave at least 2 inches between dough balls—they’ll puff up, and you don’t want them touching. If your sheet’s full, bake the first batch, then swap the tray to the middle rack while the second batch starts on the top. Rotate the pan halfway through for even color.
Make-ahead tips for this dish
Dough Prep Ahead
Make your life easier by prepping the dough rounds up to 3 days in advance. After flattening the dough into 6-inch rounds, wrap them tightly in plastic wrap and refrigerate.
The longer they chill, the more pronounced those signature swirls become when baked. I like to label them with the date so I remember when they're freshest. 🧈
Freezing for Future Baking
For ultimate convenience, freeze the dough rounds for up to 3 months. Wrap each round individually in plastic wrap, then place them in a freezer-safe bag. When ready to bake, thaw in the refrigerator overnight.
This is perfect for holiday baking when you want to avoid last-minute stress. Just add 1-2 minutes to your baking time if using frozen dough.
Icing Prep Strategy
Make the icing the night before and store it in an airtight container at room temperature. The flavors meld beautifully overnight, and it's ready to pipe when your cookies come out of the oven.
If it thickens slightly, simply whisk in 1 teaspoon milk to restore its smooth consistency. This saves you time on baking day and ensures perfect frosting every time. ✨
Cookie Storage Secrets
Store unfrosted cookies in an airtight container at room temperature for up to 5 days. The icing hardens after 24 hours, so I recommend frosting them right before serving. For longer storage, freeze the unfrosted cookies for up to 2 months.
Thaw at room temperature, then refrost with fresh icing for that bakery-fresh look. The key is keeping them separated until serving day.
Baking in Batches
Preheat your oven to 375°F and bake one sheet at a time to maintain even temperature. If you're making a big batch, rotate the baking sheets halfway through for even browning.
I find that using two baking sheets at once works best when baking these cookies. The secret is spacing them 2 inches apart—they spread more than you might expect! 🔥
Make-Ahead Party Hack
For parties, bake all the cookies 2 days ahead and store them unfrosted. On the day of the event, frost them fresh and arrange them on a platter with powdered sugar dusting.
This way, you can focus on your guests instead of last-minute baking. David always appreciates when I handle the cookie prep ahead of time—it's his favorite part of any gathering! 💫
Nutrition facts
Frequently asked questions
Can I substitute butter with margarine or shortening?
The butter is essential for that signature swirl and flavor. Margarine won't give the same rich taste, and shortening will make the cookies denser. For the best results, stick with 1 cup unsalted butter—it's what creates those iconic golden swirls. If you're concerned about cost, try using a high-quality European-style butter like Plugrá, which melts beautifully.
How do I fix cookies that spread too much?
If your cookies spread too thin, it's usually because the dough wasn't chilled enough. Next time, make sure to refrigerate the dough rounds for at least 2 hours. Also, avoid overmixing the dough—just combine until the flour disappears. For a quick fix, try baking at 350°F instead of 375°F to slow the spread. The edges should be golden while the centers stay soft.
Can I make the icing ahead of time?
Prepare the icing the night before and store it in an airtight container at room temperature. It actually tastes better after resting as the flavors meld. If it thickens, just whisk in 1 teaspoon milk to restore smoothness. The icing should be thick enough to hold its shape but still spreadable when piped. This makes baking day much easier—just pipe and decorate when your cookies come out of the oven.
What's the secret to getting those perfect swirls?
The key is using cold, cubed butter that's been chilled for at least 2 hours after mixing. When you make the cuts in the dough and pull it apart, the cold butter creates those beautiful swirls as it melts in the oven. For extra definition, try twisting each wedge slightly before baking. The longer you chill the dough, the more pronounced the swirls will be.
Can I use a hand mixer instead of a stand mixer?
Yes, but you'll need to work in stages. Use your hand mixer to cream the butter and sugars for 4-5 minutes, scraping the bowl frequently. For the icing, beat it for 3-4 minutes until smooth. The main difference is you'll need to be more vigilant about scraping the bowl. If you're short on time, the stand mixer does make this step much easier. Either way, don't rush—proper mixing ensures that light, fluffy texture.