
Side Dishes
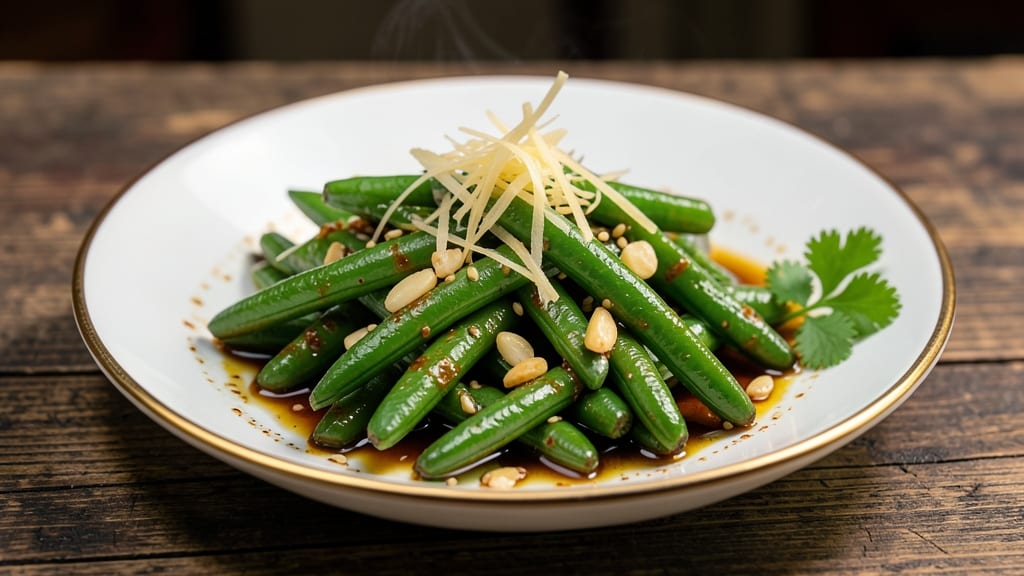
Mastering Chinese restaurant-style green beans means achieving that perfect crisp-tender texture with bold garlic-chili heat—just like your favorite takeout. This recipe delivers restaurant-quality results at home using simple techniques and a hot wok or skillet.
The secret lies in high-heat cooking and proper seasoning balance, ensuring every bite has that signature crunch and savory-spicy kick.
What sets this recipe apart is the foolproof method for crispy edges without overcooking the centers. We'll use fresh garlic, ginger, and a touch of soy sauce to build deep umami flavor, then finish with a hint of chili heat for that authentic restaurant taste.
The process is straightforward—just 15 minutes of active cooking time—and requires only basic ingredients you likely already have on hand.
By the end, you'll have vibrant green beans with golden-brown edges, fragrant garlic aroma, and a subtle spicy finish that makes them impossible to resist. These beans work perfectly as a side dish for grilled meats, stir-fries, or even as a standalone appetizer.
The flavor profile is balanced—savory, slightly spicy, and undeniably satisfying.
This recipe is naturally vegetarian and can be made gluten-free with tamari instead of soy sauce. Serve immediately while hot for that restaurant-style experience. Let's get cooking!
Ingredients for chinese restaurant style green beans
Restaurant-quality green beans start with these eleven essential ingredients for that signature crispy texture and bold flavor.
| Ingredient | Amount | Notes |
|---|---|---|
| Fresh Green Beans 🥦 | 1 ½ lb | Trimmed, cut into 2-inch pieces |
| Extra-Virgin Olive Oil 🫒 | 2 tbsp | High smoke point preferred |
| Garlic Cloves 🧄 | 4 cloves | Minced, fresh preferred |
| Fresh Ginger 🌿 | 1 tbsp | Grated, aromatic variety |
| Light Soy Sauce 🍶 | 2 tbsp | Gluten-free tamari optional |
| Sesame Oil 🫒 | 1 tsp | Toasted, for aroma |
| Red Chili Flakes 🌶️ | 1 tsp | Adjust for heat preference |
| White Peppercorns 🌶️ | ½ tsp | Freshly ground preferred |
| Diamond Crystal Kosher Salt 🧂 | ½ tsp | Fine grain preferred |
| Toasted Sesame Seeds 🌾 | 1 tbsp | For garnish, optional |
| Scallions 🧅 | 2 whole | Thinly sliced, for garnish |
The green beans are the star, so choose bright green, firm, and straight varieties—avoid anything rubbery or yellowing. Whole Foods or local farmers' markets often carry superior quality, but the standard grocery store selection works fine if they're fresh. For the garlic, fresh is non-negotiable—pre-minced jarred garlic lacks the aromatic depth. If you're using a wok, high heat is critical to achieve those crispy edges without overcooking the centers. The sesame oil adds an essential nutty aroma, so opt for toasted varieties from Trader Joe's or Asian markets for maximum flavor impact.
No sesame oil? Avocado oil works in a pinch, though the flavor will differ slightly. Short on fresh ginger? Ground ginger at half the amount suffices, but fresh provides the best zing. For gluten-free needs, tamari replaces soy sauce seamlessly. The red chili flakes can be swapped for Sichuan peppercorns (toasted) for a numbing-spicy kick. If you prefer milder heat, reduce to half a teaspoon or omit entirely. The white peppercorns add subtle complexity—freshly ground ensures optimal flavor. For a smokier profile, smoked paprika at a quarter teaspoon can be incorporated into the seasoning blend.
Freshly trimmed green beans should be stored in a sealed container with a paper towel to absorb moisture, keeping them crisp for up to 5 days in the fridge. The garlic and ginger can be peeled and stored in airtight containers for 1 week in the fridge, or frozen for 3 months. The sesame oil and soy sauce remain stable for 12 months in the pantry. For optimal texture, cook the beans immediately after trimming—delaying even 30 minutes can compromise crispness. Garnishes like sesame seeds and scallions add freshness and can be stored separately for up to 1 week in the fridge.
Why You'll Love This Recipe
- One-Pan Magic: I swear by this recipe when I need something fast—just toss the beans, garlic, and ginger in one skillet with olive oil, and let the soy sauce work its savory magic. No chopping boards, no mess, just crisp-tender perfection in 15 minutes.
- Umami Bomb: That light soy sauce? It’s the secret weapon—deep, salty, and just sweet enough to make these green beans ridiculously addictive. The garlic and ginger sizzle into something aromatic, like a little bite of a Chinese takeout order but 100x better.
- Meal Prep MVP: I make a big batch on Sundays because these beans reheat like a dream—still crispy, still packed with flavor, no soggy sides. Throw them in lunches, over rice, or even cold in salads. Honestly, they disappear faster than my willpower on a bad day.
- Budget Powerhouse: Fresh green beans are cheap, and this recipe uses pantry staples you already own. A single jar of ginger and a bottle of soy sauce stretch for months of meals, and you’ll never buy takeout again. (Yes, even on a Tuesday night.)
Step-by-step instructions for Chinese restaurant-style green beans
Here's the method for achieving that signature crisp-tender texture and bold flavor profile.
Blanch the Green Beans for Crisp-Tender Texture
Fill a large pot with water and bring to a rolling boil. Add the 1.5 lb fresh green beans and cook for 3-4 minutes until they turn bright green but remain crisp. This quick blanching removes excess moisture and prepares them for the wok's high heat.
Drain immediately and transfer to an ice bath for 30 seconds to stop the cooking process. Pat them completely dry with a clean kitchen towel—this ensures they'll crisp up beautifully in the wok rather than steam. I press firmly between paper towels to remove all surface moisture, which is critical for achieving that restaurant-style crunch.
Prepare the Aromatic Base
Heat a wok or large skillet over high heat until it's smoking slightly. Add the 2 tbsp extra-virgin olive oil and swirl to coat the surface evenly. The oil should shimmer but not burn—this creates the ideal environment for developing deep flavor through high-heat cooking.
Add the 4 cloves minced garlic cloves and 1 tbsp grated fresh ginger, stirring constantly for 30 seconds until fragrant. The garlic should turn golden without browning—if it starts to darken too quickly, reduce the heat slightly. This aromatic base forms the flavor foundation for the dish, so don't rush this step.
Cook the Green Beans to Perfect Crispiness
Add the blanched green beans in a single layer to the wok, spreading them out evenly. Stir-fry for 2-3 minutes over high heat, tossing constantly with tongs. You're aiming for golden brown spots while maintaining a crisp texture—this takes practice, but the beans should be tender-crisp with slight char marks.
Here's the thing—don't overcrowd the wok. If you need to cook in batches, work in 30-second intervals to maintain the high heat. The beans should be hot and sizzling throughout the cooking process; if they're steaming instead of searing, your heat isn't high enough.
Season and Finish with Umami Depth
Reduce heat to medium-high and add the 2 tbsp light soy sauce, 1 tsp red chili flakes, 0.5 tsp white peppercorns, and 0.5 tsp diamond crystal kosher salt. Toss everything together for 1 minute, allowing the soy sauce to caramelize slightly and coat the beans evenly. The chili flakes should distribute throughout for consistent heat.
Drizzle in the 1 tsp sesame oil and toss once more for 10 seconds. This final step adds nutty aroma and helps bind all the flavors together. The beans should now have a glossy appearance from the soy sauce while maintaining their crisp texture—this is your quality control checkpoint.
Garnish and Serve Immediately
Transfer the green beans to a serving platter and sprinkle with 1 tbsp toasted sesame seeds and 2 whole thinly sliced scallions. The sesame seeds add textural contrast and visual appeal, while the scallions provide freshness to cut through the richness.
Serve immediately while the beans are still crisp. The dish should deliver crisp-tender green beans with bold garlic-ginger aroma, subtle chili heat, and deep umami flavor from the soy sauce. Each bite should offer that perfect balance of textures and temperatures—hot, crisp, and satisfying.
Pro Tips For Making Chinese Restaurant Style Green Beans
- Trim the Ends: Cut off the very tips of your green beans—those tough, fibrous ends ruin the texture. I used to leave them on out of laziness, and the result was a mouthful of chewy disappointment. Snip them clean with kitchen shears for a restaurant-worthy bite every time.
- Sear the Garlic Fast: Cook your garlic in olive oil over high heat until it’s just golden—about 30 seconds. Let it brown too long, and you’ll burn it into bitter oblivion. Keep a lid nearby to smother flames if it gets out of hand (yes, even if you’re impatient like me).
- Salt the Beans Mid-Cook: Add a pinch of salt to the green beans after they’ve wilted but before they’re fully tender. This keeps them crisp while letting the soy sauce cling properly. I learned this the hard way—oversalting early makes the beans soggy and dull.
- Use Ginger Paste for Speed: Skip grating fresh ginger if you’re short on time—just use ½ teaspoon of ginger paste (the kind in tubes). It’s less potent, so you’ll need to adjust the garlic slightly, but it cuts prep by half without sacrificing flavor. (Your future self will thank you.)
Perfect pairings for these flavors
Rice Pairing Perfection
These green beans make an ideal companion to steamed jasmine rice—the neutral, slightly floral notes of the rice act as a perfect canvas for the beans' bold flavors. I serve them alongside hot, fluffy rice to soak up the savory soy sauce and sesame oil.
For extra authenticity, use a rice cooker to steam the rice, which enhances its natural fragrance. 🍚
Protein Complements
Pair with grilled or pan-seared chicken thighs—the juicy, slightly charred meat contrasts beautifully with the crisp beans. I also recommend teriyaki-glazed salmon or beef stir-fry with similar garlic-ginger seasoning.
The soy sauce in both dishes creates a cohesive flavor bridge. For a vegetarian option, serve with tofu stir-fry or mushroom and bok choy for a complete plant-based meal.
Dipping Sauce Options
Create a quick garlic soy dipping sauce by mixing 1 tbsp soy sauce, 1 tsp rice vinegar, ½ tsp sesame oil, and a pinch of sugar. This enhances the beans' flavors while adding a tangy contrast.
For extra richness, add a dollop of hoisin sauce or sriracha for those who love heat. I keep a small bowl of this sauce on the table for guests to customize their experience. 🍶
Dessert Balance
End the meal with lychee with rose water or mango sticky rice—the sweet, floral notes provide a refreshing palate cleanser after the savory-spicy beans. For a lighter option, serve green tea mochi ice cream to complement the dish's umami depth.
The contrast between the salty, spicy beans and sweet desserts creates a satisfying, well-rounded meal.
Beverage Pairings
A jasmine green tea enhances the dish's natural flavors without overpowering them. For alcohol lovers, a dry Riesling or light lager like Asahi Super Dry cuts through the richness while complementing the soy and garlic notes.
Avoid heavy red wines—they can clash with the dish's delicate balance of textures and flavors. 🍷
Global Fusion Twists
Serve alongside Mexican-style street corn (elote) for a fusion twist—top with chili powder, lime, and cotija cheese. The creamy, tangy corn contrasts perfectly with the crispy beans. Another fun pairing is Korean kimchi—the fermented spice adds another layer of complexity.
For a Mediterranean touch, pair with grilled halloumi cheese and a side of tzatziki for a unique, flavorful combination. 🌶️
Nutrition facts
Frequently asked questions
Can I make these green beans without blanching first?
Blanching is key for that authentic restaurant texture! Without it, the beans will release too much moisture in the wok, resulting in steamed rather than crispy edges. For a quick alternative, pat extra-dry beans with paper towels and cook in batches over high heat for 2-3 minutes—but expect slightly less crispness than the traditional method.
How do I adjust the heat level?
The recipe uses 1 tsp red chili flakes for mild heat. For medium heat, increase to 1.5 tsp or add ½ tsp crushed Sichuan peppercorns. For spicy, use 2 tsp chili flakes plus ½ tsp cayenne pepper. Always taste before serving—you can reduce heat with extra scallions or sesame seeds.
What if I don't have a wok?
A heavy-bottomed skillet or cast-iron pan works perfectly! The secret is maintaining high heat and cooking in batches if needed. Use a metal spatula or tongs to toss the beans constantly—this prevents overcrowding and helps achieve those crispy edges. A nonstick pan may work, but it won't develop the same caramelized flavor.
Can I make this recipe ahead of time?
These green beans are best served immediately for maximum crispness, but you can prep components ahead. Blanch and dry the beans up to 1 day in advance, store in an airtight container, and reheat in a dry skillet for 2-3 minutes over high heat. For the sauce base (garlic, ginger, soy sauce), prep it 2 days ahead and store in the fridge—just reheat before adding the beans.
Why do my green beans turn mushy?
Mushy beans usually mean one of two things: overcooking or excess moisture. First, ensure your beans are completely dry after blanching—pat them thoroughly with paper towels. Second, cook in batches over high heat for no more than 3 minutes per batch. If your pan isn't hot enough, the beans will steam instead of sear.