
Soups & Stews
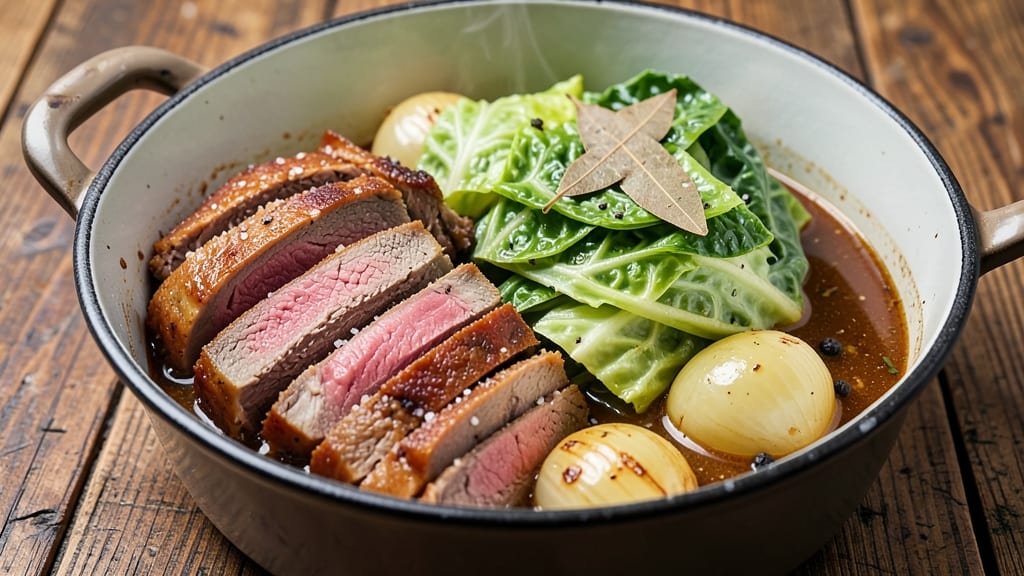
This classic boiled corned beef and cabbage recipe brings comfort and tradition to your St. Patrick's Day table with its rich, savory flavors. The slow-cooked corned beef becomes tender and infused with aromatic spices, while the cabbage softens into a perfect side.
I've perfected this method over years of holiday celebrations, ensuring every bite delivers that satisfying, hearty taste.
The beauty of this dish lies in its simplicity—just a few key ingredients and a foolproof cooking method. You'll start with a brisket of corned beef, simmered in water with bay leaves, peppercorns, and onions until fork-tender.
The cabbage, boiled separately in salted water, absorbs just enough flavor to complement the rich beef without overpowering it.
By the time it's done, you'll have a pot of restaurant-quality corned beef that practically falls apart at the touch of a fork, paired with cabbage that's just tender enough.
The aroma alone will fill your kitchen with warmth, making it a dish that feels like a hug on a cold day. Serve with mustard, horseradish, or even a simple side of potatoes for the full experience.
This recipe scales beautifully for gatherings, and leftovers reheat just as well the next day. Whether you're celebrating St. Patrick's Day or simply craving a comforting meal, this classic delivers. Let's get started on creating a dish that tastes like tradition.
Ingredients for classic boiled corned beef and cabbage
Six simple ingredients, one unforgettable St. Patrick's Day aroma. Nothing fancy—just tradition.
| Ingredient | Amount | Notes |
|---|---|---|
| Corned Beef Brisket 🥩 | 3 lb | Pre-cured, thick-cut preferred |
| Green Cabbage 🥬 | 1 whole | Heads cut into wedges |
| Large Yellow Onions 🧅 | 2 whole | Quartered, skins on |
| Bay Leaves 🌿 | 4 whole | Fresh preferred |
| Black Peppercorns 🌶️ | 1 tbsp | Whole, lightly crushed |
| Salt 🧂 | 2 tbsp | Kosher or sea salt |
| Water 💧 | 8 cups | Cold, filtered preferred |
| Carrots 🥕 | 4 whole | Whole, peeled |
| Garlic Cloves 🧄 | 4 cloves | Smash lightly with knife |
| Apple Cider Vinegar 🍎 | 1 tbsp | For tangy depth |
| Mustard Seeds 🌱 | 1 tsp | Whole, optional |
| Fresh Parsley 🌿 | ¼ cup | Chopped for garnish |
The corned beef is the star, so don't cut corners. Grab a 3-pound brisket from the deli counter—it's pre-cured and ready to go. Costco or local butchers often have the best quality, but the regular supermarket stuff works fine. Look for thick cuts—thinner slices dry out during cooking. The cabbage? Green is classic, but red adds color. A whole head gives you plenty of wedges. I usually buy organic to skip the wax, but regular cabbage works too. The onions and carrots add sweetness—yellow onions for mild flavor, red if you want color. Skip the pre-cut veggies though; whole roots stay fresher longer.
No bay leaves? Dried work at half the amount, but fresh are worth it. Out of apple cider vinegar? White vinegar or lemon juice works in a pinch. Mustard seeds optional, but they add a nice bite. The corned beef comes pre-seasoned, but I always add extra peppercorns and garlic for depth. Pre-cured means no extra salt needed—trust the process. For the cabbage, I usually cut it into 8 wedges, keeping the core intact so it holds together. If you're serving a crowd, double the cabbage—everyone wants seconds. The carrots can be baby carrots if that's what's handy, but whole carrots stay crisp longer.
This reheats like a dream—honestly tastes better the next day. Store in the fridge for 4-5 days, covered with the cooking liquid. Freezes beautifully for up to 3 months. I like to portion it into containers so lunches are ready to grab. The cabbage keeps well too—just reheat it in a pot with a splash of water. For leftovers, I always save some of the cooking liquid to drizzle over the top—it's packed with flavor. The corned beef gets more tender with time, so don't rush it. Make extra; it disappears fast.
Why You'll Love This Recipe
- One-Pot Magic: I swear by this—just toss everything into a pot, add water, and walk away. No flipping, no fussing, no extra pans. The cabbage softens while the beef tenderizes itself, and honestly? That’s my kind of cooking.
- Salty-Sweet Symphony: The corned beef brisket brings the deep, savory punch, but the onions caramelizing at the bottom? Pure flavor gold. Between us, the bay leaves and peppercorns add this subtle, earthy depth that makes it taste like a hug from your grandma’s kitchen.
- Leftovers That Win: This dish actually improves the next day. The beef gets even more tender, and the cabbage soaks up all the rich broth. I make a double batch on Sundays just so I can reheat slices for sandwiches all week—no one complains, either.
- Budget-Friendly Feast: A single brisket feeds six, and the veggies stretch it into a full meal without breaking the bank. Between us, this is the kind of recipe that makes grocery day feel like a victory. Plus, the ingredients last forever, so you’re not scrambling for last-minute swaps.
Step-by-step instructions for classic boiled corned beef and cabbage
This traditional method delivers tender brisket and perfectly cooked cabbage with bold, savory flavors.
Prepare the Corned Beef Brisket
Rinse the 3 lb corned beef brisket under cold water to remove any surface curing salt. Pat it completely dry with paper towels—this helps the meat absorb flavors better during cooking. Place the brisket in a large stockpot and cover it with the 8 cups cold water. Bring to a boil over high heat, then immediately reduce to a gentle simmer.
Skimming any foam that rises to the surface is important—it prevents cloudy broth. Let the brisket simmer uncovered for 3 hours, adding more water if needed to keep it covered. The water should smell rich and aromatic, and the meat should be tender enough to pierce with a fork. Don't rush this step; slow cooking builds deep flavor.
Add Vegetables and Seasonings
After the initial 3 hours, carefully remove the brisket and set it aside. Add the 1 whole green cabbage (cut into wedges), 2 whole large yellow onions (quartered), 4 whole carrots (peeled), and 4 smashed garlic cloves to the pot. Stir in the 4 whole bay leaves, 1 tbsp lightly crushed black peppercorns, 2 tbsp salt, 1 tbsp apple cider vinegar, and 1 tsp mustard seeds.
Return the brisket to the pot, making sure it's fully submerged. Bring everything back to a gentle simmer and cook uncovered for another 1½ to 2 hours. The vegetables should be tender when pierced with a fork, and the broth should be rich and flavorful. If the water level gets too low, add hot water to maintain coverage—this keeps the meat moist and prevents burning.
Finish Cooking and Rest
Once the brisket is fork-tender and the vegetables are fully cooked, turn off the heat. Let the entire pot sit covered for 15 minutes—this resting period allows the flavors to meld and the meat to absorb all that delicious broth. Remove the brisket and let it rest on a cutting board for 10 minutes before slicing.
Strain the broth if you prefer a cleaner presentation, or serve it as-is for maximum flavor. The cabbage should be bright green with just a slight softness, the carrots tender-crisp, and the onions caramelized. Garnish with the ¼ cup chopped fresh parsley right before serving to add freshness and color. This classic combination delivers hearty, comforting flavors perfect for any gathering.
Pro Tips For Making Classic Boiled Corned Beef And Cabbage
- Parboil the Brisket First: I learned this the hard way—throwing a raw brisket into boiling water makes the meat tough and uneven. Instead, start with cold water and bring to a simmer gently, then add the brisket. This guarantees even cooking and keeps the texture tender. (Yes, it takes 10 extra minutes, but your slice will be worth it.)
- Core the Cabbage: Whole cabbages stay stubbornly undercooked in the center. Cut out the tough core first—it’s the white, stringy bit at the base. This lets the leaves soften faster and absorb all that rich broth. (Pro tip: Slice into wedges for even faster cooking.)
- Don’t Crowd the Pot: After burning three batches, I finally figured out that cramming too much cabbage and onions into the pot steams them instead of braising. Leave space—pack them in loosely, or cook in batches. You want flavor, not soggy greens.
- Save the Liquid: That golden broth after boiling? Don’t pour it down the drain. Strain it, reduce it by half, and use it to make gravy or drizzle over mashed potatoes. (I know, I know—it’s extra work, but it turns a simple dish into something restaurant-worthy.)
Storing and reheating your leftovers
Refrigerator Storage
Store your corned beef and cabbage in an airtight container with some of the cooking liquid to keep it moist. The liquid is packed with flavor—don’t drain it! Keep the meat and veggies refrigerated for up to 4-5 days.
I like to portion the beef separately from the cabbage to reheat them individually, ensuring the cabbage stays tender and the beef remains juicy. 🥬
Freezer Prep
For longer storage, freeze the corned beef and cabbage in airtight freezer bags or glass containers. Label with the date—this dish freezes beautifully for up to 3 months. To save space, remove the beef from the pot and freeze it separately from the cabbage.
When ready to reheat, thaw overnight in the fridge for even cooking. I always keep a bag of this in my freezer for lazy weeknights. ❄️
Stovetop Reheating
My favorite method for reheating corned beef is on the stovetop. Place the meat in a pot, cover with ½ cup of its cooking liquid, and heat over medium-low heat for 10-15 minutes until warmed through.
For the cabbage, add a splash of water and reheat for 5-7 minutes—just until hot. The slow heat keeps everything tender and prevents drying. Stir occasionally to distribute the heat evenly. 🔥
Microwave Method
For a quick fix, transfer the corned beef and cabbage to a microwave-safe dish with a splash of water. Cover loosely with a damp paper towel and microwave on 50% power for 3-4 minutes, stirring halfway.
The cabbage reheats faster than the beef, so check it first. If it looks dry, add a little more liquid. This method is handy for lunches but lacks the depth of stovetop reheating. ⏱️
Reviving Leftovers
If your leftovers have lost some moisture, don’t throw them out! Place the beef in a pot with ½ cup water or broth and simmer for 5-7 minutes to restore tenderness. For the cabbage, add a splash of water and a pinch of salt to brighten the flavor.
A drizzle of the reserved cooking liquid before reheating adds back that rich, savory taste. Leftovers always taste better the next day—trust me! 💫
Serving Suggestions
Serve your reheated corned beef and cabbage with classic sides like mashed potatoes, buttered noodles, or sourdough bread. A dollop of Dijon mustard or a side of horseradish sauce adds the perfect tangy kick. For extra flair, garnish with fresh parsley or a sprinkle of black pepper.
The leftovers make an amazing sandwich filling—just pile it high on rye with some sauerkraut for a St. Patrick’s Day brunch the next morning! 🥖
Nutrition facts
Frequently asked questions
Why does the corned beef need to simmer for so long?
Slow simmering breaks down tough muscle fibers, making the meat fork-tender while allowing all the spices and curing flavors to penetrate deeply. The 3+ hour process also prevents the beef from drying out—unlike faster cooking methods that can make it tough. Patience here is key for that melt-in-your-mouth texture!
Can I use pre-cooked corned beef instead of raw?
Yes! For a quicker version, use 3 pounds of pre-cooked corned beef (like deli slices) and simmer it with the vegetables for just 1-1.5 hours instead. The flavor will be slightly less developed, but it still delivers that classic taste. Just skip the initial 3-hour simmer for raw beef.
How do I keep the cabbage from getting mushy?
Cook the cabbage in its own pot of salted water for 10-12 minutes before adding it to the beef broth. This keeps it slightly crunchy. If using the one-pot method, remove the cabbage wedges 5 minutes early and let them rest in the broth off the heat—the residual warmth finishes cooking them gently.
What’s the best way to serve this for a crowd?
Double the recipe and use a large stockpot or slow cooker for easy scaling. Serve family-style with extra broth ladled over the meat and cabbage. Add a self-serve bar with mustard, horseradish, and sauerkraut for customization. For sides, set out bowls of mashed potatoes and buttered noodles—this dish disappears fast at gatherings!
Can I make this in an Instant Pot?
Use the sauté function to brown the onions and garlic, then add all ingredients and cook on high pressure for 30 minutes (plus natural release). The cabbage will be slightly softer, so adjust to preference. For extra tenderness, add 1 cup water after pressure cooking and let it sit covered for 10 minutes.