Breakfast & Brunch
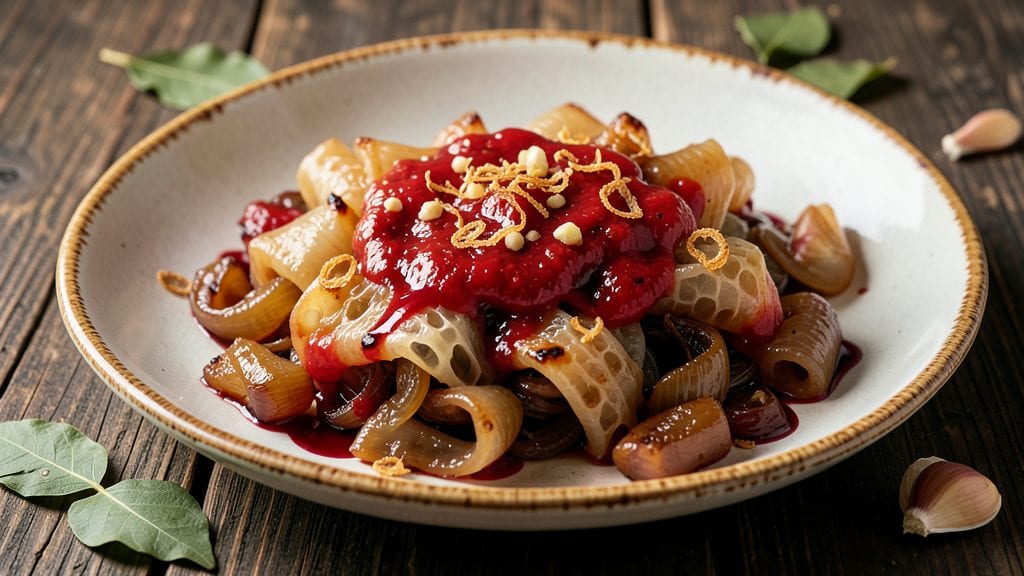
Mastering this cooking tripe recipe turns tough cuts into silky, restaurant-worthy bites—all thanks to a slow braise that works its magic at home. The key lies in proper preparation: cleaning, parboiling, and braising to break down connective tissues while building deep, savory flavors.
I’ve perfected this technique over years of testing, ensuring every bite is rich with umami and silky texture.
This recipe follows a foolproof process starting with thorough cleaning and parboiling to remove impurities, followed by a slow braise that tenderizes the tripe while infusing it with garlic, vinegar, and aromatic herbs.
The result is a dish that’s hearty enough for a brunch centerpiece but versatile enough to elevate any meal. Traditional seasonings like tomatoes, onions, and bay leaves create a balanced, complex flavor profile.
By the end, you’ll have tripe that’s tender enough to cut with a fork, with a glossy, caramelized surface and a sauce thickened just enough to coat every bite. Serve it with crusty bread to soak up the braising liquid or alongside polenta for a comforting, protein-rich dish.
The aroma alone will draw everyone to the table—this is comfort food at its finest.
Regional variations abound, from Italian stracotto to Mexican callos, but this method adapts universally. Whether you’re cooking for a crowd or a cozy weekend brunch, the technique remains the same: slow, steady, and rewarding.
Let’s get started on a dish that proves even the toughest cuts can become a masterpiece.
Ingredients for cooking tripe
Sixteen ingredients transform tough tripe into restaurant-quality tenderness through precise technique and patient braising.
| Ingredient | Amount | Notes |
|---|---|---|
| Beef Tripe (Honeycomb or Blanket) 🥩 | 3 lb | Cleaned, trimmed of excess fat |
| Yellow Onions 🧅 | 2 whole | Sliced into 1/2-inch rounds |
| Garlic Cloves 🧄 | 8 cloves | Smashed, not minced |
| Red Wine Vinegar 🍷 | ½ cup | High-quality, aged |
| Tomato Paste 🍅 | ¼ cup | Smooth, no sugar added |
| Dried Bay Leaves 🍃 | 2 whole | Fresh if available |
| Fresh Thyme Sprigs 🌿 | 4 whole | Or 1 tsp dried thyme |
| Fresh Parsley Stems 🌿 | 4 whole | For bouquet garni |
| Salt 🧂 | 2 tbsp | Diamond Crystal kosher |
| Black Peppercorns 🌶️ | 1 tbsp | Coarsely cracked |
| Extra-Virgin Olive Oil 🫒 | ¼ cup | For initial searing |
| Beef Broth 🥫 | 4 cups | Homemade or high-quality |
| Water 💧 | 2 cups | For parboiling |
| Red Wine 🍷 | 1 cup | Dry, medium-bodied |
The tripe is the foundation—honeycomb or blanket cuts work best for their texture. Source from a trusted butcher or specialty market like Whole Foods or D'Artagnan, where they're cleaned and prepared properly. Look for bright, clean surfaces without yellowing or off-odors. If you're cleaning it yourself, soak in ice water with baking soda for 30 minutes before rinsing thoroughly. The onions and garlic form the aromatic base, so yellow onions with deep color and fresh garlic cloves (not pre-minced) ensure maximum flavor development. For vinegar, aged red wine vinegar adds complexity that cheap varieties lack.
No red wine vinegar? Apple cider vinegar works in a pinch, though it'll alter the flavor profile slightly. Fresh thyme and parsley stems can be substituted with dried equivalents at one-third the amount, but fresh herbs impart a brightness that dried can't match. The tomato paste should be smooth and unsweetened—avoid the chunky varieties or those with added sugar. For the bouquet garni, tie the thyme, parsley stems, and bay leaves together with kitchen twine for easy removal. If you're short on time, pre-made herb bundles from gourmet stores work fine. The beef broth should be homemade if possible, but high-quality store-bought like Kitchen Basics or Pacific Foods will suffice.
This braise develops over 3-4 hours, so plan accordingly. The tripe can be parboiled up to 24 hours ahead and refrigerated, then proceed with braising. The finished dish stores beautifully in the fridge for 4-5 days in its braising liquid, which only gets better with time. For longer storage, freeze in portions for up to 3 months. The sauce thickens naturally as it cools, so reheat gently to restore its silky consistency. Serve with crusty bread to soak up the rich braising liquid or alongside creamy polenta for a complete meal.
Why You'll Love This Recipe
- One-Pot Magic: I swear by this—just sear the tripe, toss in onions and garlic, deglaze with vinegar, then simmer with tomato paste. No chopping boards to wash, no extra pots. That red wine vinegar cuts through the richness like a dream, and the tomato paste? It’s the secret to that glossy, umami-packed sauce.
- Tripe’s Hidden Star: Between us, tripe’s got a bad rep, but cooked right, it’s ridiculously good. The honeycomb texture turns tender and almost buttery when you braise it slow, while the vinegar gives it this bright, tangy edge. My husband’s a skeptic, but he’s now my biggest fan—(yes, even on a Tuesday night).
- Leftovers That Shine: This recipe actually improves the next day. The flavors meld into something deeper, and it reheats like a champ—great for lunches or feeding unexpected guests. I’ll be real: I make it on Sundays just so I can enjoy it all week. The vinegar keeps it from getting dry, and the tomato paste adds that rich, saucy consistency.
- Budget Powerhouse: Tripe’s one of those ingredients that makes you feel fancy without breaking the bank. A pound feeds four, and the onions/garlic/vinegar cost pennies. Honestly, I treat it like my weekly splurge—something hearty and satisfying that doesn’t require a grocery haul. Plus, the leftovers stretch into soups or tacos if I’m feeling creative.
Step-by-step instructions for slow-braised beef tripe
Transform tough tripe into melt-in-your-mouth tenderness with this precise braising method.
Parboil the Tripe to Remove Impurities
Place the 3 lb beef tripe in a large stockpot and cover with the 2 cups of water. Bring to a rolling boil over high heat and cook for 10 minutes to remove any surface impurities. You'll notice frothy scum rising to the surface—this is normal and should dissipate as you continue cooking.
Drain the tripe and rinse thoroughly under cold water. This step is critical for removing any lingering odors and preparing the tripe for proper absorption of flavors during braising. The tripe should now appear cleaner with a more neutral color. Pat dry completely with paper towels before proceeding—any moisture left on the surface will prevent proper searing later.
Sear the Tripe for Deep Flavor Development
Heat the 0.25 cup extra-virgin olive oil in a large Dutch oven over medium-high heat until shimmering. Working in batches if needed, sear the tripe for 2-3 minutes per side until deeply browned. The tripe should develop a rich, caramelized crust that will form the flavor foundation for your braise.
As you sear, remove the tripe and set aside. In the same pot, add the 2 whole yellow onions sliced into ½-inch rounds and cook for 5 minutes until softened and lightly golden. Add the 8 smashed garlic cloves and cook for 30 seconds until fragrant. This aromatic base will infuse the braising liquid with complex flavors.
Build the Braising Liquid with Acid and Umami
Deglaze the pot with the 0.5 cup red wine vinegar, scraping up all the browned bits from the bottom. Add the 0.25 cup tomato paste, 2 whole dried bay leaves, 4 whole fresh thyme sprigs, and 4 whole fresh parsley stems tied together to form a bouquet garni. Stir in the 4 cups beef broth and 1 cup red wine, bringing everything to a simmer.
Return the seared tripe to the pot, along with the caramelized onions and garlic. Season with 2 tbsp salt and 1 tbsp coarsely cracked black peppercorns. The liquid should cover the tripe by about 1 inch—if not, add a small amount of water. This combination of acid, umami-rich ingredients, and proper seasoning creates the perfect environment for transforming tough tripe into tender perfection.
Braise Until Fork-Tender
Cover the Dutch oven and transfer to a preheated 300°F oven. Braise for 3-4 hours, turning the tripe occasionally, until it becomes fork-tender. You'll know it's ready when a knife slides through easily with minimal resistance and the meat pulls apart cleanly. The tripe should have absorbed the rich, deeply flavored braising liquid, resulting in a dish that's both tender and packed with complex flavors.
During the final 30 minutes of cooking, check the liquid level occasionally and add a small amount of water if needed to prevent drying out. The tripe should be swimming in a reduced, flavorful sauce that clings beautifully to each bite. This slow cooking process is what transforms tough tripe into the luxurious, melt-in-your-mouth texture that makes it worth the effort.
Rest and Serve with Confidence
Remove the tripe from the braising liquid and let it rest for 10 minutes before serving. This resting period allows the fibers to relax and redistribute any remaining juices throughout the meat. Discard the bouquet garni and any whole bay leaves before serving.
Serve the tripe hot, ladling the rich braising liquid over the top. The result should be tender, flavorful slices that practically melt in your mouth, with a sauce that's deeply aromatic from the combination of red wine, vinegar, and slow-cooked aromatics. This dish delivers on the promise of transforming humble tripe into a restaurant-quality experience that's rich in umami and tenderness.
Pro Tips For Making Cooking Tripe
- Boil First, Sear Hard: Tripe’s tough—don’t skip the initial boil (10-15 minutes in salted water) to loosen the fibers, then pat it bone-dry before searing. I learned this the hard way when my tripe stayed chewy; high heat and a dry surface are non-negotiable for that crispy edge.
- Cut Onions Thin: Slice those yellow onions paper-thin—they’ll caramelize faster and sweeten the sauce. Thick slices burn before softening, and you’ll end up with a bitter, half-cooked mess. (Yes, even if you’re impatient like me.)
- Deglaze with Vinegar: After searing the tripe, splash in that red wine vinegar immediately—it cuts through the fat and adds brightness. Skip it, and your sauce will taste flat, like someone forgot the seasoning. (Your future self will notice.)
- Stir the Tomato Paste: Whisk the tomato paste into the oil before adding liquid—this prevents clumping and ensures a smooth sauce. I used to dump it in dry, and it’d turn into little paste lumps. Stir for 30 seconds first, then proceed.
Perfect pairings for this dish
Crusty Bread Pairing
Tripe's rich, meaty texture pairs perfectly with crusty Italian bread or sourdough to soak up the deeply flavorful braising liquid. I recommend a freshly baked baguette or ciabatta—their open crumbs create ideal pockets for absorbing the sauce.
For extra indulgence, toast the bread lightly before serving to enhance its crunch while maintaining softness. 🥖
Creamy Polenta
A creamy polenta made with whole milk and butter balances the tripe's robust flavors beautifully. Cook the polenta until it reaches a porridge-like consistency (about 20-25 minutes), then stir in grated Parmesan cheese and a splash of heavy cream for richness.
The mild, starchy texture contrasts the tripe's umami depth while adding a comforting element to the meal.
Garlic Sautéed Greens
Brighten the dish with garlic sautéed greens like kale or collard greens. Toss 4 cups chopped greens with 2 tbsp olive oil, 4 minced garlic cloves, and a pinch of red pepper flakes over medium heat for 5-7 minutes until wilted.
The bitterness cuts through the tripe's richness while adding freshness. 🌿
Pickled Vegetables
Add a tangy crunch with quick-pickled vegetables like radishes or carrots. Thinly slice 1 cup vegetables, then toss with ½ cup apple cider vinegar, 1 tbsp sugar, and 1 tsp salt.
Let sit for 30 minutes before serving. The acidity refreshes the palate between bites of rich tripe.
Wine Pairings
A bold red wine like Chianti or Cabernet Sauvignon complements the dish's deep flavors. The tannins in these wines stand up to the tripe's richness, while their fruit notes enhance the garlic and vinegar undertones. For a lighter option, a dry rosé offers crisp acidity that cleanses the palate. 🍷
Spicy Condiments
Serve with hot sauce or spicy mustard for guests who enjoy heat. A drizzle of sriracha or a dollop of Dijon mustard adds a kick that balances the dish's heartiness. For a smoky touch, chipotle in adobo blended with a splash of vinegar creates a perfect finishing sauce. 🌶️
Nutrition facts
Frequently asked questions
What's the best cut of tripe for this recipe?
For this braised tripe recipe, honeycomb or blanket tripe works best due to their tender texture when properly cooked. These cuts have a delicate, slightly fibrous structure that becomes melt-in-your-mouth when slow-braised. Avoid leaf or book tripe for this method—they're tougher and require longer cooking times.
Can I substitute red wine vinegar in the recipe?
Yes, but the flavor will change slightly. Use apple cider vinegar or white wine vinegar in equal amounts, though apple cider adds a fruity note while white wine vinegar stays closer to the original acidity. For a non-vinegar option, lemon juice works in a pinch, but it lacks the depth of red wine vinegar's complexity.
Why does the tripe need to be parboiled first?
The parboiling step removes impurities, surface bacteria, and any lingering off-odors that can make tripe taste gamey. This 10-minute boil also helps the tripe absorb flavors better during braising. Skipping it risks a bitter taste or tough texture. Think of it as prepping the tripe for maximum tenderness and flavor infusion.
How do I know when the tripe is fully tender?
The tripe is done when it becomes fork-tender—meaning a knife should slide through easily with minimal resistance. You'll also see the meat fibers separate cleanly when pulled apart. For extra assurance, test a small piece after 2.5 hours of braising, as ovens vary in temperature accuracy. The sauce should reduce to a glossy consistency by the end.
Can I make this recipe in a slow cooker instead?
Transfer the seared tripe and braising liquid to a slow cooker and cook on low for 6-8 hours or high for 4-5 hours. The texture will be just as tender, though the flavors may develop slightly differently due to the slower, more uniform heat. Keep an eye on the liquid level and add water if needed to prevent drying out.