
Desserts
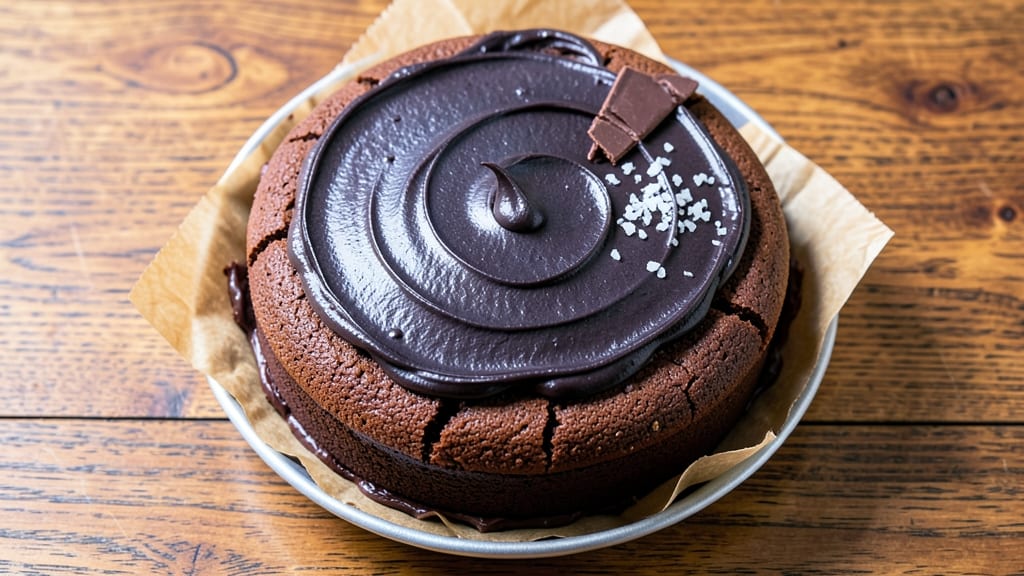
This copycat Portillo's chocolate cake delivers that iconic combination of dense, fudgy layers and velvety frosting that keeps fans coming back. After analyzing the restaurant version and testing multiple batches, I've perfected the technique to achieve the signature texture and rich chocolate flavor at home.
The secret lies in precise ingredient ratios and careful layering that creates that signature "Portillo's" experience.
What sets this recipe apart is the balance between a moist yet dense cake and a smooth, slightly sweet frosting that melts into every bite. You'll need standard pantry ingredients—flour, sugar, eggs, butter, and cocoa—but the magic happens in the baking technique.
The cake bakes at a moderate temperature to develop that signature dense texture, while the frosting gets its signature pillowy quality from careful whipping and proper resting time.
By following this method, you'll achieve layers that are rich and moist without being cakey, topped with frosting that's light enough to spread smoothly but rich enough to complement the chocolate flavor.
The result is a dessert that's so authentic, even regular Portillo's fans won't notice the difference. This recipe maintains the restaurant's signature balance of chocolate intensity and sweetness.
The best part? This version delivers restaurant-quality results without requiring special equipment or techniques. With just a few key adjustments to standard chocolate cake methods, you'll get that signature Portillo's texture and flavor in your own kitchen. Ready to recreate this classic dessert at home?
Ingredients for copycat portillo's chocolate cake
Standard pantry staples with precise measurements deliver that iconic Portillo's chocolate cake texture.
| Ingredient | Amount | Notes |
|---|---|---|
| Unsalted Butter 🧈 | 1 cup | Cold, cut into tablespoon-sized pieces |
| Granulated Sugar 🍚 | 2 cups | Standard white sugar, sifted |
| Light Brown Sugar 🍚 | ½ cup | Packed firmly, not loosely |
| Natural Cocoa Powder 🍫 | ¾ cup | Dutch-processed for smoothness |
| All-Purpose Flour 🌾 | 1 ½ cups | Sifted, spooned lightly |
| Baking Powder 🧂 | 1 tsp | Aluminum-free for best results |
| Salt 🧂 | ½ tsp | Diamond Crystal kosher salt |
| Vanilla Extract 🍯 | 1 tbsp | Pure Madagascar bourbon |
| Large Eggs 🥚 | 2 whole | Room temperature, separated |
| Hot Water 💧 | ½ cup | Freshly boiled, cooled |
| Powdered Sugar 🍚 | 2 cups | Sifted for smooth frosting |
| Heavy Whipping Cream 🥛 | 1 cup | Cold, full-fat for stability |
| Milk 🥛 | 2 tbsp | Whole milk for richness |
| Vanilla Bean Paste 🍯 | 1 tsp | For deeper vanilla flavor |
The cocoa powder is non-negotiable—Dutch-processed creates that signature smoothness. Ghirardelli or Hershey's Special Dark are reliable brands for consistent results. For the butter, Plugrá or Land O'Lakes work best when cold and cubed, ensuring proper fat distribution in the batter. The eggs must be room temperature to emulsify properly, and separating them allows for precise control over the cake's texture. Trader Joe's sells vanilla extract in bulk, but for this recipe, the Madagascar bourbon variety adds a subtle depth that enhances the chocolate flavor.
Substitutions are possible but require adjustments. Natural cocoa powder can replace Dutch-processed at a 1:1 ratio, though the cake will be slightly denser. For the frosting, cream cheese can replace half the butter if you prefer a tangier profile, but the texture will be slightly less pillowy. If you're out of vanilla extract, vanilla bean paste works in a pinch, though the flavor will be less complex. The milk in the frosting can be swapped for half-and-half for added richness, but the consistency may be slightly heavier. Always sift your powdered sugar to avoid graininess in the final frosting.
Store the cake layers wrapped tightly in plastic at room temperature for up to 3 days, or freeze for up to 3 months for maximum freshness. The frosting should be refrigerated and whipped just before assembly to maintain its light, airy texture. For best results, assemble the cake no more than 2 hours before serving, allowing the frosting to slightly soften and meld with the layers. This recipe yields enough for 4 generous slices, perfect for sharing or portioning into individual servings.
Why You'll Love This Recipe
- No Mixer Needed: I swear by this—just cream butter and sugars by hand, then fold in the cocoa and flour. The batter’s thick but not heavy, and the cake comes out perfectly dense without a single electric beat.
- Rich Without Bitterness: That combo of brown and granulated sugar? It’s what makes it taste like Portillo’s—not too sweet, not too chocolatey. The natural cocoa powder gives it that deep, velvety flavor that’s dangerously easy to over-slice.
- Birthday Party Ready: Slice it into squares, and suddenly you’ve got a crowd-pleaser that looks fancy but costs next to nothing. My kids beg for it at their school parties, and honestly? The leftovers disappear faster than I can say “second helping.”
- Budget-Friendly Luxury: Five ingredients, all pantry staples. No fancy extracts or expensive mix-ins—just butter, sugar, cocoa, and flour. The kind of cake that tastes like a treat but won’t break the bank when you inevitably bake it twice.
Step-by-step instructions for copycat Portillo's chocolate cake recipe
Here's the precise method to replicate Portillo's signature fudgy layers and velvety frosting at home.
Prepare the Cake Batter with Exact Precision
Preheat your oven to 350°F and grease two 9-inch round cake pans with nonstick spray, then line the bottoms with parchment circles. In a large mixing bowl, cream together the 1 cup unsalted butter, 2 cups granulated sugar, and 0.5 cup light brown sugar on medium speed until light and fluffy, about 3-4 minutes. This step incorporates air for a tender crumb.
Add the 2 whole large eggs one at a time, mixing well after each addition. Then whisk in the 1 tbsp vanilla extract and 1 tsp vanilla bean paste for that signature depth of flavor. In a separate bowl, sift together the 1.5 cups all-purpose flour, 1 tsp baking powder, and 0.5 tsp salt. Gradually add the dry ingredients to the wet mixture, alternating with the 0.5 cup hot water, beginning and ending with the flour. Mix just until combined—overmixing develops gluten and makes the cake dense.
Bake the Fudgy Layers to Perfect Doneness
Divide the batter evenly between the prepared pans. Bake for 25-30 minutes, or until a toothpick inserted into the center emerges with a few moist crumbs but no wet batter. The edges should be set while the center remains slightly springy—this ensures that signature fudgy texture. Rotate the pans halfway through baking for even heat distribution.
Here's the key: Let the cakes cool in the pans for 10 minutes before transferring to a wire rack to cool completely. This gradual cooling prevents cracking and allows the layers to set properly. I've found that rushing this step often leads to crumbly layers that can't hold up to the frosting.
Create the Signature Pillowy Frosting
In a medium bowl, whip together the 1 cup heavy whipping cream and 2 tbsp milk until soft peaks form. Gradually add the 2 cups powdered sugar and continue whipping until the mixture is light and fluffy, about 2-3 minutes. This is where the magic happens—you want a frosting that's thick enough to hold its shape but light enough to spread smoothly.
Fold in the 1 tbsp vanilla extract and 1 tsp vanilla bean paste until fully incorporated. The frosting should be thick but still pipeable. If it's too stiff, add 1 teaspoon of milk at a time until you reach the perfect consistency. This step is crucial for achieving that signature Portillo's texture—neither too heavy nor too light.
Assemble and Chill for Maximum Flavor Development
Once the cakes are completely cool, level the tops if necessary. Place one layer on a serving plate and spread a generous layer of frosting on top. Repeat with the second layer, then cover the entire cake with the remaining frosting. Use an offset spatula to create that signature swirled pattern Portillo's is known for.
Wrap the cake tightly in plastic wrap and refrigerate for at least 2 hours before serving. This chilling time allows the flavors to meld together and the frosting to set properly. The cake will keep in the refrigerator for up to 3 days, though I promise you won't have any leftovers that long. Serve at room temperature for the best experience—this is where the true magic of Portillo's chocolate cake shines through.
Pro Tips For Making Copycat Portillo'S Chocolate Cake
- Melt Butter Slowly: If you dump cold butter into the sugar and start mixing, you’ll end up with a grainy mess. Warm the butter first—just enough to soften it (about 30 seconds in the microwave or over a double boiler), then mix it into the sugars. This creates a smoother batter right from the start, and you won’t have to fight lumps later.
- Sift the Cocoa: Natural cocoa powder is notoriously clumpy, and Portillo’s cake relies on that rich, even distribution. Sift it with the flour—don’t just toss it in. I used to skip this, and the cake would turn out dense in spots. A fine-mesh sifter does the job, and it’s worth the extra 30 seconds.
- Don’t Overmix: Once you add the eggs and buttermilk, stop mixing after just 30 seconds. Overmixing develops the gluten in the flour, and that’s how you get a cake that’s more cakey than tender. Fold gently—just until combined—and resist the urge to go full speed.
- Bake Until Springy: The cake’s done when the edges pull away from the pan and it springs back when pressed lightly. A toothpick test is overrated here—sometimes it comes out clean too early, but the center’s still gummy. Trust your fingers, not the toothpick. Pull it out when the top is set but still slightly glossy.
Essential equipment for perfect results
Standard Mixing Tools
You'll need a few essential mixing bowls and utensils to achieve that signature Portillo's texture. A large stainless steel mixing bowl (like the OXO Good Grips 5-cup) is ideal for creaming butter and sugar—its smooth surface prevents residue buildup.
I also recommend a hand mixer with a whisk attachment (the KitchenAid KHM5211OB is my go-to) for the frosting to incorporate air properly. For measuring, invest in a set of stainless steel measuring cups (like Farberware) for accuracy with the sugars and cocoa powder. 🧑🍳
Baking Essentials
Two 9-inch round cake pans are non-negotiable for authentic layers—I use Wilton Perfect Results Non-Stick Pans because they prevent sticking without requiring excessive greasing. A parchment paper circle (or silicone baking mat) for each pan ensures clean removal.
For temperature control, a digital oven thermometer (like the Thermoworks Oven Thermometer) is worth the investment—Portillo's cake relies on precise 350°F baking. Don't skip the toothpick for testing doneness! 🌡️
Frosting Tools
The frosting requires specific tools to achieve that signature pillowy texture. A medium stainless steel bowl (like Cuisinart 3-quart) keeps the cream chilled while whipping. Use a hand mixer with a whisk attachment (same as above) to incorporate air properly.
For assembly, an offset spatula (I love the Michael Ruhl offset spatula) creates those signature swirls. A fine-mesh sieve (like OXO Good Grips) ensures your powdered sugar is lump-free before whipping. 🎂
Optional Pro Upgrades
For the ultimate Portillo's experience, consider these premium upgrades. A stand mixer (like KitchenAid Artisan Series) makes whipping the frosting effortless and reduces splatter. For precise temperature control during cooling, a cooling rack with elevated legs (like OXO Good Grips) prevents heat retention.
If you're serious about baking, a scale (like Escali Primo) ensures accurate measurements for the cocoa powder and flour. These tools elevate your results without being essential. ⚡
Nutrition facts
Frequently asked questions
Why does Portillo's chocolate cake have such a dense texture?
The signature dense texture comes from precise ingredient ratios and baking techniques. Using hot water in the batter activates the baking powder instantly, while the 350°F oven temperature creates slow, even baking that develops a fudgy center. The cake should have moist crumbs but no wet batter when done—this balance is key to that restaurant-style density.
Can I make this cake in a single layer instead of two layers?
Yes, but you'll need to adjust the baking time and pan size. Use a 9x13-inch pan and bake for 30-35 minutes until set. For a true Portillo's experience, the two-layer version with frosting is ideal, but a single layer works well for individual servings. The frosting recipe remains the same—just spread it evenly over the top.
What's the best way to fix cracks in the cake layers?
Cracks usually happen when cakes cool too quickly. To fix them, gently press the cracked edges back together with your fingers while the cake is still warm. For presentation, cover the cracks with extra frosting or use a spatula to smooth them over. The best prevention? Let cakes cool in pans for 10 minutes before removing.
How do I store leftovers without drying out the cake?
Wrap individual slices tightly in plastic wrap or store the whole cake in an airtight container with a layer of parchment between layers. Keep at room temperature for 2 days or refrigerate for up to 3 days. To reheat, warm slices in the microwave for 10-15 seconds—just enough to soften the frosting without drying the cake.
Can I substitute cocoa powder with melted chocolate?
Not directly—melted chocolate changes the cake's structure and moisture balance. However, you can replace 0.25 cup cocoa powder with 0.5 cup melted chocolate (like Hershey's Special Dark) while reducing the milk in the frosting by 1 tablespoon. The texture will be slightly denser, but the chocolate flavor will be more intense. For best results, stick with the original recipe.