
Appetizers
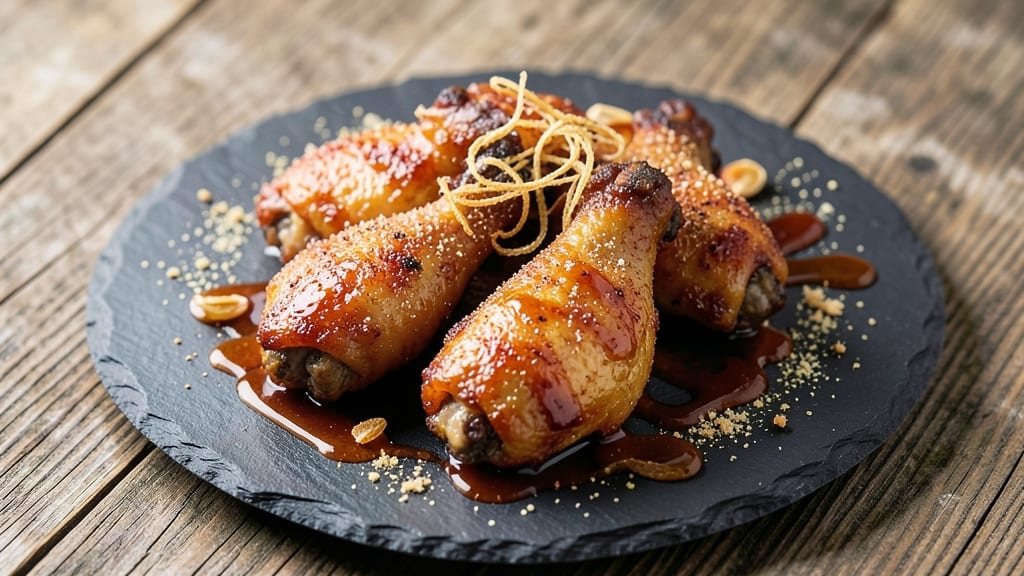
Mastering crispy oven-baked wings without deep-frying is easier than you think, and this recipe delivers that satisfying crunch while keeping things healthier. The secret lies in precise baking techniques—high heat, proper spacing, and a simple seasoning blend that locks in flavor while creating that irresistible crispiness.
I’ve perfected this method over years of testing, ensuring every bite has that perfect texture without the mess of deep-frying.
This recipe starts with a straightforward prep: patting the wings dry and applying a dry rub of salt, pepper, and paprika before baking. The key to crispiness is baking them at a high temperature—425°F—for 25 minutes, flipping halfway through.
This ensures even browning and a crispy exterior while keeping the meat juicy inside. No need for complicated steps or specialty equipment—just a baking sheet and a little patience.
By the end, you’ll have wings that are golden, crispy, and packed with flavor—ideal for game day, parties, or a weeknight snack. Serve them with classic ranch or tangy buffalo sauce, and pair with celery and carrot sticks for the full experience.
The best part? These wings stay crispy even after cooling, so you can enjoy them without worrying about soggy textures.
Whether you’re feeding a crowd or treating yourself, this method guarantees restaurant-quality results at home. Let’s get started—your taste buds will thank you!
Ingredients for crispy oven baked wings
Four pounds of wings, a few pantry staples, and 25 minutes—crispy perfection without the fryer.
| Ingredient | Amount | Notes |
|---|---|---|
| Wing Sections 🍗 | 2 lb | Drumettes and flats, skin-on preferred |
| All-Purpose Flour 🌾 | ½ cup | For coating wings |
| Cornstarch 🌾 | ¼ cup | Extra crispiness booster |
| Kosher Salt 🧂 | 1 ½ tbsp | Diamond Crystal preferred |
| Smoked Paprika 🌶️ | 1 tbsp | For deep flavor |
| Garlic Powder 🧄 | 1 tsp | Freshly ground preferred |
| Ground Black Pepper 🌶️ | ½ tsp | Freshly cracked |
| Olive Oil 🫒 | 1 tbsp | For light coating |
| Butter 🧈 | 1 tbsp | Melted, for crispiness |
| Fresh Lemon Juice 🍋 | 1 tbsp | Brightens flavor |
| Celery Sticks 🥬 | 1 cup | For serving, optional |
| Carrot Sticks 🥕 | 1 cup | For serving, optional |
| Ranch Dressing 🥛 | ½ cup | For dipping, optional |
The wings are everything here. Look for fresh, plump drumettes and flats—avoid those pre-cut, frozen ones with weird colors. Costco or Trader Joe's usually have the best quality, but any grocery store's fresh section works. Pat them dry with paper towels (this is non-negotiable)—any moisture will turn your crispy dream into a soggy nightmare. I like to separate the wings into a single layer on a tray before seasoning so they don't stick. The skin-on variety crisps up better, but skinless works in a pinch if that's all you've got. Buy extra if you're feeding a crowd—people always go back for seconds.
No cornstarch? Extra flour works, but you'll lose that glass-like crunch. Swap smoked paprika for regular paprika if that's all you have, but the flavor won't be quite as deep. Short on butter? Olive oil or neutral oil does the job, though butter gives that golden sheen. The lemon juice is optional but cuts through the richness—great if you're serving with something heavy like ranch. For the flour mix, I always toast it in a dry pan for 30 seconds first (just until it smells nutty)—this adds a subtle depth of flavor. If you're making a big batch, double the seasoning mix and store it in an airtight container for up to 2 weeks.
These wings stay crispy for hours, so they're perfect for parties. Keep them warm in a 200°F oven while you finish cooking the rest of the batch. For leftovers, store in an airtight container for up to 3 days, but reheat in the oven at 375°F for 5-10 minutes to restore the crunch. The celery and carrots? Buy the pre-cut kind from Trader Joe's—they're already washed and ready to go. Ranch dressing? The kind with a little tang works best. Make extra seasoning—it's great on roasted potatoes or even sprinkled over salads.
Why You'll Love This Recipe
- No-Fry Night Hero: The oven does all the work—no greasy mess, no deep-frying fears. Toss those wings in flour and cornstarch, sprinkle with salt and smoked paprika, and let the heat work its magic. That’s it. Zero fuss, all crisp.
- Smoky Magic in Minutes: That smoked paprika isn’t just for show—it clings to the wings like a warm hug. The flour-cornstarch combo locks in moisture while the oven renders the skin into addictive crunch. Honestly, the first bite makes me forget takeout exists.
- Game Day or Lazy Sunday: These wings handle everything—tailgates, movie nights, or when you’re too tired to care. Double the batch, store them in the fridge, and reheat with a quick oven blast. They’re my go-to for when I need something reliable but still feels special.
- Budget Crunch, Big Payoff: Wings are cheap, and this method stretches them further. A single bag feeds four, and the pantry staples (flour, salt, paprika) cost pennies. Between us, this is how I feed a crowd without breaking the bank—or my willpower.
Step-by-step instructions for crispy oven-baked wings
Here's how to achieve that perfect crispy texture without deep-frying—just oven magic and simple prep.
Prep the Wings for Maximum Crispiness
Start by patting the 2 lb wing sections completely dry with paper towels. Any moisture left on the skin will prevent crispiness, so take your time here. Separate the drumettes and flats if they're still attached, and arrange them skin-side up on a baking sheet lined with parchment paper.
In a small bowl, whisk together the 0.5 cup all-purpose flour, 0.25 cup cornstarch, 1.5 tbsp kosher salt, 1 tbsp smoked paprika, 1 tsp garlic powder, and 0.5 tsp ground black pepper. This dry rub is what creates that perfect crispy crust. I like to use freshly ground spices—they make all the difference in flavor.
Coat and Rest for Even Crispiness
Lightly brush the wings with 1 tbsp olive oil—just enough to help the coating stick without making them greasy. Then, toss the wings in the flour mixture, pressing gently to ensure every surface is evenly coated. You'll want a thin but complete layer—this ensures crispiness without heaviness.
Transfer the coated wings to a wire rack set over a baking sheet. Let them rest at room temperature for 15 minutes. This step is crucial—it allows the coating to adhere properly and prevents the wings from steaming in the oven, which would make them soggy instead of crispy.
Bake Until Golden and Crispy
Preheat your oven to 425°F. Once hot, place the baking sheet with wings on the middle rack. Bake for 35 minutes, flipping the wings halfway through at the 17-minute mark. You're looking for wings that are deep golden brown and crispy to the touch—this is when you'll know they're ready.
For extra crispiness, melt the 1 tbsp butter with the 1 tbsp fresh lemon juice in a small saucepan over low heat. Once the butter is fully melted, brush this mixture over the wings during the last 5 minutes of baking. The butter adds richness, while the lemon brightens the flavor and helps create that perfect crispy finish.
Serve with Crunchy Sides
Remove the wings from the oven and let them rest for 5 minutes—this helps them stay crispy when you serve them. Arrange the 1 cup celery sticks and 1 cup carrot sticks on a platter alongside the wings. These fresh, crunchy vegetables cut through the richness of the wings beautifully.
For serving, I like to offer the 0.5 cup ranch dressing on the side. The cool, creamy ranch balances the heat and crispiness of the wings perfectly. If you're serving a crowd, you can also drizzle any leftover butter-lemon mixture over the top for extra flavor.
Pro Tips For Making Crispy Oven Baked Wings
- Preheat Like It’s Your Job: Your oven needs 10 minutes at 425°F (220°C) before those wings hit the pan—no exceptions. I used to skip this and ended up with wings that took forever to crisp, no matter how much I baked them. That extra heat is what turns the flour-cornstarch mix into a proper crust, not just a sad, sticky coating.
- Pat Them Bone-Dry: Moisture is the enemy of crispiness. After trimming excess fat, blot the wings with paper towels—even if they look dry. I learned this the hard way when my first batch came out soggy despite perfect timing. Cornstarch needs a dry surface to cling and crisp, not a wet one.
- Skip the Overcrowding: One tray at a time, no exceptions. I crammed 30 wings on a single sheet once and spent 20 minutes flipping them mid-bake, ruining the even cooking. Space them ½-inch apart so hot air circulates—this is how you get that golden, shatterable crust without burning the edges.
- Double the Cornstarch: Swap half the flour for cornstarch in your coating—it’s the thing that matters most for that oven-fry texture. I was skeptical until I tried it: the wings turned out lighter, crispier, and stayed crunchy longer. (Yes, even if you’re impatient like me.)
Make-ahead tips for this recipe
Prep Ahead for Parties
Season the wings up to 24 hours ahead and store them in an airtight container in the fridge. I like to coat them in the flour mixture and let them sit uncovered on a wire rack overnight—the coating stays crisp, and the flavors meld beautifully.
Just bake straight from the fridge at 425°F for 40-45 minutes, adding 5 extra minutes if they're cold. 💪
Freezer-Friendly Prep
For long-term prep, coat the wings completely and freeze them on a tray before transferring to a freezer bag. They’ll keep for 3 months—thaw in the fridge overnight before baking.
No need to adjust cooking time, but I recommend brushing with extra butter-lemon mixture during the last 5 minutes to compensate for any moisture loss.
Batch Baking Strategy
If feeding a crowd, bake wings in two batches on the same tray with 1-inch spacing between each. Keep the first batch warm in a 200°F oven while the second batch cooks.
I use a wire cooling rack over a baking sheet to maintain crispiness—this prevents soggy bottoms from resting on the tray.
Crispy Storage Hacks
Store leftover wings in a single layer on a wire rack in the fridge for up to 3 days—this preserves the crunch. For reheating, bake at 375°F for 5-7 minutes until golden again.
Avoid the microwave—it turns crispy wings into sad, rubbery bites. For extra crunch, sprinkle with 1 tsp cornstarch before reheating. ✨
Sauce Prep Shortcuts
Make buffalo sauce or ranch dressing the night before and store in the fridge. I like to double the ranch recipe and keep it in a squeeze bottle for easy serving.
For buffalo sauce, mix ½ cup hot sauce, ¼ cup melted butter, and 1 tbsp honey—store in a jar. Toss wings in sauce just before serving to keep them crispy.
Game Day Timeline
Here’s my foolproof schedule for game day: Day before: Prep wings and sauce. Morning of: Bake wings (they’ll stay warm in the oven). 30 mins before kickoff: Set out celery/carrots and warm sauce. This keeps everything fresh and ready without last-minute stress. 🏈
Nutrition facts
Frequently asked questions
Why do my oven-baked wings turn out soggy instead of crispy?
Moisture is the enemy of crispiness! Always pat wings thoroughly dry before coating, and avoid overcrowding the baking sheet. Use a wire rack over the tray to allow air circulation, and never skip the 15-minute rest before baking. If your oven runs hot, reduce temp to 400°F and bake 5 extra minutes.
Can I use frozen wings for this recipe?
Fresh wings yield the best results, but frozen works in a pinch. Thaw completely in the fridge overnight, then pat extra dry—frozen wings release moisture during baking. Add 5 minutes to baking time and brush with extra butter-lemon mixture at the end to compensate for any lost crispiness.
What's the best way to keep wings crispy after baking?
Store them in a single layer on a wire rack (not stacked) in the fridge for up to 3 days. Reheat at 375°F for 5-7 minutes—never microwave! For extra crunch, sprinkle with 1 tsp cornstarch before reheating. Keep them warm in a 200°F oven during parties to maintain texture.
How can I make these wings spicier or sweeter?
For heat, add ½ tsp cayenne or 1 tsp chili powder to the flour mix. For sweetness, toss baked wings in 1 tbsp honey mixed with 1 tbsp melted butter during the last 5 minutes of baking. For a sticky glaze, brush with ½ cup BBQ sauce after baking and broil for 2 minutes.
Can I bake these wings in an air fryer instead?
Preheat air fryer to 375°F and cook in batches for 12-15 minutes, shaking halfway. Use the same flour coating but reduce olive oil to ½ tbsp—air fryers crisp faster. For extra crunch, spray with 1 tsp oil after coating. Watch closely to avoid burning!