
Breakfast & Brunch
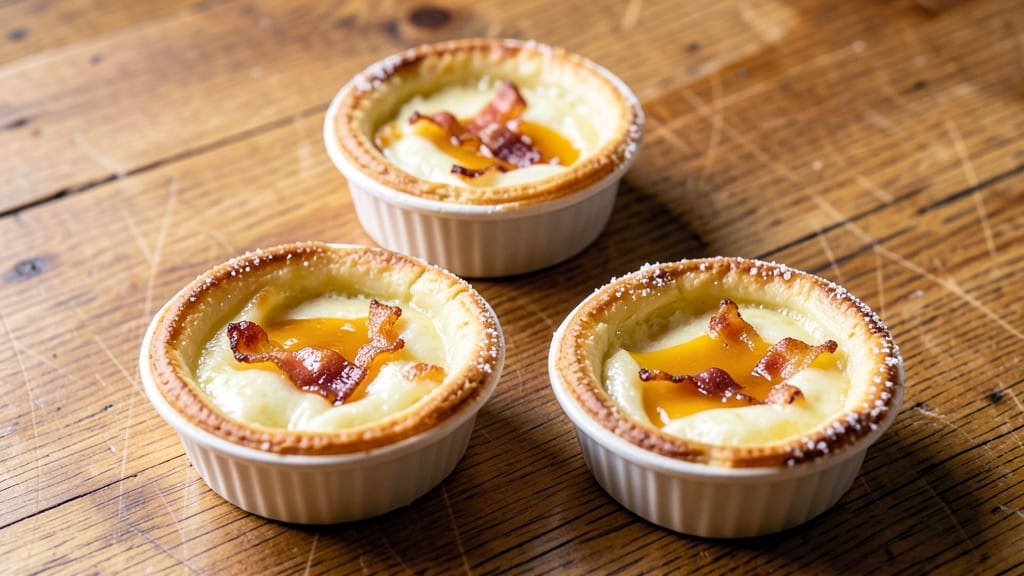
This easy mini quiche Lorraine recipe transforms a classic into perfect bite-sized portions with crispy edges and tender centers—no fuss, just flavor. The secret lies in a pre-baked crust and a simple filling that comes together in under 20 minutes of active prep time.
I developed this version after years of making full-size quiches that always resulted in leftovers, and it’s become my go-to for brunch gatherings or quick breakfast solutions.
The beauty of mini quiches is their versatility—ideal for appetizers, party platters, or even a light dinner. You’ll start with a foolproof crust (store-bought or homemade) that bakes to golden perfection, then fill it with a rich mixture of eggs, cream, sharp cheddar, and crispy bacon.
The key to achieving those crispy edges without burning the filling is precise baking temperature and timing, which I’ll walk you through step by step.
What you’ll end up with is a tray of golden, flaky-edged quiches that are easy to pick up and devour. The bacon adds smoky depth, the cheese melts into a velvety layer, and the crust holds its shape beautifully—no soggy bottoms here.
These mini quiches reheat well too, making them perfect for meal prep or last-minute entertaining.
Ready to master this recipe? We’ll cover everything from crust prep to baking tips, plus variations like adding spinach or mushrooms for a vegetarian twist. Let’s get started!
Ingredients for easy mini quiche lorraine
Crispy crust, creamy filling, and smoky bacon—just these ingredients transform into perfect bite-sized quiches.
| Ingredient | Amount | Notes |
|---|---|---|
| Store-Bought Pie Crust 🥧 | 1 sheet | Pre-made for convenience, thawed |
| Unsalted Butter 🧈 | 4 tbsp | Cold, cubed for crust topping |
| Coarse Sugar 🍚 | 1 tbsp | For sprinkling on crust |
| Large Eggs 🥚 | 4 whole | Room temperature for smooth filling |
| Heavy Cream 🥛 | ½ cup | Full-fat for creamy texture |
| Sharp Cheddar Cheese 🧀 | 1 cup | Shredded, aged for tang |
| Cooked Bacon 🥓 | 4 oz | Crispy, chopped into bits |
| Salt 🧂 | ½ tsp | Kosher or sea salt |
| Freshly Ground Black Pepper 🌶️ | ¼ tsp | Freshly cracked preferred |
| Nutmeg 🌿 | ⅛ tsp | Freshly grated for warmth |
| All-Purpose Flour 🌾 | 1 tbsp | For dusting crust molds |
The crust is everything here. I always grab Pillsbury refrigerated pie crust—it’s foolproof and bakes up flaky every time. If you’re feeling ambitious, a homemade crust (butter + flour + ice water) works too, but it’s a time investment. For the pre-baked crust, Whole Foods or Trader Joe's carry those cute mini tart pans that make perfect quiche molds—no need to fuss with muffin tins. Just remember to chill the crust for 15 minutes after pressing it into the pans. That keeps it from shrinking while baking.
No sharp cheddar? Gruyère or Swiss melts beautifully too, though it’ll be less tangy. The bacon can be pre-cooked from a package, but Trader Joe's smoked bacon is my go-to—it’s leaner and holds its shape better. Running short on heavy cream? Half-and-half plus a splash of milk works in a pinch, though the texture won’t be quite as rich. And if you’re avoiding dairy, a cashew cream blend (soaked cashews + water) can mimic the creaminess, though the flavor will differ. The nutmeg is non-negotiable for that classic quiche flavor—don’t skip it!
These quiches reheat beautifully—just 10 seconds in the microwave or 5 minutes at 350°F to restore crispiness. Keep them in the fridge for up to 4 days, covered tightly. For make-ahead prep, assemble the quiches (unbaked) and refrigerate for up to 24 hours before baking. The crust stays crispy when baked straight from the fridge, which is a game-changer for busy mornings. Freeze unbaked quiches for up to 1 month—just add 3-5 minutes to baking time when you’re ready to serve.
Why You'll Love This Recipe
- No-Fuss Assembly: I swear by the store-bought crust here—no rolling, no stress, just cut and fill. Ten minutes of work, zero effort, and you’ve got golden little bites ready to go.
- Rich Without Trying: That heavy cream and egg combo? It’s like a custardy hug in your mouth. The sugar caramelizes just enough to give it this subtle sweetness that balances the salty bacon (if you add it).
- Party in a Handful: These are my go-to for brunch, potlucks, or when I’m too tired to cook. They reheat beautifully, so I make a batch on Sunday and snack all week—or take them anywhere without a fuss.
- Budget-Friendly Luxury: Eggs, cream, and butter stretch far, and you can make these for under $10. Honestly, it’s one of those recipes where you get restaurant-quality flavor without the price tag.
Step-by-step instructions for easy mini quiche Lorraine
Here's how to make these perfect bite-sized quiches with golden crusts and creamy centers.
Prepare the Crust Molds and Preheat
Roll out the 1 sheet store-bought pie crust on a lightly floured surface until it's about 1/8-inch thick. Cut it into 4 equal squares using a sharp knife or pizza cutter. Gently press each square into a 4-inch round tart pan or ramekin, making sure to press the dough up the sides to create crispy edges. Dust the inside of each mold with 1 tablespoon all-purpose flour to prevent sticking.
Preheat your oven to 375°F while you prepare the filling. This temperature ensures the crust gets crispy without burning while the filling cooks through. I like to place a baking sheet on the middle rack to catch any potential drips from the crust edges.
Make the Bacon-Cheese Filling
In a medium bowl, combine the 4 oz cooked bacon (chopped into small pieces), 1 cup sharp cheddar cheese (shredded), 0.5 tsp salt, 0.25 tsp freshly ground black pepper, and 0.125 tsp nutmeg. Mix gently with a fork until the cheese is evenly distributed. This combination gives you that classic Quiche Lorraine flavor with a perfect balance of smoky, salty, and slightly spiced notes.
While mixing, I like to taste the cheese mixture to ensure the seasoning is right. The nutmeg adds warmth that pairs beautifully with the bacon and sharp cheddar. Don't skip this step—it makes all the difference in the final flavor.
Assemble and Bake the Quiches
In a separate bowl, whisk together the 4 whole large eggs, 0.5 cup heavy cream, and 1 tbsp coarse sugar until smooth. This mixture should be well combined but not overly thick. Distribute the bacon-cheese mixture evenly among the 4 prepared crusts, pressing down gently to create an even layer.
Pour the egg mixture over each quiche, filling them almost to the top. Sprinkle the remaining coarse sugar evenly over all quiches—this helps create a beautiful caramelized crust on top. Bake for 25-30 minutes until the edges are golden brown and the centers are just set (they'll continue cooking slightly after removal).
Finish with Butter and Rest
Remove the quiches from the oven and immediately dot each one with 1 tablespoon cold unsalted butter (about 1 tablespoon total, divided among all quiches). The butter will melt and create a glossy, golden finish that adds richness. Let them rest for 5 minutes before serving—this allows the filling to set slightly and makes them easier to handle.
Serve these mini quiches warm for the best texture—crispy crusts, creamy filling, and that perfect balance of flavors. They're perfect for brunch, appetizers, or even a light lunch. Store any leftovers in the refrigerator for up to 2 days, and reheat in the oven at 350°F for 10 minutes to restore their crispiness.
Pro Tips For Making Easy Mini Quiche Lorraine
- Preheat Your Muffin Tin: Pop it in the oven for 5 minutes at 375°F before adding crusts—this melts the butter faster and prevents soggy bottoms. I learned this the hard way after pulling out quiches with sad, greasy crusts instead of golden ones.
- Whisk Eggs Like a Maniac: Beat those eggs and cream until the mixture is thick and leaves a trail when you lift the whisk—this ensures a silky texture, not a watery one. I used to skip this, and the quiches turned out more like custard pudding.
- Skip the Overfilling: Fill the crusts only ¾ full—eggs expand, and overflowing means a messy cleanup and undercooked centers. Trust me, your quiches will thank you when they’re set perfectly in the middle.
- Use Cold Butter: Dot the crust with cold, cubed butter instead of melted—it browns beautifully and adds richness without making the filling greasy. Yes, it takes 10 seconds to chill, but it makes a real difference.
Perfect pairings for this easy mini quiche lorraine
Crispy Crust Sides
Mini quiches pair perfectly with garlic butter toast points—simply brush toasted sourdough with 2 tbsp melted butter mixed with 1 tsp minced garlic and a pinch of flaky sea salt.
The buttery crunch contrasts beautifully with the creamy quiche filling. For extra flair, sprinkle with toasted sesame seeds or crushed black pepper right before serving. 🥖
Fresh Greens Balance
A simple arugula salad with lemon vinaigrette cuts through the richness of the quiche. Toss 4 cups baby arugula with 2 tbsp olive oil, 1 tbsp fresh lemon juice, ½ tsp Dijon mustard, and a pinch of salt.
Top with ¼ cup shaved Parmesan and 2 tbsp toasted pine nuts for texture. The peppery bite refreshes your palate between bites.
Creamy Dips
Serve with a side of herbed sour cream—mix ½ cup sour cream with 1 tbsp fresh chives, ½ tsp lemon zest, and a pinch of salt.
The tangy creaminess complements the quiche's richness and adds a luxurious touch. For a smoky twist, stir in ½ tsp smoked paprika or 1 tsp chopped fresh dill. 🥄
Beverage Pairings
Start your day with a sparkling rosé or dry Riesling—the crisp acidity balances the quiche’s creaminess. For coffee lovers, a strong black coffee with a splash of heavy cream and 1 tsp brown sugar mirrors the quiche’s flavors. A chilled hibiscus iced tea adds a refreshing, slightly tart contrast.
Sweet Contrasts
Balance the savory quiches with honey-glazed figs or caramelized apples. Warm 4 figs with 1 tbsp honey and a pinch of cinnamon for 5 minutes until tender.
The natural sweetness and jammy texture create a perfect bite-sized pairing. For a crunchy option, serve with toasted almonds or candied pecans. 🍇
Make-Ahead Serving
Assemble quiches ahead and refrigerate unbaked for up to 24 hours—they’re perfect for brunch buffets. Serve with mini muffin liners for easy transport and a chafing dish to keep them warm.
Pair with pre-cut fruit skewers (melon, berries) and chilled sparkling water with citrus slices for a complete, stress-free spread. ✨
Nutrition facts
Frequently asked questions
Can I use a different type of cheese instead of sharp cheddar?
Gruyère, Swiss, or even fontina work beautifully—they melt smoothly and add unique flavors. For a vegetarian twist, try feta or goat cheese with spinach or caramelized onions. Just adjust seasoning since some cheeses are saltier than cheddar.
How do I prevent soggy crusts in mini quiches?
Pre-bake the crusts for 8-10 minutes at 375°F before adding filling. This creates a barrier that keeps them crispy. Chill the assembled quiches for 15 minutes before baking too—this helps the filling set faster and reduces moisture transfer.
Can I make these mini quiches ahead of time?
Yes! Assemble them (unbaked) and refrigerate for up to 24 hours or freeze for 1 month. Add 3-5 minutes to baking time if frozen. They reheat perfectly in the oven at 350°F for 10 minutes to restore crispiness.
What’s the best way to store leftovers?
Keep them in an airtight container in the fridge for 4 days. For longer storage, freeze unbaked quiches (up to 1 month) or baked ones (up to 2 months). Reheat baked quiches at 350°F for 10 minutes to revive the crust.
Can I make these without bacon?
Swap bacon for sautéed mushrooms, caramelized onions, or sun-dried tomatoes. For a meat option, try diced ham or crumbled sausage. Just adjust cooking times if using wet ingredients like mushrooms.