
Main Courses
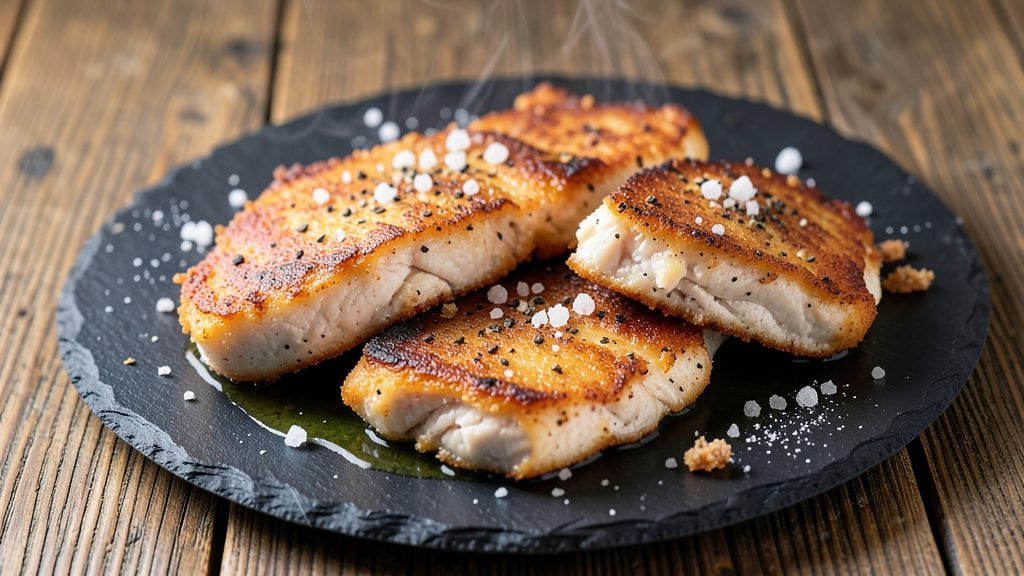
This fried chicken tenders recipe delivers golden crispy bites that stay tender inside—no deep-frying mess or soggy results. The secret lies in a precise breading technique and 350°F oil temperature, which creates that perfect crunch without drying out the meat.
After years of trial and error (and a few burned batches), I’ve perfected a method that guarantees restaurant-quality tenders in just 15 minutes.
What sets this recipe apart is the two-step breading process: a dry flour base for structure, followed by a buttermilk-soaked coating that locks in moisture while creating an irresistible golden crust.
I use vegetable oil for its neutral flavor and high smoke point, ensuring even frying without overpowering the chicken. The key is frying in small batches—crowding the pan will drop your oil temperature and leave you with greasy, unevenly cooked tenders.
By the time you’re done, you’ll have crispy, shatteringly golden tenders with juicy, white meat inside—no dry bites in sight.
The breading stays crisp even after resting, so you can serve them immediately with honey mustard or ranch, or hold them in a 200°F oven for up to 10 minutes if you’re feeding a crowd.
This is the kind of recipe that turns weeknight dinners into crowd-pleasing moments without sacrificing simplicity.
Pair with classic sides like fries, coleslaw, or a fresh garden salad for a complete meal. The beauty of this method is its foolproof nature—once you master the technique, you’ll never go back to store-bought or soggy homemade versions again. Let’s get cooking!
Ingredients for fried tenders
Golden crunch meets juicy perfection with these crispy tenders—just 12 ingredients for restaurant-quality results.
| Ingredient | Amount | Notes |
|---|---|---|
| Boneless, Skinless Chicken Breast Cutlets 🍗 | 1 ½ lb | Pounded to even 1/4-inch thickness |
| All-Purpose Flour 🌾 | 1 ½ cups | Sifted for smooth breading |
| Vegetable Oil 🫒 | 3 cups | For frying, neutral flavor |
| Buttermilk 🥛 | 1 cup | Full-fat for best coating |
| Diamond Crystal Kosher Salt 🧂 | 1 ½ tsp | Fine grain preferred |
| Ground Black Pepper 🌶️ | 1 tsp | Freshly cracked for flavor |
| Garlic Powder 🧄 | ½ tsp | Not garlic salt |
| Paprika 🌶️ | 1 tsp | Smoked for extra depth |
| Cornstarch 🌾 | 2 tbsp | For extra crispiness |
| Unsalted Butter 🧈 | 2 tbsp | Melted for basting |
| Lemon Juice 🍋 | 1 tbsp | Freshly squeezed |
| Fresh Parsley 🌿 | ¼ cup | Chopped for garnish |
The chicken cutlets are non-negotiable—boneless, skinless breasts work best, but pound them to even thickness (about 1/4-inch) for consistent cooking. I grab mine from Whole Foods or the butcher counter at Kroger—look for plump, firm pieces without gray edges. The flour matters too: sifted all-purpose creates a smoother breading than pre-mixed baking blends. For the oil, vegetable oil is my go-to because it stays neutral and has a high smoke point (350°F is critical—any lower and you’ll get grease bombs).
No buttermilk? Substitute 1 cup milk + 1 tbsp vinegar (let it sit 5 minutes). Short on cornstarch? Add 1 tbsp extra flour—it’s all about that crispy texture. The smoked paprika gives a subtle depth, but regular paprika works too if that’s what you’ve got. Fresh parsley is optional but worth it for a pop of color—dried parsley at 1/3 the amount is a decent swap. Pro tip: Keep your oil at 350°F using a candy thermometer—no eyeballing here!
These stay crispy for 15 minutes at room temperature, so make them ahead and hold in a 200°F oven if serving a crowd. For leftovers, store in an airtight container for 3 days—reheat in a 375°F oven for 10 minutes to restore crispiness. Freeze breaded tenders (uncooked) for up to 2 months—fry straight from frozen, adding 2-3 minutes to cooking time. The secret to reheating? Paper towels under them soak up excess oil.
Why You'll Love This Recipe
- Crispy in Minutes: Honestly, the buttermilk marinade does all the heavy lifting—just pound the chicken, soak it for 20 minutes, and boom, golden perfection in the pan. No fancy techniques, just hot oil and a steady hand.
- Tender-Crisp Magic: That flour crust? It’s not just salty—it’s got a satisfying snap while staying juicy inside. The kosher salt (trust me, don’t skip it) makes every bite pop, and the buttermilk keeps it from drying out.
- Game for Any Meal: Between us, these work for everything: a quick lunch with honey mustard, a hearty dinner with roasted potatoes, or even a snack when my kids get home from soccer. (Yes, even on a Tuesday night.)
- Budget-Friendly Leftovers: Chicken breasts stretch farther than you’d think, and the leftovers reheat like a dream—crispy again in the air fryer, no questions asked. Plus, you’re using pantry staples, so your wallet stays happy too.
Step-by-step instructions for golden crispy fried chicken tenders
Here's how to achieve that perfect balance of crispy exterior and tender interior every time.
Prepare the Chicken for Maximum Crispiness
Begin by patting the 1.5 lb boneless, skinless chicken breast cutlets completely dry with paper towels. This step is non-negotiable—any moisture left on the surface will prevent that golden crust from forming. Place each cutlet between two sheets of plastic wrap and pound to an even ¼-inch thickness using a meat mallet. This ensures even cooking and prevents the centers from staying undercooked while the edges crisp.
Season both sides generously with 1.5 tsp diamond crystal kosher salt, 1 tsp ground black pepper, 0.5 tsp garlic powder, and 1 tsp paprika. I like to press the seasoning into the meat so it adheres well. Let the seasoned cutlets rest at room temperature for 15 minutes while you prepare the buttermilk marinade. This resting period allows the seasoning to penetrate slightly and the meat to come to the same temperature as your cooking environment, ensuring even cooking.
Create the Buttermilk Marinade for Tender Bites
In a shallow dish large enough to accommodate all the chicken cutlets, combine 1 cup buttermilk, 2 tbsp cornstarch, and an additional 0.5 tsp diamond crystal kosher salt. The cornstarch acts as a tenderizer and helps create an extra-crispy coating. Stir well until the cornstarch is fully dissolved. Add the chicken cutlets to the marinade and turn to coat completely. Let them marinate for 10-15 minutes, flipping once halfway through. You'll notice the chicken begins to develop a slightly opaque appearance—this indicates the marinade is working and the meat is absorbing moisture, which will keep it tender during frying.
While the chicken marinates, prepare your frying station. Fill a deep skillet or Dutch oven with 3 cups vegetable oil to a depth of about 2 inches. Place it over medium heat and let the oil come to temperature. I use a deep-fry thermometer to monitor the oil—it should reach 350°F. If you don't have a thermometer, test the oil by dropping in a small piece of bread. It's ready when it sizzles and turns golden brown within 30 seconds.
Fry to Perfect Crispy Perfection
Working in batches to avoid overcrowding the pan (which lowers oil temperature), carefully remove the chicken from the buttermilk using tongs and let any excess drip off back into the marinade. This prevents the oil from splattering when you add the chicken. Fry the cutlets for 2-3 minutes per side until they reach an internal temperature of 165°F and develop a deep golden brown color. The key here is patience—don't rush the frying process. You're looking for that beautiful contrast of crispy exterior and tender interior.
As the chicken fries, you'll notice small bubbles forming around the edges—this is the cornstarch creating that extra-crispy texture. Once golden brown, transfer the fried cutlets to a wire rack set over a paper towel-lined plate. This allows air to circulate underneath, preventing sogginess. Keep the fried chicken warm in a 200°F oven while you complete the remaining batches.
Finish with Butter and Lemon for Extra Flavor
In the same skillet you used for frying, reduce the heat to medium-low and add 2 tbsp unsalted butter. Let it melt completely, then pour in 1 tbsp freshly squeezed lemon juice. Toss the fried chicken cutlets in this butter-lemon mixture until they're evenly coated. The acidity of the lemon brightens the flavors and cuts through the richness of the fried chicken, while the butter adds a luxurious finish. You'll see the cutlets glisten slightly from the butter coating—this is your visual cue that they're ready to serve.
Transfer the chicken to a serving platter and garnish with ¼ cup chopped fresh parsley. The parsley adds a pop of color and freshness that complements the rich, crispy chicken. Serve immediately with your favorite dipping sauce—whether it's classic ranch, honey mustard, or a simple aioli. The contrast of the crispy, golden tenders with a cool, creamy dip is what makes this dish irresistible.
Pro Tips For Making Fried Tenders
- Hammer the Chicken Thin: Chicken breasts fight back—pound them to ¼-inch thickness with a rolling pin or heavy skillet. Thinner cutlets cook faster and get that perfect golden crust without drying out. (Yes, even if it feels like overkill.)
- Salt the Buttermilk: Toss ½ teaspoon kosher salt into the buttermilk before dipping. The salt penetrates the chicken while marinating, so you won’t need to over-season later. (I learned this after tasting bland tenders—don’t make my mistake.)
- Double-Dip for Crust: Dip the floured cutlets back into buttermilk, then flour again. The extra layer locks in moisture and guarantees a shatteringly crisp crust. (Sounds weird, but it works—trust the process.)
- Keep Oil Hot, Not Smoking: Maintain 350°F (175°C)—hot enough to sizzle but not burn. Too hot = rubbery outside, raw inside. Too cool = greasy, soggy mess. Use a thermometer if you’re unsure. (Your future self will thank you.)
Best sauces and condiments for this dish
Classic Ranch Dip
This creamy, tangy ranch is the ultimate match for crispy tenders.
I blend 1 cup mayonnaise, ½ cup sour cream, 2 tbsp buttermilk, 1 tbsp fresh lemon juice, 1 tsp onion powder, 1 tsp garlic powder, ½ tsp dried dill, and ½ tsp dried parsley. The secret?
Let it sit for 10 minutes before serving so flavors meld. Serve chilled in a small bowl with a sprinkle of paprika for color. 🥛
Sweet Honey Mustard
Sweet and tangy cuts through the richness perfectly. Mix ¼ cup mayonnaise, 2 tbsp Dijon mustard, 2 tbsp honey, 1 tbsp apple cider vinegar, and ½ tsp celery seeds. For extra depth, add 1 tsp grated lemon zest.
This sauce is my go-to for kids and adults alike—it’s sweet enough to appeal to little ones but complex enough for grown-ups. Store leftovers in an airtight container for 5 days in the fridge. 🍯
Spicy Sriracha Aioli
For heat lovers, this aioli brings the fire. Whisk ½ cup mayonnaise, 2 tbsp sriracha, 1 tbsp lime juice, 1 tsp honey, and ½ tsp smoked paprika. Thin with 1 tsp water if needed for dipping consistency.
Serve with a side of cool ranch for balance. The smoky paprika echoes the spices in your tenders, creating a cohesive flavor profile. 🌶️
Creamy Blue Cheese
Bold and tangy, this sauce elevates tenders to gourmet level. Crumble ½ cup blue cheese into ½ cup sour cream, then stir in 1 tbsp chopped walnuts, 1 tsp apple cider vinegar, and ½ tsp black pepper.
The nutty crunch contrasts beautifully with the crispy tenders. Keep this sauce chilled until serving—it’s best enjoyed immediately. 🧀
BBQ Sauce Glaze
Turn your tenders into a finger-licking appetizer with a quick BBQ glaze. Heat ¼ cup BBQ sauce (I love Sweet Baby Ray’s original) with 1 tbsp butter in a small saucepan until warm.
Brush lightly over fried tenders just before serving. The smoky-sweet sauce pairs perfectly with the crispy texture. For extra shine, broil for 30 seconds under the oven. 🔥
Lemon Garlic Yogurt
Bright and refreshing, this sauce cleanses your palate between bites. Mix ½ cup Greek yogurt, 1 tbsp lemon juice, 1 tsp minced garlic, ½ tsp salt, and 1 tbsp chopped fresh dill.
The tangy yogurt balances the richness of the fried chicken beautifully. Store in an airtight container for 4 days in the fridge. 🍋
Nutrition facts
Frequently asked questions
Can I use chicken thighs instead of breasts for this recipe?
Chicken thighs will work, but they have more fat and cook differently. For best results, trim excess fat and use 1/3-inch thick slices. Thighs stay juicier but may not get as crispy—reduce frying time to 1-2 minutes per side to avoid overcooking. The internal temp should still reach 165°F.
Why did my tenders turn out greasy instead of crispy?
Greasy tenders usually mean the oil was too cool (below 350°F) or you overcrowded the pan. Use a thermometer to monitor oil temp and fry in batches of 2-3 tenders. Also, pat the chicken completely dry before breading—any moisture causes oil to splatter and lowers temp.
How do I keep the breading from falling off?
The two-step breading (flour + buttermilk) creates adhesion, but timing matters. Don't let the buttermilk-soaked chicken sit too long before frying—work quickly. Also, don't overcrowd the pan, which steams the breading. Fry at 350°F for 2-3 minutes per side without moving them until golden.
Can I bake these instead of frying for a healthier version?
Yes! Preheat oven to 425°F and brush tenders with oil after breading. Bake on a wire rack for 12-15 minutes, flipping halfway. For extra crispiness, broil for 1-2 minutes at the end. The texture won't be as crispy as fried, but it's a great lighter alternative.
What's the best way to reheat leftover crispy tenders?
Place tenders on a wire rack over a baking sheet and reheat at 375°F for 5-7 minutes. For extra crispiness, toss them in a bit of flour or cornstarch before reheating. Microwaving makes them soggy—always use the oven method for best results.