Snacks
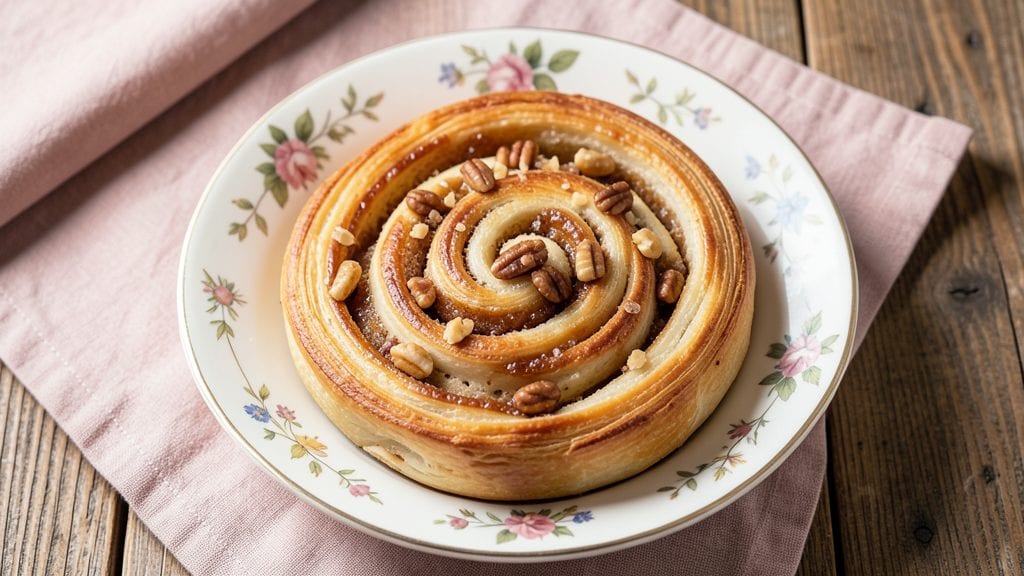
Grandma's nut roll recipe brings back the warmth of Sunday afternoons spent in a sunlit kitchen, where the scent of cinnamon and toasted nuts filled the air. This classic dessert with its signature buttery layers and nutty swirls has been passed down through generations, each family adding their own twist.
The secret lies in the perfect balance of crispy, flaky pastry and tender, nut-filled centers that melt in your mouth.
What makes this recipe truly special is how it captures both tradition and simplicity—just a few basic ingredients transform into something extraordinary. The dough requires minimal handling, while the nut filling combines toasted walnuts or pecans with sugar and spices for that unmistakable flavor.
Whether you prefer a Swedish-inspired version with cardamom or a German-style roll with almonds, this recipe delivers nostalgia in every bite.
The magic happens during the rolling and slicing process, where precision ensures those beautiful, even layers that become crispy around the edges and tender in the center.
Baking at the right temperature creates the perfect texture—crisp enough to hold its shape but soft enough to feel like a hug from your grandmother. This is the kind of dessert that disappears quickly, leaving only crumbs and happy memories behind.
Perfect for holidays, family gatherings, or simply treating yourself, this nut roll recipe is a testament to how simple ingredients can create something truly special. Let’s bring a piece of tradition to your kitchen today.
Ingredients for grandma's nut roll
Buttery dough, toasted nuts, and cinnamon warmth—this is Grandma’s recipe in a bowl.
| Ingredient | Amount | Notes |
|---|---|---|
| All-Purpose Flour 🌾 | 4 cups | Sifted for light texture |
| Unsalted Butter 🧈 | 1 cup | Cold, cubed for dough |
| Granulated Sugar 🍚 | ½ cup | Plus extra for sprinkling |
| Large Eggs 🥚 | 3 whole | Room temperature preferred |
| Vanilla Extract 🌸 | 1 tbsp | Pure vanilla for authentic flavor |
| Ground Cinnamon 🌿 | 1 tsp | Freshly ground preferred |
| Salt 🧂 | ½ tsp | Fine sea salt |
| Walnuts 🥜 | 1 ½ cups | Toasted, roughly chopped |
| Pecans 🥜 | ½ cup | Toasted, roughly chopped |
| Light Brown Sugar 🍚 | 1 cup | Packed, for filling |
| Cardamom Pods 🌿 | 1 tsp | Ground, optional for Swedish twist |
| Powdered Sugar 🍚 | 1 cup | For dusting finished rolls |
| Heavy Cream 🥛 | ¼ cup | For brushing layers |
The butter is non-negotiable—European-style or Plugrá makes all the difference here. Grab it cold from the grocery store’s dairy case—it should be firm enough to hold its shape when cubed. The walnuts and pecans? Toast them yourself in a dry pan until fragrant (about 5 minutes)—store-bought toasted nuts lose their punch. For the flour, King Arthur or Gold Medal brands are my go-to—they handle the rolling and slicing like a dream. And if you’re feeling fancy, swap the cardamom for almond extract for that German-style twist.
No walnuts? Pistachios or macadamias work in a pinch, but toast them extra long—they’re oilier. Short on pecans? Hazelnuts or almonds add a different buttery note. The brown sugar in the filling can be swapped for white sugar plus 1 tsp molasses if that’s what you’ve got. For the dough, if you don’t have vanilla extract, 1 tsp vanilla sugar or even a scraped vanilla bean pod will do. Pro tip: Use a food processor for the dough—it’s faster and gives you that perfect flaky texture without overworking it.
This dough is best made a day ahead—wrap it tightly in plastic and chill overnight for easier rolling. The nut filling? Store it in an airtight container for up to 1 week in the fridge, but trust me, it’ll disappear faster than that. Once baked, these rolls keep 3-4 days at room temperature in an airtight container, or freeze the unbaked rolls for up to 3 months. Reheat slices in the oven for 5 minutes at 350°F—nothing beats that fresh-from-the-oven crunch!
Why You'll Love This Recipe
- No-Fuss Dough: I swear, this dough comes together faster than I can say "butter and flour." Just mix, roll, fold—no kneading, no fuss. The key? Cold butter cut into the flour like little snowballs. It’s the kind of recipe that makes me feel like I’ve earned my dessert.
- Vanilla-Butter Magic: That first bite? Pure comfort. The sugar and vanilla in the filling melt into the tender layers like a hug from Grandma, while the butter keeps it rich without being heavy. Honestly, I’ve tried store-bought nut rolls—nothing compares.
- Breakfast or Snack: Serve it warm with coffee for a lazy morning, or pack slices for lunch the next day. The texture holds up surprisingly well, and the sweetness never feels overpowering. (Yes, even on a Tuesday night.)
- Budget-Friendly Staples: Flour, butter, sugar—these are ingredients I already have. No specialty items, no markup. Plus, one pan of this feeds my whole family, and leftovers? They disappear faster than I can reheat them. My secret weapon for frugal Sundays.
Step-by-step instructions for Grandma's nut roll recipe
Here's how to create those perfect nutty swirls and buttery layers just like Grandma used to make.
Prepare the Dough and Nut Filling
Start by combining the 4 cups all-purpose flour, 0.5 cup granulated sugar, 1 tsp ground cinnamon, and 0.5 tsp salt in a large mixing bowl. Cut in the 1 cup cold, cubed unsalted butter using a pastry cutter or your fingers until the mixture resembles coarse crumbs with pea-sized butter pieces remaining.
In a separate bowl, whisk together the 3 whole large eggs and 1 tbsp vanilla extract. Gradually add the wet ingredients to the dry mixture, stirring gently just until combined. The dough will be slightly sticky—don't overwork it. Divide the dough into two equal portions and flatten each into a 6-inch circle on a lightly floured surface.
For the nut filling, toast the 1.5 cups walnuts and 0.5 cup pecans in a dry skillet over medium heat for 5-7 minutes until fragrant and golden. Let them cool slightly, then roughly chop. In a small bowl, mix the toasted nuts with 1 cup light brown sugar and 1 tsp ground cardamom pods (if using). Spread half of this nut mixture evenly over one of the dough circles, leaving a ½-inch border around the edges.
Assemble and Roll the Nut Roll
Carefully place the second dough circle on top of the nut-filled circle, completely covering the filling. Gently press the edges to seal, then use a sharp knife to trim any excess dough. This is where the magic happens—roll the dough tightly from the long edge toward you, using even pressure to create a 2-inch diameter log. Seal the seam by pinching it gently.
Here's the thing—don't worry if it's not perfect. The roll will hold together as it bakes. Wrap the log in plastic wrap and refrigerate for at least 1 hour (or up to 24 hours). This chilling step ensures the roll maintains its shape and layers beautifully when baked. I like to place it on a plate and cover it completely with plastic wrap to prevent any leaks.
Bake to Golden Perfection
Preheat your oven to 350°F. Unwrap the chilled nut roll and place it seam-side down on a parchment-lined baking sheet. Brush the top generously with 0.25 cup heavy cream and sprinkle with a thin layer of the 0.5 cup granulated sugar reserved for sprinkling. This creates that beautiful caramelized crust we all love.
Bake for 35-40 minutes until the top is golden brown and the internal temperature reaches 190°F when measured with an instant-read thermometer. The roll should look beautifully puffed with those enticing nut swirls peeking through the buttery layers. If the top browns too quickly, tent loosely with foil for the last 10 minutes of baking to prevent over-browning.
Cool and Dust with Powdered Sugar
Remove the nut roll from the oven and let it cool on a wire rack for 15 minutes. This resting period allows the layers to set and makes it much easier to slice. While it cools, prepare the powdered sugar glaze by sifting 1 cup powdered sugar into a small bowl.
Once the roll is cool enough to handle, slice it into 12 equal pieces using a sharp serrated knife. Dust each slice generously with the powdered sugar glaze right before serving. The contrast between the warm, nutty roll and the cool, sweet powdered sugar is what makes this recipe truly special. Serve immediately while still warm for the best experience!
Pro Tips For Making Grandma'S Nut Roll
- CHILL THE DOUGH: After mixing your nut roll dough, pop it in the fridge for at least 30 minutes—even if the recipe doesn’t say so. I learned this the hard way when my first batch spread like a pancake instead of holding its shape. Cold butter behaves better, and the layers stay crisp.
- USE COLD BUTTER: Cut that unsalted butter into cubes and freeze it for 10 minutes before mixing. Room-temperature butter makes the dough greasy and hard to handle, and your nut roll will end up dense. Trust me, your future self will notice the difference in flakiness.
- MEASURE FLOUR RIGHT: Spoon the flour into your measuring cup, then level it off with a knife—don’t scoop directly from the bag. Packed flour adds too much, and your nut roll will turn out tough instead of tender. This isn’t the prettiest method, but it’s the tastiest.
- BRUSH WITH EGG WASH: Whisk one egg with a splash of water, then brush it over the rolled dough before baking. It gives that golden, glossy finish and helps the layers crisp up properly. I skip this when I’m lazy, but the difference in texture is noticeable.
Storing and reheating this dish
Refrigerator Storage
After baking, let your nut roll cool completely before storing. Place it in an airtight container lined with parchment paper to prevent sticking—Rubbermaid Brilliance containers work perfectly. Keep it refrigerated for up to 4 days, though I find the texture stays best within 2-3 days.
The layers remain crispy on the outside while staying tender inside. 💫
Freezing Unbaked Rolls
For long-term storage, freeze the unbaked nut roll wrapped tightly in plastic wrap followed by foil. I label mine with the date and freeze for up to 3 months.
Thaw overnight in the fridge before baking—this preserves the buttery layers beautifully. The filling stays fresh, and the dough doesn’t dry out. ❄️
Reheating Slices
To revive the crispiness, place slices on a baking sheet and warm in a 350°F oven for 5-7 minutes until golden. For a quick fix, use the air fryer at 325°F for 3-4 minutes—this keeps the edges perfectly crisp.
Avoid microwaving; it makes the dough soggy and dulls the nut flavor. 🔥
Reviving Stale Rolls
If your nut roll loses its crunch, don’t toss it! Wrap slices in a damp paper towel and microwave for 10-15 seconds. Then, transfer to a baking sheet and broil for 1-2 minutes to restore that golden crust.
The nut filling stays moist, and the buttery layers regain their flakiness. 💡
Serving Leftovers
Store-bought nuts? No problem—just toast them extra long (8-10 minutes) to compensate. For a gluten-free twist, swap the flour for a 1:1 gluten-free blend like King Arthur’s, but add 1 extra tbsp of xanthan gum to bind the dough. The texture won’t be identical, but it’s still delicious. ✨
Gift-Worthy Packaging
Slice the nut roll and pack individual pieces in cellophane bags tied with twine for a charming gift. Add a sprinkle of powdered sugar and a handwritten note for that homemade touch.
These rolls keep beautifully at room temperature for 2 days when stored in a tightly sealed tin—perfect for holiday gifts! 🎁
Nutrition facts
Frequently asked questions
Can I substitute store-bought nut filling for homemade?
You can use store-bought nut filling, but toast the nuts yourself for better flavor. If using pre-made filling, warm it slightly before spreading to make it more pliable. For a quick shortcut, mix 1.5 cups toasted chopped nuts with 1 cup brown sugar and 1 tsp cinnamon to mimic the recipe's richness.
Why does my nut roll spread when baking?
Overworking the dough or skipping the 1-hour chill causes spreading. The dough needs time to firm up before rolling. Also, ensure your butter is cold when cutting it into the flour—this prevents excessive melting during baking. If it still spreads, try rolling it slightly thinner or baking at 325°F instead of 350°F.
How do I make this gluten-free?
Replace the all-purpose flour with a 1:1 gluten-free blend like King Arthur's, plus 1 extra tbsp xanthan gum. Chill the dough longer (2 hours) to help it hold its shape. The texture won't be identical, but it'll still be delicious with that nutty goodness.
Can I bake this in a smaller pan?
Yes, but adjust the baking time. For a 10-inch pan, reduce baking time to 25-30 minutes. The key is to bake until the center reaches 190°F. Use a toothpick test—it should come out clean with a few moist crumbs.
What's the best way to slice the nut roll?
Use a sharp serrated knife and dip it in hot water between slices for clean cuts. Let the roll cool 15 minutes first—this prevents smashing. For even slices, lightly mark the roll with a toothpick before cutting.