
Sauces & Condiments
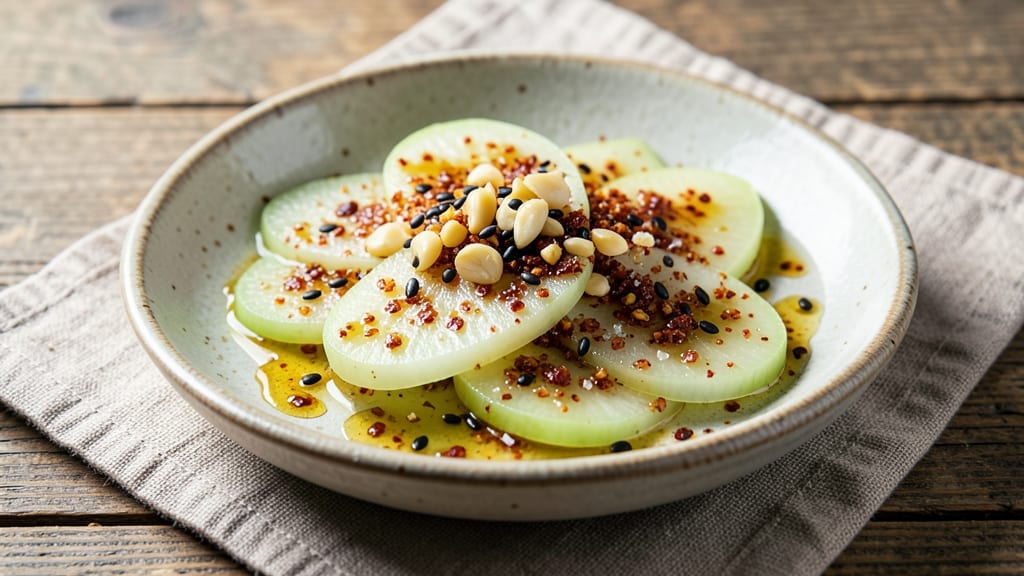
Making Korean white radish pickle (mu or jang) transforms simple ingredients into a crunchy, tangy side dish that elevates any meal. This traditional fermented recipe requires just seven days to develop its signature flavor—no shortcuts, only patience rewarded with a vegetarian delight that pairs perfectly with rice.
The process involves precise ingredient ratios: radish, salt, garlic, and gochugaru (Korean red pepper flakes) work together to create a balance of spice and brightness.
The key to success lies in proper preparation: peeling the radish, slicing it evenly, and layering it with salt to draw out moisture before adding the fermenting mixture. This method ensures crispy texture and deep flavor development.
Unlike quick pickles, the fermentation process builds complexity over time, making each batch uniquely satisfying. The result is a tangy, slightly spicy condiment that adds freshness to any dish.
Once fermented, these pickles can be stored in the refrigerator for weeks, maintaining their crunchy texture and vibrant taste. They’re a staple as banchan—Korean side dishes—served alongside grilled meats, rice, or even in sandwiches for an extra kick.
This recipe delivers restaurant-quality results at home with minimal effort, just time and attention to detail.
Perfect for meal prep, gifting, or simply enjoying as a snack, this Korean white radish pickle recipe is a foolproof way to bring authentic Korean flavors to your table.
Whether you're a beginner or an experienced cook, the process is straightforward and rewarding. Let’s get started on creating your own batch!
Ingredients for korean white radish pickle
Seven ingredients transform into a restaurant-quality fermented side dish with crispy texture and vibrant flavor.
| Ingredient | Amount | Notes |
|---|---|---|
| Korean White Radish (Daikon) 🥕 | 2 lb | Organic preferred, peeled and sliced into 1/4-inch rounds |
| Diamond Crystal Kosher Salt 🧂 | ½ cup | Non-iodized, fine grain for even distribution |
| Gochugaru (Korean Red Pepper Flakes) 🌶️ | ¼ cup | Medium spice level, not cayenne substitute |
| Garlic Cloves 🧄 | 6 cloves | Fresh, peeled and thinly sliced |
| Rice Vinegar 🍶 | ¼ cup | Seasoned or unseasoned, 5% acidity preferred |
| Sesame Oil 🫒 | 1 tbsp | Toasted, for aroma |
| Ginger Root 🌿 | 1 tbsp | Fresh, grated, for subtle heat |
| Green Onion 🧅 | 2 whole | Thinly sliced, for garnish |
| Distilled Water 💧 | 1 cup | Filtered, for brine balance |
| Sugar 🍚 | 1 tbsp | White granulated, optional for sweetness |
The Korean white radish is the foundation—organic daikon from H Mart or Korean grocery stores delivers the best texture (avoid pre-cut radishes). Peel it thoroughly to remove any fibrous skin, then slice uniformly for even fermentation. Diamond Crystal kosher salt is essential for proper moisture extraction; avoid iodized salts that can inhibit fermentation. For gochugaru, Maesil Chogochu from specialty stores offers authentic flavor—never substitute cayenne, which lacks the nuanced sweetness. The garlic should be fresh, with a vibrant purple hue indicating potency.
Substitutions require careful balance: no gochugaru? Paprika plus a pinch of cayenne mimics the color but not the depth. Rice vinegar unavailable? Apple cider vinegar at equal measure works, though flavor differs slightly. Fresh ginger can be swapped for 1/2 teaspoon ground ginger, but texture suffers. For the sugar, honey or agave are 1:1 substitutes, though they may alter fermentation slightly. The sesame oil is non-negotiable—its aroma is critical to the final profile, so use only toasted varieties (none of that cheap, nutty supermarket oil).
Ferment in a sterilized glass jar with a tight seal, stored at 65-70°F for optimal fermentation. The pickles develop best over 7 days, though they improve for up to 3 weeks in the refrigerator. For meal prep, portion into small airtight containers—they’ll keep their crunch for 2 months. The brine can be reused for subsequent batches, though flavor diminishes after 3 uses. Always taste before serving; fermentation times vary by climate.
Why You'll Love This Recipe
- No-Chop Option: I swear by the lazy day hack—just slice the daikon into thick rounds instead of julienning. Same crunch, half the effort, and those garlic-infused rounds? Absolute magic. (Honestly, my knife block thanks me.)
- Spicy-Tangy Magic: That first bite where the salted crunch meets the heat of gochugaru and the bright tang of rice vinegar? It’s the kind of flavor that sticks with you. The radish soaks up just enough vinegar to soften the edges while keeping that satisfying bite.
- Meal Prep MVP: Make a big batch on Sunday, and you’ve got a snack, side, or topping for the week. I toss it into rice bowls, pair it with grilled meats, or just eat it straight from the jar—no judgment. It lasts 10 days in the fridge, and the flavor gets better over time.
- Budget Crunch-Saver: Daikon is cheap, salt and vinegar are pantry staples, and a little gochugaru goes a long way. I’ve made this for under $3 per batch, and it stretches to feed my whole family. (My kids still ask for it even when I forget to buy fancy snacks.)
Step-by-step instructions for Korean white radish pickle
Master this classic fermentation technique for vibrant, crunchy pickles with perfect tang and spice.
Prepare the Radish and Brine Solution
Begin by peeling the 2 lb Korean white radish (daikon) and slicing it into even ¼-inch rounds using a mandoline or sharp knife. Arrange the slices in a single layer on a clean cutting board and sprinkle generously with all 0.5 cup Diamond Crystal kosher salt. Let them sit for 15 minutes—the radish will begin to soften slightly and release moisture, which is essential for proper fermentation.
While the radish absorbs the salt, combine the 1 cup distilled water, 0.25 cup rice vinegar, and 1 tbsp sugar in a large bowl. Stir until the sugar dissolves completely, creating a balanced brine solution. This liquid will help preserve the radish while enhancing its natural sweetness. Keep this mixture ready for the next step, as timing is critical for achieving the right texture and flavor profile.
Layer Radish and Seasoning in a Fermentation Jar
Transfer the salted radish slices to a clean, airtight fermentation jar or large mason jar, packing them tightly but gently to avoid crushing. In a small bowl, mix together the 0.25 cup gochugaru (Korean red pepper flakes), 6 peeled and thinly sliced garlic cloves, 1 tbsp freshly grated ginger root, and 1 tbsp toasted sesame oil. Sprinkle this spiced mixture evenly over the radish slices, ensuring each layer gets coverage.
Pour the prepared brine solution over the radish, submerging all slices completely. If any slices float to the top, press them down gently with a clean spoon or weight. The radish should remain fully submerged to prevent mold growth and ensure even fermentation. Leave about 1 inch of headspace at the top of the jar for expansion during the process.
Seal and Ferment for Optimal Flavor Development
Seal the jar tightly with its lid and place it in a cool, dark location—such as a pantry or cellar—where the temperature remains between 60-70°F. Ferment for 7 days, checking the jar daily to ensure the radish stays fully submerged. If needed, press down the slices with a clean utensil to maintain submersion. After 3 days, you'll notice a slight tang developing, which intensifies over the remaining fermentation period.
During fermentation, the radish will soften slightly while developing a vibrant pink hue from the gochugaru. The garlic and ginger will infuse their aromatic qualities, creating a complex flavor profile. The rice vinegar contributes acidity, balancing the natural sweetness of the radish and enhancing preservation. Avoid opening the jar frequently, as exposure to air can disrupt the fermentation process and alter the final texture.
Finish with Garnish and Storage
After 7 days, carefully open the jar and remove the radish slices, transferring them to a clean bowl. Thinly slice the 2 whole green onions and sprinkle them evenly over the radish. The green onion adds a fresh, crisp contrast to the fermented flavor. Return the radish to the jar, pressing down gently to redistribute the seasoning and liquid. Seal the jar again and refrigerate immediately to halt fermentation and preserve the pickles.
These pickles will continue to develop flavor over the next 3-5 days in the refrigerator, becoming increasingly tangy and complex. They can be stored in the fridge for up to 3 months, though the texture will gradually soften over time. For best results, use within 4 weeks for maximum crunch and vibrant flavor. Serve as a side dish, in banchan-style meals, or as a topping for noodle dishes and rice bowls.
Pro Tips For Making Korean White Radish Pickle
- Trim the Core First: Slice off the thick core of the daikon before cutting into sticks—it’s the only way to get even, crisp slices. I used to fight with uneven radish, then realized the core was the real villain. A sharp knife and steady hand make this step faster than you’d think.
- Salt in Stages: Don’t dump all the kosher salt at once. Start with half, let the radish sit 10 minutes, then add the rest—this draws out moisture without turning it mushy. I learned this after my first batch turned into sad, waterlogged sticks.
- Toast the Gochugaru: Dry-toast the Korean red pepper flakes in a pan for 30 seconds until fragrant—this deepens the flavor and cuts the raw heat. Skip this, and you’ll just get a milder, blander pickle. (Yes, even if you’re impatient like me.)
- Use Cold Vinegar: Chill the rice vinegar in the fridge for 10 minutes before mixing—it sharpens the acidity and keeps the radish crisp longer. Warm vinegar feels lazy, but cold vinegar makes the difference in texture. Trust me, your future self will notice.
Essential equipment for great korean white radish pickle
Fermentation Jar Essentials
Invest in a wide-mouth, airtight glass jar (like Le Parfait 1-quart jars) for optimal fermentation. The wide mouth makes packing radish slices easier, while the airtight seal prevents contamination. I recommend quart-sized jars for this recipe—they provide enough headspace for expansion while keeping the radish submerged.
For larger batches, use 2-quart jars with a fermentation weight (like PicklePipes) to keep slices submerged without crushing. 🥫
Salt and Texture Tools
Use Diamond Crystal kosher salt—it dissolves evenly and won’t leave gritty residue. A mandoline slicer (like OXO Good Grips) ensures uniform ¼-inch slices, which ferment evenly. For pressing down slices during fermentation, I keep a clean ceramic or glass weight (or even a small plate) handy.
Avoid metal weights—they can react with the acidity and affect flavor. A fine-mesh strainer helps drain excess brine before storage.
Spice and Aroma Control
For authentic flavor, gochugaru (Korean red pepper flakes) is non-negotiable—Maesil Chogochu from Korean markets delivers the best balance of sweetness and heat. A microplane (like Bamix) is perfect for grating fresh ginger, while a garlic press (like OXO Good Grips) ensures even slices.
Store spices in airtight containers (like Weck jars) to preserve their potency. A small whisk helps emulsify the brine mixture smoothly for even distribution.
Temperature Monitoring
Fermentation thrives at 65-70°F—use a digital thermometer (like Thermoworks Thermapen) to monitor your storage space. If your kitchen runs hotter, ferment in a cool pantry or basement.
For precise control, a fermentation chamber (like Norwex Fermentation Fridge) keeps temps stable. Avoid refrigerating during fermentation—it halts the process entirely.
Storage Containers
After fermentation, transfer pickles to small airtight containers (like Glasslock 8-ounce jars) for portion control. These keep radish slices crisp for 2 months in the fridge. For meal prep, divide into single-serving sizes—perfect for lunches or banchan pairings.
Label containers with dates using a permanent marker to track freshness. A vacuum sealer (like FoodSaver) extends shelf life to 6 months while preserving texture. 💫
Nutrition facts
Frequently asked questions
Can I use regular daikon radish instead of Korean white radish?
Yes, you can substitute regular daikon radish, but Korean white radish has a sweeter, milder flavor and firmer texture that works better for fermentation. For best results, choose a daikon with minimal blemishes and similar size to ensure even fermentation. If using daikon, you may need to adjust fermentation time slightly—it tends to soften faster than Korean white radish.
How do I know when the pickles are ready to eat?
After 7 days of fermentation, your pickles should have a pleasant tangy aroma and a slightly pinkish hue from the gochugaru. The texture should be firm but slightly softer than raw radish. Taste one slice—it should be crunchy with a balanced mix of spice, garlic, and sweetness. If it tastes too mild, let it ferment 1-2 more days in the fridge.
Can I make this recipe without rice vinegar?
Yes, but the flavor will differ. Replace rice vinegar with an equal amount of apple cider vinegar or white vinegar, though apple cider adds a fruity note. For a more authentic taste, consider using 1 tbsp of fish sauce** (if not vegetarian) or extra gochugaru to compensate for the missing acidity. The fermentation process will still work, but the tanginess will be less pronounced.
Why did my pickles turn mushy or develop mold?
Mold or mushiness usually happens when slices aren’t fully submerged during fermentation, exposing them to air. Always keep radish slices covered with brine, using a weight if needed. If mold appears, discard the batch immediately—it can release harmful bacteria. To prevent this, ensure your jar and tools are sterilized and store at 65-70°F for optimal fermentation.
How can I use these pickles beyond serving as a side dish?
These pickles are incredibly versatile! Add them to rice bowls, noodle dishes, or sandwiches for a tangy crunch. They also pair well with grilled meats, kimchi fried rice, or even as a topping for tacos. For extra flavor, mix them into salads or blend into soups for depth. Store leftovers in the fridge for up to 3 months to enjoy their vibrant taste.