
Snacks
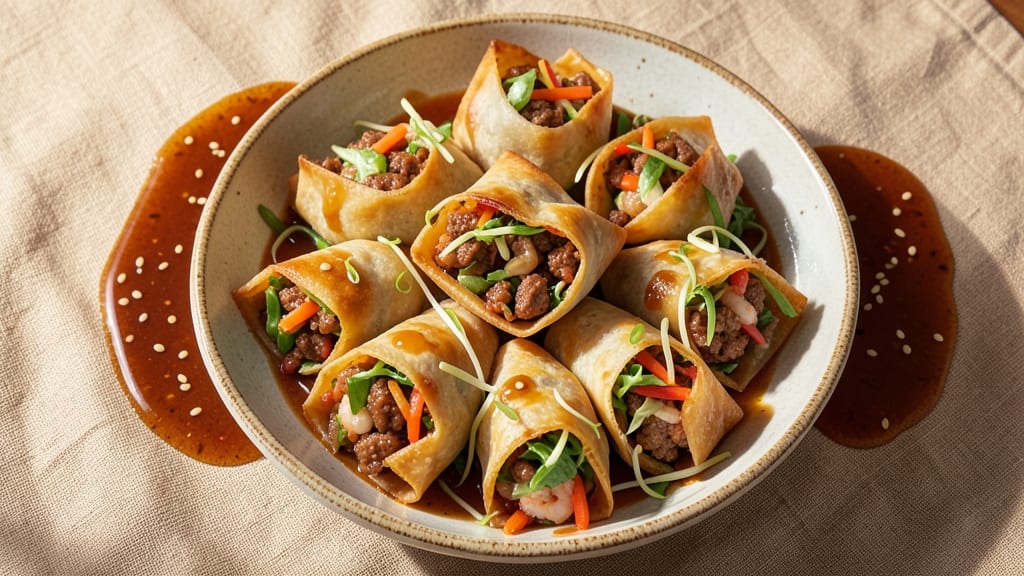
This lumpia rolls recipe delivers crispy, golden spring rolls with fresh, flavorful fillings that make every bite satisfying. The secret lies in a combination of tender fillings—whether meat or veggie—and a perfect crispy wrapper that holds up to frying or baking.
I’ve perfected this technique over years of testing, ensuring the rolls stay crispy on the outside while remaining juicy inside, no matter the filling.
What sets these lumpia rolls apart is the balance of texture and flavor. The fillings are seasoned just right, whether you choose a savory mix of ground pork and shrimp or a vibrant vegetable blend with carrots, cabbage, and bean sprouts.
The wrappers, lightly coated in egg wash and fried to a golden brown, create that irresistible crunch that makes them impossible to resist.
By the time you’re done, you’ll have a batch of crispy, restaurant-quality lumpia rolls that are perfect for appetizers, snacks, or even a light main dish. The fillings stay tender and flavorful, while the wrappers achieve that perfect crispy texture that holds up even when dipping.
Serve with a tangy sweet chili sauce or peanut dipping sauce for the ultimate experience.
This recipe works for both traditional frying and healthier baking methods, making it versatile for any occasion. Whether you’re hosting a party or just craving a satisfying snack, these lumpia rolls are sure to impress. Let’s get started on creating your own batch!
Ingredients for lumpia rolls
These ingredients create crispy, golden lumpia rolls with juicy fillings that stay satisfying every bite.
| Ingredient | Amount | Notes |
|---|---|---|
| Lumpia Wrappers 🥟 | 12 whole | Square egg roll wrappers preferred |
| Ground Pork 🐷 | 1 lb | Lean or regular, finely chopped |
| Large Shrimp 🦐 | ½ lb | Peeled, deveined, chopped small |
| Carrots 🥕 | 2 medium | Julienned or finely diced |
| Green Cabbage 🥬 | 2 cups | Finely shredded, core removed |
| Bean Sprouts 🌱 | 1 cup | Fresh, rinsed and drained |
| Garlic Cloves 🧄 | 4 cloves | Minced, for flavor base |
| Fresh Ginger 🌿 | 1 tbsp | Grated, for zesty kick |
| Soy Sauce 🍶 | ¼ cup | Light or regular, not low-sodium |
| Oyster Sauce 🍜 | 1 tbsp | For umami depth |
| Large Eggs 🥚 | 1 whole | Beaten for egg wash |
| Vegetable Oil 🫒 | 2 cups | For frying, high smoke point |
| Salt 🧂 | 1 tsp | Kosher or sea salt |
| Black Pepper 🌶️ | ½ tsp | Freshly ground |
The wrappers are your golden ticket—King Noodle or Tasty Brand from the Asian aisle are my go-tos, but any square egg roll wrapper works. Grab a few extra just in case. For the fillings, fresh ginger and garlic are non-negotiable—they bring that bright, zesty punch that makes these rolls sing. Trader Joe's has pre-grated ginger if you're short on time, but fresh is always better. The carrots? Julienne them yourself—store-bought pre-shredded gets mushy fast. Look for carrots that are firm and vibrant orange, not dry or wilted.
No shrimp? Extra ground pork or chicken works great—just increase the amount by half. Short on bean sprouts? Substitute extra cabbage or even finely chopped water chestnuts for crunch. The soy sauce can be swapped for coconut aminos if you're avoiding gluten, but the umami will be slightly different. For the wrappers, rice paper wrappers are a thinner alternative if you want extra crispiness. And if you're baking instead of frying, brush with extra egg wash for that golden color. The fillings should be packed tightly but not overstuffed—think 'snug but not bursting.'
These keep surprisingly well—2 days in the fridge if you're frying, 3 days if baking. Store between layers of parchment paper to keep them crispy. For freezing, fry or bake first, then freeze on a tray before bagging. They reheat beautifully in the oven at 350°F for 10 minutes. I always make a double batch—one for dinner, one for snacks. Serve with sweet chili sauce or peanut sauce for that perfect dipping experience.
Why You'll Love This Recipe
- No-Fuss Assembly: I swear by this recipe because it’s the kind of dish where you can prep while chatting—no fancy skills needed. Just spread the pork-shrimp mix on a wrapper, add a few shreds of carrot and cabbage, roll, and pan-fry. My kids even help (and eat their "mistakes" without complaint).
- Crispy-Creamy Magic: That first golden-brown sear on the lumpia wrappers? Absolute perfection. The outside stays crisp while the inside stays tender, and the shrimp adds a briny punch that cuts through the sweet carrots and cabbage. Honestly, it’s the kind of combo that makes you want to eat it straight from the pan.
- Potluck Star: Between us, this is my secret weapon for gatherings—it’s hearty enough for a main but light enough for a side. Double the batch, freeze half, and boom: you’ve got a dish that’s always a hit, whether it’s a BBQ, office party, or just a lazy Sunday.
- Budget Meal Maker: Ground pork and shrimp stretch far, and cabbage and carrots are cheap staples. I make a big batch on Sundays, and it feeds my family for days—sometimes even leftovers for lunch the next week. Plus, the wrappers are a one-time buy that lasts forever. Smart, simple, and satisfying.
Step-by-step instructions for crispy spring rolls with fresh fillings
Here's how to make these irresistibly crispy lumpia rolls with perfect fillings and golden-brown wrappers.
Prepare the Filling Mixture
In a large mixing bowl, combine the 1 lb ground pork, 0.5 lb chopped shrimp, 2 medium julienned carrots, 2 cups finely shredded green cabbage, and 1 cup rinsed bean sprouts. This colorful mix will be the heart of your spring rolls.
Add the 4 minced garlic cloves and 1 tbsp grated fresh ginger to the bowl. These aromatics will infuse the filling with bold flavor as they cook. Sprinkle in the 0.25 cup soy sauce, 1 tbsp oyster sauce, 1 tsp salt, and 0.5 tsp black pepper. Mix everything thoroughly with your hands until all ingredients are evenly distributed and the pork begins to change color slightly.
This step is where all the flavors come together. The soy and oyster sauces will create that perfect umami balance while the ginger and garlic add zing. Don't skip the mixing by hand - it helps distribute the seasonings perfectly throughout the filling.
Assemble the Lumpia Rolls
Place one of the 12 lumpia wrappers on a clean work surface with the corner closest to you. Spoon about 2 tablespoons of the filling mixture onto the wrapper, about 1 inch from the bottom edge. Fold the bottom corner over the filling to create a base.
Now here's the key: fold in the sides of the wrapper toward the center, creating a rectangular shape. This is where you'll achieve that classic spring roll shape. Roll tightly but gently from the bottom up, using your fingers to press the filling against the wrapper as you go. Seal the edge with a tiny dab of water to help it stick.
Repeat with remaining wrappers and filling. I like to work on a bamboo mat for easier rolling, but a clean counter works too. Keep the filled rolls on a tray lined with a damp towel to prevent sticking while you assemble all 6 rolls.
Create the Egg Wash
In a small bowl, beat the 1 whole large egg until just combined. The egg wash is what will give your spring rolls that beautiful golden-brown color and crispy texture. Add 1 tablespoon of water to help thin the mixture slightly - this makes it easier to brush on evenly.
Dip a pastry brush into the egg wash and carefully brush it over each lumpia roll, coating all surfaces. Pay special attention to the seams where the wrappers are sealed. The egg wash needs to be applied evenly but not too thickly - you want a thin, even coat that will crisp up beautifully.
Let the egg-washed rolls rest for 5 minutes while you prepare the frying setup. This brief resting time helps the egg wash adhere better to the wrappers, preventing any filling from leaking out during frying.
Fry Until Golden and Crispy
Heat 2 cups of vegetable oil in a deep fryer or heavy pot to 350°F. You'll want to maintain this temperature consistently - too hot and they'll burn before cooking through, too cool and they'll be greasy. Use a thermometer to monitor the oil temperature accurately.
Carefully place 2-3 lumpia rolls at a time into the hot oil, being gentle to avoid splashing. Fry for 3-4 minutes, turning occasionally, until they're a beautiful golden brown color. The key to crispy spring rolls is this frying time - they should be golden all over but still slightly soft in the center when you remove them.
Transfer the fried rolls to a paper towel-lined plate to drain excess oil. Keep them warm in a 200°F oven while you fry the remaining batches. The residual heat in the oven will help maintain their crispiness while you finish cooking.
Serve Immediately for Maximum Crispiness
Serve the lumpia rolls immediately while they're still hot and crispy. The perfect spring roll has a crackly exterior that gives way to tender, flavorful filling. Arrange them on a platter and serve with your favorite dipping sauce - sweet chili sauce, peanut sauce, or a tangy vinegar dip all work beautifully.
For the best experience, serve these spring rolls right away. The crispiness starts to fade within minutes as they cool, so enjoy them immediately. These make an amazing appetizer, snack, or even a light main course when paired with a fresh salad or rice.
Pro Tips For Making Lumpia Rolls
- Blanch Shrimp First: I learned this the hard way—raw shrimp in lumpia rolls turn rubbery when fried. Drop them in boiling water for 30 seconds, then shock in ice water. They’ll stay juicy and take on the wrapper’s crispness like a dream.
- Shred Cabbage Thin: Thick cabbage strands make limp, soggy rolls. Use a knife to slice it paper-thin, then stack and roll like a burrito. The texture stays crunchy, not mushy—trust me, your bite will thank you.
- Keep Wrappers Damp: Dry wrappers crack like overcooked pasta. Dip them in warm water for 3 seconds, then lay on a damp towel while assembling. They’ll stay pliable and seal tight without tearing.
- Fry in Batches: Crowding the pan drops the oil temp, and your rolls turn greasy instead of golden. Work in single layers, and resist the urge to flip too soon—wait until the edges are deep brown, about 2 minutes. Patience here makes crispy rolls.
Essential equipment for lumpia rolls
Deep Fryer Essentials
For authentic lumpia rolls, a deep fryer is my top recommendation—it maintains 350°F oil temperature consistently, which is critical for that perfect golden-brown crust. I swear by the Ninja Foodi Deep Fryer for its precise temperature control and even heating.
If you don’t have one, a heavy-bottomed Dutch oven (like Lodge 5.5-quart) works just as well—just monitor the oil closely with a thermometer (I use ThermoWorks Thermapen). 🔥
Wrapper Prep Tools
Preventing wrapper tears starts with the right tools. A bamboo rolling mat (like Kasugai brand) keeps wrappers from sticking while rolling, while a sharp chef’s knife (I prefer Wüsthof) helps julienne carrots and chop cabbage efficiently.
For sealing edges, keep a small bowl of water nearby—just a tiny dab keeps fillings contained. Pro tip: Dip your fingers in water before rolling to avoid sticking.
Egg Wash Brush
The secret to even egg wash lies in a high-quality pastry brush (I love West Bend’s silicone brushes). Avoid cheap brushes—they shed bristles into your oil. For extra crispiness, mix the egg wash with 1 tablespoon cold water to help it adhere better.
Brush the egg wash just before frying—don’t let the rolls sit too long or they’ll absorb moisture and turn soggy.
Oil Temperature Gauge
Never guess your oil temperature—invest in a candy/deep-fry thermometer (like Thermoworks Smoke). Oil should read 350°F—any lower and your rolls will be greasy, any higher and they’ll burn.
If your thermometer isn’t digital, test with a wooden chopstick: if bubbles form around it immediately, the oil is ready. Adjust heat as needed to maintain this temp.
Draining Setup
Set up a two-tiered draining station: a wire rack (placed over a baking sheet) for initial draining, followed by a paper towel-lined plate to absorb excess oil. Keep fried rolls in a 200°F oven while finishing the batch—the residual heat keeps them crispy.
I also keep a small bowl of ice water nearby to quickly chill any oil splatters for safety. 💡
Optional Baking Tools
For a lighter version, preheat your oven to 375°F and line a baking sheet with parchment paper (or a silpat mat). Brush rolls with extra egg wash and bake for 12-15 minutes, flipping halfway.
A spray oil mister (like Simple Houseware’s) helps mimic frying’s crispiness. Just don’t skip the egg wash—it’s what creates that golden crust!
Nutrition facts
Frequently asked questions
Can I make lumpia rolls without a deep fryer?
Use a heavy pot with 2 cups of oil and maintain 350°F with a thermometer. For a healthier option, bake at 375°F for 12-15 minutes with extra egg wash. The texture will differ slightly, but they’ll still be delicious.
What’s the best way to prevent wrapper tears?
Keep wrappers covered with a damp towel until use. Work on a bamboo mat or clean surface, and dip your fingers in water before rolling. Don’t overstuff—2 tablespoons of filling per roll is ideal. A tiny water dab on the seam helps seal it securely.
How do I store leftover lumpia rolls?
For fried rolls, store in an airtight container for 2 days (they’ll lose crispiness). Baked rolls last 3 days. Reheat in a 350°F oven for 5-10 minutes to restore crunch. Freeze fried rolls after cooking on a tray, then bag for up to 1 month.
Can I make lumpia rolls with rice paper wrappers?
Yes! Rice paper wrappers create thinner, crispier rolls. Soften them in warm water first, then proceed as directed. Use 1 tablespoon filling per wrapper and roll tightly. Fry at 375°F for 2-3 minutes—they cook faster than traditional wrappers.
Why did my lumpia rolls turn out greasy?
Oil was too cool (below 350°F) or overcrowded the fryer. Use a thermometer and fry 2-3 rolls at a time. For baked rolls, brush with 1 tablespoon oil after egg wash. Greasiness often means the oil absorbed too much moisture from the filling.