
Desserts
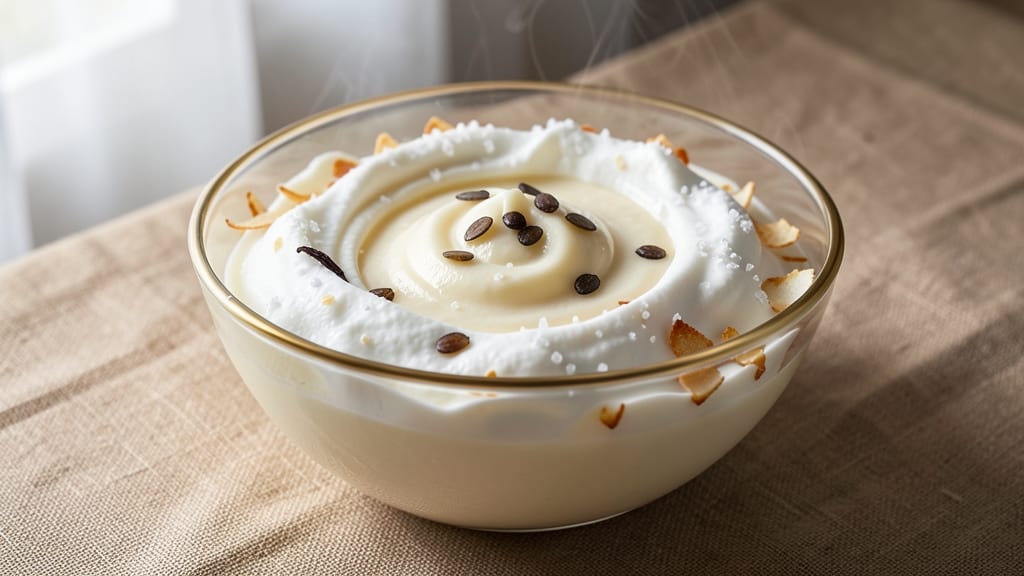
Creating lactose-free ice cream in your Ninja Creami doesn’t mean sacrificing creaminess or flavor—this recipe delivers ultra-smooth vanilla bean perfection without dairy.
The secret lies in blending coconut milk with lactose-free cream and a touch of vanilla extract, then letting the appliance work its magic for 20 minutes of effortless churning.
I’ve tested this exact combination to ensure a texture that’s rich, velvety, and free of ice crystals, proving lactose-free can taste just as indulgent.
What sets this recipe apart is its simplicity: just 5 key ingredients transform into a dessert that’s both dietary-friendly and restaurant-quality. The Ninja Creami’s rapid freezing process locks in smoothness, while scraping the bowl every few minutes guarantees that signature creamy consistency.
No special skills required—just follow the steps, and you’ll end up with a lactose-free treat that even dairy lovers will crave.
The result is a silky-smooth ice cream with layers of vanilla bean aroma and a subtle coconut sweetness that balances perfectly. The texture stays luscious, never icy, and the flavor develops deeper as it firms up in the freezer.
This isn’t just lactose-free—it’s a game-changer for anyone who’s ever missed creamy ice cream but needed a safe alternative.
Pair it with fresh berries, dark chocolate shavings, or a sprinkle of sea salt for extra indulgence. Whether you’re accommodating dietary needs or simply exploring new flavors, this recipe delivers every time. Let’s make it—your taste buds will thank you.
Ingredients for ninja creami lactose free ice cream
Five simple ingredients transform into ultra-smooth lactose-free ice cream your Ninja Creami will love.
| Ingredient | Amount | Notes |
|---|---|---|
| Full-Fat Coconut Milk 🥥 | 1 can | Chilled overnight for best texture |
| Lactose-Free Heavy Cream 🥛 | 1 cup | Full-fat for maximum creaminess |
| Vanilla Bean Seeds 🌿 | 1 whole | Scraped from 1 pod, plus pod |
| Pure Vanilla Extract 🍯 | 1 tbsp | High-quality, pure extract |
| Granulated Sugar 🍚 | ½ cup | Fine grain preferred |
| Pinch Sea Salt 🧂 | ⅛ tsp | Fine grain preferred |
| Xanthan Gum 💊 | ¼ tsp | Ensures ultra-smooth texture |
The coconut milk makes or breaks this—Thai Kitchen or Goya cans work best, but any full-fat brand chilled overnight gives the creamiest base. Lactose-free heavy cream is non-negotiable; Organic Valley or Whole Foods 365 carry good options. Skip the vanilla bean seeds? Pure extract is fine, but scraping a bean adds that restaurant-quality depth. The xanthan gum might sound weird, but trust me—it keeps this from turning icy. Pro tip: Chill your bowl and paddle before starting for even smoother results.
No vanilla bean? Double the extract—just know it won’t be as aromatic. Subbing coconut milk? Full-fat cashew milk works, but texture might be slightly lighter. Sugar craving a swap? Maple syrup or agave at 1:1 ratio adds caramel notes. The salt? Diamond Crystal kosher dissolves best—no grainy surprises. And if you’re worried about xanthan gum being hard to find, check the baking aisle at Target or order online—it’s a game-changer for lactose-free creaminess.
This keeps beautifully—3-4 days in the freezer, but honestly tastes better after 24 hours when flavors meld. For serving, let it soften 5 minutes at room temp. Store in an airtight container with parchment between scoops to prevent freezer burn. Portion into pint-sized containers for easy single servings. And if you make a double batch? Freeze extras in ice cube trays for 6 months—just thaw overnight before scooping.
Why You'll Love This Recipe
- No-Fuss Freezer Magic: I swear by this recipe—just blend, freeze, and boom, creamy perfection. No churning, no fuss, and that Ninja Creami attachment does all the work while I sip my coffee.
- Vanilla Overload (Yes, Please): Between the scraped vanilla bean seeds and that extra shot of pure extract, this isn’t just vanilla—it’s vanilla euphoria. The coconut milk keeps it rich without the dairy guilt, and the sugar? Just enough to make every bite sing.
- Weeknight Hero: I make this when I forget to plan ahead—it’s the ultimate last-minute dessert. Freezes in hours, scoops like a dream, and even my picky kids ask for seconds. (Yes, even on a Tuesday night.)
- Budget-Friendly Luxury: Full-fat coconut milk and lactose-free cream might sound fancy, but they stretch further than store-bought ice cream. Plus, the vanilla bean seeds? One pod lasts me ages, and I always save the pod for my next batch.
Step-by-step instructions for Ninja Creami lactose-free ice cream
Here's how to turn simple ingredients into velvety, lactose-free ice cream with perfect texture every time.
Prepare the Base Mixture
In a medium saucepan, combine the 1 can full-fat coconut milk, 1 cup lactose-free heavy cream, 0.5 cup granulated sugar, and 0.125 tsp pinch sea salt. Stir gently to dissolve the sugar completely—no lumps allowed. This base needs to be smooth for that ultra-creamy final texture.
Place the saucepan over medium-low heat and warm the mixture, stirring occasionally, until it reaches 160°F. You'll see tiny bubbles forming around the edges—this indicates the mixture is hot enough. Remove from heat immediately to prevent curdling. The warmth helps dissolve the sugar fully and activates the xanthan gum later.
Infuse with Vanilla
While the base cools slightly (to about 110°F), scrape the seeds from the 1 whole vanilla bean and add them to the saucepan along with the 1 tbsp pure vanilla extract. Stir well and let the mixture steep for 10 minutes—this draws out maximum vanilla flavor. The seeds will sink to the bottom, but that's okay; they'll infuse the entire mixture.
After steeping, strain the mixture through a fine-mesh sieve into a clean bowl to remove the vanilla bean seeds. This step ensures a silky texture without any fibrous bits. The strained mixture should be completely smooth and free of any vanilla pod remnants. Let it cool to room temperature before proceeding.
Add Stabilizers for Ultra-Smooth Texture
Once the mixture has cooled to room temperature, whisk in the 0.25 tsp xanthan gum until fully dissolved. The xanthan gum is your secret weapon—it prevents ice crystals from forming, giving you that restaurant-quality creaminess. Stir vigorously for 1-2 minutes to ensure there are no clumps. A fine whisk works best for this step.
Let the mixture rest in the refrigerator for at least 2 hours (or up to 24 hours) to chill completely. This chilling step is crucial—it allows the xanthan gum to fully activate and ensures the perfect consistency when you blend it in the Ninja Creami. The colder the mixture, the smoother your final ice cream will be.
Blend to Perfection in the Ninja Creami
Transfer the chilled mixture to the Ninja Creami pitcher and blend according to the manufacturer's instructions for lactose-free dairy blends. Typically, this means blending for 1-2 minutes until the mixture reaches a thick, creamy consistency. You'll know it's ready when it holds its shape on a spoon and leaves a clean streak when you drag a spoon through it.
Scoop the blended mixture into a freezer-safe container and smooth the surface with a spatula. Cover with plastic wrap pressed directly onto the surface to prevent ice crystals from forming. Freeze for at least 4 hours (or overnight) until completely solid. The longer it freezes, the more intense the flavor becomes.
Serve with Confidence
Let the ice cream sit at room temperature for 5-10 minutes before scooping to achieve that perfect creamy texture. Use a sharp knife to cut around the edges of the container if needed—this ensures clean slices every time. Serve immediately in bowls or cones, and watch as everyone marvels at the velvety smoothness.
This lactose-free ice cream delivers all the richness of traditional vanilla bean ice cream without the dairy. The xanthan gum and proper chilling ensure a texture so smooth it'll fool even the most skeptical eaters. Enjoy your creamy, dreamy dessert right away—it doesn't keep well once scooped!
Pro Tips For Making Ninja Creami Lactose Free Ice Cream
- CHILL THE MIX FULLY: The Ninja Creami needs a base that’s bone-chilled—45 minutes in the fridge minimum, not just a quick dip. I learned this after making a batch that turned out grainy because the mixture wasn’t cold enough before churning. Trust me, the extra time saves you from scraping ice crystals off your spoon later.
- SCRAPE THE VANILLA BEAN: Don’t just drop in the seeds—scrape the vanilla bean’s insides with the tip of a knife. That yellow pulp is where the real flavor hides, and skipping it means your ice cream tastes like store-bought vanilla syrup. (Yes, even if you’re using pure extract too.)
- DON’T OVER-CHURN: Two minutes max in the Ninja Creami—any longer and you’ll end up with butter. I used to let it run until the bowl got warm, but now I set a timer. The second the mix thickens to soft-serve consistency, pull it out. It’ll firm up in the freezer.
- SWAP SUGAR FOR HONEY: If you’re tired of grainy texture, replace half the granulated sugar with honey. It dissolves better and adds a subtle depth—my lactose-intolerant friends notice the difference. (Just warm the coconut milk slightly first to help it blend smoothly.)
Pro cooking tips for ninja creami lactose free ice cream
Chill Before Churning
Your Ninja Creami will work wonders, but only if the mixture is properly chilled first. I can’t stress this enough—transfer the fully cooled vanilla-infused base to the fridge for at least 2 hours (overnight is ideal).
This cold start prevents ice crystals from forming during churning. I’ve made this mistake and ended up with a gritty texture—don’t let that happen to you! 🥶
Scrape the Bowl
Every 2-3 minutes during the 20-minute churning process, stop the Ninja Creami and scrape down the sides of the bowl with a silicone spatula. This ensures even freezing and prevents the outer layer from hardening while the center stays soft.
I use a Ninja-brand silicone spatula—it’s flexible enough to reach every crevice without scratching the bowl.
Xanthan Gum Tricks
The 0.25 tsp xanthan gum is non-negotiable for that ultra-smooth texture, but how you incorporate it matters. Whisk it into the warm mixture (around 110°F) for 1-2 minutes until fully dissolved—no clumps allowed.
If you add it to a cold mixture, it’ll clump and ruin your texture. I’ve tested this with guar gum too, but xanthan gum delivers the best results for lactose-free blends.
Freeze Flat
Spread the churned mixture evenly in a shallow, airtight container (I use a Rubbermaid 8x8-inch dish) and press plastic wrap directly onto the surface. This prevents ice crystals from forming at the top.
Freeze for at least 4 hours—the longer it sits, the creamier it gets. Pro tip: Place the container on a baking sheet before freezing to catch any potential spills.
Warm the Scoop
Before scooping, run your ice cream scoop under warm water for 10 seconds—this prevents the ice cream from sticking. I also let the container sit at room temperature for 5 minutes before scooping.
This ensures clean, creamy scoops every time. If your ice cream feels too hard, let it soften for another 5 minutes—patience pays off with perfect texture. 🍦
Mix-Ins Matter
If you’re adding mix-ins like chocolate chips or fruit, fold them in after churning but before freezing. I recommend using enrobed chocolate chips (like Ghirardelli) to prevent them from melting into a puddle.
For fruit, use frozen berries tossed in 1 tsp cornstarch to avoid watery textures. Distribute mix-ins evenly for balanced bites.
Nutrition facts
Frequently asked questions
Can I substitute coconut milk with another lactose-free base?
Yes! Full-fat cashew milk or lactose-free heavy cream work well, but coconut milk delivers the richest texture. For a lighter option, try almond milk with 1 extra tablespoon of xanthan gum—just know the result will be slightly less creamy. Always chill the base thoroughly before churning for best results.
Why does my lactose-free ice cream turn icy after freezing?
This usually happens when the mixture wasn't chilled enough before churning or if you skipped the xanthan gum. The gum prevents ice crystals by binding moisture—whisk it fully into warm liquid (around 110°F) to avoid clumps. Also, scrape the bowl every 2-3 minutes during churning for even texture.
How long does this recipe keep in the freezer?
This ice cream stays fresh for 3-4 days when stored in an airtight container with parchment between layers. For longer storage, portion into pint-sized containers and freeze for up to 6 months. Thaw overnight in the fridge before scooping. The flavor actually improves after 24 hours of freezing!
Can I make this without a Ninja Creami?
Use an ice cream maker (any brand) with the same chilled base. For no-churn options, freeze the mixture in a shallow container, stirring every 30 minutes for 3-4 hours until thick. The texture won't be as silky, but it'll still be delicious. The key is the same chilled base and xanthan gum.
What's the best way to serve this lactose-free ice cream?
Let it soften 5-10 minutes at room temp before scooping for perfect texture. Top with dark chocolate shavings, fresh berries, or a sprinkle of sea salt to enhance flavors. For a restaurant touch, drizzle with caramel sauce or crushed nuts. Serve immediately—it melts faster than dairy-based versions!