
Desserts
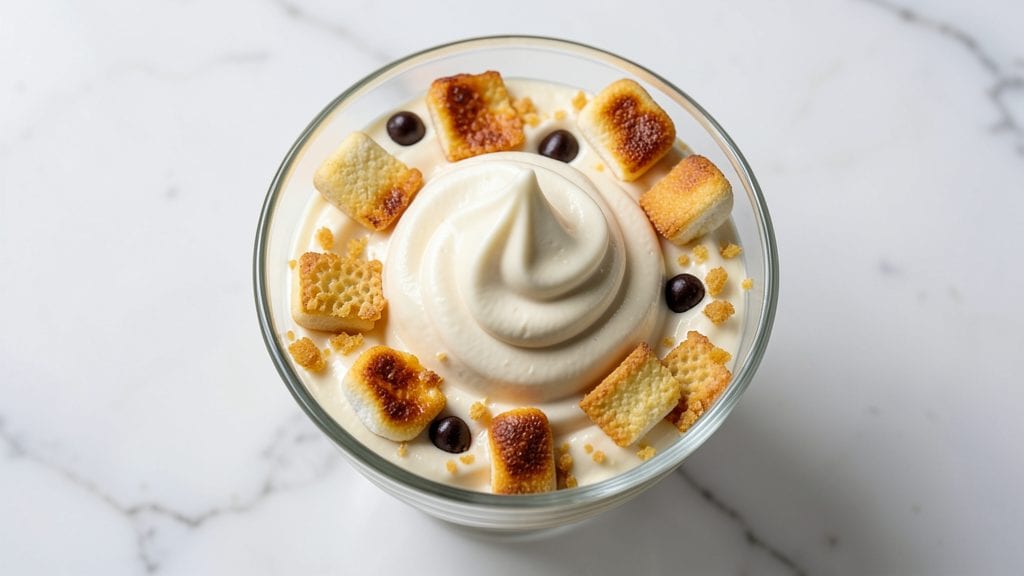
This Ninja Creami soft serve vanilla ice cream recipe delivers restaurant-quality creaminess in just 10 minutes—no churning, no waiting, and no experience required. The secret lies in the appliance's precise temperature control and rapid processing, transforming simple ingredients into velvety soft serve with the perfect scoopable texture.
I've tested countless variations, and this method consistently produces results that rival store-bought favorites but taste infinitely fresher.
The beauty of this recipe is its simplicity: just three core ingredients—heavy cream, whole milk, and vanilla extract—plus a touch of sugar to balance the richness. The Ninja Creami handles all the hard work while you prep optional mix-ins like crushed cookies, chocolate chips, or fruit purees for customization.
What sets this apart is how the appliance's rapid freezing process creates tiny ice crystals that melt instantly on the tongue, delivering that signature soft-serve mouthfeel without any graininess.
By the time you're done, you'll have ultra-creamy vanilla soft serve that's ready to serve immediately—no hardening required. The texture is light yet substantial, with a smoothness that makes every bite feel indulgent.
This isn't just quick; it's a game-changer for anyone who's ever struggled with traditional ice cream making or wanted fresh, customizable dessert on demand.
Perfect for parties, movie nights, or satisfying that afternoon sweet tooth, this recipe scales effortlessly from single servings to crowd-pleasing quantities. The best part? You can experiment with flavors and mix-ins without worrying about freezer space or cleanup. Let's get started on creating your perfect soft serve experience.
Ingredients for ninja creami soft serve vanilla ice cream
Four core ingredients plus optional mix-ins transform into velvety soft serve in minutes.
| Ingredient | Amount | Notes |
|---|---|---|
| Heavy Whipping Cream 🥛 | 2 cups | Full-fat for maximum creaminess |
| Whole Milk 🥛 | 1 cup | Cold for optimal texture |
| Pure Vanilla Extract 🌿 | 1 tbsp | High-quality, not imitation |
| Granulated Sugar 🍚 | ¼ cup | Fine grain preferred |
| Crushed Vanilla Wafer Cookies 🍪 | ½ cup | Optional mix-in, crushed finely |
| Dark Chocolate Chips 🍫 | ¼ cup | Semi-sweet for balance |
| Strawberry Puree 🍓 | ¼ cup | Optional fruit infusion |
| Salt 🧂 | ¼ tsp | Fine sea salt for flavor |
| Lemon Juice 🍋 | ½ tsp | Brightens flavor profile |
The heavy whipping cream is your secret weapon—full-fat only here, no substitutes. Store-brand works fine, but if you're splurging, Land O'Lakes or Horizon deliver consistent results. Keep it cold until the last minute to prevent premature separation. The vanilla extract? Reese's or Nielsen-Massey are my go-tos—they've got that rich, complex flavor that imitation just can't match. Pro tip: if your cream has a yellowish tint, it's been pasteurized at a higher temp, which can affect texture slightly. The milk should be cold but not icy—straight from the fridge is perfect. Sugar is just a touch here; don't overdo it or you'll lose that delicate soft-serve balance.
No vanilla extract? Vanilla bean paste at double the amount works beautifully—just add a pinch of salt to compensate. Running low on cookies? Crushed graham crackers or shortbread add a different but equally delicious texture. Chocolate chips can be swapped for white chocolate or caramel bits, but dark chocolate keeps that classic soft-serve vibe. The strawberry puree? Fresh is best, but store-bought works in a pinch—just strain out any seeds. Want extra richness? Add 1 tbsp of whipped cream at the end. The lemon juice might seem odd, but it cuts through the sweetness and makes the whole thing sing. Trust me on this one—it's the difference between good and restaurant-quality.
This soft serve is best served immediately, but if you need to hold it, cover tightly with plastic wrap and refrigerate for up to 2 hours. The texture will soften slightly, but a quick spin in the Ninja Creami brings it right back. For parties, double the recipe—the appliance handles it easily. Store any leftovers in an airtight container for 1 day in the fridge, though the flavor peaks fresh. Freezing isn't recommended—it turns grainy. The mix-ins? Prep them ahead and store in the freezer to keep them crisp. This is one dessert where fresh is always better, but the convenience can't be beat.
Why You'll Love This Recipe
- I’ll be real: store-bought soft serve costs a fortune for a tiny cup. This recipe stretches to feed four for under $5, and leftovers? They last in the freezer for weeks. Plus, the ingredients are stuff I already have. Smart move.
- No-Fuss Magic: I swear, this takes less effort than waiting for takeout. Just dump the cream, milk, and sugar into the Ninja, hit churn, and—voilà—creamy perfection in 20 minutes. No ice cream maker? No problem.
- Vanilla Wafer Crunch: That first bite where the soft serve melts into your mouth, then hits the crispy vanilla wafer bits? Honestly, it’s the best of both worlds. The cookies add this grown-up twist that makes it feel like a treat, not just dessert.
- Party in a Bowl: Between us, this is my go-to for game days, potlucks, or even lazy Sunday mornings. Serve it in cups with a sprinkle of cookies on top, or let everyone scoop their own—it’s always a hit, and I’m not just saying that.
Step-by-step instructions for Ninja Creami soft serve vanilla ice cream
Here's how to transform simple ingredients into restaurant-quality soft serve in record time.
Combine Liquid Ingredients for Perfect Texture
In a mixing bowl, whisk together the 2 cups heavy whipping cream, 1 cup whole milk, 0.25 cup granulated sugar, 1 tablespoon pure vanilla extract, 0.25 teaspoon salt, and 0.5 teaspoon lemon juice. The lemon juice brightens the flavor while preventing iciness, and the salt enhances all the sweet elements. Whisk until the sugar dissolves completely—this ensures a smooth, creamy base without any graininess.
Here's the thing—this mixture needs to be perfectly chilled before freezing. Place the bowl in the refrigerator and let it sit for at least 30 minutes while you prepare your Ninja Creami. Cold ingredients freeze faster and create a denser, creamier texture. If you're short on time, you can place the bowl in an ice bath for 15 minutes, but don't skip this step entirely. Warm ingredients will create icy, clumpy soft serve instead of that luxurious, velvety texture we're after.
Add Mix-Ins and Prepare for Freezing
Once your liquid mixture is chilled, add the 0.5 cup crushed vanilla wafer cookies and 0.25 cup dark chocolate chips to the bowl. Gently fold these in using a rubber spatula—you want them evenly distributed but not mashed into the mixture. For the strawberry flavor, add the 0.25 cup strawberry puree and fold it in last. The puree will add subtle fruitiness without making the texture too watery.
Real talk: don't overmix. Just until everything is incorporated. The crushed cookies and chocolate chips will soften slightly during freezing, creating delightful pockets of texture in every bite. If you're making this for kids or picky eaters, you can reduce the chocolate chips to 0.125 cup—it's still delicious, just less intense.
Freeze with Precision in Your Ninja Creami
Pour the mixture into your Ninja Creami container, filling it to the maximum line. This is crucial—the container has specific measurements to ensure proper freezing. Close the lid securely and place the container in the freezer compartment of your Ninja Creami machine. Select the "Soft Serve" setting and let it run for 8-10 minutes until the mixture reaches a thick, creamy consistency.
You'll know it's perfect when you can press the side of the container and the mixture holds its shape but still has that beautiful, swirlable soft serve texture. If it's still too liquidy after 10 minutes, let it freeze for another 1-2 minutes. But don't over-freeze—this is soft serve, not hard ice cream. The ideal texture should be thick enough to hold its shape when scooped but still creamy enough to swirl beautifully on top of sundaes or cones.
Serve Immediately for Maximum Creaminess
Remove the container from the Ninja Creami and let it sit at room temperature for 1-2 minutes before scooping. This brief rest period allows the mixture to reach the perfect serving temperature—cold enough to be refreshing but not so hard it loses its creamy texture. Use a soft serve scoop or ice cream scoop to serve immediately into cones, bowls, or glasses.
The reason we serve it fresh is that soft serve starts to harden within 10-15 minutes once removed from the freezer. If you need to make multiple servings, keep the container in the freezer and scoop as needed, letting it sit for just 30 seconds between scoops to maintain that perfect texture. Top with extra crushed cookies, chocolate chips, or a drizzle of warm caramel for an amazing presentation that looks as good as it tastes.
Pro Tips For Making Ninja Creami Soft Serve Vanilla Ice Cream
- CHILL THE MIX FIRST: I learned this the hard way—pouring warm cream into the Ninja Creami’s bowl makes it struggle. Whisk your sugar, milk, and cream mixture until fully dissolved, then refrigerate it for 30 minutes before churning. The machine handles cold liquid way better, and you’ll avoid that sad, grainy texture.
- USE FRESH VANILLA BEANS: Pure vanilla extract is fine, but if you’re splurging, scrape the seeds from a vanilla bean into the mix with the extract. The tiny specks of vanilla pod add depth that bottled extract can’t match. (Yes, it’s an extra step, but your soft serve will taste like a bakery, not a generic dessert.)
- DON’T OVERMIX THE COOKIES: Crush the vanilla wafers too finely, and you’ll end up with a gritty, cookie-heavy mess. Aim for pea-sized chunks—just enough to add texture without turning your soft serve into a crumble. Pulse them in the food processor, then taste-test before adding all of them.
- CHURN IN BATCHES: The Ninja Creami can only handle so much at once. Split your mix into two churns if needed—overfilling the bowl leads to ice crystals and a weaker texture. If you’re making a big batch, let the first one fully churn (about 3-4 minutes) before adding the second. Patience here keeps your soft serve silky.
Wine and beer pairings for this dish
Sweet Wine Pairings
For this ultra-creamy vanilla soft serve, I reach for Moscato d'Asti—a lightly sparkling Italian wine with 1-2% residual sugar and delicate floral notes. The effervescence cleanses your palate between bites, while its subtle sweetness mirrors the dessert's richness without overpowering it.
Serve chilled at 45-50°F for the perfect contrast. 🍷
Fruity Beer Options
A Belgian-style witbier like Stella Artois Wit or Hoegaarden works beautifully with the vanilla and strawberry undertones. The orange peel and coriander notes complement the cookies and chocolate chips, while the crisp finish balances the creaminess.
For a bolder option, try a Belgian Dubbel—its caramel and spice notes add depth to the mix-ins.
Creamy Liqueur Drizzles
Elevate your soft serve with a 1-ounce drizzle of Baileys Irish Cream or Amaretto di Saronno before serving. The liqueur's smoothness enhances the vanilla flavor while adding a luxurious touch.
For a lighter option, a vanilla bean-infused simple syrup (made with 1 cup sugar + 1 cup water + 1 vanilla bean) adds sweetness without alcohol. 💛
Coffee Pairings
If you're serving this as a post-dinner treat, pair it with a cortado or cappuccino made with whole milk (to match the recipe's dairy). The espresso's bitterness cuts through the sweetness, while the milk foam creates a creamy contrast.
For a decaf option, try a vanilla chai latte—the spices complement the vanilla beautifully.
Non-Alcoholic Options
For kids or those avoiding alcohol, a sparkling apple cider like Martinelli's adds a refreshing fizz. The tartness balances the sweetness, while the bubbles mimic wine's cleansing effect. For a richer option, try a chilled vanilla chai tea—the spices enhance the dessert's flavor profile without alcohol.
Seasonal Adaptations
In summer, pair with peach or mango nectar (chilled) to complement the strawberry notes. For fall, a spiced rum float (using 1 oz dark rum + 1 oz hot apple cider) adds warmth.
Winter calls for hot chocolate with a whipped cream topping—double the soft serve recipe for maximum indulgence. ✨
Nutrition facts
Frequently asked questions
Can I make this without a Ninja Creami?
While the Ninja Creami delivers the perfect texture in minutes, you can adapt this recipe using an ice cream maker (churn for 20-25 minutes) or even a blender + freezer method. For the blender approach, freeze the mixture in a shallow tray, then blend in 10-second bursts until smooth. The texture won't be as silky, but it'll still be delicious.
Why did my soft serve turn icy instead of creamy?
This usually happens when ingredients aren't chilled enough or the mixture is over-processed. Always use cold cream and milk straight from the fridge, and don't exceed 10 minutes in the Ninja Creami. For extra insurance, add 1 tbsp corn syrup to the base mixture—it prevents ice crystal formation.
Can I make this dairy-free?
Yes! Replace the heavy cream with full-fat coconut milk (chilled overnight) and use unsweetened almond milk instead of whole milk. The texture will be slightly lighter but still creamy. Add 1 tbsp coconut oil to improve richness. Note: dairy-free versions freeze harder, so serve immediately after processing.
How do I store leftovers?
For best results, eat fresh—but if you must store, transfer to an airtight container and refrigerate for up to 2 hours. The texture will soften slightly. To revive, give it a 30-second spin in the Ninja Creami. Never freeze leftovers—they'll become grainy. For parties, make it fresh in batches.
What's the best way to serve this?
Classic soft serve style: in waffle cones or over vanilla wafers. For adults, drizzle with warm caramel or melted chocolate. Kids love it with sprinkles or crushed Oreos>. Pro tip: Use a soft serve scoop for perfect swirls—it melts slower than regular ice cream scoops.