
Desserts
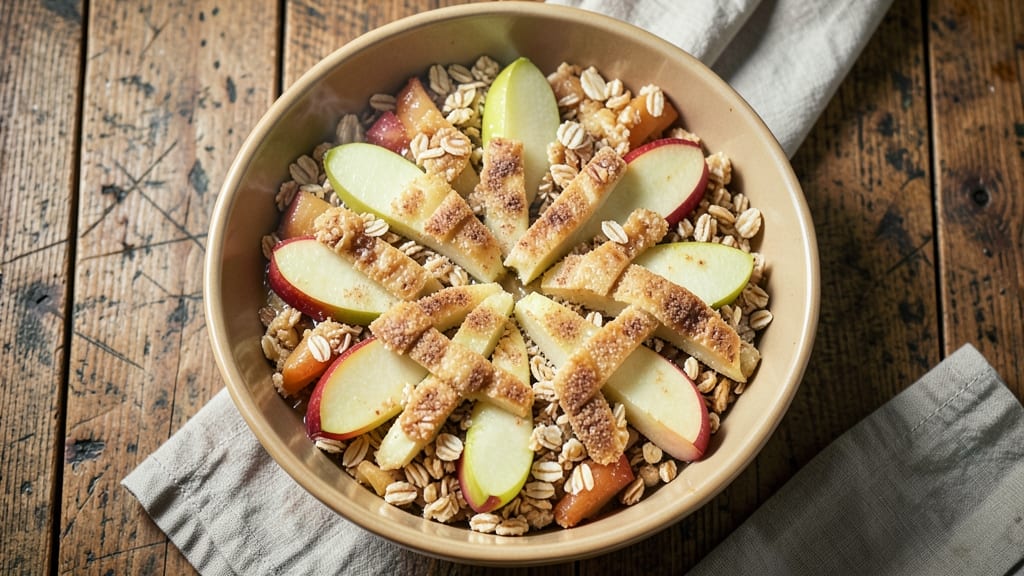
This nostalgic old Betty Crocker apple crisp recipe delivers the same cozy magic—cinnamon-kissed apples baked beneath a buttery, crunchy oat topping that turns golden and impossible to resist. This recipe delivers the classic dessert experience with minimal effort, perfect for family gatherings or cozy weeknight treats.
The secret lies in balancing tender apples with a buttery, spiced topping that bakes to crispy perfection.
What makes this recipe stand out is its foolproof technique: no fancy ingredients, just simple pantry staples like apples, cinnamon, and oats. The filling cooks down into a tender, caramelized base while the topping transforms into a delightful crunch.
It’s the kind of dessert that feels homemade yet requires just 30 minutes of active prep and 45 minutes in the oven.
By the time it comes out, you’ll have a golden-brown crisp with a warm, spiced apple filling that’s just sweet enough and a topping so crisp it’ll disappear from the plate.
The aroma alone will have everyone gathering around the table. Serve it warm with a scoop of vanilla ice cream or a drizzle of caramel for that extra touch of nostalgia.
This recipe scales beautifully for crowds, making it ideal for holiday dinners or potlucks. The best part? Leftovers reheat wonderfully, though I’ve never had any last that long. Let’s get baking!
Ingredients for old betty crocker apple crisp
Classic pantry staples meet nostalgic dessert magic in this timeless apple crisp.
| Ingredient | Amount | Notes |
|---|---|---|
| Granny Smith Apples 🍎 | 4 medium | Peeled, cored, sliced |
| Honeycrisp Apples 🍎 | 2 medium | Peeled, cored, sliced |
| All-Purpose Flour 🌾 | 1 cup | For topping texture |
| Old-Fashioned Rolled Oats 🌾 | 1 cup | Not instant oats |
| Brown Sugar 🍚 | ¾ cup | Packed firmly |
| Granulated Sugar 🍚 | ½ cup | For caramelization |
| Unsalted Butter 🧈 | ¾ cup | Cold, cubed |
| Ground Cinnamon 🌿 | 1 tbsp | Freshly ground preferred |
| Ground Nutmeg 🌿 | ½ tsp | Freshly grated |
| Salt 🧂 | ½ tsp | Fine sea salt |
| Vanilla Extract 🍯 | 1 tsp | Pure vanilla |
| Lemon Juice 🍋 | 1 tbsp | Freshly squeezed |
The apples are the heart of this recipe. Granny Smith adds tartness while Honeycrisp brings natural sweetness—together they create that perfect balance. Most grocery stores carry these varieties, but any crisp apples (like Fuji or Braeburn) work. Look for firm, unblemished fruit—avoid anything soft or bruised. I like to slice them about ¼-inch thick for even baking, and a quick toss with lemon juice keeps them from browning while you prep the topping. Trader Joe's and Costco often have pre-washed apples, which saves time.
No Granny Smith? McIntosh or Rome apples work in a pinch—they're more tart but still delicious. Running low on butter? Vegetable shortening keeps the topping crisp, though it lacks flavor. The oats are non-negotiable for texture—quick oats won't give the same crunch. For a gluten-free version, swap the flour for almond flour or gluten-free 1:1 blend. The spices? Penzeys or McCormick brands stay fresh longer. If you're feeling fancy, add a pinch of cardamom to the topping for a modern twist.
This crisp reheats beautifully—just 5 minutes at 350°F makes it taste fresh again. Store leftovers in an airtight container for up to 4 days in the fridge, though I've never had any last that long. For make-ahead convenience, assemble the crisp a day ahead and refrigerate before baking—it keeps perfectly. Freezes well too: bake, cool completely, then wrap tightly for up to 3 months. The topping stays crisp even after freezing, which always surprises me.
Why You'll Love This Recipe
- No-Fuss Assembly: I swear by this recipe when I’m too tired to fuss—just slice those tart Granny Smiths and sweet Honeycrisp apples into the pan, dump the oat-flour mix on top, and bake. The only measuring I do is the brown sugar, and honestly? That’s the best part.
- Weeknight or Guest Night: Make it for yourself on a Tuesday with leftover yogurt on the side, or double the batch for company. It’s the same easy recipe either way, and the leftovers reheat beautifully—just pop them in the oven until golden again.
- Budget-Friendly Crowd-Pleaser: Uses pantry staples (flour, oats) and apples you can buy in bulk. A single batch feeds four, but I’ve stretched it to six when my kids beg for seconds—no one turns down this reliable, affordable dessert.
Step-by-step instructions for old Betty Crocker apple crisp recipe
This classic apple crisp delivers perfect balance—tender spiced filling with a crunchy buttery topping.
Prepare the Apple Filling
In a large mixing bowl, combine the peeled and sliced 4 medium Granny Smith Apples and 2 medium Honeycrisp Apples. The Granny Smith adds tartness while Honeycrisp provides sweetness and texture. Sprinkle the apples with the 0.5 cup granulated sugar and 1 tbsp lemon juice, tossing gently to coat evenly. The lemon juice prevents browning and enhances the apples' natural sweetness.
In a separate small bowl, whisk together the 1 tsp vanilla extract and the 1 tbsp ground cinnamon. Pour this spice mixture over the apples and toss again until fully distributed. Add the 0.5 tsp ground nutmeg and 0.5 tsp salt, mixing lightly. This combination creates warm, aromatic notes that complement the apples perfectly. Transfer the prepared apples to a 9x13-inch baking dish and spread them evenly in a single layer.
Make the Crisp Topping
In the same large mixing bowl you used for the apples, combine the 1 cup old-fashioned rolled oats, 1 cup all-purpose flour, 0.75 cup brown sugar, and 0.5 tsp salt. Stir well to distribute all ingredients evenly. The oats provide texture while the flour creates a binding structure for the topping.
Cut the 0.75 cup unsalted butter into small cubes and add them to the dry mixture. Use your fingers or a pastry cutter to work the butter into the flour mixture until it resembles coarse crumbs with pea-sized butter pieces remaining. This texture ensures a crispy topping without becoming greasy. The cold butter is crucial—it prevents the topping from melting too quickly during baking.
Assemble and Bake
Sprinkle the oat mixture evenly over the prepared apple filling in the baking dish. Press down gently but not firmly—you want the topping to stay crumbly rather than compact. This creates pockets of air that will crisp up beautifully during baking. Place the dish on a baking sheet to catch any potential spills.
Bake in a preheated 375°F oven for 35-40 minutes, until the topping is golden brown and the filling is bubbling at the edges. The apples should be tender but not mushy, and the topping should have a crisp texture. If the edges brown too quickly, tent the dish with aluminum foil during the last 10-15 minutes of baking to prevent over-browning.
Cool and Serve
Remove the apple crisp from the oven and let it cool for 10-15 minutes before serving. This resting period allows the filling to set slightly and the topping to crisp up further. Serve warm with a scoop of vanilla ice cream or a dollop of whipped cream for the ultimate dessert experience.
For best results, store any leftovers in an airtight container in the refrigerator for up to 3 days. Reheat individual portions in the microwave for 30-45 seconds or in a 350°F oven for 10-15 minutes to restore the crispy texture. The flavor actually improves after the first day as the spices meld with the apples.
Pro Tips For Making Old Betty Crocker Apple Crisp
- CHOP APPLES UNEVENLY: Don’t slice them perfectly—cut Granny Smiths and Honeycrisp into ¼-inch wedges with some chunks left whole. The uneven sizes mean some apples soften faster, while others hold shape, giving you texture in every bite. (Yes, it looks messy, but that’s how you get the classic crisp.)
- TOAST YOUR OATS: Spread the old-fashioned rolled oats on a dry skillet over medium heat for 3–4 minutes until they’re golden and smell nutty. This deepens their flavor and prevents the topping from turning gummy. (I learned this the hard way—raw oats make a sad, doughy mess.)
- DON’T SKIP THE BUTTER: The recipe calls for ½ cup melted butter in the topping—don’t substitute oil or cut it. Butter’s fat keeps the oat crumble crispy, while its milk solids add caramelized browning. (I know, it’s extra calories, but this is dessert. Worth it.)
- BAKE UNTIL BUBBLY: Pull the dish out when the edges are deep golden and the apples are bubbling like a stew. Tent with foil for 5 minutes, then let it sit another 10—this traps steam so the topping stays crisp while the filling sets. (Peeking too early ruins everything.)
Pro cooking tips for this recipe
Butter Temperature Matters
The key to a perfectly crisp topping lies in using cold butter—cut it into ½-inch cubes and keep it chilled until mixing. Cold butter creates steam pockets during baking, ensuring that crunchy texture we all love.
I like to pull my butter straight from the fridge and cut it with a sharp knife just before mixing with the dry ingredients. If your butter starts to soften too quickly, chill the bowl for 10 minutes before proceeding. 🧈
Even Apple Slicing
Slice your apples uniformly at ¼-inch thickness for even cooking. I use a mandoline slicer for consistency, but a sharp chef’s knife works too. Thicker slices will stay firmer, while thinner ones caramelize faster.
Toss the sliced apples with 1 tbsp lemon juice immediately to prevent browning while you prepare the topping. This simple step keeps your crisp looking fresh and vibrant.
Prevent Over-Browning
If your topping browns too quickly, tent the baking dish with aluminum foil during the last 10-15 minutes of baking. This traps heat while allowing steam to escape, preventing a burnt exterior.
I also recommend placing the dish on a baking sheet to catch any spills—this keeps your oven clean and makes cleanup a breeze. The goal is golden brown, not charred.
Spice Freshness Check
Freshly ground spices make all the difference in this recipe. I always use Penzeys or McCormick ground cinnamon and nutmeg for the best flavor.
If your spices are over a year old, toast them lightly in a dry pan for 1-2 minutes to revive their aroma before adding to the apples. A pinch of cardamom in the topping adds a modern twist—just ¼ tsp enhances the warm spice notes without overpowering.
Rest Before Serving
Let your apple crisp rest for 10-15 minutes after baking—this allows the filling to set and the topping to crisp up further. Serving it warm with vanilla ice cream is my favorite, but I’ve also drizzled homemade caramel sauce over the top for extra decadence.
The resting time also makes it easier to slice cleanly without losing the topping. Patience here pays off with every bite. 🍴
Make-Ahead Magic
Assemble this crisp a day ahead and refrigerate it before baking—it keeps perfectly and tastes even better the next day. For freezing, bake the crisp, cool completely, then wrap it tightly in plastic wrap and foil.
It freezes for up to 3 months, and the topping stays delightfully crisp when reheated. I’ve even made two crisps at once and frozen one for lazy weeknights—just reheat at 350°F for 15 minutes to restore that fresh-from-the-oven magic.
Nutrition facts
Frequently asked questions
Can I use frozen apples instead of fresh in this crisp?
Yes, but thaw and drain them thoroughly first! Use 2 cups frozen chopped apples (thawed) plus 1 extra apple to compensate for water loss. Spread them on a paper towel to remove excess moisture before baking. This prevents a soggy topping—just don't skip the lemon juice, which helps balance the texture.
Why does my crisp topping get greasy instead of crispy?
The butter likely melted too quickly during mixing. Always use cold butter cut into small cubes and work it into the dry ingredients until you have pea-sized pieces remaining. Chill your mixing bowl for 10 minutes if your kitchen is warm. The goal is coarse crumbs, not a paste!
What's the best way to make this crisp gluten-free?
Swap the all-purpose flour for a 1:1 gluten-free baking blend (like Bob's Red Mill) and use certified gluten-free oats. The texture will be slightly denser, but still delicious. For extra crunch, add ¼ cup chopped pecans to the topping. Just be sure to use separate utensils to avoid cross-contamination.
How do I keep the topping from sticking to the pan?
Line your 9x13-inch baking dish with parchment paper, leaving overhang on two sides for easy removal. Lightly grease the parchment with butter or oil. If you skip the parchment, spray the dish with baking spray before adding the apples. The crisp will release cleanly when cool, and you can even reuse the parchment for storage!
Can I make this crisp in a smaller dish?
Yes! For a 9x9-inch dish, reduce the recipe by about 25% (use 3 apples total and adjust toppings accordingly). For a 7x11-inch dish, reduce by 40%. The baking time stays the same, but check for doneness at 30 minutes—smaller pans cook faster. The key is maintaining the same thickness of apple layer!