
Soups & Stews
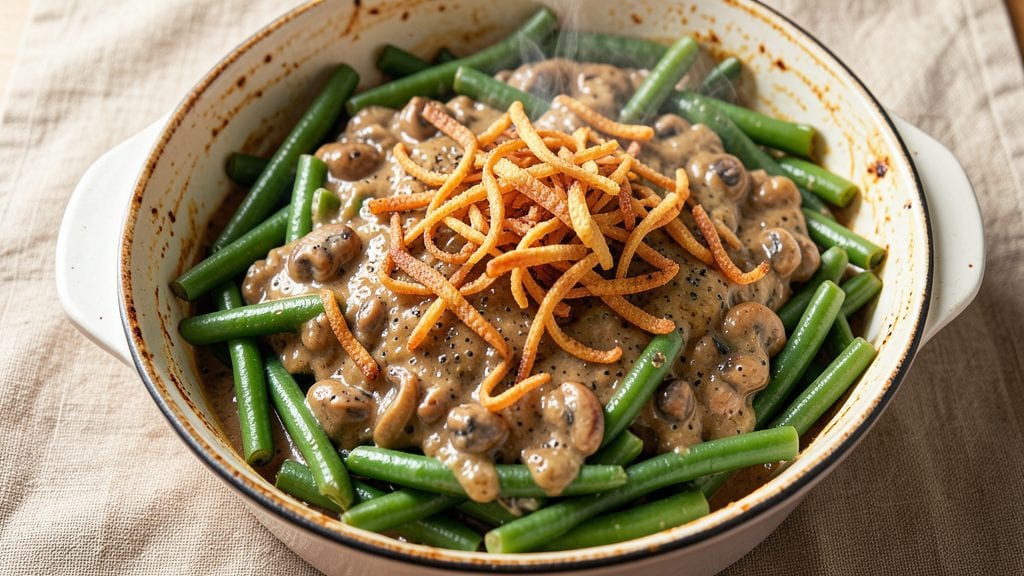
The original Campbell Soup green bean casserole recipe delivers that iconic mid-century coziness—creamy mushroom sauce and crunchy fried onions just as you remember. The classic 1950s method delivers that signature one-bowl magic—tender green beans bathed in rich, velvety sauce, topped with golden, crunchy onions that create the perfect textural contrast.
I've recreated this dish exactly as it was meant to be, using authentic techniques that preserve its retro charm while ensuring modern reliability.
The beauty of this recipe lies in its simplicity and foolproof results. With just a handful of ingredients and a single baking dish, you'll achieve that iconic casserole texture—creamy yet firm, with a golden crust that's impossible to resist.
The key is layering the green beans properly and baking until the sauce thickens just enough to hold everything together, while the fried onions get perfectly crispy.
This dish is designed to feed a crowd or satisfy a family dinner, all while bringing back the warmth of a classic comfort food.
What makes this version special is the balance between tradition and adaptability. While we're staying true to the original recipe, I've included notes for modern twists—like using gluten-free soup mix or vegan cream substitutes—so you can enjoy this dish no matter your dietary needs.
The result is a creamy, comforting side that pairs perfectly with roasted chicken, ham, or even as a standalone main for a potluck. The aroma alone will transport you back to simpler times, while the taste delivers pure, retro-inspired comfort.
Ready in just 45 minutes, this casserole requires minimal prep and hands-off baking, making it perfect for busy weeknights or holiday gatherings. The crispy fried onions add a satisfying crunch that contrasts beautifully with the creamy sauce, creating every bite with that nostalgic texture.
Whether you're making it for the first time or recreating a childhood memory, this recipe delivers the classic Campbell's green bean casserole experience—just as it was meant to be.
Ingredients for original campbell soup green bean casserole
Just twelve ingredients for that nostalgic, creamy green bean casserole everyone loves.
| Ingredient | Amount | Notes |
|---|---|---|
| Green Beans 🥦 | 2 lbs | Fresh or frozen, trimmed |
| Campbell's Cream of Mushroom Soup 🍄 | 2 cans | (10.5 oz each) condensed soup |
| Milk 🥛 | ½ cup | Whole milk for creaminess |
| French Fried Onions 🧅 | 1 cup | Seasoned, for topping (🧂) |
| Butter 🧈 | ½ cup | Unsalted, melted |
| All-Purpose Flour 🌾 | ¼ cup | For thickening sauce |
| Salt 🧂 | ½ tsp | Kosher or sea salt |
| Black Pepper 🌶️ | ¼ tsp | Freshly ground preferred |
| Garlic Powder 🧄 | ½ tsp | For extra depth |
| Onion Powder 🧅 | ½ tsp | For savory base |
| Ground Black Pepper 🌶️ | ¼ tsp | Extra for topping |
| Parmesan Cheese 🧀 | ¼ cup | Freshly grated, optional |
The Campbell's Cream of Mushroom Soup is the heart of this dish—grab the condensed version (not low-fat) for that authentic 1950s richness. I always buy the classic red can from the store's center aisle, not the organic or gluten-free versions. Fresh green beans? Trim the ends and snap them clean—no need to peel. Frozen works too (thaw first), but fresh has that extra snap. The French fried onions are non-negotiable—Trader Joe's or Kroger brands give the best crunch. Store them in an airtight container so they stay crispy until baking day.
No Campbell's soup? Gluten-free cream of mushroom soup works in a pinch, or make your own by blending cooked mushrooms, milk, and a little flour. Short on milk? Heavy cream makes it extra lush, but whole milk keeps it classic. The butter and flour combo thickens the sauce—don't skip it, or the casserole will be too soupy. For extra flavor, add a dash of Worcestershire sauce (trust me, it blends right in). And if you're avoiding dairy, coconut milk or cashew cream can replace the milk/butter mix—just add a splash of lemon juice to balance.
This casserole tastes even better the next day—make it ahead and reheat covered at 350°F for 15 minutes. The onions crisp up faster when baked fresh, so don't add them until the last 10 minutes. Store leftovers in the fridge for up to 5 days, though I've never had it last that long. Freeze portions for up to 3 months—just thaw overnight in the fridge before reheating. The Parmesan? Sprinkle it on right before serving, so it stays fresh and melty.
Why You'll Love This Recipe
- Pantry Magic: I swear by this recipe when I’ve got nothing but canned soup and frozen veggies. The moment I mix that Campbell’s Cream of Mushroom with milk and butter, it turns into this velvety, umami-rich base that needs nothing else to shine.
- Crunchy-Top Obsession: That final sprinkle of French fried onions isn’t just garnish—it’s the star. The contrast between the creamy green bean soup and the buttery, toasty crunch? Chef’s kiss. I’ll fight anyone who says it’s just “topping.”
- Leftovers That Don’t Suck: Honestly, this dish begs for seconds—and thirds. The flavors actually get better the next day, especially if you reheat it with a splash of milk to keep that creamy texture. My freezer’s always stocked with portions because it’s the only casserole my picky teens will eat cold.
- Weeknight Workhorse: Between us, this is my go-to when I’m exhausted but need dinner on the table. Toss in the green beans, dump in the soup mix, bake, and boom—done. The only “work” is the 10 minutes of stirring, and the cleanup is one bowl. (Yes, even on a Tuesday night.)
Step-by-step instructions for original Campbell soup green bean casserole recipe
Here's how to recreate this nostalgic classic with rich, creamy layers and crispy toppings.
Blanch and Prepare the Green Beans
Start by trimming the ends off the 2 lbs of green beans if using fresh ones. For frozen green beans, there's no need to thaw them first. In a large pot, bring 4-6 quarts of salted water to a rolling boil over high heat. Add the green beans and cook for exactly 3-4 minutes until they're bright green and tender-crisp but still have a slight bite. Drain immediately in a colander and rinse under cold water to stop the cooking process.
This quick blanching preserves their vibrant color and crisp texture, which is essential for that perfect retro casserole texture. Spread them on a baking sheet to cool slightly while you prepare the creamy sauce. The beans should be hot but not steaming when you add them to the sauce mixture later - this helps them absorb all that rich flavor.
Make the Creamy Mushroom Sauce
In a large mixing bowl, combine the 2 cans of Campbell's Cream of Mushroom Soup, 0.5 cup of milk, 0.5 cup of melted butter, 0.25 cup of all-purpose flour, 0.5 teaspoon of salt, 0.25 teaspoon of black pepper, 0.5 teaspoon of garlic powder, and 0.5 teaspoon of onion powder. Stir vigorously with a whisk or electric mixer until the mixture is completely smooth and well combined, with no visible flour streaks remaining.
This sauce is the heart of your casserole, so take your time here. The mixture should be thick but pourable - like heavy cream. If it looks too thick, add 1-2 tablespoons of additional milk to reach the perfect consistency. The flavors will meld beautifully as you assemble everything, creating that classic creamy texture we all love.
Combine Beans and Sauce
Add the blanched green beans to the sauce mixture and gently fold everything together until the beans are completely coated. The heat from the hot beans will help warm the sauce slightly, making it easier to mix. Transfer the entire mixture to a greased 9x13-inch baking dish, spreading it out evenly in one layer.
Don't worry if the sauce looks a bit thin at this stage - it will thicken beautifully as it bakes. The beans should be evenly distributed throughout, with no dry spots. This is where all the magic happens, as the flavors meld together during baking. The dish should look like a creamy green forest when you're done spreading it out.
Prepare the Topping Mixture
In a small bowl, combine 1 cup of French fried onions, 0.25 teaspoon of ground black pepper, and 0.25 cup of freshly grated Parmesan cheese. Mix gently with a fork until the onions are evenly coated with the cheese and pepper. This topping is what gives the casserole its signature crunch and cheesy flavor.
Here's a pro tip: For extra crispiness, spread the onions out on a baking sheet and broil for 2-3 minutes before adding them to the casserole. This step isn't absolutely necessary but will give you that perfect restaurant-style crunch. The mixture should look golden and inviting, ready to be sprinkled on top of your creamy green bean masterpiece.
Bake to Golden Perfection
Preheat your oven to 350°F. Sprinkle the prepared topping mixture evenly over the green bean mixture in the baking dish. For best results, use a spoon to gently press down on the topping so it makes good contact with the creamy layer below. This helps create that delicious crispy layer we all know and love.
Bake uncovered for 30-35 minutes, until the top is golden brown and the edges are bubbling. The center should still be slightly jiggly when you test it - it will continue cooking slightly after you remove it from the oven. The casserole is done when it smells heavenly and the top has developed that beautiful golden-brown color. Let it rest for 5 minutes before serving to allow the juices to set.
Pro Tips For Making Original Campbell Soup Green Bean Casserole
- Blanch the Green Beans: Drop those beans into boiling water for exactly 3-4 minutes—no more, no less—then shock them in ice water. Overcooking turns them mushy, and skipping the ice bath means they’ll keep cooking in the oven. I learned this the hard way when my casserole looked like a sad, watery pudding instead of the creamy, crisp-topped classic.
- Whisk the Soup Cold: Take the Campbell’s soup and milk out of the fridge before mixing—cold ingredients blend smoother and don’t curdle. Stir in the butter last, one pat at a time, until fully melted. I used to dump everything in hot and ended up with a soup that separated like oil and water.
- Bake Until Bubbly: Don’t pull it out at 350°F just because the recipe says 30 minutes. The casserole is done when the edges are golden and the center jiggles just slightly—like a wobbly Jell-O. If it’s still liquidy, give it 5-10 more minutes. Underbaked casserole is the fastest way to ruin a holiday dinner.
- Toast the Onions First: Spread the French fried onions on a baking sheet and broil for 2-3 minutes before sprinkling them on top. The heat crisps them up instantly, giving you that perfect crunch instead of soggy bits. (Yes, even if you’re impatient like me—just watch them like a hawk.)
Common mistakes when making your original campbell soup green bean casserole
Overcooking the Beans
Blanching green beans for more than 4 minutes turns them mushy, ruining that essential tender-crisp texture. I’ve seen people boil them until they’re completely soft—this is a cardinal sin.
The beans should stay bright green and have a slight bite. For frozen beans, skip thawing first; they’ll cook faster and maintain their shape better. 🥦
Skipping the Sauce Thickening
The butter-flour slurry is non-negotiable—it’s what gives the sauce that perfect creamy consistency. I’ve made this mistake by omitting the flour, and the result was a watery, soupy mess. Whisk the mixture until completely smooth to avoid lumps.
If it’s too thick, add 1-2 tablespoons of milk gradually. The sauce should coat the back of a spoon but still be pourable. 🧈
Uneven Topping Distribution
Adding the fried onions all at once creates clumps and uneven browning. I learned this the hard way—my first attempt had some areas with too many onions and others almost bare. Sprinkle them evenly and press down gently with a spoon to ensure even contact with the creamy layer.
For extra crispiness, broil the onions for 2-3 minutes before adding them to the casserole. 🧅
Baking at the Wrong Temperature
Ovens vary, but 350°F is critical for this recipe. Baking at 375°F can cause the top to burn before the center is fully heated, while 325°F may leave the sauce undercooked.
Use an oven thermometer to verify your oven’s accuracy. The casserole is done when the top is golden and the edges are bubbling, but the center is still slightly jiggly. 🌡️
Not Resting Before Serving
Cutting into the casserole immediately after baking causes the creamy layer to slide out of the dish. Let it rest for 5-10 minutes to allow the juices to redistribute and the structure to set.
This also helps the fried onions crisp up further. Patience here makes all the difference—trust me, it’s worth the wait. ⏳
Using Low-Quality Fried Onions
Not all fried onions are created equal. Cheap, pre-packaged brands can turn soggy during baking. I recommend Trader Joe’s or Kroger for that perfect crunch. For a restaurant-quality finish, spread the onions on a baking sheet and broil for 2-3 minutes before adding them to the casserole.
This step elevates the dish from homemade to showstopper. 💫
Nutrition facts
Frequently asked questions
Can I make this casserole ahead of time?
This dish actually tastes better the next day. Assemble the casserole as directed, then refrigerate uncovered for up to 24 hours before baking. When ready to bake, add the fried onions and bake at 350°F for 30-35 minutes (cover loosely with foil if worried about browning too quickly). The flavors meld beautifully overnight.
What if I don't have French fried onions?
You can make a quick substitute by thinly slicing 1 large yellow onion, tossing with 1 tablespoon butter and 1 teaspoon sugar, then baking at 400°F for 20-25 minutes until caramelized. For extra crunch, broil for 2-3 minutes at the end. While not identical, it adds that sweet, savory contrast the dish needs.
Can I make this recipe gluten-free?
Yes! Use a gluten-free cream of mushroom soup and replace the all-purpose flour with 1/4 cup cornstarch or gluten-free flour blend. The sauce will still thicken properly, though you may need to whisk it more vigorously. For the fried onions, check labels for gluten-free certified brands like Trader Joe's or Annie's.
Why does my casserole turn out watery?
Watery results usually happen when the sauce isn't thickened enough. Make sure to whisk the butter and flour mixture until completely smooth—no lumps! If it's still too thin after baking, simmer the mixture on the stovetop for 5-10 minutes before assembling. The sauce should coat the back of a spoon but still be pourable.
Can I use this as a main dish instead of a side?
Serve it with a simple garlic bread or Caesar salad for a complete meal. For extra protein, top with crumbled bacon or shredded rotisserie chicken before baking. It's hearty enough to stand alone, especially when paired with crusty bread to soak up the creamy sauce.