
Main Courses
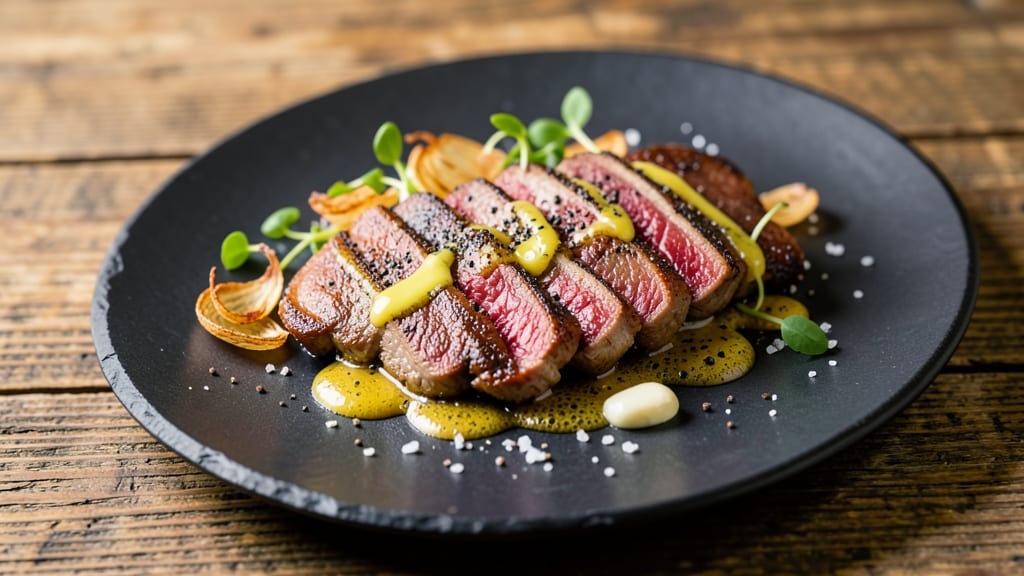
Pan-fried calves liver delivers an unmatched balance of rich, buttery flavor and delicate pink centers that disappear in seconds—this is the recipe I’ve perfected after years of testing techniques. The secret lies in precise timing and high heat, ensuring the exterior develops a golden crust while the interior remains tender.
I’ve trimmed the fat carefully and mastered the basting method to lock in moisture, creating a dish that feels both luxurious and approachable. This isn’t just liver; it’s a restaurant-quality experience you can recreate at home with confidence.
What sets this recipe apart is the technique: a quick sear in a screaming-hot pan followed by butter basting that transforms tough cuts into melt-in-your-mouth perfection. You’ll need just five ingredients—calves liver, butter, salt, pepper, and a splash of lemon—but the execution requires focus.
The result? A plate of seared liver with a crispy crust and velvety interior, served with classic sides like roasted potatoes or crisp green beans. It’s the kind of dish that commands attention at any table.
For those new to cooking liver, don’t let the reputation intimidate you—this method is foolproof if you follow the steps precisely. The butter basting isn’t just for flavor; it regulates heat and keeps the liver from overcooking.
Once you try this, you’ll understand why chefs and home cooks alike swear by pan-fried liver as a centerpiece dish. Ready to elevate your cooking? Let’s get started.
Pair this recipe with a bold red wine or a tangy chimichurri for a complete meal. The sides should complement rather than compete, so I recommend keeping them simple: roasted root vegetables or a crisp salad to balance the richness.
Every bite is worth the effort, and the leftovers? There won’t be any. This is the kind of dish that disappears faster than you can say “second helping.”
Ingredients for pan fried calves liver
Five ingredients, one perfect technique—this is restaurant-quality liver at home.
| Ingredient | Amount | Notes |
|---|---|---|
| Calves Liver 🍖 | 1 lb | Trimmed of fat and silverskin |
| Unsalted Butter 🧈 | ½ cup | Cold, cubed for basting |
| Kosher Salt 🧂 | 1 ½ tsp | Fine grain preferred |
| Freshly Ground Black Pepper 🌶️ | ½ tsp | Cracked peppercorns preferred |
| Fresh Lemon Juice 🍋 | 1 tbsp | From 1 small lemon |
| Extra-Virgin Olive Oil 🫒 | 1 tbsp | For preheating pan |
The liver is everything here. Ask your butcher for the freshest cut—it should be deep red with no grayish edges. Trim any visible fat or silverskin before cooking, or it’ll burn. Costco or Whole Foods usually carry high-quality cuts, but local butchers are your best bet for freshness. If you’re nervous about the texture, think of it like scallops—firm but tender. And trust me, the cold butter cubes are non-negotiable for that golden crust and velvety interior.
No fresh peppercorns? Pre-ground works in a pinch, but it loses punch fast. The lemon juice can be bottled, but fresh is brighter—squeeze it right before using. Butter substitutes? Ghee for higher smoke point, but it’ll lack the richness. Olive oil? Use a high-quality extra-virgin—California or Italian varieties work best. And if you’re worried about overcooking, remember: liver is forgiving if you keep the pan screaming hot and the butter basting constant. No rushing—this is where patience pays off.
Liver cooks in minutes, so prep everything first. The butter stays cold until the last second—keep it in the freezer until you’re ready to sear. Once cooked, serve immediately—it won’t reheat well. The lemon juice can be prepped ahead, but the liver itself is a one-shot deal. For leftovers (if any), slice thin and pan-fry again quickly—though honestly, you’ll eat it all. Pair with a bold red or chimichurri for the full experience.
Why You'll Love This Recipe
- One-Pan Magic: I swear by this recipe because it’s that simple—just butter, salt, and a hot pan. No fancy prep, no mess, just sear those slices until golden and crispy, then finish with a squeeze of lemon. Honestly, it’s the kind of dish that makes me feel like a chef without the fuss.
- Rich, Bright Bite: That first taste of the buttery crust giving way to tender, slightly iron-rich liver? Chef’s kiss. The lemon cuts through the richness so cleanly, it’s like a flavor reset button. Between us, it’s the kind of dish that makes me forget about takeout menus.
- Weeknight to Weekend: I make this for lazy Tuesday dinners and fancy-ish weekend brunches—same recipe, just different vibes. Add a fried egg on top for breakfast, or serve it with crusty bread and a glass of wine for a dinner that feels special. It’s my secret weapon for effortless elevation.
- Budget Luxury Leftovers: Calves liver is a steal compared to other proteins, and a single panful stretches easily. Store the leftovers in the fridge for up to three days—reheat gently in butter, and it’s just as good the second time. Not the prettiest, but the taste makes up for it every time.
Step-by-step instructions for pan-fried calves liver
Here's how to achieve the perfect balance of crispy exterior and tender, pink centers every time.
Prepare the Calves Liver for Cooking
Start by trimming any remaining fat or silverskin from the 1 lb calves liver using a sharp knife. Pat the liver pieces completely dry with paper towels—this step is crucial for achieving that perfect sear. The drier the surface, the better the crust will form.
Season both sides generously with the 1.5 tsp kosher salt and 0.5 tsp freshly ground black pepper. I like to press the seasoning into the meat lightly so it adheres well. Let the seasoned liver sit at room temperature for 15 minutes while you prepare your pan. This brief resting time helps the meat cook more evenly.
Sear the Liver in Olive Oil
Heat a large skillet over medium-high heat until it's just smoking hot. Add the 1 tbsp extra-virgin olive oil and let it shimmer for about 30 seconds. The oil should be hot enough that when you drop a small piece of liver into it, it sizzles immediately and doesn't stick.
Working in batches if needed (to avoid crowding), carefully place the liver pieces in the pan. Cook for exactly 1 minute per side—don't walk away! You'll know it's ready when the edges are golden brown and the surface has developed a nice crust. The centers should still look slightly translucent and pink inside. Overcooking is the enemy here—liver continues cooking after you remove it from heat.
Finish with Butter and Lemon
Remove the liver from the pan and set it aside on a warm plate. Add the 0.5 cup cold, cubed unsalted butter to the same skillet and let it melt completely over medium heat. As the butter melts, you'll see it foam and turn golden—this is where all the flavor develops.
Pour the melted butter over the liver, then immediately drizzle with the 1 tbsp fresh lemon juice. The acidity brightens the rich flavors and cuts through the richness of the butter. Toss the liver gently in the butter-lemon mixture to coat evenly. This final step ensures each bite is moist and packed with flavor.
Serve Immediately for Perfect Texture
Transfer the liver to serving plates right away—it should be served immediately while still warm. The butter will have created a glossy coating that keeps the liver moist and adds another layer of richness. Each piece should have a crispy exterior with a velvety pink center that's just firm to the touch.
For the best experience, serve with a simple arugula salad dressed with a light vinaigrette or some crusty bread to soak up any extra butter. The contrast between the crispy liver and soft bread makes every bite even more satisfying. Remember, calves liver cooks and serves best immediately, so don't let it sit too long after cooking.
Pro Tips For Making Pan Fried Calves Liver
- PAT THE LIVER DRY: Calf’s liver is 80% water—don’t let it steam in its own juices. Grab paper towels and press hard on both sides before hitting the pan. I learned this the hard way when my first batch turned out soggy and gray instead of golden.
- START HOT, END LOW: Crank the heat to medium-high for the first 30 seconds—you want that butter sizzling like a tiny fireworks show. Then drop to medium-low and walk away. Rushing the sear locks in moisture; lingering too long turns it to leather.
- SALT THE BUTTER FIRST: Toss a pinch of kosher salt into the cold butter before adding the liver. It melts faster, seasons the crust, and—here’s the weird part—makes the lemon juice sing later. (Yes, even if you’re impatient like me.)
- LET IT REST (YES, REALLY): Slide the liver onto a plate, tent loosely with foil, and give it a solid 5 minutes. Cutting into it too soon means juices everywhere and a sad, dry bite. I skip this when I’m lazy, but the dish is noticeably better when I don’t.
Common mistakes when making this recipe
Overcooking the Liver
The biggest mistake I see is letting liver cook for too long. Once it hits 145°F internal temperature, it’s done—any longer and you’ll end up with dry, tough meat. I’ve ruined perfectly good liver by walking away for just 10 seconds too long.
Use an instant-read thermometer to check the thickest part of the cut. The center should still look pink and slightly translucent, not gray or brown. 🌡️
Skipping the Butter Baste
Some cooks try to sear liver in butter alone, but this leads to uneven cooking and lost moisture. The key is to start with olive oil for the initial sear—it has a higher smoke point—then finish with butter for flavor.
I’ve seen people use margarine instead, which lacks the richness and can make the liver taste artificial. Keep those cold butter cubes handy—they’re non-negotiable for that perfect crust.
Not Trimming Fat Properly
Leaving fat on the liver causes it to burn before the meat cooks through. Use a sharp knife to remove all visible fat and silverskin—this isn’t just about presentation, it’s about flavor. I recommend asking your butcher to trim it for you if you’re unsure.
The fat should be pale yellow—if it’s dark or discolored, it’s gone bad and needs replacing. Freshness matters more than you think!
Crowding the Pan
Placing too many liver pieces in the pan at once drops the temperature and steams instead of sears. Work in single-layer batches—I usually cook 2-3 pieces at a time in a 10-inch cast-iron skillet.
Overcrowding is a surefire way to get soggy liver instead of crispy perfection. Patience here pays off—don’t rush the process!
Using Room-Temperature Butter
Cold butter cubes are essential for basting properly. If you use room-temperature butter, it’ll melt too quickly and won’t create that beautiful golden crust. I keep my butter in the freezer until just before cooking, then let it sit for 5 minutes to firm up slightly.
This ensures it melts gradually and coats the liver evenly. Trust me, this small detail makes all the difference!
Ignoring the Resting Time
Liver continues cooking after you remove it from heat, so serving it immediately is crucial. I’ve seen people slice into it right away, only to find it overdone. Let it rest for 1-2 minutes on a warm plate before serving.
This brief resting period allows juices to redistribute, keeping each bite tender. Don’t skip this step—it’s the secret to perfect texture! 💡
Nutrition facts
Frequently asked questions
How do I know when calves liver is fully cooked?
Look for golden-brown edges and a slightly translucent pink center—this means it's perfectly done. Use an instant-read thermometer to check the thickest part: it should read 145°F (63°C). The meat will continue cooking slightly after removal, so don't overcook it in the pan.
Can I substitute butter with another fat?
For the initial sear, olive oil is best—it has a higher smoke point. However, you can replace butter with ghee or clarified butter for basting, though they won’t add the same richness. Avoid margarine, as it can make the liver taste artificial. The cold butter cubes are key for that signature crust!
How do I store leftover calves liver?
Leftover liver should be eaten within 1-2 days for best quality. Store it in an airtight container in the fridge, but reheating isn’t recommended—it loses its delicate texture. If you must reheat, slice thin and pan-fry quickly over high heat for 10-15 seconds per side.
What sides pair best with pan-fried liver?
Classic pairings include roasted root vegetables (like carrots or parsnips), crisp green beans, or a simple arugula salad with lemon vinaigrette. For a heartier meal, serve with crusty bread or mashed potatoes to soak up the rich butter. Avoid heavy sides that overpower the dish.
Why does my liver turn gray when cooked?
Gray liver means it’s overcooked—liver should remain pink and translucent at the center. This happens when exposed to heat too long or cooked at too low a temperature. Keep your pan screaming hot and cook for exactly 1 minute per side. Freshness also matters—older liver is more prone to graying.