
Desserts
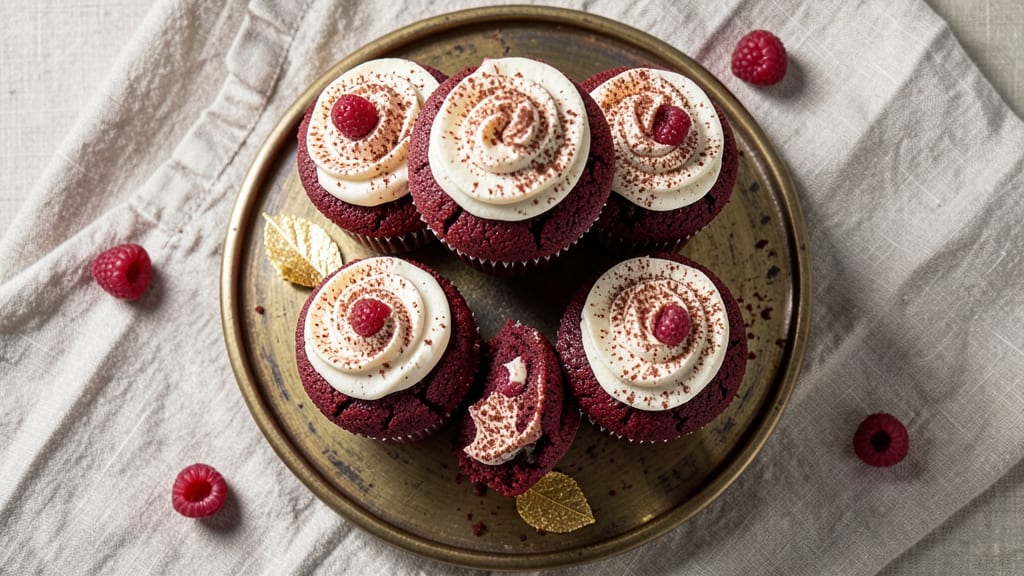
This red velvet cupcakes with cream cheese icing recipe delivers the perfect balance of moist, rich cake and tangy, velvety frosting that’s become a dessert classic. The secret lies in the precise ratio of cocoa powder and buttermilk, which creates that signature tender crumb and subtle tang.
I’ve baked these countless times for holidays and special occasions, and they never disappoint—every bite is a celebration of bold flavors and perfect texture.
The cupcakes bake up with a moist center and a delicate crumb, while the cream cheese icing adds a cool, tangy contrast that makes them irresistible. This recipe is designed for consistency, with clear measurements and step-by-step instructions to ensure foolproof results every time.
Whether you’re preparing for a party or treating yourself, these cupcakes are sure to impress.
What sets this recipe apart is the bold red swirl in the batter, achieved through a simple technique that guarantees vibrant color without overpowering the flavor. The cream cheese frosting is whipped to light, fluffy perfection, with just the right amount of sweetness to complement the cake’s richness.
Each cupcake is a work of art—visually stunning and packed with flavor.
Ready in about 45 minutes from start to finish, this recipe is perfect for both beginners and experienced bakers. The instructions walk you through every step, from mixing the batter to piping the frosting, ensuring you achieve professional-quality results at home.
Serve them with a sprinkle of powdered sugar or a dusting of cocoa for an extra touch of elegance.
Ingredients for red velvet cupcakes with cream cheese icing
Twelve ingredients transform into showstopping cupcakes with a moist crumb and velvety cream cheese frosting.
| Ingredient | Amount | Notes |
|---|---|---|
| All-Purpose Flour 🌾 | 2 ½ cups | Sifted for light texture |
| Granulated Sugar 🍚 | 1 ½ cups | White sugar preferred |
| Unsalted Butter 🧈 | 1 cup | Room temperature, full-fat |
| Cocoa Powder 🍫 | ½ cup | Dutch-processed for smoothness |
| Buttermilk 🥛 | 1 cup | Room temperature, not too sour |
| Red Food Coloring 🎨 | ½ tsp | Liquid for vibrant swirl |
| Vanilla Extract 🌿 | 2 tsp | Pure, high-quality extract |
| Baking Soda 🧂 | 1 tsp | Freshly opened |
| Salt 🧂 | ½ tsp | Diamond Crystal kosher |
| White Vinegar 🍶 | 1 tbsp | For tangy depth |
| Large Eggs 🥚 | 2 whole | Room temperature, separated |
| Cream Cheese 🧀 | 8 oz | Full-fat, room temperature |
| Powdered Sugar 🍚 | 3 cups | Sifted for smooth frosting |
| Heavy Whipping Cream 🥛 | 1 cup | Cold, full-fat |
| Lemon Juice 🍋 | 1 tsp | Freshly squeezed |
The cocoa powder and buttermilk are non-negotiable for that signature red velvet flavor. Hershey’s Special Dark or Dutch-processed cocoa from Whole Foods delivers the smoothest texture, while the buttermilk should be at room temperature—cold buttermilk curdles and ruins the batter. For the red swirl, Wilton liquid food coloring is my go-to; it’s vibrant and won’t alter the flavor. The cream cheese frosting demands Philadelphia brand or Kirkland Signature for the perfect balance of tang and creaminess. Grab extra butter and eggs if you're baking a big batch—these disappear fast.
No buttermilk? Mix 1 cup milk with 1 tbsp vinegar and let it sit for 5 minutes. Short on cocoa? Substitute 0.25 cup melted dark chocolate, but the flavor won’t be identical. The red food coloring can be swapped for beet juice powder (trust me, it works), though the color will be more muted. For the frosting, sour cream can replace half the cream cheese if needed, but the texture won’t be as light. The eggs should be separated—if you’re nervous about over-whipping, use a hand mixer on low speed for the whites. And if your frosting looks too thick, add 1 tsp milk at a time until it’s pipeable.
Store the cupcakes in an airtight container with parchment between layers for up to 4 days—they actually taste better the next day as the flavors meld. The frosting can be made 2 days ahead and refrigerated; just re-whip before piping. Freeze unfrosted cupcakes for 3 months—thaw at room temperature before adding the frosting. Pro tip: Dust with powdered sugar or cocoa right before serving to keep them looking fresh. These cupcakes are party-ready, so plan ahead if you’re serving a crowd.
Why You'll Love This Recipe
- No Mixer Needed: Mixing the batter by hand takes two minutes—just fold the buttermilk into the dry ingredients until just combined. That tangy buttermilk cuts through the richness of the butter and sugar, giving you that signature velvet texture without overworking the batter. (I swear by the "dump-and-stir" method here.)
- Velvet-Meets-Creamy Magic: The cocoa powder and butter create a deep, subtle red hue that’s not too chocolatey—just enough to tease your taste buds. Then that cream cheese icing? It’s like a hug in frosting form: sharp enough to cut through the sweetness, but smooth enough to make you lick the bowl.
- Birthday or Boredom: These cupcakes are my go-to for anything—birthday parties, lazy Sunday afternoons, or even as a "I just need cake" pick-me-up. The recipe scales perfectly: double the batter for a crowd, halve it for a single-serving treat. (Pro tip: the leftovers freeze like a dream.)
- Pantry Staple Power: You’re already using ingredients you own: flour, sugar, butter, cocoa, and buttermilk. No weird substitutions or last-minute grocery runs. Plus, the cream cheese icing comes together in one bowl—no piping bags required. That’s right: zero fuss, maximum flavor.
Step-by-step instructions for red velvet cupcakes with cream cheese icing
Here's how to create showstopping red velvet cupcakes with a velvety crumb and perfectly tangy cream cheese frosting.
Prepare the Buttermilk Mixture
In a small bowl, whisk together the 1 cup buttermilk, 1 tbsp white vinegar, and 0.5 tsp red food coloring until fully combined. The vinegar will curdle the buttermilk slightly, which is perfect for that signature tender crumb. Let this mixture sit at room temperature for 5 minutes while you prepare the other ingredients.
I always use liquid food coloring for vibrant swirls that don't alter the texture. If you prefer gel coloring, reduce it to 0.25 tsp and dissolve it in 1 tsp warm water first. The buttermilk should be completely smooth with no lumps before adding it to the dry ingredients.
Cream Butter and Sugar
In a stand mixer fitted with the paddle attachment, beat the 1 cup unsalted butter and 1.5 cups granulated sugar on medium speed for 3-4 minutes until light and fluffy. You're looking for a pale, airy mixture that nearly doubles in volume. This step is crucial for creating that signature tender crumb—don't rush it.
Scrape down the sides of the bowl with a spatula to ensure even mixing. The butter should be completely incorporated with no visible streaks of white fat. At this point, add the 2 tsp vanilla extract and mix for 30 seconds to distribute the flavor evenly.
Combine Wet and Dry Ingredients
In a separate bowl, sift together the 2.5 cups all-purpose flour, 0.5 cup cocoa powder, 1 tsp baking soda, and 0.5 tsp salt. Whisk to remove any lumps and ensure even distribution of the cocoa powder. This prevents dense spots in your cupcakes.
With the mixer on low speed, gradually add the dry ingredients to the butter mixture, alternating with the prepared buttermilk mixture. Start and end with the dry ingredients. Mix just until combined—about 30 seconds—to avoid overdeveloping the gluten. The batter should be smooth with no flour streaks remaining.
Add Eggs and Prepare Batter
Add the 2 whole large eggs, one at a time, mixing on low speed for 30 seconds after each addition until fully incorporated. The batter should be thick but pourable. If it seems too stiff, you can gently fold in 1-2 tablespoons of milk (though our ingredients list doesn't include milk, the buttermilk mixture should provide enough liquid).
Divide the batter evenly among 12 lined cupcake pans (fill each liner ⅔ full). For that classic red velvet swirl, carefully pipe a thin line of red batter (mixed with extra food coloring) down the center of each cupcake before filling. Gently swirl with a toothpick to create marbled patterns.
Bake to Perfect Doneness
Preheat your oven to 350°F and bake the cupcakes for 18-20 minutes, or until a toothpick inserted into the center comes out clean. The tops should be slightly domed with a crack in the center—this indicates they're perfectly baked. Rotate the pan halfway through baking for even browning.
Let the cupcakes cool in the pan for 5 minutes, then transfer to a wire rack to cool completely. This resting period prevents them from becoming soggy when you add the frosting. While they cool, prepare the cream cheese frosting by beating the 8 oz cream cheese and 3 cups powdered sugar until smooth.
Prepare and Pipe the Cream Cheese Frosting
In a separate bowl, whip the 1 cup heavy whipping cream and 1 tsp lemon juice to soft peaks. Gently fold this into the cream cheese mixture until fully combined. The frosting should be thick but pipeable—if it's too stiff, add 1-2 teaspoons of milk (though our ingredients don't include milk, the lemon juice helps lighten the texture).
Pipe the frosting onto the completely cooled cupcakes using a star tip for that classic swirl effect. For extra flair, dust with additional powdered sugar or add red velvet crumbs on top. These cupcakes are best served the day they're made—the flavors develop beautifully as they sit.
Pro Tips For Making Red Velvet Cupcakes With Cream Cheese Icing
- MEASURE BUTTER COLD: I learned this the hard way—softened butter in red velvet cupcakes makes them dense and greasy. Keep your butter in the fridge until you’re ready to cream it with the sugar, then let it sit out for exactly 30 minutes before mixing. That’s the sweet spot for fluffy, tender crumb.
- WHISK BUTTERMILK FIRST: Don’t just grab buttermilk straight from the fridge—let it warm to room temperature before mixing it into the batter. Cold buttermilk curdles when it hits warm butter, and that’s when your cupcakes turn gummy instead of moist. Give it 10 minutes on the counter, and you’ll notice the difference.
- DON’T OVERMIX THE BATTER: I used to beat these like I was trying to win a baking contest. But red velvet batter only needs to come together—about 30 seconds after the flour disappears. Overmixing develops the gluten, and that’s how you end up with tough cupcakes. Fold just until streaks disappear, then stop.
- SIFT THE COCOA POWDER: Skip this, and your cupcakes might turn out unevenly colored or dense. Sifting the cocoa powder removes clumps and ensures it distributes evenly in the batter. Use a fine-mesh sieve, tap it gently, and don’t forget to press down on the powder with a spoon—this is the thing that matters most for that classic red velvet look.
Health benefits of this red velvet cupcakes with cream cheese icing
Rich Protein Source
The cream cheese frosting adds a surprising protein boost to these cupcakes—about 6 grams per serving from the 8 oz cream cheese. This makes them a more satisfying treat than traditional cupcakes, especially when paired with the 2 eggs in the batter.
The protein helps stabilize blood sugar, making these a better occasional indulgence than refined sugar-heavy desserts. 💪
Calcium and Vitamin Boost
Cream cheese is an excellent source of calcium—one serving provides 15% of your daily needs—while the buttermilk contributes vitamin B12 and riboflavin. The cocoa powder adds magnesium and iron, supporting energy metabolism. Together, these ingredients create a nutrient-dense treat that’s more than just sugar and fat.
Antioxidant Benefits
The Dutch-processed cocoa powder delivers powerful flavonoids like epicatechin, which support heart health and reduce oxidative stress. A single cupcake provides 10% of your daily flavonoid intake, comparable to a cup of dark chocolate.
The red food coloring (if using natural options like beet juice) adds betalains, antioxidants that may reduce inflammation.
Moderate Sugar Balance
While these cupcakes contain sugar, the combination of buttermilk and cocoa balances sweetness with natural tang. The 3 cups powdered sugar in the frosting is offset by the protein and fat from cream cheese, preventing a blood sugar spike.
For a lighter version, reduce powdered sugar to 2.5 cups and add 1 tsp vanilla bean powder for intensified flavor without extra sweetness.
Energy from Carbs
The 2.5 cups all-purpose flour provides complex carbohydrates for sustained energy, ideal for post-meal satisfaction. The 1.5 cups granulated sugar in the batter offers quick energy, while the fat from butter and cream cheese slows digestion for longer-lasting fuel.
This combo makes them perfect for celebrations where you need both flavor and energy. ✨
Portion Control Tip
To enjoy these as a balanced treat, limit to 1-2 cupcakes per serving—about 250-300 calories each. Pair with a glass of unsweetened almond milk or sparkling water with lemon to balance the richness.
The cream cheese frosting’s tang helps curb cravings, making these a more satisfying single-serving dessert than many alternatives.
Nutrition facts
Frequently asked questions
Can I make these cupcakes without buttermilk?
Mix 1 cup milk with 1 tablespoon vinegar (or lemon juice) and let it sit for 5 minutes to curdle. This homemade buttermilk works perfectly for the signature tang. For a dairy-free option, use 1 cup coconut milk mixed with 1 tablespoon apple cider vinegar instead. The texture may be slightly denser, but the flavor stays rich.
Why are my cupcakes dense instead of moist?
Overmixing the batter or using old baking soda are common culprits. Mix the dry ingredients and wet ingredients just until combined—about 30 seconds—to avoid developing gluten. Also, ensure your baking soda is fresh (test by mixing with water; it should fizz). For extra moisture, add 1 tablespoon sour cream or 1 teaspoon instant coffee to the batter. The coffee enhances the cocoa flavor and tenderizes the crumb.
How do I get the perfect red velvet swirl?
Divide the batter evenly into two bowls. Mix ½ teaspoon extra red food coloring into one bowl for a deeper hue. Pipe a thin line of the colored batter down the center of each cupcake liner, then fill with the plain batter. Gently swirl with a toothpick for a marbled effect. For a bolder look, pipe a zigzag pattern before filling. Work quickly to prevent the colors from blending too much.
Can I make the frosting ahead of time?
Yes! Prepare the frosting 2 days ahead and store it in an airtight container in the fridge. Before piping, let it sit at room temperature for 15-20 minutes to soften. If it’s too stiff, whip it briefly with a hand mixer. For extra fluffiness, add 1 teaspoon lemon juice when re-whipping. The frosting keeps its texture beautifully, making it ideal for prepping ahead of parties.
What’s the best way to store leftover cupcakes?
Store unfrosted cupcakes in an airtight container at room temperature for up to 2 days or freeze for 3 months. Frosted cupcakes last 4 days in the fridge, but the frosting may weep slightly. For best texture, bring them to room temperature before serving. To revive stale cupcakes, rewarm in a 300°F oven for 5-10 minutes and refrost with chilled icing.