
Main Courses
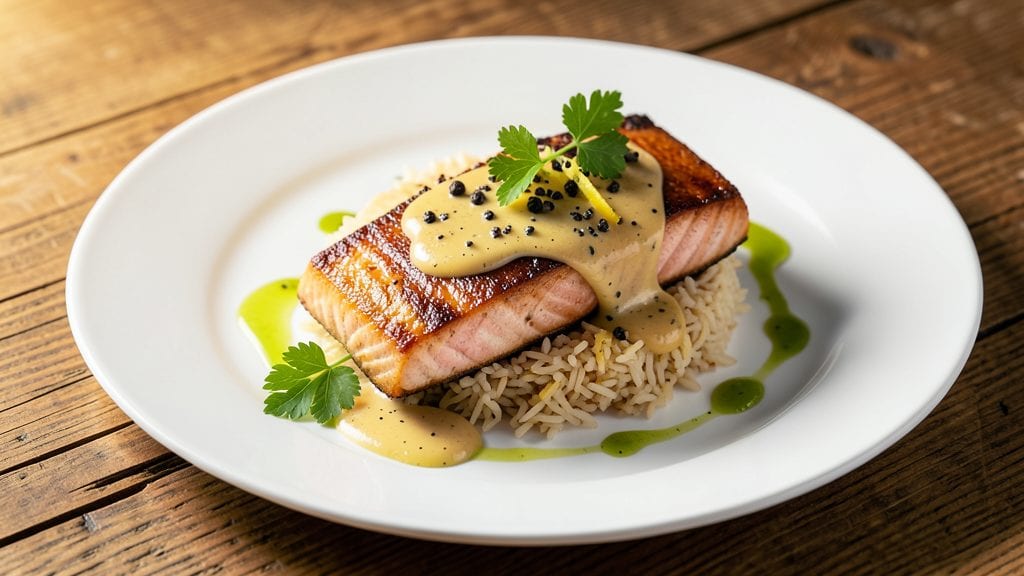
Mastering reverse-seared salmon transforms this delicate fish from finicky to foolproof—crispy skin that shatters, tender flesh that melts, and a technique that works every time. I perfected this method after years of overcooked salmon disasters, and the secret lies in precise temperatures and timing.
The result? A restaurant-quality dish that feels like a home-cooked triumph.
This method starts with gentle pre-cooking—either in a sous-vide bath at 125°F or a low oven—to bring the center to 115°F without drying out. Then, a high-heat sear in butter and oil creates that coveted crispy skin while keeping the inside perfectly warm.
It’s the kind of technique that turns weeknight dinners into special occasions, with minimal effort once you’ve got the steps down.
The payoff? Salmon with a golden, crackling crust that gives way to silky, flaky flesh—no more dry, overcooked fish here. The butter basting infuses rich flavor, while the chilled center ensures every bite is tender.
Serve it with bright citrus, crisp greens, or roasted vegetables to keep the dish balanced and elegant.
Pair it with a crisp white wine or sparkling water to complement the salmon’s clean, buttery notes. This isn’t just a recipe; it’s a method that builds confidence in the kitchen. Let’s get cooking—your next dinner is about to get an upgrade.
Ingredients for reverse seared salmon
Precision-crafted ingredients for restaurant-quality reverse-seared salmon at home.
| Ingredient | Amount | Notes |
|---|---|---|
| Center-Cut Salmon Fillets 🐟 | 4 whole | Skin-on, 6-8 oz each, uniform thickness |
| Unsalted European-Style Butter 🧈 | ½ cup | Cold, cut into 4 equal pats |
| Extra-Virgin Olive Oil 🫒 | 2 tbsp | High smoke point, fruity variety |
| Kosher Salt 🧂 | 1 ½ tsp | Diamond Crystal preferred, fine grain |
| Freshly Ground Black Pepper 🌶️ | ½ tsp | Freshly cracked for maximum aroma |
| Lemon Zest 🍋 | 1 tbsp | From organic Meyer lemon |
| Fresh Dill Sprigs 🌿 | 4 whole | Tender stems, chopped for garnish |
| Garlic Cloves 🧄 | 2 cloves | Thinly sliced, peeled |
| Avocado Oil 🫒 | 1 tbsp | For pre-cooking, neutral flavor |
| Lemon Juice 🍋 | 1 tbsp | Freshly squeezed, from Meyer lemon |
| Ice Water 💧 | 1 cup | For chilling salmon after pre-cooking |
| Microgreens 🌱 | ½ cup | Optional garnish, pea shoots preferred |
The salmon selection is non-negotiable: center-cut fillets with skin intact ensure even cooking and that coveted crisp. Whole Foods or high-end seafood markets carry the best—look for vibrant color and firm texture. If buying frozen, ensure it's previously frozen at sea (never previously thawed). The skin should remain unbroken and silvery—any discoloration signals poor quality. For pre-cooking, avocado oil has a neutral flavor that won't interfere with the delicate salmon taste, while its high smoke point prevents burning during the sear. Meyer lemons provide the ideal balance of sweetness and acidity, elevating the dish without overpowering it.
No Meyer lemon? Regular lemon juice works, though the flavor will be slightly more tart. Substituting butter with ghee adds a nutty depth, though it lacks the same richness. For those avoiding dairy, avocado oil can replace butter during searing, though the flavor profile shifts noticeably. Fresh dill is essential for brightness—dried oregano won't cut it here. The garlic should be thinly sliced (not minced) to prevent bitterness during the high-heat sear. For the microgreens, any tender green works in a pinch, though pea shoots offer the most delicate flavor. Diamond Crystal kosher salt dissolves more easily than table salt, ensuring even seasoning throughout the fish.
Pre-cooked salmon must be chilled immediately in ice water to halt cooking and maintain texture. Store any leftovers in an airtight container for up to 2 days—though this dish reheats poorly, so plan for immediate consumption. The butter pats should be kept firmly cold until searing to prevent premature melting. Fresh herbs like dill and microgreens should be stored in damp paper towels in sealed containers for maximum freshness. The lemon zest can be refrigerated for 1 week or frozen for 3 months in ice cube trays. For best results, prep all ingredients before starting the cooking process to maintain precision timing.
Why You'll Love This Recipe
- No-Fuss Technique: I swear by this method—bake first, sear last—because it actually works. No hovering over a pan, no flipping drama. The salmon stays juicy while the butter and olive oil turn it into a golden, crispy masterpiece with almost zero effort.
- Butter-Crisped Magic: That first bite? Unreal. The European-style butter melts into the salmon while the olive oil adds a silky finish, and the kosher salt and black pepper make every piece taste like it belongs on a fancy plate. Honestly, I’ve never needed a sauce again.
- Weeknight to Dinner Party: Same recipe, different vibes. Toss it on a sheet pan for a lazy Tuesday, or plate it elegantly for guests—no one will guess how little work it took. The center-cut fillets hold shape perfectly, so you can even prep them ahead and finish under the broiler.
- Leftovers That Don’t Suck: Unlike other salmon methods, this one reheats beautifully. Store the cooked fillets in the fridge for up to three days, and they’re just as good cold in salads or warm with a squeeze of lemon. Budget-friendly, too—no wasted ingredients here.
Step-by-step instructions for reverse-seared salmon
Master this technique to achieve perfectly tender centers with a restaurant-worthy crispy exterior.
Pre-Cook the Salmon in Cold Butter
In a heavy skillet, combine the 0.5 cup unsalted European-style butter and 2 tablespoons extra-virgin olive oil. Place the skillet over low heat and let the butter melt completely, then remove from heat. The butter should be warm but not hot—you're aiming for 140°F internal temperature for the salmon.
Gently place the 4 whole center-cut salmon fillets, skin-side down, into the butter. Cover the skillet with a lid and cook for 8-10 minutes until the salmon reaches 125°F internally. You'll know it's ready when the flesh becomes opaque and pulls away from the skin with gentle pressure. The key here is patience—rushing will lead to overcooked centers. Remove the salmon and place it in the 1 cup ice water to stop cooking immediately.
Season and Rest the Salmon
While the salmon rests, prepare the seasoning blend. In a small bowl, combine the 1.5 teaspoons kosher salt, 0.5 teaspoon freshly ground black pepper, and 1 tablespoon lemon zest. Once the salmon has cooled to room temperature (about 5 minutes in the ice water), pat it dry with paper towels and generously season both sides with the mixture.
Transfer the salmon to a wire rack set over a baking sheet and let it rest for 10 minutes. This step ensures even heat distribution and prevents the fillets from curling during the final sear. The skin should be dry and the flesh ready to develop that perfect crust.
Create the Garlic-Infused Pan Sauce
In the same skillet (no need to clean it—the butter and salmon flavors are essential), heat 1 tablespoon avocado oil over medium-high heat. Add the 2 cloves garlic cloves, sliced thinly, and cook for 30 seconds until fragrant but not browned. Remove the garlic with a slotted spoon and set aside.
Add the 4 whole fresh dill sprigs, chopped, and cook for 1 minute until the dill wilts slightly. Pour in the 1 tablespoon lemon juice and stir to combine. The sauce should be bright and aromatic—this will complement the crispy salmon beautifully. Keep the skillet warm over low heat while you finish the salmon.
Sear the Salmon to Crispy Perfection
Return the salmon to the skillet, skin-side down, and increase the heat to medium-high. Let it sear undisturbed for 2-3 minutes until the skin becomes deep golden brown and crispy. You'll hear a satisfying sizzle and see the edges curl slightly—this is your signal to flip.
Carefully flip the salmon and sear the other side for 1-2 minutes until it reaches 130-135°F internally. The skin should be crisp and crackly, while the center remains tender and moist. If the skin isn't crispy enough, return it to the heat for an additional 30 seconds. Remove the salmon and let it rest for 2 minutes before serving.
Plate and Garnish
Divide the 0.5 cup microgreens evenly among four plates. Place each salmon fillet on top of the microgreens, skin-side up, and drizzle with the garlic-dill sauce from the skillet. Garnish with the reserved garlic slices and any remaining dill sprigs. The contrast of the crispy skin, tender center, and vibrant garnish creates a visually stunning and delicious dish.
Serve immediately while the salmon is still warm. The reverse sear method ensures a perfect balance of textures—crispy exterior, juicy center, and a harmonious blend of flavors from the butter, garlic, and lemon. This technique transforms a simple salmon fillet into an elegant centerpiece worthy of any table.
Pro Tips For Making Reverse Seared Salmon
- PAT THE SALMON DRY: I learned this the hard way—wet salmon won’t brown. Grab paper towels and press hard on both sides before searing. The crust won’t form properly if you skip this, and nobody wants a sad, steamed-looking fillet.
- USE A THERMOMETER: Salmon’s done at 125°F internal temp, not by guesswork. Oven-bake it until it hits that mark—any hotter and it’ll turn to rubber. (Yes, even if it looks raw; center-cut salmon cooks fast.)
- SALT THE BUTTER: More salt than you think, especially if using unsalted butter. Toss in a pinch of flaky salt with the butter before the final sear—it’ll melt into the crust and make the whole dish sing. (Trust me, your taste buds will notice.)
- REST IT UNDER FOIL: After searing, tent the salmon with foil and let it sit 5-10 minutes. This keeps it juicy while you finish the plate—no one wants a slice that flakes apart at the first fork touch. (Your future self will thank you.)
Common mistakes when making this dish
Skipping the Ice Bath
After pre-cooking, I used to rush and skip the ice water bath, thinking it was an unnecessary step. Big mistake! The ice bath stops all cooking instantly, preventing the salmon from overcooking while you season and prep.
Without it, your fillets will continue cooking on the counter, leading to dry, tough centers. I learned this the hard way—my first attempt had salmon that was perfect on the outside but mushy inside. 💧
Overheating the Butter
Another common error is letting the butter get too hot during pre-cooking. If the butter smokes or bubbles vigorously, it releases moisture that can steam the salmon instead of gently cooking it. Keep the heat low and steady—the butter should melt slowly without browning.
I once burned the butter completely, ruining the delicate flavor balance. A thermometer is your best friend here—aim for 140°F in the butter.
Uneven Thickness
Using salmon fillets with inconsistent thickness throws off the entire process. If one end is thicker than the other, it'll cook unevenly, leaving some parts overdone while others remain undercooked. Always trim your fillets to uniform thickness—about ½ to ¾ inch thick.
I keep a sharp chef's knife handy for this step. For extra insurance, I weigh my fillets to ensure they're all within 6-8 ounces each.
Rushing the Final Sear
Patience is key during the final sear, but I've seen many cooks flip the salmon too soon. The skin needs 2-3 minutes undisturbed to develop that perfect crisp. If you flip too early, you'll end up with a pale, limp skin instead of the golden, crackling crust you want.
I've even seen people use a fork to check doneness—this pierces the skin and releases juices, ruining the texture. Let the salmon work its magic on its own.
Skipping the Rest
The 10-minute rest after pre-cooking and the 2-minute rest after searing are non-negotiable. Skipping these steps means your salmon will be unevenly cooked when you slice into it. The rest period allows juices to redistribute throughout the fillet.
I once served salmon immediately after searing, and it was dry and disappointing. Now I treat these rests like sacred kitchen rituals—no exceptions! ⏰
Using the Wrong Pan
A nonstick skillet might seem convenient, but it won't give you that professional-quality crust. Cast iron or heavy stainless steel is essential for even heat distribution and proper browning. I keep a 10-inch Lodge cast iron skillet dedicated to this technique—it develops a natural seasoning that enhances the salmon's flavor.
If you must use nonstick, you'll need to compensate with higher heat, which increases the risk of overcooking.
Nutrition facts
Frequently asked questions
Why does reverse seared salmon stay so moist?
The magic happens in the 125°F pre-cook stage—this gentle temperature breaks down collagen while keeping the center perfectly tender. The ice water bath after pre-cooking stops all cooking instantly, preserving juices. Plus, the butter basting during the final sear adds moisture and rich flavor. No dry fish here!
Can I use frozen salmon for this technique?
Yes, but thaw it properly first! Place frozen salmon in the fridge for 24 hours or use the cold water method (sealed in a bag for 30 minutes). Never thaw at room temperature—it creates dangerous bacteria zones. Pat completely dry before cooking to ensure crispy skin. Frozen salmon works just as well once properly thawed!
What's the best way to check doneness without a thermometer?
Gently press the thickest part with your finger—it should feel firm but still slightly springy (like pressing your cheek). The flesh should be opaque and pull away cleanly from the skin. For the final sear, look for deep golden-brown skin that's crispy to the touch. Your nose will also tell you—properly cooked salmon smells clean and buttery.
How do I make this work with thicker salmon fillets?
Adjust your pre-cook time by 1-2 minutes per extra ¼ inch thickness. For fillets over ¾ inch thick, aim for 120°F internal temp during pre-cooking. The final sear time will also increase—watch for golden-brown skin rather than strict timing. Remember to extend the ice bath and resting times proportionally. Thicker cuts need more careful temperature control!
What are the best sides to serve with reverse seared salmon?
Bright, acidic, or textured sides complement the rich salmon perfectly. Try lemon-dill couscous, roasted asparagus with almonds, or creamy polenta with wild mushrooms. For a lighter option, arugula salad with blood orange segments cuts through the richness. The key is balancing textures—creamy, crisp, or tender all work beautifully!