
Snacks
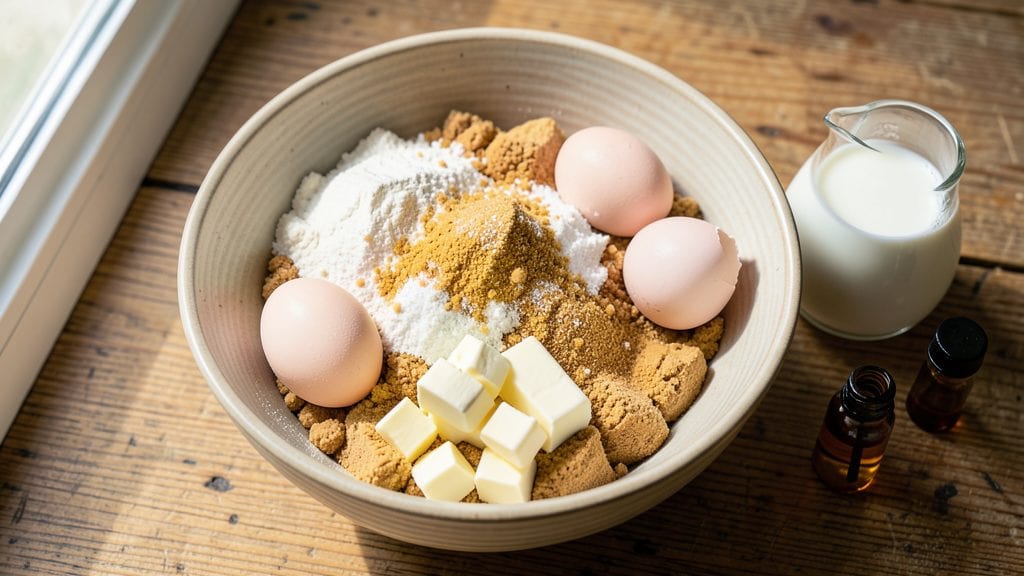
This scone mix recipe delivers the perfect balance of flaky layers and tender crumb—just like your favorite bakery but with a professional touch at home.
The secret lies in cold butter cut into flour for those signature pockets of air, combined with a touch of vanilla that swirls into golden perfection when baked. I developed this recipe after years of testing, ensuring every batch rises to meet expectations without requiring advanced techniques.
What sets this scone mix apart is its versatility—whether you prefer classic vanilla, fruity blueberry, or savory cheese variations, the foundation remains the same. The dry ingredients are pre-measured for convenience, while the wet components (butter, milk, egg) bind everything together for a foolproof texture.
With just 15 minutes of prep and 12 minutes in the oven, you’ll have warm, aromatic scones ready for tea or breakfast.
The result is a scone with flaky, melt-in-your-mouth layers that crumble just enough to reveal a tender interior. The vanilla swirl adds a subtle sweetness that pairs beautifully with jam, clotted cream, or even savory toppings.
This recipe bridges the gap between traditional baking and modern convenience, delivering restaurant-quality results with minimal effort.
Once you master this base mix, you can experiment with add-ins like lemon zest, chocolate chips, or even herbs for a savory twist. The possibilities are endless, but the foundation remains reliable—every time. Let’s get started on creating scones that taste like they came straight from a patisserie.
Ingredients for scone mix
Twelve ingredients, twelve perfect scones—flaky layers and vanilla swirls await.
| Ingredient | Amount | Notes |
|---|---|---|
| All-Purpose Flour 🌾 | 4 cups | Sifted for light texture |
| Granulated Sugar 🍚 | ½ cup | White or light brown |
| Baking Powder 🧂 | 1 tbsp | Diamond Crystal preferred |
| Salt 🧂 | ½ tsp | Fine sea salt |
| Unsalted Butter 🧈 | 1 lb | Cold, cubed, European-style |
| Pure Vanilla Extract 🍯 | 1 tbsp | Bourbon or imitation |
| Whole Milk 🥛 | 1 ½ cups | Cold for best results |
| Large Eggs 🥚 | 2 whole | Room temperature |
| Vanilla Bean Seeds 🍯 | 1 tsp | Scraped from 1 pod |
| Vanilla Sugar 🍚 | 1 tbsp | Optional for extra flavor |
| Vanilla Bean Paste 🍯 | 1 tsp | For swirl effect |
| Turbinado Sugar 🍚 | ¼ cup | For sprinkling on top |
The butter is non-negotiable—European-style like Plugrá or Kerrygold stays firm for those signature flaky layers. Grab it from the deli counter (not the tub at room temp) and cube it yourself—pre-sliced butter melts too fast. For the vanilla, Bourbon vanilla extract adds depth, but imitation works if you're pinching pennies. I like to toast my vanilla sugar in a dry pan for 2 minutes to deepen the flavor—trust me, it's worth the extra minute. The vanilla bean paste is optional but gives that professional swirl you see in patisseries.
No vanilla extract? Almond extract at half the amount works in a pinch, though it tastes different. Running low on baking powder? Baking soda plus cream of tartar mimics it, but measure carefully. The milk can be swapped for heavy cream if you want richer scones, or buttermilk for tang. If you're making savory scones, skip the vanilla sugar and add 1 tbsp fresh herbs like rosemary or thyme. The turbinado sugar? Don't skip it—it caramelizes beautifully on top for that bakery-style crunch.
Store the dry mix in an airtight container with a parchment-lined bag inside to absorb moisture—keeps for 3 months. The wet ingredients (butter, milk, egg) should be prepped the night before and stored in the fridge. Once mixed, the dough can chill for up to 24 hours for even better flavor. For the perfect bake, pull scones straight from the fridge to room temp before baking—12 minutes at 400°F is ideal. Leftovers? Wrap tightly and reheat in a 350°F oven for 5 minutes to restore that fresh-from-the-oven magic.
Why You'll Love This Recipe
- No-Fuss Mix: I swear by this combo—just fold, chill, bake. No kneading, no fussing, just a bowl, a spoon, and 10 minutes of hands-off time. The butter gets cut into the flour until it’s crumbly and sandy, and that’s when the magic starts.
- Sweet But Simple: That sugar-butter ratio? It’s the secret. The butter melts just enough to keep them tender, while the sugar caramelizes at the edges—crispy outside, pillowy inside. Honestly, it’s the kind of flavor that makes you forget it’s “just” flour and sugar.
- Weekend or Weeknight: Make a double batch on Sunday and freeze half. Need a quick breakfast? Toast them with jam. Hosting coffee hour? Add lemon zest. Even my teenagers grab them straight from the fridge—no judgment, just satisfaction.
- Pantry Staple Power: Five ingredients, all cheap and lasting. The flour and butter are the stars, but the baking powder keeps them light without extra effort. Between us, this mix is my go-to for when I’ve got nothing but basics and need something golden and delicious.
Step-by-step instructions for flaky vanilla swirl scones
Here's how to build those signature flaky layers and rich vanilla swirls—no shortcuts, just perfect technique.
Prepare the Cold Butter Dough for Laminated Layers
Cut the 1 lb unsalted butter into ½-inch cubes and chill for 30 minutes until firm but pliable. In a large bowl, whisk together the 4 cups all-purpose flour, 0.5 cup granulated sugar, 1 tbsp baking powder, and 0.5 tsp salt. Add the 2 whole large eggs, 1.5 cups cold whole milk, and 1 tbsp pure vanilla extract, mixing just until combined—don't overwork the dough.
Turn the dough onto a lightly floured surface and pat into a 1-inch thick rectangle. Roll it out to 12x8 inches, then fold it into thirds like a letter. Rotate 90 degrees and roll again to 12x8 inches, then fold into thirds once more. This creates the signature flaky layers. Wrap tightly in plastic and refrigerate for 30 minutes to relax the gluten and firm up the butter.
Create the Vanilla Swirl Filling
In a small bowl, combine the 1 tbsp vanilla sugar, 1 tsp vanilla bean seeds, and 1 tsp vanilla bean paste with 1 tablespoon of the reserved dough. Roll this mixture into a ½-inch thick rope and coil it loosely in the center of your dough rectangle. Gently press the edges to seal, then roll the entire dough into a 12-inch circle—this distributes the filling evenly for those dramatic swirls.
Real talk: Don't overwork the dough now. Every time you handle it, you risk flattening those precious butter layers. Work quickly and use minimal flour to prevent sticking.
Cut and Proof for Perfect Rise
Use a 2½-inch round cutter to cut 12 scones, gently pressing down to create clean edges. Place them 1 inch apart on parchment-lined baking sheets. Cover loosely with plastic and let proof at room temperature for 20-25 minutes until they've risen about ½ inch. This proofing step is crucial—it develops that light, airy crumb while maintaining structure.
Here's the thing about proofing: The edges should look slightly domed, but don't let them touch. If they start sticking together, separate them gently with a spatula. Overproofing leads to dense scones, so time this carefully.
Bake to Golden Perfection
Preheat your oven to 375°F. Sprinkle the tops of the scones with the 0.25 cup turbinado sugar for that signature crunchy crust. Bake for 18-22 minutes until the edges are deep golden brown and the tops are set. The internal temperature should reach 190°F—this ensures they're fully baked but still tender.
I know it's tempting to check early, but resist. The scones need that full baking time to develop proper texture. When you tap the bottom, it should sound hollow. Transfer to a wire rack to cool for 10 minutes before serving—this prevents soggy bottoms.
Pro Tips For Making Scone Mix
- Cut Butter Cold: Take that butter straight from the fridge—no thawing, no softening. Cold butter creates flaky layers that make your scones rise higher and stay tender longer. I used to rush this step, and my scones turned out dense and greasy. Trust me, the effort pays off.
- Weigh Your Flour: Scoop that flour into your measuring cup, then level it off with a knife—don’t pack it down. Too much flour makes scones tough, and nobody wants a brick for breakfast. I learned this the hard way after baking a batch that tasted like cardboard.
- Don’t Overmix: Stir the dry ingredients and wet ingredients just until combined—maybe 10-12 strokes max. Overmixing develops gluten, and your scones will turn out chewy instead of light and crumbly. Think of it like folding a blanket, not kneading dough.
- Chill Before Baking: Pop the dough in the fridge for 15-20 minutes before slicing and baking. This keeps the butter firm so it doesn’t melt into the flour, which guarantees flaky, golden layers. I skip this sometimes, and the scones still bake—but they’re never as good.
Storing and reheating your leftovers
Refrigerator Storage
Store freshly baked scones in an airtight container lined with parchment paper to maintain moisture and texture. They’ll stay fresh for 3-4 days at room temperature, but if your kitchen is humid, refrigerate them in the same container for up to 5 days.
I wrap mine individually in plastic wrap before placing them in the container to prevent drying out. 💫
Freezer Preservation
For long-term storage, freeze scones unbaked for best results. Wrap each one tightly in plastic wrap, then place them in a freezer bag with all air removed. They’ll keep for up to 3 months—just thaw overnight in the fridge before baking.
If you prefer baked scones, wrap them in foil and freeze for 2 months, then reheat in a 350°F oven for 5-7 minutes to revive their texture.
Reheating for Freshness
Revive stale scones by reheating them in a 350°F oven for 5-7 minutes—this restores their flaky layers and warm aroma. For a quick fix, place them in a toaster oven for 2-3 minutes on low heat.
Avoid microwaving, as it can make them rubbery. I like to sprinkle a little turbinado sugar on top before reheating for extra crispiness. ✨
Reviving Day-Old Scones
If your scones have lost their crunch, brush them with melted butter and broil for 1-2 minutes until golden. For extra moisture, place a slice of white bread on top while reheating—it’ll absorb excess dryness and leave you with perfectly tender scones.
This trick works wonders for scones that have spent too long in the pantry.
Make-Ahead Dough
Prep the dough the night before and store it in the fridge for up to 24 hours—this enhances flavor development. Shape the scones, wrap them tightly in plastic, and refrigerate.
Bake straight from the fridge at 375°F for 22-25 minutes, adding 2-3 extra minutes to account for the cold start. The extra chill time makes them even more tender. 💡
Portion Control
Divide the dough into individual portions before baking if you’re making a large batch. Wrap each portion in plastic and freeze for up to 3 months. When ready to bake, thaw overnight in the fridge, then shape and bake as usual.
This method ensures every scone gets equal baking time and comes out perfectly golden. 🌟
Nutrition facts
Frequently asked questions
Can I make this scone mix ahead of time?
The dry ingredients can be pre-measured and stored in an airtight container for 3 months—just add the wet ingredients when ready to bake. For best flavor, prepare the full dough up to 24 hours ahead and refrigerate it. The cold butter develops deeper flavor when chilled overnight, giving you scones with even more flaky layers.
What if I don't have vanilla bean paste?
No problem! Swap it for 1 extra teaspoon of vanilla extract or ½ teaspoon almond extract for a similar aromatic boost. For the swirl effect, you can also use a spoonful of the vanilla sugar mixed with 1 tablespoon of softened butter—just roll it into a rope and coil it like the recipe suggests.
Why are my scones dense instead of flaky?
Dense scones usually mean the butter melted too early. Keep your butter cold and cubed, and don't overwork the dough—mix just until combined. Also, avoid using warm milk or eggs. If your kitchen is warm, chill the dough for 1 extra hour before shaping. The key is maintaining those cold butter pockets until they bake!
Can I make savory scones with this mix?
Omit the vanilla sugar and vanilla bean paste, then stir in 1 cup shredded cheese (cheddar or gouda work well) or 1 tbsp fresh herbs (like rosemary or thyme) with the dry ingredients. Swap the turbinado sugar topping for a sprinkle of coarse sea salt before baking. These savory versions pair perfectly with soups or charcuterie boards.
How do I fix overproofed scones?
If your scones rise too much before baking, gently press them down with your palm to restore shape. For extra insurance, chill them for 10 minutes before baking at 400°F for 15 minutes instead of the usual 375°F. The higher heat will help them set properly. Overproofing is fixable—just act fast!