
Breakfast & Brunch
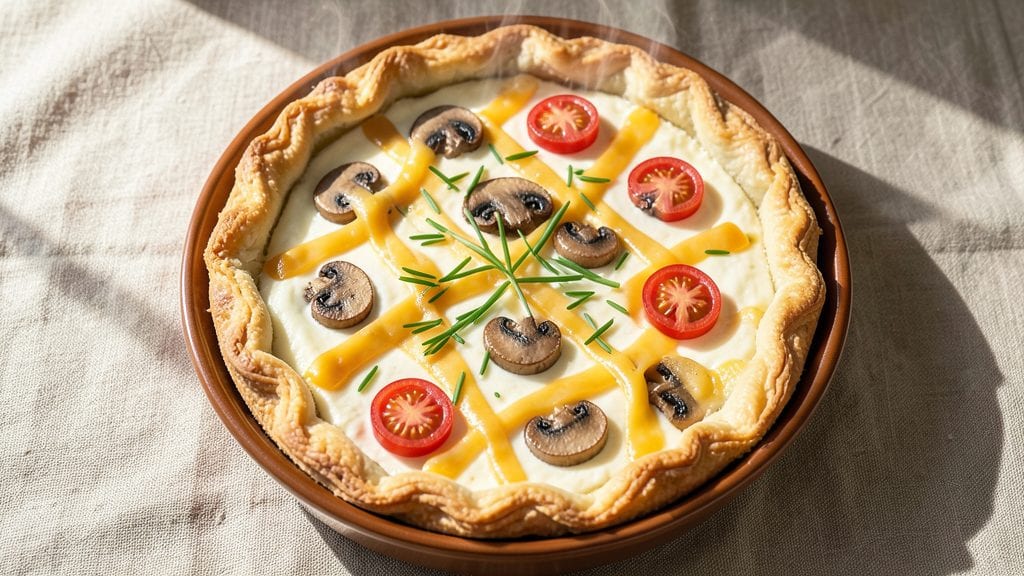
This sour cream quiche recipe delivers the perfect balance of a flaky crust and a velvety, tangy filling that makes every breakfast feel special. The secret lies in a precise method that ensures the crust stays crisp while the filling remains rich and creamy—no soggy bottoms here.
I developed this recipe after years of trial and error, refining every step to guarantee restaurant-quality results at home.
The beauty of this quiche is its versatility—customize it with your favorite fillings like ham, spinach, or mushrooms while keeping the core technique intact. A well-chilled crust prevents shrinking, and the sour cream in the filling creates that signature tender texture.
Ready in about 50 minutes, this dish is ideal for brunch gatherings or a satisfying weekend meal.
What you’ll achieve is a golden, perfectly baked quiche with a flaky crust that holds up to every slice and a filling so creamy it melts in your mouth. The tangy notes from the sour cream balance the richness of the eggs and cheese, making each bite irresistibly smooth.
This is the kind of dish that elevates simple breakfasts into something truly memorable.
Serve it warm with a side salad or crusty bread for the full experience. Whether you're feeding a crowd or treating yourself to a special morning, this quiche never disappoints. Let’s get started on creating your perfect slice of comfort.
Ingredients for sour cream quiche
Flaky crust and velvety filling start with these simple yet essential ingredients.
| Ingredient | Amount | Notes |
|---|---|---|
| All-Purpose Flour 🌾 | 2 ½ cups | For pie crust, sifted |
| Unsalted Butter 🧈 | 1 cup | Cold, cubed, full-fat |
| Ice Water 💧 | ½ cup | Chilled, for crust |
| Large Eggs 🥚 | 4 whole | Room temperature |
| Sour Cream 🥛 | 1 cup | Full-fat, not low-fat |
| Heavy Cream 🥛 | ½ cup | Whole milk works too |
| Shredded Sharp Cheddar Cheese 🧀 | 1 ½ cups | Freshly grated preferred |
| Salt 🧂 | 1 ½ tsp | Kosher or sea salt |
| Black Pepper 🌶️ | ½ tsp | Freshly ground preferred |
| Nutmeg 🌿 | ¼ tsp | Freshly grated for warmth |
| Garlic Powder 🧄 | ½ tsp | Not garlic salt |
| Chives 🌿 | ¼ cup | Fresh, chopped for garnish |
| Bacon 🥓 | 6 oz | Cooked and crumbled |
The crust is everything here. King Arthur flour gives the best texture, but any all-purpose will work. Use cold butter—cut it into tiny cubes and keep it chilled the whole time. Whole Foods or Trader Joe's sell pre-cubed butter in their freezer section, which is a lifesaver. The ice water is non-negotiable—it keeps the dough from getting gummy. For the filling, full-fat sour cream is crucial (the tangy notes balance the richness). I always grab the La Creamerie brand from the store—it's worth the extra dollar. The sharp cheddar? Freshly grated makes all the difference, so skip the pre-shredded kind (it has anti-caking agents).
No sour cream? Greek yogurt works in a pinch, but the texture won't be quite the same. Short on chives? Fresh parsley or green onions are great swaps. Bacon too salty? Cook it first, drain well, and rinse the crumbles if needed. The nutmeg is optional but adds that signature quiche warmth—if you skip it, just double the black pepper. For the crust, no butter? Lard or shortening keeps it flaky, but the flavor won't be as rich. And if you're feeling fancy, add a pinch of smoked paprika to the crust for depth.
The crust dough needs to chill for at least 30 minutes—don't skip this. It keeps the filling from making it soggy. Store leftover crust dough wrapped in plastic for up to 3 days in the fridge. The filling can be prepped ahead and baked later—just cover it and refrigerate for up to 24 hours. For leftovers, slice and reheat in a 350°F oven for 10-12 minutes—it tastes even better the second time around. Garnish with extra chives right before serving so they stay vibrant.
Why You'll Love This Recipe
- No-Fuss Crust: I swear by this cold butter-and-flour crust—just mix, press, chill. No rolling pins, no stress. The ice water keeps it tender without the fuss of pie dough, and it’s ready while you whip up the filling.
- Creamy Magic: That sour cream in the filling? It’s the secret weapon. Rich but not heavy, with a texture so smooth it melts in your mouth. The eggs cook up silky, and the butter in the crust adds a golden, flaky edge that’s pure satisfaction.
- Weeknight Hero: This quiche is my go-to for busy mornings or lazy Sundays. Make it ahead, pop it in the oven, and breakfast (or brunch) is sorted. Honestly, I’ve served it at 7 AM and 7 PM—same delicious result.
- Budget-Friendly Luxury: Flour, butter, eggs, sour cream—these are pantry staples that taste like a fancy brunch. No specialty ingredients, no markup. Leftovers? Even better. I’ve reheated slices for days, and they’re still the star of the plate.
Step-by-step instructions for sour cream quiche
Here's how to build a golden, flaky crust with a rich, tangy filling that melts in your mouth.
Make the Perfect Crust
In a large mixing bowl, combine the 2.5 cups all-purpose flour and 1.5 teaspoons salt. Cut in the 1 cup unsalted butter using a pastry cutter or your fingers until the mixture resembles coarse crumbs with some pea-sized butter pieces remaining. This texture is crucial for achieving that signature flaky quality.
Gradually add the 0.5 cup ice water, one tablespoon at a time, mixing gently with a fork until the dough just comes together. Avoid overmixing—you want to preserve those delicate butter pockets that create the flaky layers. Form the dough into a disk, wrap it in plastic, and refrigerate for at least 30 minutes while you prepare the filling.
Cook the Bacon and Prepare the Filling
Line a baking sheet with parchment paper and arrange the 6 ounces bacon in a single layer. Bake at 400°F for 12-15 minutes, flipping halfway, until crispy. Drain on paper towels and crumble into small pieces. The bacon should be fully cooked through with a rich, caramelized flavor that will elevate your quiche.
In a medium bowl, whisk together the 4 whole large eggs, 1 cup sour cream, 0.5 cup heavy cream, 1.5 cups shredded sharp cheddar cheese, 0.5 teaspoon black pepper, 0.25 teaspoon nutmeg, and 0.5 teaspoon garlic powder until completely smooth. Fold in the crumbled bacon and 0.25 cup chopped chives, reserving a small amount for garnish. This mixture should be thick but pourable—if it's too thick, you can whisk in a tablespoon or two of milk or water to loosen it slightly.
Roll Out and Blind-Bake the Crust
On a lightly floured surface, roll out the chilled dough into a 9-inch circle, about 1/8-inch thick. Transfer it to a 9-inch pie dish and gently press it into the bottom and up the sides. Trim any excess dough hanging over the edge. Here's the trick to prevent a soggy bottom: Line the crust with parchment paper, fill it with pie weights or dried beans, and bake at 375°F for 15 minutes. Remove the weights and bake for another 5 minutes until the crust is lightly golden.
This pre-baking step ensures your crust stays crispy even after absorbing the moist filling. The edges should be just starting to set, but the center might still look slightly pale—it's okay. The filling will finish baking the crust perfectly.
Assemble and Bake the Quiche
Pour the egg mixture evenly into the pre-baked crust, spreading it out with a spatula to create an even layer. Sprinkle the reserved 0.25 cup chopped chives evenly over the top for a pop of color and fresh flavor. The filling should fill the crust almost to the top—it will puff up slightly during baking.
Bake at 350°F for 40-45 minutes, until the center is just set and the top is golden brown. Here's how to test for doneness: Gently shake the pie dish—if the filling jiggles slightly but doesn't wobble, it's ready. If the edges brown too quickly, cover them with aluminum foil after 25 minutes to prevent over-browning while the center finishes cooking.
Rest and Serve
Remove the quiche from the oven and let it cool for 10 minutes before slicing. This resting period allows the filling to set completely and makes it much easier to serve neat slices. The crust should be crisp and flaky, while the filling will be creamy with just a slight wobble in the center—this is perfect texture for a quiche.
Slice into 6 equal wedges and serve warm or at room temperature. Each bite should deliver that perfect combination of crispy crust, rich tangy filling, and smoky bacon flavor. Store any leftovers covered in the refrigerator for up to 3 days, and reheat individual slices in the oven at 350°F for 10-12 minutes to restore that perfect texture.
Pro Tips For Making Sour Cream Quiche
- Chill the Dough First: Skip rolling straight from the fridge, but give that butter-flour mix 30 minutes in the coldest part of your fridge. I learned this the hard way—warm dough spreads like soup, and your crust will end up looking like a sad, greasy pancake instead of a sturdy base.
- Use Full-Fat Sour Cream: Light or low-fat sour cream won’t cut it here—it’s the creamy magic that makes this quiche rich and tender. My grandmother swore by it, and she was right: the fat keeps the custard from drying out, even if you’re not the most precise timer.
- Bake Until the Center Jiggles: That wobbly center isn’t a mistake—it’s the sign of a perfect quiche. Pull it out when the edges are golden and the middle still has a slight bounce (about 40-45 minutes at 375°F). Let it sit 5 minutes before slicing, or you’ll end up with a runny mess.
- Prevent a Soggy Bottom: Blind-bake the crust for 10 minutes before adding the filling—yes, even if you’re in a hurry. I skip this when I’m lazy, but the difference is noticeable: a crisp base instead of a soggy, buttery sponge. Use pie weights or dried beans (they work just as well).
Make-ahead tips for leftovers
Prep Ahead Crust
Make the crust dough up to 3 days ahead and store it wrapped tightly in plastic in the fridge. This gives the gluten time to relax, making it easier to roll out later.
I like to shape it into a disk and flatten it slightly before refrigerating—this prevents cracking when you roll it out. When ready to use, let it sit at room temperature for 10-15 minutes before rolling to avoid stressing the dough. 🧈
Filling Prep Timeline
Whisk the egg filling the night before and refrigerate it in an airtight container. The flavors meld beautifully overnight, and the mixture will be perfectly chilled when you're ready to assemble.
For the bacon, cook it ahead of time and store the crumbles in the fridge for up to 3 days. Reheat them gently in a skillet before adding to the filling to restore their crispiness. 🥓
Blind-Bake Shortcut
Pre-bake the crust the morning of your brunch and store it at room temperature in a cool, dry place. Cover it loosely with a clean kitchen towel to keep it fresh. This step is crucial for preventing a soggy bottom—don't skip it!
If you're really short on time, use a store-bought pie crust and blind-bake it according to the package instructions. Just be sure to preheat your oven to 375°F for even baking. ⏰
Assemble Early
Pour the filling into the crust and refrigerate the assembled quiche for 1-2 hours before baking. This chilling step helps the filling set slightly, reducing the risk of a runny center. It also allows you to bake it straight from the fridge—just add 5-10 minutes to your baking time.
I find this method especially helpful for busy mornings when I need to bake right before serving. 💡
Leftovers Strategy
Slice and store any leftovers in an airtight container for up to 3 days. Reheat individual portions in the oven at 350°F for 10-12 minutes to restore that perfect creamy texture.
For a quick breakfast, wrap slices in foil and reheat in the microwave for 45-60 seconds, but the oven method keeps the crust crispier. 🍽️
Freezer-Friendly Option
Assemble the quiche and bake it as directed, then let it cool completely. Wrap the whole quiche tightly in plastic wrap followed by aluminum foil to prevent freezer burn. It will keep in the freezer for up to 2 months.
To serve, thaw overnight in the fridge and reheat at 350°F for 20-25 minutes. The texture might be slightly denser, but it's still delicious! ❄️
Nutrition facts
Frequently asked questions
Why does my quiche crust always get soggy?
Soggy crusts happen when moisture from the filling steams the bottom. The fix? Always pre-bake the crust with pie weights or dried beans for 15-20 minutes at 375°F before adding filling. This creates a barrier that stays crisp even after baking. Chilling the assembled quiche for 1-2 hours before baking also helps set the filling slightly, reducing moisture transfer.
Can I make this quiche without a pie dish?
Use a 9-inch cast-iron skillet or oven-safe ceramic dish. The key is to blind-bake the crust first—just line it with parchment and weights. For a rustic look, try a free-form crust on a baking sheet, but expect uneven edges. Just ensure the crust is fully pre-baked to prevent sogginess.
What’s the best way to reheat leftovers?
Oven reheating preserves texture best: slice quiche, wrap in foil, and bake at 350°F for 10-12 minutes until warm. For quick fixes, microwave for 45-60 seconds (cover with a damp paper towel to prevent drying). Never reheat straight from the fridge—let slices sit at room temperature for 5 minutes first.
How do I adjust this recipe for a gluten-free crust?
Replace the all-purpose flour with a 1:1 gluten-free flour blend (like Bob’s Red Mill) and add 1 tablespoon xanthan gum to the dough. Use 1 extra tablespoon of ice water since gluten-free doughs absorb more moisture. Chill the dough 45 minutes extra to prevent cracking. The filling stays the same—just ensure your crust is fully pre-baked.
Can I make this quiche ahead and freeze it?
Yes! Bake the quiche, cool completely, then wrap tightly in plastic followed by foil. Freeze for up to 2 months. Thaw overnight in the fridge and reheat at 350°F for 20-25 minutes. The texture may be slightly denser after freezing, but it’s still delicious. Label your container with the date to track freshness.