Side Dishes
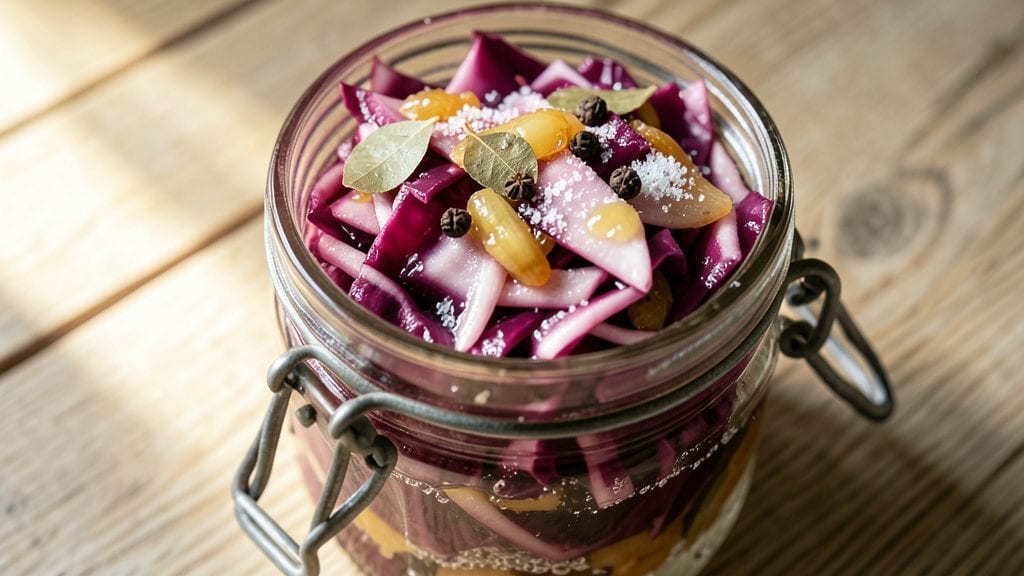
Sweet and sour red cabbage canning transforms humble cabbage into a vibrant, tangy side dish that keeps beautifully for months. The careful balance of vinegar, sugar, and spices creates that signature fermented brightness while preserving all the texture and flavor in sterilized jars.
I developed this recipe after years of perfecting the science of safe canning—no more guessing about pH levels or processing times.
What makes this recipe special is the foolproof method that ensures safe, long-lasting results while delivering restaurant-quality flavor. You'll start with fresh red cabbage, thinly sliced and simmered with onions, vinegar, and spices until tender and infused with that signature sweet-sour taste.
The key to perfect canning lies in proper sterilization, precise processing times, and maintaining the right acidity level.
By the time you're done, you'll have jars of vibrant red cabbage with tender slices and that perfect balance of sweet and tangy flavors. This preserved side dish is ideal for holiday tables, sandwiches, or serving alongside roasted meats.
The process might seem intimidating at first, but following these exact steps guarantees safe, delicious results that will impress even experienced canners.
This recipe includes all the critical safety details you need—from sterilization techniques to proper processing times—so you can confidently preserve your harvest. Whether you're a seasoned canner or trying it for the first time, these instructions will guide you through each step with precision.
Let's get started on preserving that perfect sweet and sour flavor.
Ingredients for sweet and sour red cabbage canning
Six jars of vibrant red cabbage await—just these ingredients transform humble cabbage into restaurant-quality preserved goodness.
| Ingredient | Amount | Notes |
|---|---|---|
| Red Cabbage 🥬 | 3 lb | Fresh, firm, vibrant purple |
| Yellow Onions 🧅 | 2 whole | Medium, thinly sliced |
| White Vinegar 💧 | 2 cups | 5% acidity for proper pH |
| Granulated Sugar 🍚 | 1 ½ cups | White or light brown |
| Bay Leaves 🌿 | 3 whole | Fresh or dried |
| Allspice Berries 🌶️ | 4 whole | Crushed lightly |
| Cloves 🌿 | 6 whole | Whole, not ground |
| Salt 🧂 | 1 ½ tsp | Non-iodized preferred |
| Water 💧 | 4 cups | Filtered or distilled |
| Pint-Sized Mason Jars 🍶 | 6 whole | With lids and bands |
| Lemon Juice 🍋 | ½ cup | Freshly squeezed |
The cabbage is your canvas here, so pick the freshest, firmest heads you can find. Local farmers markets often have the best quality, but the grocery store works too—just avoid any with wilted or yellowing leaves. For onions, yellow varieties add the most sweetness when caramelized. Vinegar matters for safety too—stick with 5% acidity white vinegar (like Heinz or Texas Pete) to ensure proper pH levels. The sugar isn't just for sweetness—it helps preserve color and texture during processing. I always buy organic allspice berries and whole cloves from the bulk section at Whole Foods or Penzeys for maximum flavor punch.
No white vinegar? Apple cider vinegar works too—just add an extra tablespoon of lemon juice to compensate. Running short on sugar? Honey at a 1:1 ratio gives a different depth of flavor. Out of whole spices? Ground allspice at half the amount is fine, but you'll lose that beautiful spice speck appearance. For jars, Ball or Kerr brand are the gold standard—make sure they're new and undamaged. The lemon juice is non-negotiable for acidity—if you're using bottled, add an extra tablespoon to be safe. And for heaven's sake, sterilize your jars properly—boiling them for 10 minutes in water is the only way to guarantee safety.
This recipe makes enough to fill 6 pint jars, perfect for gifting or holiday prep. The preserved cabbage keeps for up to 18 months in a cool, dark pantry—just check the seal holds after opening. I always date my jars with a permanent marker so I know when they were canned. For best results, use within 12 months of canning. The flavor actually improves over time, developing that perfect sweet-sour balance. Store unopened jars upright, and once opened, transfer to the fridge where they'll last about 2 weeks. Trust me, you'll want to make extra—this stuff disappears fast!
Why You'll Love This Recipe
- No-Chop Nightmare: I swear, this is one of those rare recipes where the hardest part is deciding how much cabbage to buy. Thinly slice the onions and shred the cabbage—done. The vinegar and sugar do all the heavy lifting while you sip your coffee.
- Sweet-Tart Magic: That first bite? Pure contrast—bright, tangy vinegar cutting through the cabbage’s natural sweetness, then the sugar pulling it all together into something dangerously addictive. Bay leaves add this earthy depth that makes it taste like a hug from your grandma’s kitchen.
- Pantry Staple Power: Between us, I’ve used this in tacos, over grilled chicken, and even as a side for breakfast sausages. The onions caramelize just enough to add richness, so it’s never boring. Honestly, I keep a jar in the fridge for emergencies—because let’s be real, life happens.
- Budget-Friendly Pantry Gold: Red cabbage lasts forever, onions are cheap, and sugar/vinegar? You already have them. This recipe stretches across meals without breaking the bank. I’ve made it for potlucks, holiday sides, and lazy Sundays—always a crowd-pleaser, always a steal.
Step-by-step instructions for sweet and sour red cabbage canning
Here's the method to preserve that perfect balance of sweet, tangy, and aromatic flavors in your jars.
Prepare the Red Cabbage and Onions
Start by removing the outer leaves from the 3 lb red cabbage and cutting it into ¼-inch thick wedges, keeping the core intact. This shape ensures even cooking and proper preservation. Transfer the wedges to a large stockpot and cover with 4 cups water. Bring to a boil over medium-high heat, then immediately reduce to medium-low heat and simmer for 10 minutes. You'll see the cabbage soften and begin to collapse slightly—this is when it's ready.
While the cabbage cooks, thinly slice the 2 whole yellow onions (about ⅛-inch thick slices). Once the cabbage has softened, drain it thoroughly in a colander, pressing gently to remove excess water. This step is crucial—too much moisture in the jars can lead to mold growth during storage. Transfer the drained cabbage back to the pot and add the sliced onions, tossing gently to combine.
Build the Sweet and Sour Brine
In a separate saucepan, combine the 2 cups white vinegar, 1.5 cups granulated sugar, 1.5 tsp salt, 0.5 cup lemon juice, 3 whole bay leaves, 4 whole allspice berries, and 6 whole cloves. Bring this mixture to a boil over medium heat, stirring until the sugar and salt dissolve completely. The liquid should turn into a clear, golden syrup—this is your preserving brine. Let it simmer for 5 minutes to allow the spices to infuse fully.
Here's the thing—don't rush this step. The spices need time to release their aromatic oils into the liquid. You'll know it's ready when the mixture smells deeply of citrus, allspice, and bay. Remove the pan from heat and let the brine cool slightly (about 10 minutes), but keep it warm enough to maintain a gentle simmer when you add the cabbage.
Pack the Jars and Process the Canned Cabbage
Sterilize your 6 whole pint-sized mason jars and lids by boiling them in water for 10 minutes. While they're sterilizing, carefully ladle the warm cabbage and onion mixture into each jar, filling them to within ½ inch of the rim. Use a wooden spoon to press down gently, ensuring the vegetables are packed tightly and submerged in liquid. This prevents mold growth and maintains that vibrant color.
Ladle the warm brine over the cabbage in each jar until the liquid covers the vegetables by ½ inch. Use a non-metallic utensil to remove any air bubbles trapped between the layers. Wipe the rims of the jars with a clean, damp cloth to ensure a perfect seal. Place the lids on the jars and screw the bands down fingertip-tight (not too tight—just until resistance is met).
Pressure Can the Jars for Long-Term Storage
Load the jars into a pressure canner, ensuring they're upright and not touching each other. Add 2-3 inches of hot water to the canner, making sure the water level is below the jar shoulders. Place the lid on the canner and bring the water to a boil over high heat. Once boiling, reduce the heat to maintain a gentle rolling boil and process the jars for 75 minutes at 10 pounds of pressure (adjust for altitude if necessary).
This processing time ensures the cabbage is safely preserved and free from harmful bacteria. After the time is up, turn off the heat and let the canner cool naturally for 15 minutes. Then, carefully remove the lid (be cautious—the steam is intense) and let the jars sit for an additional 5 minutes before removing them. Place the jars on a clean towel and let them cool completely at room temperature for 12-24 hours. You'll hear the satisfying ping of the lids sealing—this confirms your jars are properly preserved.
Store and Enjoy Your Preserved Cabbage
Once the jars have cooled completely, check the seals by pressing down on the center of each lid. If it doesn't pop back up, the jar is sealed and ready for storage. Label each jar with the date and store them in a cool, dark place (like a pantry) for up to 12 months. The flavors will mellow slightly over time, but the sweet and sour balance will remain delightfully vibrant.
To use, simply open a jar and enjoy the cabbage straight from the fridge as a side dish, in salads, or even as a topping for roasted meats. The tangy, slightly sweet profile makes it incredibly versatile. If you notice any jars that didn't seal properly or show signs of spoilage (like mold or foul odors), discard them immediately—safety first!
Pro Tips For Making Sweet And Sour Red Cabbage Canning
- Shred Cabbage Thin: The difference between mushy and perfect comes down to knife work—slice the cabbage as thinly as you can handle, almost like coleslaw. I used to cut it in thick wedges, and it always turned out chewy; now it cooks down tender but still holds shape.
- Sweat Onions Low: Don’t rush the onions—cook them on medium-low heat until they’re golden and translucent, not browned. I learned this the hard way after burning three batches; the flavor gets bitter if you let it go, and you’ll taste it in the final jar.
- Vinegar First, Sugar Last: Add the vinegar to the boiling water before the cabbage and onions, then bring it back to a rolling boil. Dumping sugar in first makes it clump like glue; wait until the liquid’s hot and clear to stir it in for a smooth, glossy finish.
- Skip the Crowded Jars: Pack the cabbage mixture loosely—it expands when canning, and overstuffing leads to broken jars or soggy, mushy cabbage. Leave about an inch of headspace, then tap the jars gently on the counter to settle the contents naturally. (Yes, even if you’re impatient like me.)
Dietary considerations for these flavors
Gluten-Free Friendly
The good news is that this sweet and sour red cabbage recipe is naturally gluten-free—no wheat, barley, or rye is involved. The cabbage, onions, vinegar, sugar, and spices all come from gluten-free sources.
Just double-check your vinegar label (some flavored varieties may contain additives with gluten) and ensure your spices are certified gluten-free if you're highly sensitive. I always use Penzeys brand spices because they're tested for purity. 🌱
Low-Sugar Adaptation
If you're watching your sugar intake, you can reduce the 1.5 cups granulated sugar to 1 cup without sacrificing too much sweetness. The vinegar and lemon juice will still provide plenty of tangy brightness.
For an even lower-sugar option, consider using ½ cup honey or maple syrup instead—just remember that honey has a slightly different flavor profile and may darken the cabbage slightly. The key is balancing sweetness with acidity to maintain that signature sweet-sour taste.
Vegan and Vegetarian
This recipe is already perfect for vegans and vegetarians since it contains no animal products. The cabbage, onions, vinegar, sugar, and spices are all plant-based. Just ensure your vinegar is vegan-friendly (some traditional vinegars may be processed with animal products) and that your lemon juice is 100% pure.
The preserved cabbage makes a fantastic side dish for plant-based meals, pairing beautifully with tofu, tempeh, or hearty vegetable stews. It's a pantry staple that adds vibrant color and flavor to any meal.
Allergy Considerations
For those with vinegar allergies, this recipe may not be suitable due to the essential role of vinegar in both flavor and preservation. However, if you're sensitive to other components, check for potential cross-contamination.
For example, if you have a mustard allergy, avoid brands of vinegar that may be processed in facilities handling mustard. Always read labels carefully, and if in doubt, opt for certified allergy-free brands.
The spices and sugar in this recipe are typically safe for most allergies, but individual sensitivities vary.
Acid Sensitivity
If you or someone in your household has acid reflux or sensitivity to vinegar, you can reduce the vinegar slightly by 1-2 tablespoons and increase the lemon juice by the same amount. The lemon juice provides acidity while being slightly gentler on the stomach for some people.
You can also serve the preserved cabbage in smaller portions alongside meals that are easier to digest, like steamed vegetables or grilled fish. Always listen to your body—if the tanginess causes discomfort, adjust the ratio to suit your needs.
Storage for Dietary Needs
Once opened, store your preserved cabbage in the refrigerator for up to 2 weeks to maintain freshness and safety. For those following a FODMAP diet, this recipe is generally low in fermentable carbs, but the onions may be a concern for some.
If needed, you can omit the onions or use a smaller amount. The cabbage itself is a great source of fiber and vitamin C, making it a nutritious addition to any diet.
Just remember to always check the seals and discard any jars that don't seal properly or show signs of spoilage. 💡
Nutrition facts
Frequently asked questions
Can I use green cabbage instead of red for this recipe?
While you can substitute green cabbage, the vibrant color and slightly sweeter flavor of red cabbage are key to this recipe. Green cabbage will work, but expect a less visually striking result and a milder taste. If you must use green, add an extra ½ teaspoon of turmeric to the brine for color and a pinch more sugar (¼ cup extra) to compensate for the less sweet profile.
How do I know when my jars are properly sealed?
After cooling for 12-24 hours, press the center of each lid. If it doesn't pop back up, the jar is sealed. You should also hear a satisfying ping as the jars cool. If a jar doesn't seal, refrigerate it and use the contents within 1 week. Never taste-test for safety—always rely on visual and auditory cues.
Can I adjust the sweetness or sourness after canning?
Unfortunately, once canned, you can't easily adjust the balance. The recipe is designed to create that perfect harmony of flavors during processing. If you prefer it sweeter, add 1 extra tablespoon of sugar per jar to the brine before canning. For more sourness, increase the vinegar by 1 tablespoon per jar—just ensure the total vinegar remains at least 2 cups for 6 jars to maintain proper acidity.
What if I don't have a pressure canner? Can I use a water bath?
No, this recipe requires a pressure canner because the low-acid nature of vegetables demands higher temperatures to ensure safety. Water bath canning is only suitable for high-acid foods like tomatoes with added acid or pickles. For this recipe, investing in a quality pressure canner is essential—it's the only way to guarantee safe, long-term storage.
How should I store opened jars of sweet and sour cabbage?
Transfer the contents to an airtight container and refrigerate immediately. Properly stored, it will keep for 2 weeks in the fridge. For longer storage, consider freezing the cabbage in portions—it holds up well and maintains most of its texture. Just thaw overnight in the refrigerator before using.