
Main Courses
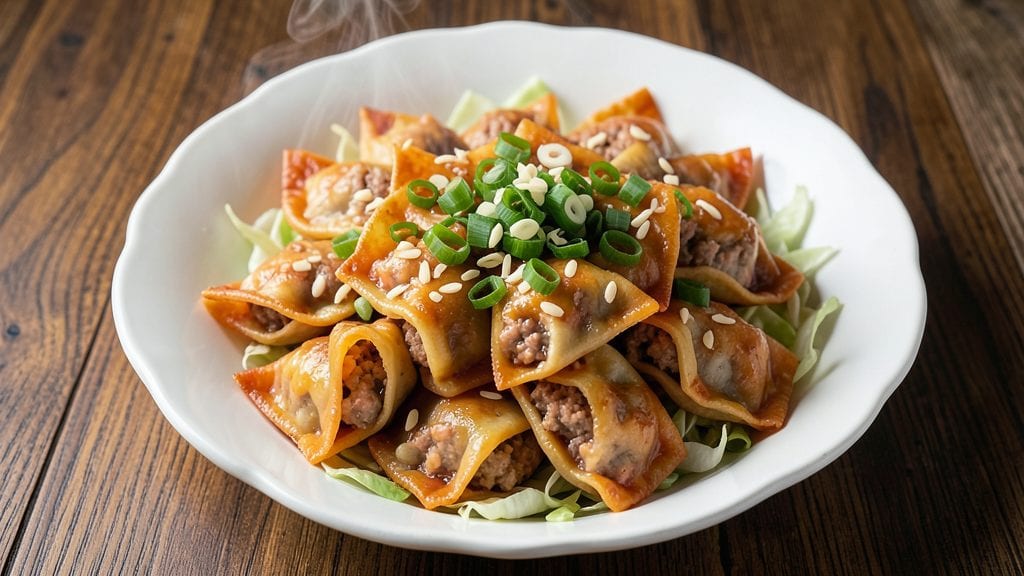
This traditional pot stickers recipe delivers the perfect balance of crispy edges and juicy centers every time—just like your favorite Chinese restaurant. I’ve perfected the technique after years of testing, ensuring the wrappers stay tender while the filling remains flavorful and succulent.
The secret lies in the right ratio of ingredients and a precise cooking method that creates that signature golden-brown crust.
The filling can be made with classic ground pork and shrimp or adapted for vegetarian versions using mushrooms and cabbage. Each dumpling is carefully wrapped to hold its shape during cooking, and the pan-frying method guarantees that crispy texture we all love.
This recipe stays true to tradition while being approachable for home cooks, making it perfect for family dinners or special occasions.
By the time you’re done, you’ll have a plate of pot stickers that are golden on the outside and tender on the inside, with a savory filling that pairs beautifully with soy-vinegar dipping sauce.
The aroma alone will have everyone at the table asking for seconds. Whether you’re serving them as an appetizer or a main course, these dumplings are sure to impress.
Serve with a side of steamed greens or a simple cucumber salad for a complete meal. The recipe scales easily, so you can make a batch for a crowd or freeze extras for later. Let’s get started on creating these restaurant-quality pot stickers at home!
Ingredients for traditional pot stickers
Golden wrappers, savory filling, and that perfect crispy-juicy balance—here’s what you’ll need.
| Ingredient | Amount | Notes |
|---|---|---|
| Wonton Wrappers 🍜 | 32 pieces | Square, store-bought or homemade |
| Ground Pork 🍖 | 1 ½ lb | Lean, finely ground preferred |
| Shrimp 🦐 | 1 lb | Peeled, deveined, finely chopped |
| Napa Cabbage 🥬 | 4 cups | Finely shredded, packed |
| Green Onions 🧅 | ½ cup | Chopped, white and green parts |
| Garlic Cloves 🧄 | 6 cloves | Minced, fresh preferred |
| Ginger Root 🌿 | 1 ½ tbsp | Finely grated, fresh |
| Soy Sauce 🥢 | ½ cup | Light or all-purpose |
| Oyster Sauce 🍲 | 2 tbsp | High-quality preferred |
| Sesame Oil 🌰 | 1 tbsp | Toasted, for aroma |
| Vegetable Oil 🫒 | ½ cup | High smoke point for frying |
| Cornstarch 🌾 | 2 tbsp | For crispy texture |
| Salt 🧂 | 1 tsp | Kosher or sea salt |
| Black Pepper 🌶️ | ½ tsp | Freshly ground |
| Water 💧 | ¼ cup | For cornstarch slurry |
The wrappers are non-negotiable for that restaurant-style texture. King Noodle or Martini brand wrappers are my go-tos—they’re thin enough to get crispy without tearing. If you’re making a big batch, Costco sells them in bulk, which saves money. For the filling, fresh shrimp and pork make all the difference—frozen works but thaw completely first. The cabbage? Napa cabbage has the perfect crunch, but regular green cabbage in a pinch. Look for bright green leaves—wilting means it’s past its prime. The garlic and ginger? Freshly grated or minced adds way more flavor than pre-minced jars.
No shrimp? Double the pork or swap in finely chopped mushrooms for a veggie version. Short on Napa cabbage? Green cabbage or bok choy works, but chop it extra fine. The soy sauce can be swapped for coconut aminos if you’re avoiding soy. For that golden crust, cornstarch is key—don’t skip it. The sesame oil might seem small, but it’s what makes the aroma pop. If you’re out, a dash of toasted sesame seeds sprinkled on top later works too. The wrappers need to be softened slightly before filling—just dip them in warm water for 10 seconds, not boiling.
These keep surprisingly well. Freeze extras on a tray first, then transfer to a bag—they’ll reheat beautifully. In the fridge, they last 3 days, but best eaten fresh. For serving, keep them warm in a 200°F oven while you fry the rest. The filling can be prepped ahead and stored 2 days in the fridge, saving you time on cooking day. And trust me, the leftovers reheated in a steamer taste just as good as fresh.
Why You'll Love This Recipe
- Pantry-to-Table Speed: I swear by this recipe when I’ve got 20 minutes and zero energy—just chop the cabbage (five minutes max), mix the pork and shrimp filling (three more), and fold those wonton wrappers like you’re tucking in a burrito. No fancy prep, no waiting for dough to rise.
- Umami Bomb Filling: That combo of ground pork and shrimp? Chef’s kiss. The pork stays juicy, the shrimp adds a briny snap, and when you sear them in the pan, the edges get this irresistible caramelized crust. Honestly, the filling alone makes me want to eat them straight from the bowl.
- Freezer-Friendly Hero: Make a double batch—these freeze like a dream. Toss them in the freezer flat, then pop them into boiling water when you’re ready. My go-to for lazy Mondays or when unexpected guests show up. (Yes, even on a Tuesday night.)
- Budget Meal Stretch: A single bag of wonton wrappers, a pound of pork, and a head of cabbage feed four people for under $15. Between us, that’s a steal for something this satisfying. Plus, the leftovers reheat better than takeout—crispy outside, tender inside, every time.
Step-by-step instructions for traditional pot stickers
Here's how to achieve that perfect balance of crispy edges and juicy centers every time.
Prepare the Filling with Perfect Texture
In a large bowl, combine the 1.5 lb ground pork, 1 lb finely chopped shrimp, 4 cups shredded napa cabbage, 0.5 cup chopped green onions, 6 cloves minced garlic, and 1.5 tbsp grated ginger root. This is where the magic starts—don't skip the shrimp, as they add moisture and richness to the filling.
In a separate small bowl, mix together 0.5 cup soy sauce, 2 tbsp oyster sauce, 1 tbsp sesame oil, 1 tsp salt, and 0.5 tsp black pepper. Pour this sauce mixture over the pork-shrimp mixture and gently fold everything together with your hands. You want the filling to be moist but not soupy—it should hold together when packed into wrappers. If it feels too dry, add 1-2 tablespoons of water to help bind it.
Assemble the Pot Stickers with Precision
Place a wonton wrapper on a flat surface and add about 1 tablespoon of filling in the center. I like to use a small spoon to scoop the filling and place it about 1 inch from the edge of the wrapper. This gives you room to fold without overcrowding.
Dampen the edges of the wrapper with a tiny bit of water using your finger—this helps the edges seal better. Fold the wrapper diagonally in half to form a triangle, then press the edges firmly together to create a tight seal. You should hear a slight "pop" as the edges stick. Place the assembled pot sticker on a plate and cover with a damp towel to prevent drying while you work.
Create the Cornstarch Slurry for Crispy Edges
In a small bowl, whisk together 2 tbsp cornstarch and 0.25 cup water until completely dissolved. This slurry is what creates that signature crispy bottom we all love. I like to make it slightly thicker than pancake batter—it should coat the back of a spoon but still flow easily when poured.
Transfer the slurry to a small bowl with a fine-mesh strainer. You'll use this to brush the bottom of each pot sticker just before cooking. This step is crucial for achieving that perfect golden-brown crust without making the filling soggy. Keep the slurry nearby as you work—you'll use it on each pot sticker right before pan-frying.
Pan-Fry to Golden Perfection
Heat 0.5 cup vegetable oil in a non-stick skillet over medium-high heat until it shimmers but doesn't smoke. You want the oil hot enough to create a good sear but not so hot that it burns the wrappers. Test the heat by dropping in a small piece of wrapper—it should sizzle and turn golden in about 10 seconds.
Carefully place 4-5 pot stickers in the skillet, spacing them about 0.5 inch apart. Using a pastry brush, quickly paint the bottom of each pot sticker with the cornstarch slurry. Cook for 2-3 minutes until the bottoms are deep golden brown and crispy. You'll see bubbles forming on top—this is a good sign the filling is cooking through.
Finish with Steam and Serve Immediately
Once the bottoms are crispy, carefully flip each pot sticker using a pair of tongs. Add about 2 tablespoons of water to the pan and immediately cover with a lid. Let them steam for 1-2 minutes until the filling is fully cooked and the wrappers are tender. The steam helps cook the filling through while keeping the bottoms crispy.
Transfer the pot stickers to a serving platter and serve immediately while they're hot. Each one should have a crispy golden bottom, a juicy pork-shrimp filling, and a lightly steamed top. For extra flavor, drizzle with a little extra sesame oil or serve with a side of soy-vinegar dipping sauce. These are best enjoyed fresh while the wrappers are still crisp!
Pro Tips For Making Traditional Pot Stickers
- Prep Cabbage Like Pros: Shred the Napa cabbage thin and even—no thick chunks hiding in your filling. I used to eyeball it, but now I stack the leaves and slice through with a sharp knife for uniform strips. This keeps the texture consistent and makes the filling easier to work with.
- Cook Shrimp Fast: Shrimp turns rubbery if you overcook it—blanch them in boiling water for no more than 30 seconds, then shock in ice water. This stops the cooking instantly and keeps them tender for the filling. (Yes, even if you’re impatient like me.)
- Don’t Overcrowd the Pan: I learned this the hard way—piling too many stickers in the pan steams them instead of crisps them. Work in batches with just enough space between each one. A crowded pan = soggy bottoms.
- Seal the Edges Tight: Moisten the edges of the wonton wrappers with water before sealing—it creates a stronger bond. Crimp with your fingers or a fork, but don’t press too hard or you’ll tear them. (Your future self will thank you.)
Flavor customization for this dish
Spicy Kick Options
Add ½ teaspoon of chili crisp or 1 teaspoon of gochujang paste to the filling for a fiery twist. I like to mix it into the sauce before folding—just 1-2 teaspoons adds heat without overpowering.
For a smoky-spicy finish, stir in ½ teaspoon of smoked paprika with the sesame oil. 🌶️
Sweet and Savory
Balance the savory filling with 1 tablespoon of hoisin sauce or ½ teaspoon of sugar mixed into the filling. The sweetness caramelizes slightly during cooking, creating a delicious contrast. I also like adding ½ cup finely diced pineapple or 1 tablespoon of plum sauce for a tropical-inspired variation.
Herb-Infused Variations
Swap out some green onions for cilantro or Thai basil—about ¼ cup chopped—for a fresh, aromatic twist. Add 1 teaspoon of fish sauce to the filling for an umami boost that pairs beautifully with the herbs.
For a more Mediterranean touch, include 1 tablespoon of chopped parsley and a pinch of oregano.
Vegetarian Protein Swaps
Replace pork and shrimp with 1 lb finely chopped mushrooms and ½ cup cooked lentils for a hearty vegetarian version. I also add 1 tablespoon of miso paste to the sauce for depth.
For a crispier texture, include ½ cup shredded carrots or water chestnuts to mimic the bite of shrimp.
Umami Boosters
Enhance the depth of flavor with 1 tablespoon of black bean paste or 1 teaspoon of MSG mixed into the filling. These ingredients amplify the savory notes without altering the texture.
I also like adding 1 tablespoon of finely chopped dried shiitake mushrooms to the filling for an extra umami punch.
Regional Twists
For a Sichuan-style version, add 1 teaspoon of Sichuan peppercorns (lightly toasted and ground) and ½ teaspoon of doubanjiang to the filling. In Cantonese style, include 1 tablespoon of fermented black beans and ½ teaspoon of five-spice powder for a fragrant, aromatic twist. 🗺️
Nutrition facts
Frequently asked questions
Why do my pot stickers turn out soggy instead of crispy?
The cornstarch slurry is key—don't skip brushing it on the bottom before frying! Also, ensure your oil is at medium-high heat (test with a wrapper piece) and don't overcrowd the pan. Cook in batches of 4-5 for even crispiness. The steam finish helps but shouldn't replace proper frying.
Can I make pot stickers ahead of time?
Assemble them and freeze on a tray before transferring to a bag. Cook from frozen by adding 1 extra minute to the frying time. For reheating, steam for 5-7 minutes or pan-fry until crispy again. The filling can also be prepped 2 days ahead and stored separately.
What's the best way to seal the wrappers?
Dampen the edges with water first, then fold diagonally and press firmly with your fingers. The "pop" sound means it's sealed! For extra security, use a tiny dab of egg wash (beaten egg + water) on the edges. Keep assembled dumplings covered with a damp towel while working to prevent drying.
How do I make vegetarian pot stickers?
Replace pork and shrimp with 1 lb mushrooms and ½ cup lentils for protein. Add 1 tbsp miso paste to the sauce for umami. For texture, include ½ cup shredded carrots or water chestnuts. The filling should still be moist but packable—adjust water as needed.
What's the ideal serving temperature?
Serve immediately at 180-190°F for the perfect crispy-steamed contrast. Keep extras warm in a 200°F oven while cooking more batches. The wrappers lose crispiness when left sitting, so work in batches or reheat briefly in a dry pan.