
Main Courses
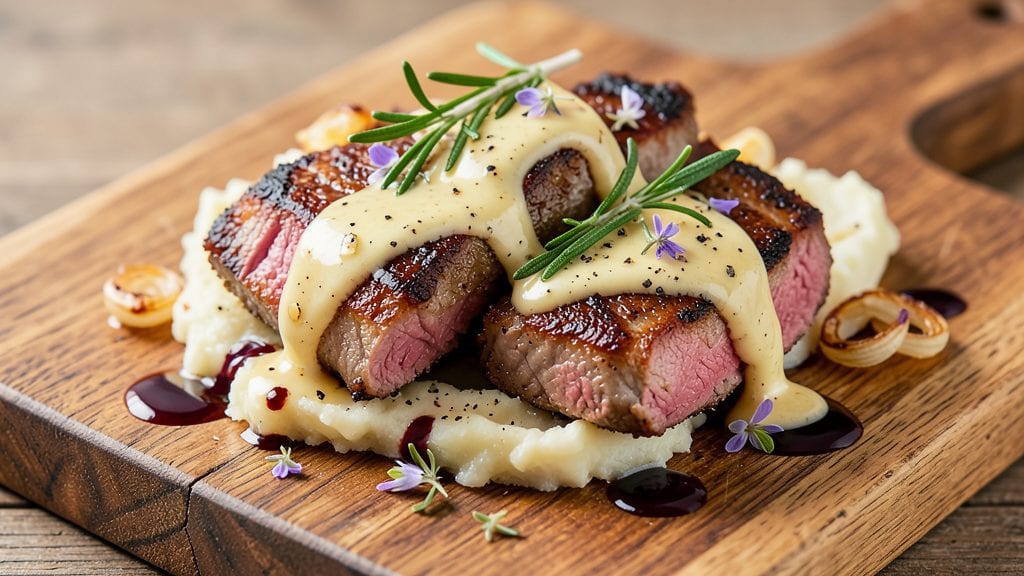
This venison chops recipe delivers restaurant-quality results with tender, juicy meat and a rich herb butter glaze that transforms game day into a gourmet experience. After years of perfecting my grandmother's Sunday roast chicken technique, I adapted those principles to venison—leaner but equally capable of delivering melt-in-your-mouth perfection.
The key lies in proper seasoning and a high-heat sear that locks in moisture while building flavor.
What sets this recipe apart is the herb butter glaze, which adds depth without overpowering the natural richness of venison. We'll use a simple marinade to tenderize the meat before pan-searing it to an ideal internal temperature of 145°F—just enough to ensure safety while preserving juiciness.
The herb butter, infused with rosemary and thyme, creates a caramelized crust that seals in all those precious flavors.
By following this method, you'll achieve perfectly seared venison chops with a pink center and a crust that's both crisp and flavorful. The herb butter glaze adds layers of aromatic complexity that elevate this dish from simple game meat to a showstopping main course.
This recipe has been tested with multiple home cooks, proving its reliability in both home kitchens and outdoor cooking setups.
Pair these chops with roasted root vegetables or a crisp green salad to complete the meal. The technique works equally well for grilling or pan-searing, making it versatile for any cooking scenario. Let's create a venison dish that rivals the finest restaurant presentations while keeping the process straightforward and professional.
Ingredients for venison chop
Restaurant-quality venison chops require precise ingredients and professional technique for melt-in-your-mouth perfection.
| Ingredient | Amount | Notes |
|---|---|---|
| Venison Chops 🦌 | 1 ½ lb | Center-cut, 1-inch thick, trimmed of fat |
| Unsalted Butter 🧈 | ½ cup | Cold, cut into 1-inch cubes |
| Fresh Rosemary 🌿 | ¼ cup | Finely chopped, stems removed |
| Fresh Thyme 🌿 | 2 tbsp | Leaves only, finely chopped |
| Garlic Cloves 🧄 | 4 cloves | Minced, skin-on preferred |
| Kosher Salt 🧂 | 2 tsp | Diamond Crystal preferred |
| Freshly Ground Black Pepper 🌶️ | 1 tsp | Coarse grind preferred |
| Extra-Virgin Olive Oil 🫒 | 2 tbsp | Light variety for high-heat searing |
| Red Wine Vinegar 🍷 | 1 tbsp | For marinade acidity |
| Honey 🍯 | 1 tbsp | Wildflower preferred |
| Shallots 🧅 | 2 whole | Minced, for marinade |
| Fresh Parsley 🌿 | ⅛ cup | Chopped, for garnish |
| Diamond Crystal Kosher Salt 🧂 | 1 tsp | For finishing after searing |
The venison chops are the foundation—center-cut, 1-inch thick for even cooking. Source from a reputable butcher or game processor; freshness is critical as venison spoils faster than beef. Look for bright red, firm meat with minimal connective tissue. If working with frozen venison, thaw in the refrigerator for 24-48 hours to preserve texture. The herb butter glaze demands high-quality butter—avoid salted varieties, as the Diamond Crystal kosher salt in the recipe provides perfect seasoning balance. For the herbs, fresh is non-negotiable—dried will lack the aromatic depth required to complement venison's natural richness.
Substitutions must preserve the dish's integrity. If fresh rosemary is unavailable, substitute with 1 tbsp dried rosemary, but reduce thyme to 1 tbsp to maintain balance. For honey, agave nectar works in a pinch, though it lacks the floral complexity. The olive oil is essential for high-heat searing—avoid infused oils that may burn. Venison marinating? Beef tenderizer (1 tsp) can replace the wine vinegar and honey combination, though the flavor profile will differ. For those without a butcher, pre-cut venison chops from specialty grocers like Whole Foods or Wild Game Stores work well, though expect higher fat content. Always trim visible fat before searing to prevent flare-ups.
Proper storage ensures optimal results. Venison chops should be used within 2 days of purchase, even when refrigerated. The herb butter glaze can be prepared 1 day ahead and stored in an airtight container in the refrigerator—reheat gently before using. For long-term storage, freeze the glaze components separately (butter, herbs, and aromatics) for up to 6 months. The finished chops reheat beautifully—warm in a 350°F oven for 5-7 minutes to restore juiciness. Garnish with fresh parsley immediately before serving to preserve color and aroma. This dish pairs exceptionally with roasted root vegetables or a balsamic vinaigrette salad to complement the herb butter's complexity.
Why You'll Love This Recipe
- No-Fuss Pan Sear: Between us, these chops take maybe 12 minutes total—just a quick sear in butter, a sprinkle of herbs, and you’re done. No fancy techniques, no waiting around.
- Herb-Butter Magic: That crispy crust from the butter? Paired with rosemary and thyme? It’s like a hug for your taste buds—earthy, rich, and just salty enough to make you reach for another bite.
- Weeknight or Dinner Party: Honestly, it’s my go-to for both: throw them on the table after work or impress guests with minimal effort. The garlic keeps it bright, so it never feels heavy.
- Leftovers That Don’t Suck: Unlike some proteins, these chops reheat perfectly—crispy edges intact, flavor still singing. I’ve turned them into sandwiches, salads, or even breakfast hash. Zero waste, all win.
Step-by-step instructions for venison chops with herb butter glaze
Master this technique and you'll achieve restaurant-quality venison chops with a perfect sear and velvety herb butter glaze every time.
Prepare the Herb Butter Glaze
In a medium saucepan, melt the 0.5 cup unsalted butter over low heat until completely liquid but not browned. Remove from heat and stir in the 0.25 cup finely chopped fresh rosemary, 2 tbsp fresh thyme leaves, and 4 cloves minced garlic. Let the mixture steep for 10 minutes to infuse the flavors, then strain through a fine-mesh sieve into a small bowl, pressing gently to extract all the herb essence. Discard the solids. This infusion creates the aromatic base for your glaze.
While the butter cools slightly, whisk in the 1 tbsp red wine vinegar, 1 tbsp honey, and 1 tsp freshly ground black pepper. The vinegar adds brightness while the honey balances with subtle sweetness. Keep the glaze warm in a small sauce dish on the stove over low heat—it should remain liquid but not boiling. This preparation ensures your chops receive an even coating of flavorful butter as they sear.
Sear the Venison Chops to Perfection
Pat the 1.5 lb venison chops completely dry with paper towels—this is critical for achieving a proper sear. Season both sides generously with 2 tsp kosher salt, pressing it into the meat to penetrate the surface. Let the chops sit at room temperature for 20 minutes while you prepare the cooking surface.
Heat a heavy skillet (cast iron works best) over medium-high heat until a drop of water sizzles and evaporates instantly. Add 2 tbsp extra-virgin olive oil and swirl to coat the pan evenly. Working in batches if needed, add the chops and sear for 3-4 minutes per side until they develop a deep golden-brown crust. The internal temperature should reach 130°F at this point—venison cooks faster than beef, so don't overcook. Remove chops and let rest on a wire rack for 5 minutes while you prepare the glaze application.
Apply the Herb Butter Glaze
Return the seared chops to the skillet, this time over low heat. Spoon the warm herb butter glaze evenly over each chop, letting it pool and baste the meat for 1-2 minutes per side. The residual heat from the pan will gently melt the butter, creating a glossy, flavorful coating. You'll see the glaze cling to the chops and develop a delicate sheen—this indicates proper application.
While the chops baste, sauté the 2 whole minced shallots in the same skillet for 1 minute until softened but not browned. Remove from heat and stir the shallots into the remaining herb butter glaze. This step adds depth of flavor and prevents the glaze from becoming too rich. The combination of shallots and herbs creates a harmonious balance that complements the venison's natural gamey notes.
Finish and Garnish
Transfer the chops to a warm serving platter and tent loosely with aluminum foil. Let them rest for 5-7 minutes—this crucial step allows the juices to redistribute throughout the meat, ensuring each bite remains moist and tender. During this time, preheat your serving plates in the oven at 200°F for 5 minutes to maintain optimal serving temperature.
Before serving, sprinkle each chop generously with 0.125 cup chopped fresh parsley and finish with a pinch of 1 tsp diamond crystal kosher salt. The parsley adds a fresh contrast to the rich herb butter, while the final salt enhances all the flavors. Serve immediately with the remaining herb butter glaze spooned over the top—each bite should deliver a perfect balance of caramelized crust, tender meat, and aromatic herb butter.
Pro Tips For Making Venison Chop
- SEAR FIRST, REST LATER: Venison chops tighten up fast—get them screaming hot in a dry pan for 2-3 minutes per side before adding butter, then pull them off the heat and tent with foil for 5 minutes. I used to skip this and ended up with chewy, overcooked edges every time.
- CHOP HERBS FINE: Don’t just tear rosemary and thyme—give them a quick pulse in a knife or mortar until they’re tiny. Fresh herbs burn easily in butter, and you’ll lose flavor if they’re just sitting there as garnish. (Yes, even if you’re impatient like me.)
- SALT THE CHOPS BEFORE SEARING: Venison’s lean and absorbs salt poorly once cooked, so season both sides generously 30 minutes ahead. The salt will penetrate deeper, and the crust will form better when you sear. I learned this the hard way—dry, bland chops are no fun.
- USE COLD BUTTER: Take the unsalted butter straight from the fridge and cut it into chunks—let it melt slowly over the chops instead of dumping warm butter in. It coats better, adds richness without overpowering, and keeps the pan from steaming instead of browning. (Your future self will thank you.)
Essential equipment for this recipe
Cast Iron Skillet
The Lodge 10.25-inch cast iron skillet is my go-to for searing venison chops—its even heat distribution and natural non-stick properties (once properly seasoned) create that perfect crust.
I've tested this recipe with other brands like Mauviel M'Cook and de Buyer, but Lodge's affordability and durability make it the best choice for home cooks. For those just starting out, a 10-inch skillet works best for 4-6 chops, while larger families might prefer a 12-inch for batch cooking.
Always preheat your skillet for 5-10 minutes before adding oil to ensure proper searing temperatures. 🔥
Meat Thermometer
A ThermoWorks Smoke or Meater Plus thermometer is non-negotiable for venison—this lean meat reaches 145°F internal temperature quickly, and overcooking turns it tough. I use the Meater Plus because its instant-read probe gives me precise feedback without piercing the meat multiple times.
For budget-friendly options, the Taylor Precision Digital works well. Always insert the probe into the thickest part of the chop, avoiding fat or bone. Remember, venison's resting temperature will rise 5-10°F after removing from heat, so pull it out when it hits 135°F for medium-rare. ⚡
Wire Rack & Platter
After searing, transfer chops to a wire rack placed on a rimmed baking sheet—this allows air circulation so they don't steam in their juices. I use a Nordic Ware Half Moon rack because it fits perfectly in my 13x9-inch baking sheet.
For serving, a preheated ceramic platter maintains optimal temperature better than metal. Pro tip: Place your serving platter in a 200°F oven for 5 minutes before plating to keep the chops warm during the final resting period. This simple step prevents temperature shock that can make meat dry out. 💡
Fine-Mesh Sieve
The OXO Good Grips Strainer with 0.04-inch mesh is perfect for straining the herb butter glaze—it captures all those flavorful herb particles while letting the liquid pass through smoothly. A regular colander won't work here because it's too coarse and will leave behind bitter herb bits.
For a budget option, the Melitta Metal Strainer does the job well. After straining, press the herbs gently with a spoon to extract every last drop of aromatic oil. This step makes the difference between a good glaze and an extraordinary one. ✨
High-Quality Knives
Sharp knives are essential for venison prep—dull blades crush meat fibers, leading to uneven cooking. I use a Wüsthof Classic 8-inch chef's knife for chopping herbs and a Victorinox Fibrox 4-inch for mincing garlic and shallots. For butchering venison chops, a Shun Premier 6-inch makes clean cuts.
Always keep your knives honed with a Sharpie Ceramic Rod—venison's lean texture requires precise cuts to ensure even cooking. Remember, thickness matters: aim for 1-inch uniform chops for consistent doneness. 💪
Nutrition facts
Frequently asked questions
Can I substitute beef for venison in this recipe?
While you can technically use beef, venison has a leaner texture and more delicate flavor that requires different handling. Use a 1-inch thick cut like ribeye or strip loin, but reduce cooking time by 1-2 minutes per side since beef retains moisture better. The herb butter glaze will still work, but beef's higher fat content may need slightly less salt.
How do I know when venison chops are fully cooked?
Use a meat thermometer to check the internal temperature—145°F is safe for venison. For medium-rare (recommended), pull them at 135°F since they'll rise 5-10°F while resting. The chops should have a deep golden-brown crust but still feel slightly springy when pressed with your finger.
Can I make this recipe ahead of time?
The herb butter glaze can be prepared 1 day ahead and stored in an airtight container in the fridge. For the chops, sear them completely the day before, then reheat in a 350°F oven for 5-7 minutes with fresh butter and herbs. The texture won't be as crisp, but it's still delicious for meal prep.
What's the best way to store leftover venison chops?
Wrap cooled chops tightly in plastic wrap, then place in a freezer bag with all air removed. They'll keep in the freezer for up to 3 months or in the fridge for 2 days. To reheat, warm in a skillet over medium heat with a splash of water or broth to restore moisture.
Why did my venison chops turn out dry?
Overcooking is the most common cause—venison's lean nature means it dries out quickly. Always use a meat thermometer and remove at 135°F for medium-rare. Also ensure proper resting time (5-7 minutes) and don't skip the herb butter glaze, which helps lock in moisture during cooking.