
Side Dishes
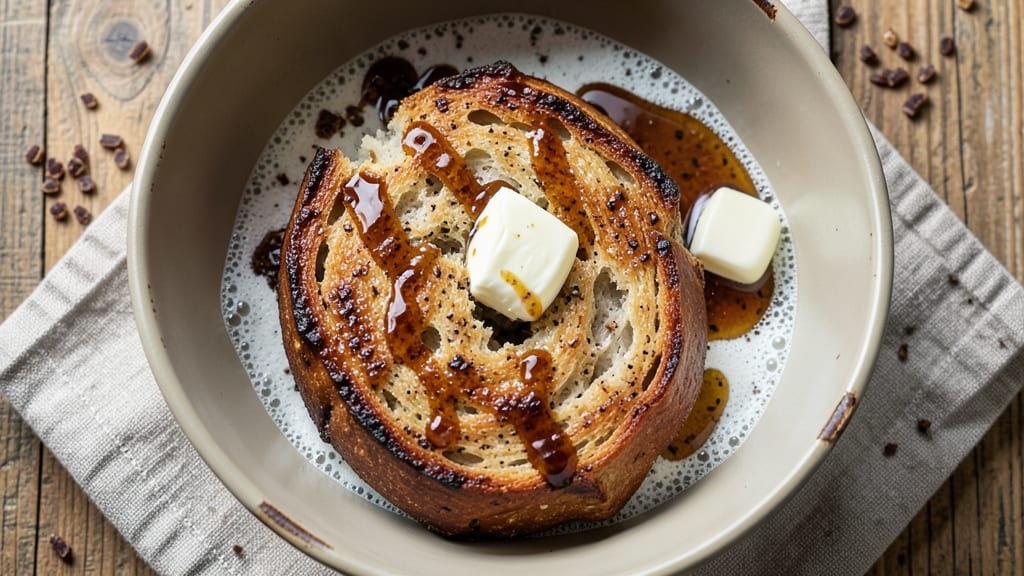
This ale bread recipe delivers a rustic crust with deep malty flavor that pairs perfectly with soups, stews, or as a hearty side. The key lies in using ale instead of water—its natural sugars feed the yeast while adding a subtle bitterness that enhances every bite.
I’ve perfected this method over years of baking, balancing tradition with modern convenience for a loaf that’s both impressive and foolproof.
The fermentation process is where the magic happens—letting the dough rise slowly develops complex flavors and a tender crumb. Unlike quick breads, this recipe requires patience, but the result is worth it: a golden-brown crust with an open crumb structure that traps moisture and flavor.
No-knead adaptations work well for busy schedules, though traditional kneading yields the best texture.
By the time it emerges from the oven, you’ll have a loaf with a crisp exterior and a soft, airy interior infused with ale’s malty depth. The aroma alone will have everyone at the table asking for seconds.
Serve warm with butter or alongside hearty meals for a bread that steals the show.
For those with dietary needs, gluten-free flour blends can substitute traditional wheat flour, though texture may vary slightly. The ale remains the star—its flavor defines this bread, making it a standout for any meal. Let’s get baking!
Ingredients for ale bread
Four key ingredients transform simple flour into malty, aromatic ale bread.
| Ingredient | Amount | Notes |
|---|---|---|
| Active Dry Yeast 🍞 | ¼ tsp | Ensure freshness by checking expiration date |
| Dark Brown Sugar 🍚 | 2 tbsp | Enhances yeast activation and flavor |
| Warm Ale 🍺 | 1 ½ cups | Use 105-110°F temperature, stout or porter preferred |
| All-Purpose Flour 🌾 | 5 cups | Bread flour for improved structure (optional) |
| Whole Wheat Flour 🌾 | 1 cup | Adds rustic texture and nuttiness |
| Unsalted Butter 🧈 | ½ cup | Cold and cubed for optimal dough texture |
| Large Eggs 🥚 | 1 whole | Room temperature for even mixing |
| Granulated Sugar 🍚 | ½ cup | Balances ale's bitterness |
| Sea Salt 🧂 | 1 ½ tsp | Fine grain for even distribution |
| Cornmeal 🌽 | ¼ cup | For dusting baking sheet |
| Water 💧 | ½ cup | Reserved for dough adjustment |
The ale is non-negotiable here—its natural sugars feed the yeast while contributing subtle bitterness that defines the flavor. For best results, use a stout or porter from a craft brewery; Guinness or Sierra Nevada Porter are excellent choices. If you can't find ale, dark beer with at least 5% ABV works in a pinch, though the flavor will be slightly less complex. The yeast should be fresh and active—test it by mixing with warm water and sugar; if it foams within 10 minutes, it's ready to use. For the flours, King Arthur or Bob's Red Mill brands provide consistent results, though any quality all-purpose will work.
No dark brown sugar? Light brown sugar plus 1 tsp molasses mimics the flavor profile. The butter's cold temperature is crucial—it creates steam during baking, resulting in that signature open crumb structure. Substituting margarine or oil will yield a denser loaf. For dietary adaptations, gluten-free 1:1 flour blends can replace the wheat flours, though the texture will be less rustic. The egg adds structure and richness; flax eggs (1 tbsp ground flax + 3 tbsp water) work for vegan versions, though the crumb will be slightly denser. The cornmeal isn't just for dusting—it adds a subtle sweetness to the crust when toasted.
This dough requires patience—first rise for 1-2 hours, then a 2-hour cold proof in the fridge for optimal flavor development. The bread keeps well at room temperature for 3 days wrapped in a cotton towel, or 1 week frozen in a sealed bag. For reheating, wrap in foil and warm at 350°F for 10 minutes. The ale-infused crust reheats beautifully, making it perfect for sandwiches or serving alongside soups. Store any leftover ale in the fridge—it pairs wonderfully with the bread's second day.
Why You'll Love This Recipe
- Foolproof First Try: I’ve made this bread more times than I can count, and honestly? The instructions are so straightforward that even my college-age son—who once burned toast—nailed it. Just toss in the yeast, warm ale, and flours, let it rise, and bake. No kneading, no fuss, no stress.
- Molasses-Kissed Magic: That dark brown sugar? It’s the secret weapon. The bread develops this deep, caramelized sweetness that pairs perfectly with the malty richness of the ale. Toast it, and you’ve got something that tastes like a hug from a bakery—warm, inviting, and impossible to resist.
- Weeknight Wonder: Between us, this bread is my go-to for lazy Sundays or when I’m prepping meals for the week. It’s hearty enough for sandwiches, sturdy enough for toast, and the whole wheat adds just enough substance to keep everyone full. (Yes, even my picky teenager.)
- Budget-Friendly Staple: I make a double batch every month because it’s cheaper than buying store bread, and the ale gives it character without breaking the bank. Leftovers? They last for days, whether I’m reheating slices for breakfast or using them to bulk up soups. Practical, reliable, and always a win.
Step-by-step instructions for ale bread recipe
Mastering this malty loaf requires precision in mixing and proofing for optimal texture.
Activate the Yeast with Warm Ale
In a large mixing bowl, combine the 1.5 cups warm ale (between 105-110°F) with the 2 tablespoons dark brown sugar and 0.25 teaspoon active dry yeast. Stir gently with a wooden spoon and let the mixture sit for 5-10 minutes until it becomes frothy. You'll notice small bubbles forming on the surface—this indicates the yeast is active and ready to work.
If the mixture doesn't bubble after 10 minutes, your yeast may be inactive. In this case, start fresh with a new packet of yeast. The ale's warmth and sugar content provide the perfect environment for yeast activation, which is the foundation of a well-risen loaf. Don't skip this step—proper yeast activation ensures your bread will rise properly later.
Mix the Dough Components
Add the 5 cups all-purpose flour, 1 cup whole wheat flour, 1.5 teaspoons sea salt, and 0.5 cup granulated sugar to the yeast mixture. Using a wooden spoon or dough whisk, stir until the ingredients begin to come together. The dough will initially appear shaggy and dry.
Next, cut the 0.5 cup unsalted butter into small cubes and add them to the bowl. The butter should be cold to help develop gluten properly. Mix in the 1 whole large egg (room temperature) and 0.5 cup water as needed to bring the dough together. Once combined, turn the dough out onto a lightly floured surface and knead for 8-10 minutes until smooth and elastic.
First Rise for Optimal Flavor Development
Shape the dough into a ball and place it in a lightly greased bowl. Cover the bowl with a damp kitchen towel or plastic wrap and let it rise in a warm place for 1-2 hours, or until it has doubled in size. The dough should feel light and springy when pressed gently with a fingertip.
This first rise allows the yeast to ferment and develop flavor. The warm environment encourages the dough to expand, creating the airy texture we want in the final loaf. If your kitchen isn't warm enough, place the bowl near a warm oven (with the light on) or use a proofing box. Avoid overproofing—the dough should rise steadily but not collapse.
Shape and Second Rise
Punch down the risen dough to release air, then shape it into a round or oval loaf. Place it seam-side up on a baking sheet dusted with 0.25 cup cornmeal to prevent sticking. Cover loosely with a towel and let it rise again for 30-45 minutes until it has puffed slightly.
The second rise is shorter but crucial for final texture. The cornmeal creates a crispy, golden crust while preventing the dough from sticking to the baking sheet. If the dough doesn't rise much during this stage, it's ready to bake. Preheat your oven to 375°F while the dough completes its final rise—this ensures even baking once it goes in.
Bake to a Golden, Crusty Perfection
Bake the shaped loaf in the preheated oven for 30-35 minutes, until the crust is deep golden brown and sounds hollow when tapped on the bottom. The internal temperature should reach 190-200°F when measured with an instant-read thermometer.
For best results, rotate the baking sheet halfway through baking to ensure even browning. The bread is done when it develops a rich, malty aroma and the crust is crisp. Let it cool on a wire rack for at least 30 minutes before slicing—this allows the crumb to set properly and prevents a gummy texture. The final loaf should have a crisp exterior and a tender, slightly dense crumb with pockets of air from the ale's fermentation.
Pro Tips For Making Ale Bread
- Test Yeast First: Pour ¼ cup warm ale into a small bowl, sprinkle in ½ packet yeast, and wait 5–10 minutes for it to foam like a tiny beer party. If it sits there lifeless? Toss it and grab fresh yeast—this recipe won’t forgive sluggish yeast, especially with the sugar and whole wheat competing for attention.
- Mix Sugar Last: Add the dark brown sugar to the dough after the yeast and ale have started fermenting—about 5 minutes into mixing. Dumping it in early can overwhelm the yeast, making your bread rise slow or uneven. Think of it like feeding a picky eater: wait for the right moment.
- Knead Until Silky: This dough fights back—whole wheat flour makes it gummy, and ale adds stickiness. Keep kneading by hand (or with a stand mixer) until it’s smooth enough to leave a clean film on your fingers. I used to quit too soon, and my bread turned out dense. Push through the mess; it’s worth it.
- Proof in a Warm Spot: Skip the oven for proofing—your stovetop with a bowl of hot water underneath works just as well. The dough needs to hit 75–80°F (24–27°C) to rise properly, and ambient kitchen temps often leave it stranded. This isn’t about speed; it’s about giving the yeast the cozy environment it craves.
Make-ahead tips for ale bread
Prep Ahead Dough
Mix the dough up to 2 days in advance and store it in an airtight container in the fridge. The cold slows fermentation, allowing flavors to meld beautifully. When ready to bake, let the dough sit at room temperature for 1 hour before shaping and baking.
This method works especially well for busy schedules—just pull it out when you're ready to bake! 💪
Cold Proofing Trick
For even better flavor, shape your dough the night before and place it in the fridge for a 12-24 hour cold proof. This extended rest develops deeper malty notes and a more open crumb.
The next morning, let it sit at room temperature for 1 hour before baking as directed. I find this technique adds a professional depth to home-baked bread. ✨
Freezer-Friendly Loaves
Bake your ale bread and let it cool completely, then wrap tightly in plastic wrap followed by a foil layer. Store in an airtight bag in the freezer for up to 3 months.
To reheat, thaw overnight in the fridge, then warm in a 350°F oven for 10 minutes wrapped in foil. The crust stays crisp, and the interior remains moist—perfect for quick meals. ❄️
Batch Prep Tips
Double the recipe and bake two loaves at once for gatherings. Use two baking sheets and rotate them halfway through baking. Store the extra loaf in the freezer as directed above. For sandwiches, slice the bread while still slightly warm—it holds together better and toasts up perfectly. 🍞
Ale Reserve Strategy
Save any leftover ale from your recipe in a sealed container in the fridge. Use it within 3 days for another batch of dough or as a marinade for meats.
The ale's flavor intensifies slightly after opening, making it ideal for second-day baking. I always keep a small stash on hand for spontaneous bread-making sessions! 🍺
Gift-Worthy Packaging
Wrap cooled loaves in parchment paper, tie with twine, and place in a brown paper bag for a rustic gift. Add a handwritten note about the ale used and baking date.
These make thoughtful gifts for neighbors or hosts—people love the thoughtfulness behind homemade bread. The aroma alone makes it feel special! 💛
Nutrition facts
Frequently asked questions
Why does ale bread taste different from regular bread?
The ale adds natural sugars and subtle bitterness that feed the yeast while creating a deeper, malty flavor profile. Unlike water, the ale's carbonation and alcohol content contribute to a more complex taste and slightly denser crumb structure. The fermentation process also develops richer, caramel-like notes that regular bread lacks.
Can I substitute beer for ale in this recipe?
Yes, but the flavor will differ slightly. Lighter beers like lagers create a milder taste, while darker beers (like stouts) mimic ale's richness. For best results, use a porter or stout with at least 5% ABV—these provide the depth and body closest to traditional ale bread. The alcohol content helps develop flavor during fermentation.
How do I know when the dough is fully risen?
Press your finger gently into the dough—if it springs back slowly (leaving a slight indent) after 1-2 hours, it's ready. The dough should also appear puffy and nearly double in size. Overproofing (when it collapses) means it's past its prime. For cold proofs, the dough may not visibly rise much but will still be light when tapped.
What's the best way to store leftover ale bread?
Wrap the cooled loaf in a cotton towel and store at room temperature for 3 days to maintain freshness. For longer storage, freeze it wrapped in plastic and foil for up to 3 months. Thaw overnight in the fridge before reheating. The crust stays crisp when reheated in a 350°F oven for 10 minutes wrapped in foil.
Can I make this bread gluten-free?
Yes, but texture will differ. Replace wheat flours with a 1:1 gluten-free blend (like Bob's Red Mill) and add 1 teaspoon xanthan gum per cup of flour to improve elasticity. Expect a denser crumb—gluten-free flours lack the structure of wheat. The ale's flavor remains the star, but the bread will be more cake-like than rustic.