
Side Dishes
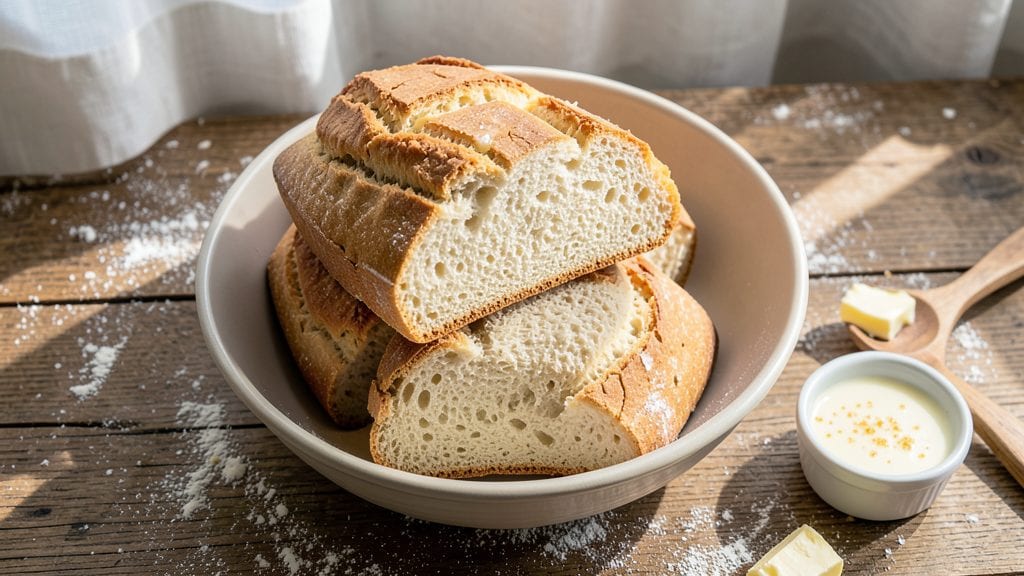
This Amish Friendship White Bread recipe delivers the iconic pull-apart texture and tender crumb that made it a beloved tradition. The secret lies in a precise mix of flour, yeast, and milk—cooked just to the right temperature to create that signature soft, pillowy interior.
I’ve baked countless loaves over the years, and this version stays true to the original while adapting for modern kitchens.
The magic happens during the shaping and baking process, where the dough is carefully braided and baked in a round pan. This method ensures an even rise and that signature pull-apart quality that makes every slice irresistible.
With just a few simple ingredients and a little patience, you’ll achieve a loaf that’s crisp on the outside and tender on the inside—perfect for sandwiches or serving alongside soups and stews.
What sets this recipe apart is the attention to detail in the dough preparation and baking times. The bread develops a golden crust while maintaining its soft, fluffy texture, making it a staple for family gatherings and holiday meals.
Once baked, it’s best served warm, but it also keeps well for days when stored properly.
Whether you’re baking for a special occasion or just craving a taste of tradition, this recipe delivers the comfort and nostalgia of homemade Amish Friendship White Bread. Let’s get started on creating a loaf that will have everyone asking for seconds.
Ingredients for amish friendship white bread
Nine simple ingredients transform into that iconic pull-apart Amish Friendship White Bread.
| Ingredient | Amount | Notes |
|---|---|---|
| All-Purpose Flour 🌾 | 8 cups | Sifted for even texture |
| Active Dry Yeast 🍞 | 2 ¼ tsp | Freshly opened for best rise |
| Granulated Sugar 🍚 | ½ cup | White sugar preferred |
| Salt 🧂 | 1 ½ tsp | Kosher or sea salt |
| Unsalted Butter 🧈 | ½ cup | Cold, cubed for easier mixing |
| Whole Milk 🥛 | 1 ½ cups | Room temperature preferred |
| Large Eggs 🥚 | 1 whole | Room temperature for even mixing |
| Cornmeal 🌽 | 1 tbsp | For dusting work surface |
| Vegetable Oil 🫒 | 2 tbsp | For greasing pan |
The flour is non-negotiable—King Arthur or Gold Medal brands yield the best results for that signature tender crumb. If you're using a mix of bread flour and all-purpose (like many traditional recipes), stick to a 70/30 ratio for optimal texture. The yeast must be freshly opened—old yeast won’t give that signature rise. For the milk, whole milk works best (the fat content enhances tenderness), but 2% in a pinch. I always grab organic eggs from the grocery store’s refrigerated section—they mix more smoothly when room temperature. The butter? Cold cubes cut into the dough better than melted butter ever could.
No whole milk? Evaporated milk or even heavy cream at the same volume works, though the texture will be slightly denser. Running short on butter? Vegetable shortening at half the amount keeps the bread tender without adding moisture. The cornmeal is key—Bob’s Red Mill is my go-to for its fine texture, which prevents sticking during shaping. For the yeast, if you’re unsure about freshness, proof it first in warm milk—it should bubble within 10 minutes. The sugar can be swapped for honey or maple syrup, but reduce by 1 tbsp to account for the extra moisture. And if you’re gluten-sensitive, King Arthur gluten-free measure-for-measure flour works surprisingly well for a lighter loaf.
This dough is a beast—it needs 2 hours of rising time at room temperature, then another 1 hour in the fridge before baking. Wrap it tightly in plastic wrap to prevent drying. The baked loaf stays fresh for 3-4 days at room temperature, wrapped in a clean kitchen towel. For longer storage, freeze slices between parchment paper for up to 3 months. Pro tip: Toast the bread before freezing—it reheats beautifully and tastes like it’s fresh from the oven.
Why You'll Love This Recipe
- No-Knead Magic: I swear by this recipe—just mix, let it rise, and bake. The yeast does all the work while I sip coffee, and that buttery aroma? Pure reward.
- Sweet & Simple Crust: That touch of sugar in the dough gives it a golden, crackly crust without tasting cloying. Honestly, the first time I bit into it, I thought, "Why didn’t I do this sooner?"
- Bakes Like a Dream: Perfect for sandwiches, toast, or even French toast. I keep a loaf frozen at all times—thaw, slice, and serve. Works for breakfast, lunch, or a quick snack when hunger strikes.
- Budget-Friendly Staple: Flour, yeast, butter, sugar—these are pantry basics that stretch far. Between us, this bread costs next to nothing to make but feels like a luxury treat. My wallet and my taste buds thank me.
Step-by-step instructions for Amish friendship white bread
Here's how to achieve that signature crust and soft, pull-apart texture that makes this bread legendary.
Activate the Yeast and Prepare the Dough
In a large mixing bowl, combine the 1.5 cups whole milk and 0.5 cup granulated sugar. Warm the mixture to 110°F—it should feel warm to the touch but not hot. Sprinkle the 2.25 teaspoons active dry yeast over the warm milk mixture and let it sit for 5-10 minutes until it begins to foam and bubble. This indicates the yeast is active and ready to work.
Once the yeast is activated, add the 8 cups all-purpose flour and 1.5 teaspoons salt to the bowl. Mix these dry ingredients together briefly with a wooden spoon to combine. Then, cut the 0.5 cup unsalted butter into small cubes and add them to the bowl. This butter will help create that signature tender crumb and slightly crisp crust.
Mix and Knead the Dough
Using a stand mixer fitted with the dough hook attachment, mix the ingredients on low speed until the butter is fully incorporated and the dough begins to come together. Gradually add the 1 whole large egg and mix until the dough forms a shaggy mass. If the dough is too sticky, add 1-2 tablespoons of flour as needed, but avoid overdoing it—this bread relies on moisture for its soft texture.
Transfer the dough to a lightly floured surface and knead it for 8-10 minutes by hand. You're looking for a smooth, elastic dough that springs back when poked. If the dough feels too dry, dampen your hands slightly with water to prevent sticking. Once kneaded, place the dough in a lightly greased bowl, cover it with a clean kitchen towel, and let it rise in a warm place for 1-1.5 hours, or until it has doubled in size. This rise is crucial for developing the bread's signature softness and airy crumb.
Shape and Second Rise
After the first rise, punch down the dough to release any air bubbles. Divide the dough into 4 equal portions and shape each into a smooth, round loaf. Place each loaf seam-side down in a 9x5-inch loaf pan that has been lightly greased with 2 tablespoons vegetable oil and sprinkled with 1 tablespoon cornmeal to prevent sticking. The cornmeal also adds a subtle texture to the crust.
Cover the loaves with the kitchen towel again and let them rise for another 45-60 minutes, or until they have puffed up noticeably and are just beginning to overflow the sides of the pans. The dough should feel springy to the touch and have a slight resistance when pressed gently. This second rise ensures the bread will have that soft, pull-apart texture that makes it so satisfying.
Bake to Golden Perfection
Preheat your oven to 375°F. Once the oven is fully heated, bake the loaves for 25-30 minutes, or until the tops are golden brown and the internal temperature reaches 190-200°F when measured with an instant-read thermometer. The bread should pull away slightly from the sides of the pan and have a crisp crust with a soft, tender interior.
To achieve the classic Amish crust, I like to brush the tops of the loaves with a little whole milk or water after 10 minutes of baking. This creates a glossy, slightly crisp top that contrasts beautifully with the soft crumb. Let the bread cool in the pans for 5 minutes before transferring it to a wire rack to cool completely. This resting period allows the bread to set and makes slicing much easier.
Slice and Serve
Once the bread has cooled completely, remove it from the pans and slice it into ½-inch thick pieces. The bread should have a soft, slightly chewy interior with a crisp, golden crust that pulls apart easily. Serve it warm with butter or jam for the ultimate comfort experience. This bread is best enjoyed fresh, but it can also be wrapped tightly in plastic wrap and stored at room temperature for 2-3 days or frozen for up to 3 months for later use.
For an extra touch, you can brush the slices with a little whole milk or melted butter before serving. This adds a subtle richness and enhances the bread's natural sweetness. The key to perfect Amish Friendship White Bread lies in patience—allowing the dough plenty of time to rise and develop its texture ensures a result that's worth every minute of waiting.
Pro Tips For Making Amish Friendship White Bread
- Use Warm Butter: This recipe calls for butter at room temperature, but don’t grab it straight from the fridge—let it sit for 30 minutes first. Cold butter won’t mix properly, and you’ll end up with pockets of unmelted fat in your dough that’ll ruin the texture. (Yes, I’ve made that mistake. Twice.)
- Proof Yeast First: Skip the "just toss it in" approach—mix the yeast, sugar, and warm water (110°F) in a separate bowl and let it foam for 5 minutes before adding to the flour. Dead yeast means a flat loaf, and this step guarantees it’s active. (Your dough will thank you.)
- Knead Until Smooth: The dough should pull away cleanly from the bowl and spring back slowly when poked. If it’s sticky or gummy after 8–10 minutes, you’re not done—keep going. Under-kneaded dough won’t rise properly, and that’s a fast track to dense bread. (Trust the process.)
- Shape Loaves Tightly: Roll the dough into logs with smooth, taut sides—no gaps or cracks. If you’re lazy and leave air pockets, the bread will spread unevenly in the oven. Use a bench scraper to tighten the seams. (I learned this after my first batch looked like a deflated hot dog.)
Perfect pairings for these flavors
Classic Butter Pairings
Nothing complements Amish Friendship White Bread like cultured European-style butter—I reach for Plugrá or Kerrygold for their rich, slightly tangy flavor. Softened butter spread on warm slices creates instant comfort.
For extra decadence, mix in 1 teaspoon honey or 1/4 teaspoon cinnamon before serving. The butter’s fat content melts beautifully into the bread’s tender crumb, enhancing its natural sweetness. 🧈
Sweet Spreads
This bread’s mild sweetness pairs perfectly with strawberry or raspberry jam—look for Smucker’s or Welch’s for classic flavors. For a homemade touch, blend 1 cup fresh berries with 2 tablespoons sugar and a squeeze of lemon.
Another favorite is peanut butter, especially Smucker’s Natural—its creamy texture contrasts wonderfully with the bread’s crisp crust. Spread generously for maximum pull-apart satisfaction.
Savory Toppings
For a savory twist, top slices with sharp cheddar cheese (like Cabot) or provolone that’s been warmed until melty. Add a sprinkle of everything bagel seasoning for a crunchy, herby contrast.
I also love avocado slices with a pinch of flaky sea salt—the creamy avocado balances the bread’s slight sweetness beautifully. These pairings elevate the bread into a full meal.
Beverage Pairings
A hot cup of black coffee (I use Folgers or Peet’s Major Dickason’s Blend) cuts through the bread’s richness, while hot tea—like Earl Grey or chamomile—adds a soothing contrast.
For a cozy brunch, serve with orange juice to highlight the bread’s subtle sweetness. Avoid overly sweet drinks that might overpower the bread’s delicate flavor profile.
Breakfast Pairings
Transform this bread into a hearty breakfast by pairing it with scrambled eggs (cooked with butter and chives) and crispy bacon. The bread’s soft texture soaks up egg yolks beautifully.
For a vegetarian option, serve with Greek yogurt topped with honey and walnuts. These combinations turn a simple slice into a satisfying morning meal.
Dessert Twists
Drizzle warm slices with warm caramel sauce (homemade or Smucker’s) and top with sea salt flakes for a sweet-salty treat. Another favorite is Nutella—spread thickly and pair with banana slices for a nostalgic dessert.
For a lighter option, dust with powdered sugar and serve with whipped cream. These dessert versions prove this bread’s versatility beyond savory meals. 🍯
Nutrition facts
Frequently asked questions
Why is this bread called "Friendship White Bread"?
The name comes from its traditional role as a gift bread among Amish communities. Bakers would share loaves with neighbors as a symbol of friendship and goodwill, often giving them away rather than selling them. The "white" refers to its light, tender crumb and golden crust that sets it apart from darker whole-grain breads.
Can I make this bread without a stand mixer?
The dough can be mixed and kneaded entirely by hand. Use a wooden spoon first to combine ingredients in the bowl, then turn the dough onto a floured surface and knead for 10-12 minutes until smooth. The key is patience—the extra kneading time helps develop the gluten for that signature pull-apart texture.
What's the secret to getting the perfect pull-apart texture?
Three things matter most: proper kneading, adequate rising time, and gentle shaping. The dough should be kneaded until elastic (not sticky), allowed to rise until doubled in size both times, and shaped with light hands to preserve air bubbles. Overworking the dough kills the texture, while under-rising makes it dense.
How do I store leftover bread to keep it fresh?
Wrap cooled loaves tightly in plastic wrap or place in an airtight container with a clean kitchen towel. At room temperature, it stays fresh for 3-4 days. For longer storage, freeze slices between parchment paper for up to 3 months. Toast frozen slices directly from the freezer for best results.
Can I make this bread gluten-free?
Yes, but with adjustments. Use a 1:1 gluten-free flour blend (like King Arthur) and add 1 teaspoon xanthan gum per cup of flour. Expect a slightly denser texture—gluten-free versions lack the signature pull-apart quality. Also increase rising time by 30-50% as gluten-free dough rises more slowly.