
Appetizers
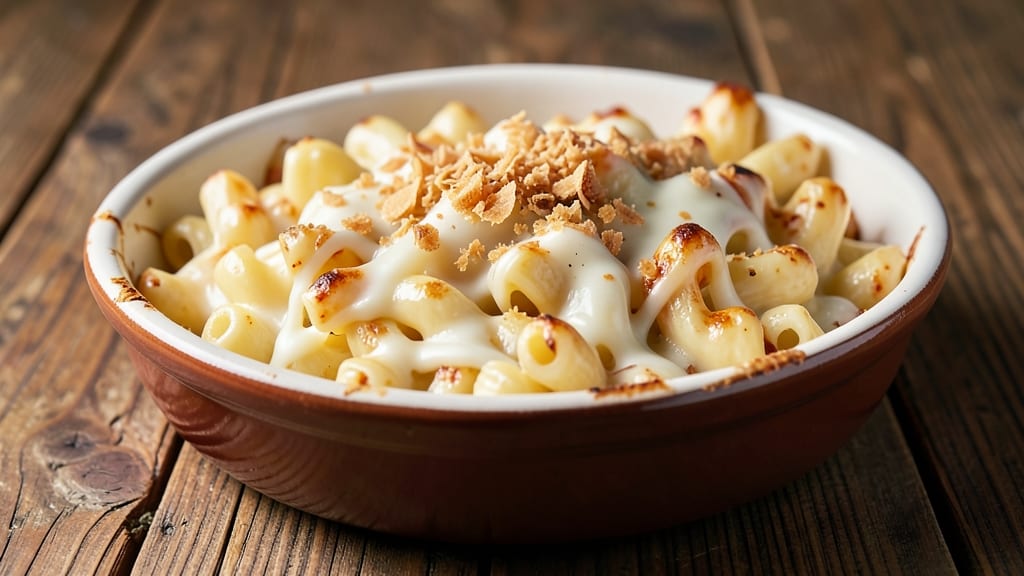
Recreating Applebee's mac and cheese at home means achieving that signature crispy cornmeal topping and impossibly gooey, pull-apart texture. The restaurant's version has been a comfort food staple for years, and this recipe delivers the same creamy, cheesy perfection with a few home-cooking adjustments.
I've tested countless variations to perfect the balance between crispy edges and tender pasta, ensuring every bite lives up to the original.
The secret lies in a two-step cooking process: first boiling the pasta until almond-soft, then mixing it with a rich, velvety cheese sauce that clings to every noodle.
The cornmeal topping isn't just for crunch—it creates that signature pull-apart magic that makes this mac and cheese feel like a hug in bowl form. With precise timing and the right cheese blend, you'll achieve restaurant-quality results that taste even better than the original.
What makes this recipe work is the combination of sharp cheddar for tang, Gruyère for depth, and a touch of cream cheese for that signature creaminess. The cornmeal topping gets golden and crispy while the mac and cheese beneath stays warm and gooey.
This isn't just comfort food—it's the kind of dish that transforms an ordinary dinner into something special, with minimal effort and maximum flavor.
Serve immediately with a side of garlic bread or a simple green salad to complete the meal. The leftovers reheat beautifully, making this the perfect recipe for feeding a crowd or meal prepping for busy weeks. Let's get started on recreating that Applebee's magic at home.
Ingredients for applebee's mac and cheese
Six ingredients deliver the signature Applebee's mac and cheese magic.
| Ingredient | Amount | Notes |
|---|---|---|
| Elbow Macaroni 🍝 | 1 ½ lbs | Medium or fine elbow shape preferred |
| Sharp White Cheddar Cheese 🧀 | 3 cups | Shredded, block preferred over pre-shredded |
| Gruyère Cheese 🧀 | 1 cup | Shredded, for depth of flavor |
| Cream Cheese 🧈 | 4 oz | Full-fat, room temperature |
| Whole Milk 🥛 | 2 cups | Warmed for smooth sauce |
| Butter 🧈 | ½ cup | Unsalted, melted |
| All-Purpose Flour 🌾 | ½ cup | For roux thickening |
| Cornmeal 🌽 | ½ cup | Fine grind for crispy topping |
| Breadcrumbs 🍞 | ¼ cup | Panko for extra crunch |
| Butter 🧈 | 2 tbsp | Melted, for cornmeal mix |
| Garlic Powder 🧄 | 1 tsp | For cornmeal seasoning |
| Salt 🧂 | 1 ½ tsp | Kosher or sea salt |
| Black Pepper 🌶️ | ½ tsp | Freshly ground preferred |
| Dried Parsley 🌿 | 1 tbsp | For garnish, optional |
The cheese blend is non-negotiable. Sharp white cheddar provides the tangy kick, while Gruyère adds nutty depth—both should be freshly shredded from blocks, not pre-shredded (it gets clumpy). For the best Gruyère, Whole Foods or specialty cheese shops carry it pre-shredded, but a wedge is even better if you're willing to grate it yourself. The cream cheese is what makes this sauce velvety; don't use low-fat or whipped versions. Kroger's or Trader Joe's sell high-quality blocks at reasonable prices, and the difference in texture is noticeable. For the pasta, Barilla or De Cecco elbow macaroni holds up best to the creamy sauce without becoming mushy.
No sharp cheddar? Extra-sharp white cheddar at half the amount works in a pinch, though the flavor won't be identical. Gruyère unavailable? Parmesan or Emmental can substitute, but Gruyère's melt is unmatched. The cornmeal topping is where the magic happens—fine-ground cornmeal (like Bob's Red Mill) gives the best texture. For extra crunch, add crushed cornflakes to the breadcrumb mix. The milk should be warmed to 110°F for a silky sauce; microwave it in 30-second bursts until just warm to the touch. Pre-shredded cheese? Pulse it in a food processor for 10 seconds to break up clumps before mixing.
This mac and cheese reheats beautifully—cover with foil and warm at 350°F for 15 minutes to restore that gooey perfection. The cornmeal topping stays crispy if you reheat it uncovered for the last 2 minutes. Store leftovers in an airtight container for up to 5 days; the sauce gets even richer overnight. For meal prep, assemble the dish (without baking the topping) and refrigerate the unbaked casserole for up to 2 days. Bake straight from the fridge—just add 10 minutes to the baking time. Freeze unbaked portions for up to 3 months; thaw overnight in the fridge before baking.
Why You'll Love This Recipe
- Five-Ingredient Magic: Honestly, I swear by this combo—just pasta, three cheeses (sharp cheddar, Gruyère, and cream cheese), and milk. No fancy techniques, no hidden ingredients. The Gruyère alone makes it taste like a restaurant dish, but I’m the one stirring the pot.
- Creamy Crispy Perfection: That crispy top layer? It’s the secret weapon. The milk and cheeses melt into a velvety sauce while the edges toast just enough to give you texture with every bite. (Yes, even on a Tuesday night.)
- Potluck Star: Between us, this is my go-to for gatherings. It’s hearty enough for a main, but I’ve also turned it into a side for BBQs or holiday dinners. The Gruyère’s nutty kick makes it feel fancy, but it’s still crowd-pleasing.
- Budget-Friendly Leftovers: I make a big batch on Sundays because it reheats beautifully—no soggy pasta here. The sharp cheddar stretches the flavor, and the cream cheese keeps it rich without breaking the bank. My kids fight over the leftovers.
Step-by-step instructions for Applebee's mac and cheese recipe
Here's how to recreate that legendary crispy-topped mac and cheese with gooey, pull-apart perfection.
Cook the Elbow Macaroni to Al Dente
Bring a large pot of water to a rolling boil and add 1.5 lbs elbow macaroni. Stir immediately to prevent sticking, then cook for 10-12 minutes until the pasta is al dente—you should still feel a slight resistance when biting into it. Drain the pasta in a colander but don't rinse it; the surface starch helps the cheese sauce cling.
While the pasta cooks, prepare a large mixing bowl by lightly greasing it with 2 tbsp butter. This prevents the cheese mixture from sticking when you combine everything. I like to keep the butter at room temperature for easier spreading.
Prepare the Crispy Cornmeal Topping
In a small bowl, combine 0.5 cup cornmeal, 0.25 cup breadcrumbs, 1 tsp garlic powder, 1.5 tsp salt, and 0.5 tsp black pepper. Then, add 2 tbsp melted butter and mix until the dry ingredients are evenly moistened. The mixture should hold together when pressed but still feel slightly crumbly.
Spread this cornmeal mixture evenly over the greased mixing bowl. This layer will create that signature crispy topping you get at Applebee's. Don't worry if it looks uneven—it'll crisp up perfectly in the oven.
Make the Cheese Sauce
In a medium saucepan, melt 0.5 cup butter over medium heat. Once melted, whisk in 0.5 cup all-purpose flour to form a roux. Cook for 2-3 minutes, stirring constantly, until the mixture turns a light golden color and smells nutty.
Slowly pour in 2 cups warmed whole milk while whisking vigorously to prevent lumps. Bring the mixture to a gentle simmer and cook for 5-7 minutes until it thickens enough to coat the back of a spoon. Remove from heat and stir in 3 cups shredded sharp white cheddar cheese, 1 cup shredded gruyère cheese, and 4 oz cream cheese until fully melted and smooth. Season with an extra pinch of salt if needed.
Assemble and Bake for Crispy Perfection
Transfer the cooked elbow macaroni to the prepared mixing bowl with the cornmeal mixture. Pour the cheese sauce over the pasta and stir gently but thoroughly to combine. The sauce should coat every strand of pasta completely.
Cover the bowl with aluminum foil and bake at 350°F for 20 minutes. After this initial baking, uncover and bake for an additional 10-15 minutes until the top is deep golden brown and crispy. The edges should pull away slightly from the bowl, creating that signature crispy crust.
Rest and Serve with Fresh Parsley
Remove the mac and cheese from the oven and let it rest for 5 minutes before serving. This resting period allows the cheese to set slightly and makes it easier to scoop. The internal temperature should reach 165°F at this point.
Sprinkle with 1 tbsp dried parsley just before serving for a pop of color and freshness. Serve immediately while the top is still crispy and the cheese is gooey. For extra indulgence, pair with a side of garlic bread or a simple green salad.
Pro Tips For Making Applebee'S Mac And Cheese
- Boil Pasta Until Firm: Applebee’s version relies on al dente elbow mac—pull it when it still has a slight bite, about 1 minute less than package instructions. I learned this the hard way: mushy pasta ruins the texture, no matter how much cheese you add. Drain immediately and shake off excess water before mixing.
- Grate Cheese Coarse: Skip the food processor for sharp white cheddar and Gruyère—hand-grate it into chunks the size of peas. This keeps the sauce from turning gloppy (yes, even with cream cheese). My grandmother swore by this, and she was right: finer cheese = sad, pasty mac.
- Temper the Milk: Warm the whole milk to body temperature (about 100°F) before mixing it into the cheese—never hot. I was skeptical until I tried it: cold milk makes the sauce grainy, and hot milk can curdle the cream cheese. A quick microwave check (test with your wrist) saves cleanup.
- Rest Before Serving: Cover the finished mac with foil and let it sit 5–10 minutes off the heat. This lets the sauce thicken and flavors meld—Applebee’s version isn’t just creamy, it’s rich. Skipping this step means a runny mess, and nobody wants that. (Your future self will thank you.)
Make-ahead tips for applebee's mac and cheese
Pre-Bake Assembly
Assemble this mac and cheese completely (including the cornmeal topping) up to 2 days ahead and refrigerate in an airtight container. When ready to bake, remove it from the fridge and let it sit at room temperature for 30 minutes before baking.
This prevents cold spots and ensures even cooking. I find this method works best for meal prep—just add 10 extra minutes to the baking time to account for the cold start. 📅
Freezer-Friendly Method
For longer storage, assemble the mac and cheese (without baking the topping) and freeze it in a single layer in a freezer-safe container. Cover tightly with plastic wrap and foil to prevent freezer burn.
When ready to serve, thaw overnight in the fridge and bake straight from the fridge, adding 15 extra minutes to the baking time. The texture remains creamy, though the topping may need 2-3 extra minutes uncovered to crisp up properly. ❄️
Reheating Leftovers
Leftovers reheat beautifully in the oven for the best texture. Cover with foil and warm at 350°F for 15 minutes, then uncover for the final 2 minutes to restore crispiness to the topping.
For microwave reheating, cover with a damp paper towel and heat in 30-second intervals on 50% power, stirring between each interval until reaching 165°F. Add a splash of milk if the sauce looks dry. 🔥
Portion Control Tips
When serving this mac and cheese as a party dish, divide it into individual portions before baking. Use 2-cup ramekins or oven-safe bowls for perfect single servings. Top each portion with the cornmeal mixture and bake until golden.
This ensures everyone gets that crispy, pull-apart experience without competition. I like to use Corelle stoneware bowls because they handle the heat well and look elegant on the table. 🍽️
Make-Ahead for Crowds
For large gatherings, prepare the cheese sauce and cook the pasta separately, then refrigerate them in airtight containers for up to 2 days. When ready to serve, combine everything in a large baking dish, top with cornmeal, and bake as directed.
This method keeps the pasta from becoming mushy and makes it easier to scale up for big groups. I’ve used this technique for Thanksgiving leftovers, and it always turns out perfect. 👨👩👧👦
Garnish Before Serving
If making ahead, hold off on adding the parsley garnish until just before serving. Fresh parsley adds brightness and color, but it loses its vibrancy when reheated. For a restaurant-style presentation, sprinkle with parsley right after removing the dish from the oven.
You can also add a few toasted breadcrumbs for extra crunch if desired. 🌿
Nutrition facts
Frequently asked questions
Why does Applebee's mac and cheese have that signature crispy topping?
The golden, pull-apart crust comes from a cornmeal-breadcrumb mix baked on top. Cornmeal adds texture while breadcrumbs create crunch. The key is baking it uncovered at the end to get that deep golden color—just like the restaurant version!
Can I make this mac and cheese without Gruyère cheese?
Yes! Use Parmesan or Emmental instead, but Gruyère's nutty flavor makes this dish special. For a budget-friendly swap, mix extra-sharp cheddar with a little Parmesan—just reduce the cheddar by ½ cup to balance the saltiness. The sauce will still be creamy, though slightly less complex.
How do I fix lumpy cheese sauce?
If your sauce looks grainy, it likely didn't melt fully. Heat it gently on the stove while whisking, or add 1 tbsp milk at a time—the extra liquid helps emulsify the cheese. For prevention, shred cheese yourself (not pre-shredded) and warm the milk before mixing. A splash of lemon juice—just ½ tsp—also smooths out lumps.
Can I use a different type of pasta?
Stick with elbow macaroni—its shape holds the sauce best. For a twist, try penne or cavatappi, but avoid long noodles like spaghetti—they won’t coat evenly. The pasta should be al dente—slightly firm to bite—so it doesn’t turn mushy when baked.
What’s the best way to serve this mac and cheese?
Pair it with garlic bread—the buttery crust soaks up the cheesy goodness! For a full meal, add a simple side salad—the acidity cuts through the richness. At Applebee’s, they often serve it with grilled chicken or steak, but this dish shines as a standalone comfort food.