
Side Dishes
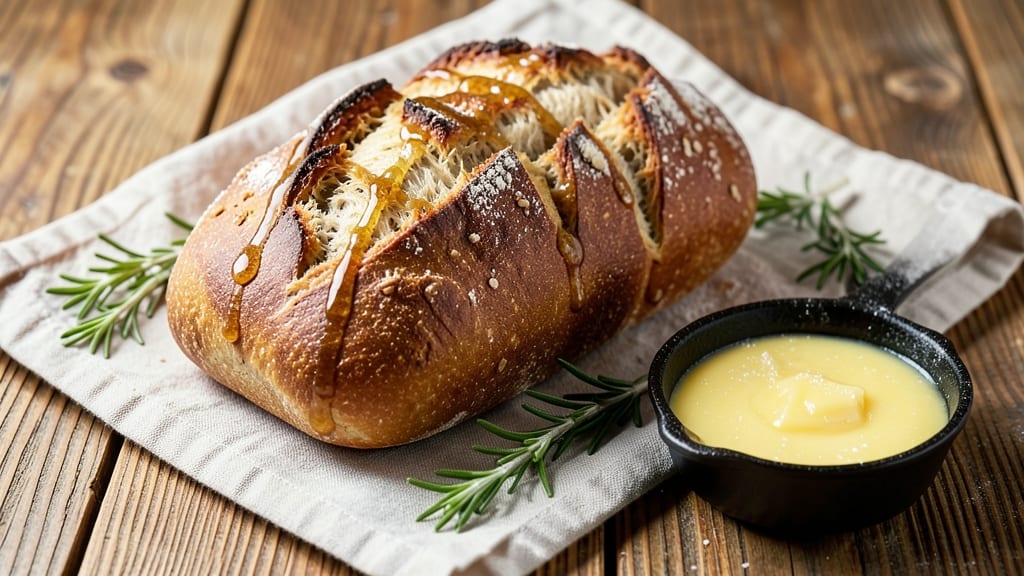
Making artisanal bread at home isn’t just possible—it’s easier than you think, and the results will blow your mind. ✨ I’ve spent years perfecting this recipe, and the secret lies in patience, the right flour blend, and understanding how dough behaves.
This isn’t your grandma’s sandwich bread; we’re talking crispy crusts that shatter like glass and airy, chewy crumbs that disappear in seconds.
The magic starts with a long fermentation—at least 4 hours, but overnight is even better. This step develops deep flavor and a light texture that store-bought bread can’t touch.
We’ll use a mix of bread flour and whole wheat for structure and nutrition, plus a touch of honey to feed the yeast and create that golden crust. No fancy equipment needed, just time and a little elbow grease.
By the end, you’ll have a loaf with a crust so crisp it sings when you tap it and a crumb so open it looks like a cloud. The aroma alone will have everyone in the house gathering around the table.
This bread is perfect for toast, sandwiches, or just eating straight from the pan with a pat of butter melting on top.
Ready to take your baking game to the next level? Let’s get started—your kitchen is about to smell like a Parisian boulangerie.
Ingredients for artisinal bread
Four loaves waiting to rise—just flour, yeast, and time to transform your kitchen into a bakery.
| Ingredient | Amount | Notes |
|---|---|---|
| Bread Flour 🌾 | 3 ½ cups | High-protein for structure and rise |
| Whole Wheat Flour 🌾 | ½ cup | For nutrition and subtle nuttiness |
| Active Dry Yeast 🍞 | ¼ oz | Or 2.25 tsp, fresh yeast preferred |
| Granulated Sugar 🍚 | ¼ cup | Feeds yeast for fermentation |
| Honey 🍯 | 1 tbsp | For crust color and sweetness |
| Unsalted Butter 🧈 | ¼ cup | Cold, cubed for flavor and richness |
| Warm Water 💧 | 1 ¼ cups | 105-110°F for ideal yeast activation |
| Salt 🧂 | 1 ½ tsp | Kosher or sea salt for balance |
| Cornmeal 🌽 | ¼ cup | For dusting baking sheet |
| Ice Water ❄️ | ½ cup | For final dough adjustment |
The flours are the foundation. King Arthur or Caputo bread flour is my go-to for that perfect rise, but any high-protein flour (12-14% protein) works. The whole wheat adds character—King Arthur or Bob’s Red Mill are reliable brands. Yeast is non-negotiable here; Saf-Instant is foolproof if you forget to proof it. For the butter, Plugrá or Land O’Lakes are solid choices. The warm water should feel like bathwater—not too hot, or you’ll kill the yeast. If your kitchen’s cold, use a thermometer—yeast hates surprises.
No bread flour? All-purpose plus 1 tbsp vital wheat gluten gets you close. Honey in a pinch? Maple syrup or agave works, but the flavor’s slightly different. Butter substitute? Cold vegetable shortening mimics the texture, though it lacks flavor. Salt? Diamond Crystal kosher is my preference—it dissolves better. The cornmeal is just for the sheet pan; semolina works too. And if your dough feels sticky after autolyse? Add ice water 1 tbsp at a time until it’s just manageable. Trust me, this is better than overhandling.
Dough keeps best in the fridge for 24 hours—the longer it rests, the better it tastes. Shape your loaves and cover them with a damp towel; they’ll rise beautifully overnight. For the crust, steam is your friend—spray the oven walls with water or use a baking stone. Once baked, cool completely on a wire rack (this prevents soggy bottoms). Loaves freeze beautifully for up to 3 months—just thaw at room temp before slicing. The aroma alone will have your neighbors knocking.
Why You'll Love This Recipe
- No-Knead Magic: Between us, this dough comes together with zero fuss—just mix, let it rise, and shape. The whole wheat adds heartiness without the usual elbow grease, and that honey? It’s the secret that keeps my lazy Sundays stress-free.
- Golden Crust, Warm Soul: The crust gets this irresistible caramelized bite from the honey and sugar, while the interior stays soft and chewy. Honestly, it’s the kind of bread that makes you pause mid-bite just to savor it—no fancy bakery needed.
- Weeknight Workhorse: Toss a loaf in the fridge, and it’s breakfast, lunch, or a quick sandwich fix for days. I’ve used it for toast, charcuterie, and even breadcrumbs (yes, even the ends). It’s the one loaf that actually gets eaten before it goes stale.
- Budget Baking Wins: Whole wheat and bread flour stretch further than you’d think, and yeast is cheaper than takeout. Here’s what sold me—this recipe costs half what store-bought artisan bread does, but tastes like I spent hours on it. (Spoiler: I didn’t.)
Step-by-step instructions for artisanal bread
Here's how to transform simple ingredients into a loaf with a crackly crust and soft interior.
👨🍳 Step 1: Activate the Yeast and Mix the Dough
In a large bowl, combine the 1.25 cups warm water, 0.25 cup granulated sugar, and 0.25 oz active dry yeast. Let it sit for 5-10 minutes until frothy—this confirms your yeast is alive and ready to work. If it doesn't bubble, your yeast might be dead, and you'll need to start over.
Add the 3.5 cups bread flour, 0.5 cup whole wheat flour, and 1.5 tsp salt to the bowl. Mix with a wooden spoon until a shaggy dough forms. Then add the 1 tbsp honey and 0.25 cup cold, cubed unsalted butter. The butter will resist at first, but keep mixing until it starts to incorporate. Use your hands now to knead for 8-10 minutes until the dough becomes smooth and elastic.
🥘 Step 2: First Rise and Shape the Dough
Lightly oil a large bowl, place the dough inside, and cover with a damp towel. Let it rise in a warm spot for 1-2 hours or until it doubles in size. You'll know it's ready when you poke it gently and the indentation stays put—this means the gluten has relaxed and the dough is ready for shaping.
Turn the dough onto a lightly floured surface and divide it into 4 equal pieces. Roll each piece into a log shape, about 8 inches long. Tuck the ends under slightly to seal them. This shaping helps create those beautiful oven springs and an even crumb structure. Place the shaped loaves on a baking sheet dusted with 0.25 cup cornmeal—this prevents sticking and adds a subtle crunch.
🔥 Step 3: Second Rise and Score the Loaves
Cover the shaped loaves again and let them rise for another 30-45 minutes until puffy. Preheat your oven to 425°F while they're rising. Just before baking, use a sharp knife or razor to score the tops of the loaves in a crosshatch or diagonal pattern—this helps control the expansion and creates those gorgeous crusty slashes.
Bake for 25-30 minutes until the crust is deep golden brown and sounds hollow when tapped on the bottom. The internal temperature should reach 190-200°F—this ensures a fully baked crumb. If the crust browns too quickly, tent the loaves with foil to prevent over-browning while they finish baking.
⏰ Step 4: Cool and Finish with Ice Water
Remove the loaves from the oven and transfer them to a wire rack. Here's the trick: immediately brush the tops with 0.5 cup ice water using a pastry brush. This creates a stunning sheen and enhances the crust's crispiness. Let the bread cool completely before slicing—this prevents a gummy interior.
Once fully cooled, slice and serve. The crust should be shatteringly crisp, while the interior remains soft and airy. Store any leftovers in a bread bag at room temperature for up to 3 days, or freeze for longer storage. This method guarantees a loaf that rivals any bakery—crusty outside, pillowy inside, with just the right amount of nuttiness from the whole wheat flour.
Pro Tips For Making Artisinal Bread
- Mix the Dough by Hand: I learned this the hard way—using a stand mixer for whole wheat bread is a recipe for disappointment. The extra protein and fiber in whole wheat gums up the mixer, leaving you with a gummy mess. Grab a wooden spoon or your hands and work the dough for 10 minutes until it’s smooth and elastic. Yes, it’s more work, but it pays off with a better crumb.
- Bloom the Yeast in Warm Honey: Skip the lukewarm water and activate your yeast in a mix of warm honey and a pinch of sugar. The honey feeds the yeast immediately, cutting fermentation time by 20-30 minutes. Just make sure the liquid is no hotter than 105°F—any hotter and you’ll kill the yeast before it even wakes up.
- Let the Dough Rest Before Shaping: Resist the urge to shape that dough right after the first rise. Give it a 15-minute rest at room temperature first—this relaxes the gluten, so it holds its shape better and doesn’t spring back when you score it. Trust me, your loaf will thank you with cleaner edges and a better rise.
- Score Deep and Fast: Don’t half-heartedly slash your dough before baking—grab a sharp razor or lame and cut ¼-inch deep. The steam needs an escape route, or your bread will blow out like an overinflated balloon. A quick, confident slash also looks way more professional. (And yes, even if you’re baking for just yourself.)
Flavor customization for artisinal bread
Sweet Honey Twist
Boost your bread’s natural sweetness by adding 2 extra tablespoons of honey to the dough during mixing. This enhances the caramelization during baking, creating a deeper golden crust with subtle sweet notes.
For extra richness, replace the honey with 1 tbsp maple syrup and 1 tbsp brown sugar—the molasses flavors add depth. 🍯
Herb-Infused Variations
Mix in 1 tablespoon of fresh rosemary or thyme during the final kneading stage for an aromatic twist. The herbs infuse the dough beautifully, especially when baked. For a Mediterranean flair, add 1 teaspoon dried oregano or a pinch of fennel seeds—both pair wonderfully with the crust’s crispness.
Seedy Crunch Additions
Sprinkle 1 tablespoon of sesame seeds, poppy seeds, or flaxseeds onto the dough before the final rise. Press them lightly into the surface so they adhere.
These seeds add texture and nutrition while giving your bread a rustic, bakery-style appearance. For a nuttier profile, try toasted pumpkin seeds or chopped walnuts.
Spiced Warmth Options
Add warmth with ½ teaspoon of cinnamon or cardamom during mixing—these spices complement the honey and create a cozy, aromatic loaf. For a savory-sweet balance, combine ½ teaspoon cinnamon with ¼ teaspoon cayenne pepper for a subtle kick.
The spices integrate seamlessly into the dough without overpowering the bread’s natural flavor.
Savory Add-Ins
For a cheesy twist, fold in ½ cup shredded Gruyère or Parmesan during the final kneading stage. The cheese melts slightly during baking, adding a rich, savory depth. Alternatively, mix in 1 tablespoon of sun-dried tomato paste for a tangy, umami-rich variation that pairs perfectly with the crust’s crispness.
Crust Enhancements
Create a darker, more flavorful crust by brushing the baked loaves with 1 tablespoon melted butter mixed with 1 teaspoon of olive oil immediately after removing them from the oven. This adds richness and extends freshness.
For a smoky note, sprinkle a pinch of smoked paprika onto the dough before baking—it enhances the crust’s depth without altering the bread’s texture. 🔥
Nutrition facts
Frequently asked questions
Why does my homemade bread turn out dense instead of airy?
The most common reasons are underproofing (not letting the dough rise long enough) or over-kneading, which breaks down the gluten structure. For this recipe, aim for a total fermentation time of 4+ hours (including both rises) and knead just until the dough becomes smooth and elastic (8-10 minutes). If your kitchen is cold, place the dough in a warm spot or use a proofing box.
Can I make this bread without a stand mixer?
This dough is designed for hand-kneading. Use a dough scraper to help fold and stretch the dough during kneading. The key is to work the dough for 8-10 minutes until it's smooth and springs back when poked. For extra strength, let it rest for 20 minutes between kneading sessions if needed.
How do I know when the dough is fully proofed?
Look for two signs: the dough should have doubled in size, and when you gently press your finger into it, the indentation should stay put (not spring back immediately). For this recipe, the first rise takes 1-2 hours, and the second rise should be 30-45 minutes. If your dough isn't rising enough, your yeast might be old or your kitchen too cold—try warming the dough slightly (place the bowl in a 100°F oven with the light on).
What's the best way to store homemade artisanal bread?
Keep it at room temperature in a bread bag or paper bag (plastic traps moisture). For longer storage, freeze the bread (up to 3 months) by wrapping each loaf tightly in plastic wrap, then placing it in a freezer bag. Thaw overnight on the counter—never microwave, as it makes the bread gummy. To revive stale bread, sprinkle with water and toast in a 375°F oven for 5-10 minutes.
Can I substitute whole wheat flour with something else?
Yes! For a lighter texture, replace the 0.5 cup whole wheat flour with all-purpose flour or add 1 tbsp vital wheat gluten to maintain structure. For a nutty flavor without density, try rye flour (0.25 cup max) or spelt flour. Just remember: whole wheat adds fiber and nutrients, so substitutions may slightly alter texture and nutrition.