
Side Dishes
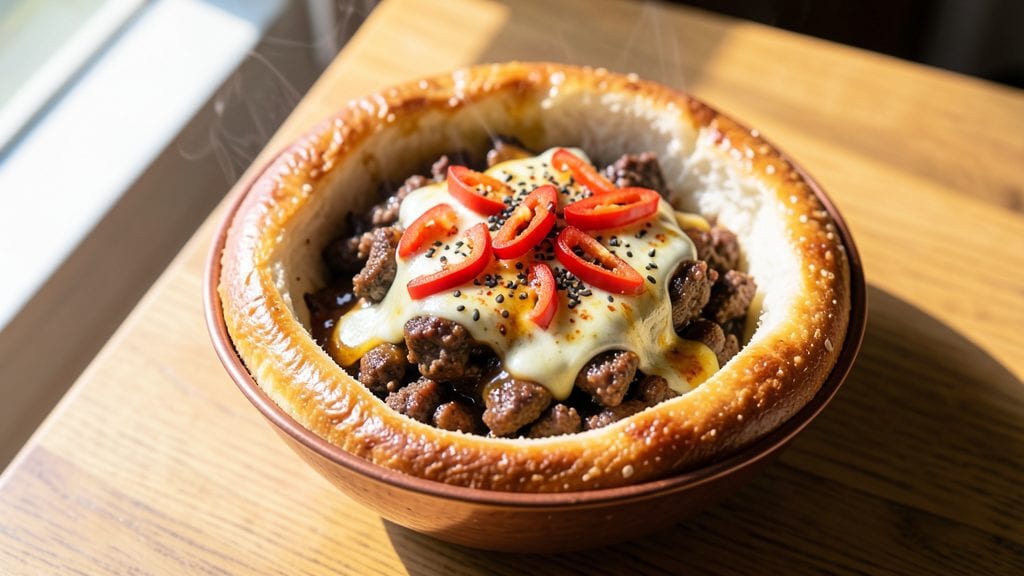
This Azerbaijani bread recipe delivers the perfect balance of fluffy lavash with a nutty sesame crunch that’s become a staple in my household. The thin, stretchy dough transforms into delicate layers that pair beautifully with soups, stews, or even as a wrap for grilled meats.
After years of experimenting with traditional techniques, I’ve refined this method to ensure a consistently light, airy texture with just the right crispness from the sesame seeds.
The secret lies in the dough’s resting time—letting it ferment slowly develops gluten for that signature elasticity, while a high-protein flour blend ensures the bread stretches thin without tearing.
You’ll work with a simple mix of flour, water, yeast, and a touch of sugar, but the magic happens in the rolling and baking process, where precision turns basic ingredients into something extraordinary.
This recipe serves four, but the leftovers keep beautifully for days, making it ideal for meal prep or sharing with guests.
What you’ll end up with is a stack of golden lavash sheets with a delicate crunch from the sesame seeds, perfect for layering with butter, cheese, or rolling around fillings like spiced lamb or fresh herbs.
The aroma alone—warm, slightly sweet, and nutty—will have everyone at the table asking for seconds. Whether you’re serving it as a side or using it as a wrap, this bread elevates any meal with its versatility and rich cultural roots.
For those eager to explore further, I’ll share variations like adding poppy seeds or herbs to the dough, as well as tips for achieving that restaurant-quality thinness at home. Let’s get started on creating your own batch of this beloved Azerbaijani classic.
Ingredients for azerbaijan bread
Nine simple ingredients transform into delicate, golden lavash with signature sesame crunch.
| Ingredient | Amount | Notes |
|---|---|---|
| All-Purpose Flour 🌾 | 4 cups | High-protein for elasticity |
| Bread Flour 🌾 | 1 cup | Boosts gluten development |
| Active Dry Yeast 🍞 | ¼ tsp | Freshly opened for vitality |
| Granulated Sugar 🍚 | ½ tsp | Feeds yeast activation |
| Warm Water 💧 | 1 ½ cups | 110°F for yeast activation |
| Sesame Seeds 🌰 | ½ cup | Toasted for nutty crunch |
| Unsalted Butter 🧈 | 2 tbsp | Melted for dough softness |
| Salt 🧂 | ½ tsp | Kosher or sea salt |
| Vegetable Oil 🫒 | 1 tbsp | For dough flexibility |
The flour blend is key here—King Arthur bread flour gives that signature chew, but Bob's Red Mill all-purpose works too if you're in a pinch. I grab mine from Whole Foods or King Arthur Flour's website for the best quality. Sesame seeds? Trader Joe's has the best toasted ones—just make sure they're labeled 'white' for that classic lavash flavor. The yeast needs to be fresh, so check the expiration date (it's good for 4 months unopened). If your kitchen's cold, warm the water to 110°F—yeast hates chills.
No bread flour? All-purpose plus 1 tbsp vital wheat gluten mimics the texture. Sesame seeds too pricey? Poppy seeds or crushed pistachios add a different crunch. The butter can be swapped for olive oil if you're avoiding dairy, but trust me on the full-fat version for that rich mouthfeel. Salt is non-negotiable—it balances the sweetness and enhances the sesame flavor. For the oil, avocado oil has a higher smoke point if you're baking at high temps, but regular vegetable oil works perfectly fine.
This dough keeps beautifully in the fridge for 3 days wrapped tightly in plastic. For longer storage, freeze portions between parchment paper for up to 3 months. Just thaw at room temp before rolling. The sesame seeds toast in 3 minutes—don't walk away, or they'll burn. I make a double batch and freeze extras; reheating them in a 200°F oven for 5 minutes brings back that fresh-from-the-oven crispness. Perfect for meal prep or gifting!
Why You'll Love This Recipe
- No-Knead Magic: I swear by this dough—just mix, wait, and bake. The yeast and warm water do all the heavy lifting while you sip coffee or scroll through your phone. Honestly, my lazy weekends just got a whole lot better.
- Sweet & Savory Crust: That touch of sugar in the dough? It caramelizes into a golden, crispy shell that’s ridiculously good with jam or butter. Between us, I’ve seen grown men fight over the last slice at breakfast.
- Weeknight Workhorse: Whether it’s a quick lunch for the kids, a picnic spread, or dinner rolls, this bread adapts. Tear it into chunks for sandwiches, toast it for bruschetta—it’s my go-to when I’m too tired to plan.
- Budget-Friendly Staple: Flour, yeast, sugar, water—this recipe costs pennies and lasts forever. I freeze leftovers in slices and pull them straight from the freezer for toast. My wallet and my taste buds thank me every time.
Step-by-step instructions for fluffy lavash with nutty sesame crunch
Here's how to make tender, elastic lavash with a perfect sesame seed finish.
Activate the Yeast for Maximum Rise
In a small bowl, combine the 1.5 cups warm water (around 110°F), 0.5 tsp granulated sugar, and 0.25 tsp active dry yeast. Let it sit for 5-10 minutes until you see frothy bubbles forming on top. This confirms your yeast is alive and ready to work.
If no bubbles appear after 10 minutes, your yeast may be dormant. In that case, discard the mixture and start fresh with a new packet of yeast. The warmth of the water and sugar help activate the yeast—this is the foundation for your bread's light texture.
Mix the Dough with High-Protein Flour
In a large mixing bowl, combine the 4 cups all-purpose flour and 1 cup bread flour. Add the 0.5 tsp salt and stir to distribute evenly. Create a well in the center and pour in the yeast mixture along with 2 tbsp melted unsalted butter and 1 tbsp vegetable oil.
Using a wooden spoon or dough whisk, gradually incorporate the wet ingredients into the dry. Once a shaggy dough forms, switch to your hands and knead on a lightly floured surface for 8-10 minutes until smooth and elastic. The bread flour adds extra gluten development, giving your lavash that signature chewy texture.
First Rise for Maximum Fluffiness
Shape the dough into a smooth ball and place it back in the mixing bowl. Cover loosely with a clean kitchen towel and let it rise in a warm place for 1-2 hours, or until doubled in size. The dough should feel light and springy when pressed gently with a finger.
Here's the thing—don't rush this step. A proper rise ensures that final lavash will be airy and tender rather than dense. If your kitchen isn't warm enough, place the bowl near a slightly warm oven (with the light on) to help speed up the process.
Roll and Toast the Sesame Seeds
Preheat your oven to 375°F. On a lightly floured surface, divide the risen dough into 4 equal portions. Roll each portion into a thin rectangle about 12x16 inches, keeping the edges slightly thicker than the center. This creates the signature lavash shape.
While the oven preheats, toast the 0.5 cup sesame seeds in a dry skillet over medium heat for 2-3 minutes, stirring constantly, until golden brown and fragrant. The nutty aroma will fill your kitchen—this is where the magic happens. Keep them nearby as you'll need them immediately after baking.
Bake for Crispy Lavash Layers
Place one rolled lavash on a parchment-lined baking sheet and sprinkle generously with toasted sesame seeds, pressing them lightly into the dough. Bake for 8-10 minutes until the edges turn golden and the center is just set. The lavash should still be slightly pliable when you remove it from the oven.
Repeat with the remaining dough portions, baking in batches if needed. For best results, stack the baked lavash with parchment paper between each layer while they cool. This prevents sticking and maintains their crispness. Once completely cool, you can store them in an airtight container for up to 5 days or freeze for longer storage.
Pro Tips For Making Azerbaijan Bread
- Test Yeast First: Skip the guesswork—mix 1 packet yeast with 1 cup warm water (110°F) and 1 tsp sugar. If it bubbles within 5-10 minutes, your yeast is alive and ready to work. I learned this the hard way after wasting dough on dead yeast that smelled like nothing.
- Mix Flours Separately: Combine bread flour and all-purpose flour in separate bowls before mixing. The bread flour’s higher protein needs more hydration, so adding it last prevents a gummy dough. Sounds like extra work, but it’s the thing that matters most for that perfect chewy texture.
- Knead Until Smooth: Stop when the dough passes the "windowpane test"—stretch a small piece and it should thin like plastic wrap without tearing. I used to over-knead, which made the bread tough, and under-knead, which left it dense. Aim for 8-10 minutes by hand or 5-6 minutes with a mixer.
- Shape Tightly, Rest Long: Roll the dough into a tight ball, tucking the edges under as you go—no loose seams. Let it rest 30 minutes before baking, covered with a damp towel. This isn’t the prettiest method, but it’s the only way to get that signature dome shape and crisp crust.
Pro cooking tips for perfect results
Dough Elasticity Secrets
The key to that signature stretchy lavash lies in proper gluten development during kneading. I knead for 8-10 minutes until the dough passes the "windowpane test"—stretch a small piece until it's translucent with just a thin edge.
The bread flour boosts protein content, but if you're short on time, add 1 tbsp vital wheat gluten to your all-purpose flour for similar results. 💪
Precision Rolling Technique
For that restaurant-quality thinness, roll your dough on a lightly floured surface using a rolling pin (I prefer a French-style marble pin for even pressure). Start with the edges thicker—about ¼ inch—then gradually thin the center to ⅛ inch or thinner.
A 12x16-inch size works perfectly for standard lavash. Pro tip: Rotate the dough 45 degrees after each roll to prevent sticking.
Sesame Seed Mastery
Toast your sesame seeds in a dry skillet over medium heat for exactly 2-3 minutes, stirring constantly. They're ready when golden and fragrant—burnt seeds taste bitter! Sprinkle them generously over the rolled dough and press lightly so they adhere.
For extra crunch, I like to mix in 1 tsp poppy seeds with the sesame for variation. 🌰
Baking Temperature Control
Bake at 375°F for 8-10 minutes until the edges are golden but the center remains slightly pliable. Overbaking makes lavash brittle. I use a digital thermometer to verify the oven temperature—many home ovens fluctuate by 25°F. For even cooking, rotate the baking sheet halfway through.
Stacking for Crispness
After baking, stack your lavash sheets with parchment paper between each layer while they cool completely. This prevents sticking and maintains that perfect crunch. Store in an airtight container at room temperature for up to 5 days, or freeze between parchment for 3 months.
Reheat frozen lavash at 200°F for 5 minutes to restore crispness. ✨
Yeast Activation Troubleshooting
If your yeast doesn't bubble after 10 minutes, it's likely dead. I've had this happen with old yeast packets—always check the expiration date! For a quick fix, substitute with 1 tsp instant yeast (which activates faster) or ½ tsp baking powder for a quick-rise version, though texture will differ.
Keep your yeast in the fridge for longer shelf life.
Nutrition facts
Frequently asked questions
What makes Azerbaijani lavash different from other flatbreads?
The signature difference lies in its thin, elastic texture and the nutty crunch from toasted sesame seeds. Unlike thicker flatbreads, lavash is rolled paper-thin (⅛ inch or less) and stretches effortlessly—perfect for wrapping around fillings or layering with butter. The sesame seeds give it a distinct flavor and aroma that sets it apart from Middle Eastern or Indian flatbreads.
Can I make this lavash without a rolling pin?
If you don’t have a rolling pin, use a wine bottle or even a smooth-sided pan wrapped in plastic wrap. For extra-thin sheets, roll the dough between two sheets of parchment paper to prevent sticking. The key is patience—press gently and rotate the dough frequently to maintain even thickness. This method works well for beginners.
How do I store leftover lavash to keep it crispy?
Store cooled lavash in an airtight container with parchment paper between layers to prevent sticking. For short-term storage (5 days), keep at room temperature. For longer storage, freeze between parchment paper for up to 3 months. To restore crispness, reheat frozen lavash at 200°F for 5 minutes or toast in a dry skillet for 30 seconds per side.
What are the best ways to serve Azerbaijani lavash?
Lavash is incredibly versatile! Use it as a wrap for grilled meats, cheese, or fresh herbs (like dushbara or qutab fillings). It’s also perfect for dipping in soups, stews, or olive oil with garlic. For a sweet twist, spread with honey and crushed nuts. In Azerbaijan, it’s often served with dolma (stuffed vegetables) or as a side with plov.
Why did my lavash turn out dense instead of fluffy?
Dense lavash usually means the dough didn’t rise enough or was overworked. Ensure your yeast is active (bubbles in 5-10 minutes) and the dough doubles in size during the 1-2 hour rise. Over-kneading or using low-protein flour can also cause density. For a lighter texture, let the dough rest 10 minutes after kneading before shaping. If all else fails, try adding 1 tbsp vital wheat gluten to boost elasticity.