
Side Dishes
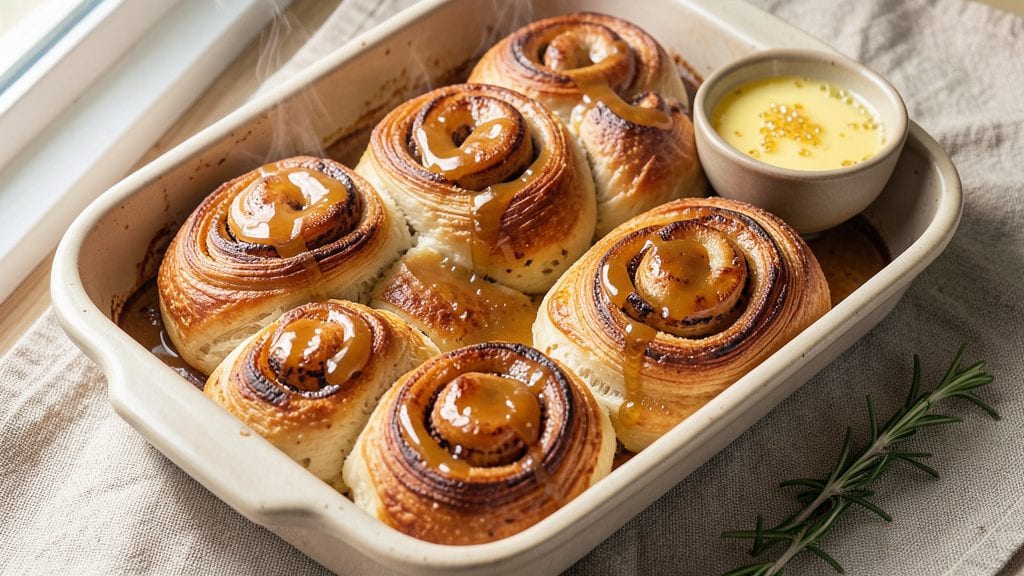
This honey butter dinner rolls recipe delivers the perfect balance of flaky, golden layers and sweet, buttery magic that transforms any meal into a special occasion.
The secret lies in a precise dough technique that creates those signature air pockets while maintaining tender, melt-in-your-mouth texture—something even home bakers can master with patience and attention to detail.
What sets these rolls apart is the honey butter glaze, a simple yet game-changing addition that adds a touch of sweetness without overpowering the bread's natural flavor.
The dough requires just a few simple ingredients and a bit of time for proper proofing, but the results are worth every minute—warm, pillowy rolls with crisp edges and a honey-kissed finish that disappears faster than you can say "seconds, please."
By following this method, you'll achieve restaurant-quality dinner rolls that are flaky enough to layer beautifully and rich enough to satisfy even the pickiest eaters.
The honey butter glaze can be adjusted to your preference—whether you prefer a subtle drizzle or a more generous coating—and pairs perfectly with soups, steaks, or as a standalone treat.
Ready in about 3 hours (including proofing time), these rolls are ideal for holiday gatherings, family dinners, or whenever you want to elevate your table with a touch of homemade elegance.
The key is in the technique—proper kneading, accurate proofing, and precise baking temperatures—that ensures each roll turns out perfectly every time.
Ingredients for honey butter dinner rolls
Twelve ingredients, three hours of patience, twelve golden rolls with honey butter magic.
| Ingredient | Amount | Notes |
|---|---|---|
| All-Purpose Flour 🌾 | 5 cups | Plus 1 tbsp for dusting |
| Active Dry Yeast 🍞 | 2 ¼ tsp | Or 1 packet (2.25 tsp) |
| Granulated Sugar 🍚 | 1 tbsp | For yeast activation |
| Unsalted Butter 🧈 | ½ cup | Cold, cubed (full-fat for flakiness) |
| Whole Milk 🥛 | ¾ cup | Warm (110°F) for best activation |
| Large Eggs 🥚 | 1 whole | Room temperature |
| Diamond Crystal Kosher Salt 🧂 | 1 tsp | Fine grain preferred |
| Honey Butter Glaze 🍯 | ½ cup | Custom blend (see notes) |
| Cornmeal 🌽 | ¼ cup | For dusting baking sheets |
| Coarse Sea Salt 🧂 | ½ tsp | For sprinkling on top |
| Pure Honey 🍯 | ¼ cup | Wildflower or clover variety |
| Unsalted Butter 🧈 | ¼ cup | Cold, cubed (for glaze) |
The flour is non-negotiable—King Arthur or Gold Medal for the best rise and texture. Yeast is the heart of this recipe, so check the expiration date (fresh is best). The butter? Plugrá or Land O'Lakes work perfectly, but avoid anything with additives. Warm the milk to 110°F—too hot and you kill the yeast, too cold and it won't activate. For the honey, local wildflower adds depth, but clover works in a pinch. The glaze's secret is using cold butter cubes mixed with honey—this creates those signature flaky layers. If you're short on time, instant yeast
No cornmeal? Semolina or all-purpose flour will do, though cornmeal gives the best texture. Short on honey? Maple syrup or agave works, but the flavor won't be identical. The glaze can be adjusted—more honey for sweetness, more butter for richness. For a lighter touch, brush on just 1 tbsp of glaze per roll. If your kitchen's humid, reduce the milk slightly to prevent overproofing. The rolls freeze beautifully too—just brush with glaze after baking and freeze on a tray before bagging. Proofing is where the magic happens. Let the dough rise in a warm spot—turn on your oven light or use a proofing box. The dough should double in size (about 1-2 hours depending on your kitchen). For the glaze, mix cold butter and honey until just combined—don't overmix or it'll get grainy. Store leftover rolls in an airtight container at room temperature for 2 days, or freeze for 3 months. Reheat in a 350°F oven for 5-10 minutes to restore that fresh-baked warmth.
Why You'll Love This Recipe
- No-Knead Magic: I swear by this trick—just mix, let the yeast do the work, and wake up to rolls that smell like a bakery. The dough’s so forgiving, even if you forget to punch it down (guilty).
- Sweet Butter Bliss: That honey-butter glaze? It’s not just good—it’s dangerously good. The warm rolls soak up the rich butter while the honey adds just enough caramelized sweetness to make every bite feel like a treat.
- Weeknight Wonder: These rolls are my secret weapon for busy nights: toss them in the oven while you cook dinner, and they’ll be golden and ready to tear into. No fancy plating, no stress—just warm, pillowy perfection.
- Budget Bakery Hack: Flour, butter, milk—these are pantry staples that won’t break the bank. A single batch feeds four, and leftovers reheat beautifully. Honestly, it’s the kind of recipe that makes you feel like you’re feeding a crowd without the grocery bill.
Step-by-step instructions for honey butter dinner rolls
Here's how to create those signature flaky layers and golden-brown tops everyone loves.
Activate the Yeast for Maximum Rise
In a small bowl, combine the 0.75 cup whole milk with the 1 tbsp granulated sugar and warm it until it reaches 110°F—it should feel warm to the touch but not hot. Sprinkle the 2.25 tsp active dry yeast over the surface and let it sit for 5-10 minutes until it becomes bubbly and frothy. This tells you the yeast is alive and ready to work.
If the yeast doesn't bubble, your milk might be too hot or the yeast could be old. Start fresh with a new packet—this is the foundation for flaky rolls. Once active, proceed to the mixer where you'll combine it with the 5 cups all-purpose flour and 1 tsp diamond crystal kosher salt. Mix on low speed until a shaggy dough forms, then increase to medium and knead for 5 minutes until smooth and elastic.
Incorporate Cold Butter for Flaky Layers
While the dough kneads, cut the 0.5 cup unsalted butter into ¼-inch cubes and chill them. Once the dough is ready, turn it out onto a lightly floured surface and roll it into a 12x16-inch rectangle. Here's the key: scatter the cold butter cubes evenly over the dough, then fold it like a letter—first in thirds, then again in thirds. This creates those signature flaky layers.
Seal the edges tightly to prevent butter from leaking out, then roll the dough back into a rectangle. Fold it into thirds once more to maximize layers, then wrap it tightly in plastic wrap and refrigerate for 1 hour. This chilling step is crucial—it firms up the butter so it doesn't melt during shaping, ensuring those perfect flakes when baked.
Shape and Proof for Perfect Rise
After chilling, turn the dough onto a lightly floured surface and gently pat it into a 12x16-inch rectangle again. Cut it into 12 equal rectangles (about 3x4 inches each) and roll each piece into a log, pinching the seams to seal. Curve each log slightly to form a crescent shape, then place them on a parchment-lined baking sheet dusted with 0.25 cup cornmeal. This keeps them from sticking.
Cover the rolls loosely with a clean kitchen towel and let them proof in a warm place for 1 hour or until they've nearly doubled in size. You'll see them puff up and develop a slight dome—this is when they're ready for the oven. The cornmeal coating also gives them that classic rustic texture we love.
Bake to Golden Perfection
Preheat your oven to 375°F while the rolls proof. Brush the tops of each roll with a mixture of 0.25 cup pure honey and 0.25 cup unsalted butter, melted together. Sprinkle generously with 0.5 tsp coarse sea salt for that perfect balance of sweet and salty. Bake for 15-18 minutes until the rolls are deep golden brown and sound hollow when tapped on the bottom.
For extra flakiness, I like to bake them on the middle rack where the heat circulates evenly. As soon as they're done, transfer them to a wire rack to cool slightly—this prevents them from getting soggy. The honey butter glaze will caramelize slightly, giving them that irresistible shine and sweet aroma that makes these rolls unforgettable.
Serve Warm with Honey Butter Glaze
While the rolls cool for 5 minutes, prepare the 0.5 cup honey butter glaze by melting the remaining 0.25 cup unsalted butter with the 0.25 cup pure honey over low heat until smooth. Drizzle this generously over the warm rolls just before serving. The contrast of warm, flaky rolls with that rich, sweet glaze is what makes these dinner rolls truly special.
Serve them fresh from the oven with your favorite meal—whether it's a holiday feast or a weeknight dinner. The rolls will stay soft and pillowy for 2-3 hours if stored in an airtight container, but they're best enjoyed while still warm. This is where the magic happens: every bite delivers that perfect balance of flaky layers, sweet honey, and buttery richness.
Pro Tips For Making Honey Butter Dinner Rolls
- Warm the Milk First: Pour your whole milk into a measuring cup, then microwave it for 30 seconds until it’s just warm to the touch—like bathwater. Cold milk kills yeast faster than you’d think, and this tiny step guarantees your dough rises twice as fast. (Yes, even if you’re impatient like me.)
- Knead Until Silky: Stop when the dough springs back immediately when poked, not after a second or two. Over-kneading makes rolls tough, but under-kneading leaves them dense. Use a stand mixer with a dough hook for 5-6 minutes—less guessing, more consistency.
- Don’t Skip the Second Rise: After shaping, let the rolls rise again in a warm spot for 30-45 minutes until they’ve puffed and nearly doubled. Skipping this step means your honey butter will soak into sad, flat rolls instead of golden, pillowy ones. Cover them loosely with a towel—no need for fancy equipment.
- Brush with Honey After Baking: Bake the rolls first, then brush the tops with warm honey butter while they’re still hot. Cold butter won’t melt into the crust, and you’ll end up with a sticky mess instead of that perfect glossy finish. A quick 1-minute brush does the trick.
Regional styles of this honey butter dinner rolls
Southern Comfort Style
In the South, dinner rolls often get a heartier touch—this version swaps honey for maple syrup and adds ½ tsp cinnamon to the dough for warmth.
I like to brush the baked rolls with a mix of ½ cup softened butter, ¼ cup maple syrup, and 1 tsp vanilla extract, then sprinkle with crushed pecans for texture.
The syrup gives a deeper caramel note that pairs perfectly with Southern classics like fried chicken or collard greens. 🌶️
New England Butter Roll
Up north, rolls lean into salted butter and brown sugar for a robust flavor. Use ½ cup brown sugar in the dough (reduce honey to ¼ cup) and add 1 tsp lemon zest to the honey butter glaze.
The tang cuts through the richness, making these rolls ideal for lobster boils or New England clam chowder. I also recommend brushing the tops with a little egg wash before baking for extra shine. ❄️
German Pretzel Twist
For a savory-sweet fusion, shape the rolls into pretzel knots and boil them in water with ½ cup baking soda (like traditional pretzels) before baking. After boiling, brush with honey butter glaze and sprinkle with coarse sea salt.
This twist adds a satisfying chew while keeping the honey butter magic. Serve with German mustard or smoked sausage for a hearty meal. 🥨
Italian Brioche-Inspired
Elevate these rolls with a brioche touch—replace ½ cup flour with ½ cup bread flour and add 1 tbsp milk powder to the dough. Fold in ¼ cup finely chopped pistachios or orange zest for a Mediterranean flair.
Brush the baked rolls with honey butter glaze and a drizzle of orange liqueur (like Cointreau) for a sophisticated finish. Perfect with Italian pasta dishes or as a dessert with espresso. 🍋
Herbed Garden Rolls
Add fresh herbs to the dough for a bright, aromatic twist. Mix 1 tbsp chopped rosemary and 1 tbsp chopped thyme into the flour before kneading. Use the same honey butter glaze but add 1 tsp fresh thyme to the melted butter.
These rolls shine with roasted lamb or herb-roasted vegetables, offering a fragrant contrast to richer dishes. 🌿
Gluten-Free Adaptation
For a gluten-free version, swap the all-purpose flour for a 1:1 gluten-free flour blend (like Bob’s Red Mill) and add ½ tsp xanthan gum to improve texture. Use ½ cup melted butter instead of cold cubes to avoid layering issues.
The honey butter glaze remains the same, but these rolls will be denser—bake at 350°F for 18-20 minutes to ensure they’re fully cooked. 💪
Nutrition facts
Frequently asked questions
Can I make these rolls without a stand mixer?
You can knead the dough by hand for 8-10 minutes until it's smooth and elastic. Work the dough on a lightly floured surface, pulling and folding it to develop the gluten. Just be prepared for slightly more effort—your arms will thank you for the workout!
How do I know when the dough is properly proofed?
The dough is ready when it's nearly doubled in size and has a slight dome. Gently press your finger into the dough—if it springs back slowly (not too fast), it's perfect. Overproofing makes rolls dense, while underproofing keeps them flat. A warm spot (like near your oven light) helps speed up proofing.
Can I make the honey butter glaze ahead of time?
Yes! Mix the honey and butter glaze up to 2 days in advance and store it in an airtight container in the fridge. Reheat gently in the microwave (10-second bursts) or at room temperature before brushing on warm rolls. The glaze will thicken slightly but works perfectly.
Why are my rolls dense instead of flaky?
Dense rolls usually mean the butter melted too soon or the dough didn't rest enough. Always chill the dough with butter cubes between folds, and don't skip the 1-hour refrigeration before shaping. Also, ensure your yeast is active and the milk is 110°F—not too hot!
Can I freeze the unbaked rolls?
Yes! Shape the rolls as directed, then freeze them on a tray lined with parchment paper until solid. Transfer to a freezer bag for up to 3 months. Bake straight from frozen at 375°F for 20-25 minutes, adding 5 minutes to the baking time. Brush with glaze after baking.