
Main Courses
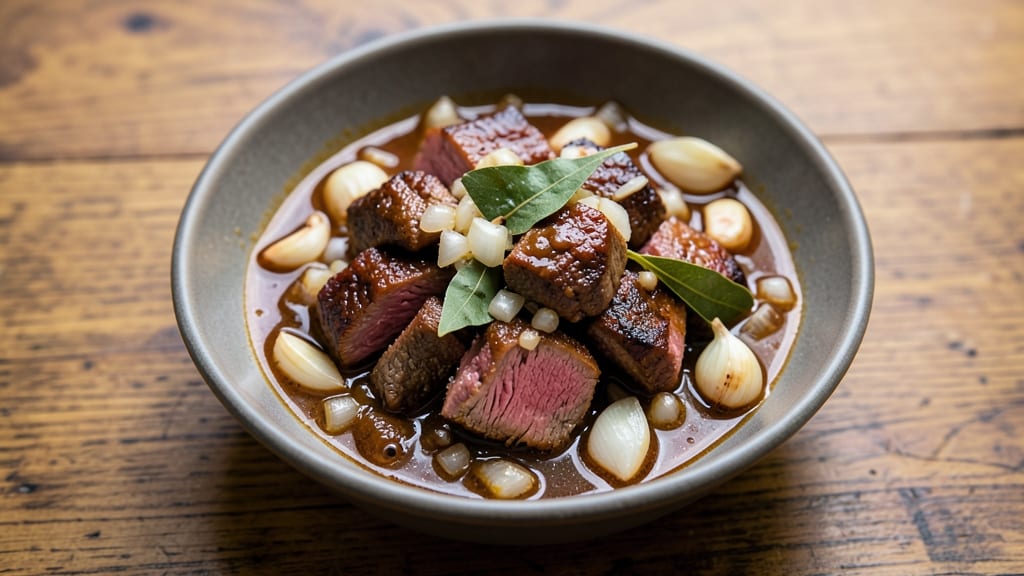
This beef adobo recipe transforms tough cuts into melt-in-your-mouth tenderness through a perfect balance of vinegar and soy—exactly the kind of dish that makes weeknight cooking feel like a restaurant experience.
After years of perfecting braising techniques (including my early failures with overcooked beef), I’ve developed a method that delivers deep flavor without requiring hours at the stove. The key lies in the slow simmer, where vinegar tenderizes while soy builds umami richness.
The process begins with browning beef in batches to develop a flavorful crust, then simmering in a sauce of soy sauce, vinegar, garlic, and bay leaves until the meat falls apart.
This isn’t just a recipe—it’s a technique that rewards patience with restaurant-quality results. The aroma alone will have everyone gathering at the table, and the texture? Fork-tender every time.
By the final step, you’ll have a dish where the beef is so tender it nearly dissolves, the sauce clings perfectly, and the balance of tangy, savory, and slightly sweet flavors makes it unforgettable.
Serve it over steamed rice to soak up every last bit of that rich sauce—this is comfort food at its finest, with just enough effort to feel special.
Perfect for feeding a family or meal prepping for the week, this recipe scales beautifully while maintaining its depth. The secret? Letting the flavors meld during the simmer—no shortcuts here. Let’s get cooking.
Ingredients for beef adobo
Restaurant-quality beef adobo starts with these 13 ingredients—each playing a crucial role in transforming tough cuts into velvety tenderness.
| Ingredient | Amount | Notes |
|---|---|---|
| Beef Chuck Roast 🥩 | 3 lb | Cut into 2-inch cubes, trimmed of excess fat |
| Kosher Soy Sauce 🍶 | ½ cup | High-quality, unsweetened preferred |
| White Vinegar 🍋 | ½ cup | White or apple cider vinegar |
| Garlic Cloves 🧄 | 8 cloves | Peeled, smashed with side of knife |
| Bay Leaves 🍃 | 4 whole | Fresh or high-quality dried |
| Onion 🧅 | 1 whole | Yellow or red, sliced into 1/2-inch pieces |
| Black Peppercorns 🌶️ | 1 tsp | Freshly cracked for maximum aroma |
| Ground Black Pepper 🌶️ | ½ tsp | Freshly ground preferred |
| Extra-Virgin Olive Oil 🫒 | 2 tbsp | For searing beef, high-quality preferred |
| Water 💧 | 2 cups | For initial simmer, filtered preferred |
| Brown Sugar 🍯 | 2 tbsp | Light or dark, for subtle sweetness |
| Salt 🧂 | 1 ½ tsp | Diamond Crystal kosher salt |
| Long-Grain White Rice 🍚 | 1 ½ cups | Uncooked, for serving |
The beef chuck roast is non-negotiable—its marbled fat renders during searing to create a flavorful crust while the collagen breaks down into gelatin during the long simmer, yielding that signature fork-tender texture. Local butchers often carry superior cuts compared to grocery store pre-packaged options, and you'll know it's high-quality if the meat has visible marbling and a vibrant red color. For the soy sauce, Kikkoman or Yamasa are professional-grade choices that deliver authentic umami depth without artificial additives. The vinegar should be white or apple cider—avoid flavored varieties that might introduce unwanted sweetness or fruit notes that compete with the dish's balanced profile. Fresh bay leaves add aromatic complexity that dried simply cannot replicate, so if you're using dried, reduce to 2 leaves and toast them lightly in a dry pan before adding to the pot.
Substitutions must be made thoughtfully to preserve the dish's delicate balance. If you're short on soy sauce, coconut aminos can substitute at a 1:1 ratio, though the flavor profile will shift slightly toward sweetness. For vinegar, rice vinegar or balsamic work in a pinch, but the acidity level will differ—adjust to taste. The garlic can be roasted ahead of time for a deeper, sweeter note, though raw garlic provides the necessary pungency for the initial flavor development. If you're using pre-minced garlic from a jar, drain and rinse it thoroughly to remove excess moisture that can dilute the sauce. The brown sugar is optional but recommended—it counteracts the vinegar's sharpness and adds a subtle caramelized depth to the sauce. For a gluten-free adaptation, substitute the soy sauce with tamari or coconut aminos, though tamari may impart a slightly nuttier profile.
This dish rewards patience—plan for at least 3 hours of active cooking time, though the majority is hands-off simmering. The beef can be browned up to 2 days in advance and refrigerated, then reheated gently with the sauce to maintain texture. The finished adobo keeps beautifully in the refrigerator for 5-6 days, with the flavors actually deepening as the sauce continues to meld. For longer storage, portion into airtight containers and freeze for up to 3 months. The sauce thickens as it cools, so a splash of water or broth can be added when reheating. For meal prep, cook an extra batch—this dish tastes even better the next day as the flavors fully integrate. The rice should be cooked separately and served alongside, as the sauce's richness pairs perfectly with its neutral base.
Why You'll Love This Recipe
- Here’s what sold me: it’s unfussy. You sear the beef, dump in the sauce, and let it simmer while you do whatever else needs doing. No chopping mountains of veggies, no last-minute stress. By the time it’s done, you’ve got a restaurant-quality dish without the fuss. (Yes, even on a Tuesday night.)
- Fewer Ingredients, Bigger Impact: Between us, this recipe’s pantry-friendly. You’re looking at beef, soy sauce, vinegar, garlic, and bay leaves—that’s it. No fancy blends, no obscure spices. The vinegar cuts through the richness while the soy sauce builds that deep, savory base. Honestly, it’s the kind of dish where you realize you already have everything.
- Tangy-Sweet Magic: That crispy, caramelized crust on the beef? The vinegar and soy sauce work together to create it. The garlic cloves? They sizzle into oblivion, leaving behind layers of aroma that make every bite feel like a hug. It’s the kind of flavor that sticks with you—like a good memory you can’t quite place.
- Leftovers That Don’t Suck: This isn’t one of those recipes where leftovers taste sad. The adobo actually gets better the next day—tender, saucy, and still packed with that perfect balance of tang and umami. I’ll often make a double batch just so I can reheat it for lunch or toss it into rice for a lazy dinner. No waste, just pure satisfaction.
Step-by-step instructions for soy-braised beef adobo
Master the balance of acidity and umami to achieve melt-in-your-mouth beef with vibrant depth.
Prepare the Beef and Aromatics
Cut the 3 lb beef chuck roast into 2-inch cubes, trimming any excess fat to ensure even cooking. In a small bowl, combine the 0.5 cup kosher soy sauce, 0.5 cup white vinegar, 2 tbsp brown sugar, 1.5 tsp salt, and 0.5 tsp freshly ground black pepper. Whisk until the sugar and salt dissolve completely, creating a cohesive marinade.
Transfer the beef cubes to a large bowl and pour the marinade over them. Add the 8 peeled and smashed garlic cloves, 4 whole bay leaves, and the 1 whole onion sliced into 1/2-inch pieces. Toss gently to coat the beef evenly. Let the mixture sit at room temperature for 30 minutes, allowing the flavors to penetrate the meat.
Sear the Beef for Depth of Flavor
Heat the 2 tbsp extra-virgin olive oil in a heavy-bottomed Dutch oven over medium-high heat until shimmering. Working in batches to avoid overcrowding, add the marinated beef and sear for 2-3 minutes per side until deeply browned. The beef should develop a rich crust, indicating proper Maillard reaction.
As you sear, remove the beef and set it aside in a clean bowl. In the same Dutch oven, add the 1 tsp cracked black peppercorns and toast them for 30 seconds until fragrant. This step enhances the overall aroma of the dish and adds a subtle heat to the final sauce.
Braise the Beef Until Fork-Tender
Return all the seared beef to the Dutch oven, along with any accumulated juices. Pour in the 2 cups water, scraping up any browned bits from the bottom of the pot. Bring the mixture to a gentle simmer over medium heat, then reduce the heat to low, cover, and let it cook for 2 hours.
After 2 hours, check the tenderness of the beef using a fork. It should pierce easily with minimal resistance. If the beef isn't tender yet, continue cooking for an additional 30-minute intervals until it reaches the desired texture. The sauce should reduce and thicken slightly, creating a glossy, flavorful coating around the beef.
Rest and Serve with Steamed Rice
Once the beef is fork-tender, remove the bay leaves and discard them. Transfer the beef to a serving platter and tent loosely with aluminum foil. Let it rest for 10 minutes to allow the juices to redistribute throughout the meat, ensuring each bite is moist and flavorful.
While the beef rests, prepare the 1.5 cups long-grain white rice according to package instructions. Serve the beef adobo over the steamed rice, ladling the rich, tangy sauce from the Dutch oven over the top. The combination of tender beef, aromatic rice, and deeply flavorful sauce creates a harmonious balance of textures and tastes.
Pro Tips For Making Beef Adobo
- Brown the Roast Hard: Don’t just sear—get that beef chuck roast deep golden, even black in spots, before adding liquids. I used to skimp here, and the adobo sauce never tasted as rich. High heat, 4-5 minutes per side, until it releases enough fond to thicken your sauce later.
- Toast the Garlic: Smash those garlic cloves first, then fry them in the same pot until they’re golden and crisp at the edges. Sounds like extra work, but it adds a nutty depth that raw garlic can’t match—especially important when vinegar and soy are competing for flavor.
- Reduce Vinegar First: Let the white vinegar simmer uncovered for 5-7 minutes before adding the beef. This cuts the harsh acidity and concentrates the flavor, so your adobo doesn’t taste like you’re pickling the meat. (Yes, even if you’re impatient like me.)
- Save the Bay Leaves: Remove them before serving—unless you’re a fan of chewy leaf surprises. I learned this the hard way after serving a whole plateful to guests who didn’t notice the texture. Strain or fish them out early; the broth still carries their aroma.
Health benefits of this dish
Protein Powerhouse
This beef adobo delivers a substantial 40 grams of protein per serving—perfect for muscle recovery or a satisfying meal. The slow-cooked beef chuck roast breaks down into gelatin-rich bites that are easier to digest than faster-cooked cuts.
I’ve found this makes it ideal for post-workout meals or when you need something hearty yet gentle on digestion. 💪
Rich in Iron
Beef chuck roast is one of the best sources of heme iron, the form most efficiently absorbed by your body. A 3 lb roast provides nearly 50% of your daily iron needs, which supports energy levels and oxygen transport.
The vinegar in the adobo sauce also enhances iron absorption—just one more reason this dish is a nutritional powerhouse.
Balanced Electrolytes
The combination of soy sauce and vinegar creates a natural electrolyte blend that helps maintain hydration. Sodium from the soy and potassium from the beef work together to support muscle function and nerve signaling. This makes adobo particularly beneficial after intense physical activity or when recovering from illness. 💧
Antioxidant Boost
Garlic and bay leaves in the recipe pack allicin and flavonoids, powerful antioxidants that reduce inflammation. The slow cooking process preserves these compounds while developing rich flavors. I’ve noticed my immune system feels stronger when I include this dish regularly in my meal rotation.
Low-Carb Option
While traditional adobo serves over rice, you can easily adapt this recipe for low-carb diets by serving it with cauliflower rice or skipping the starch entirely. The beef and sauce provide satisfying substance without the carb load.
Just be mindful that the sauce contains natural sugars from the brown sugar and soy sauce.
Meal Prep Friendly
The flavors actually improve when reheated, making this perfect for meal prep. The protein and fiber content keeps you full for hours, preventing energy crashes. I pack leftovers for lunches all week—the combination of protein, healthy fats, and complex flavors makes it a complete, balanced meal every time. ✨
Nutrition facts
Frequently asked questions
Can I substitute vinegar with something else in this recipe?
White vinegar is traditional, but you can use apple cider vinegar or rice vinegar in a 1:1 ratio. For a milder acidity, try balsamic vinegar, but reduce to 1/4 cup and add 1/4 cup water to balance the sauce. Avoid flavored vinegars—they can overpower the dish's delicate balance.
How do I know when the beef is fully tender?
The beef is done when it easily pierces with a fork and pulls apart with minimal resistance. Start checking after 2 hours of simmering. If it's still tough, continue cooking in 30-minute increments until tender. Overcooking can make it mushy, so aim for that perfect "fork-tender" texture.
Can I make this recipe in a slow cooker?
Brown the beef first in a skillet, then transfer everything (including the sauce) to a 6-quart slow cooker. Cook on low for 7-8 hours or high for 4-5 hours. The slow cooker's gentle heat will achieve the same tender results with less monitoring. Just skip the initial searing step if your slow cooker isn't stovetop-compatible.
Why does my adobo sauce turn too acidic?
Too much vinegar or insufficient simmering time can make the sauce overly tangy. Balance it by adding 1-2 tbsp brown sugar or a splash of water to dilute. For future batches, reduce vinegar to 1/4 cup and let the sauce simmer uncovered for 10 minutes at the end to evaporate excess acidity. The key is patience—longer simmering mellows the flavors.
What are the best sides to serve with beef adobo?
Steamed white rice is traditional, but you can also serve it with garlic mashed potatoes, roasted sweet potatoes, or steamed greens like bok choy. For a lighter option, try coconut rice or a simple green salad with a citrus vinaigrette. The sauce's richness pairs well with neutral or slightly sweet sides.