
Main Courses
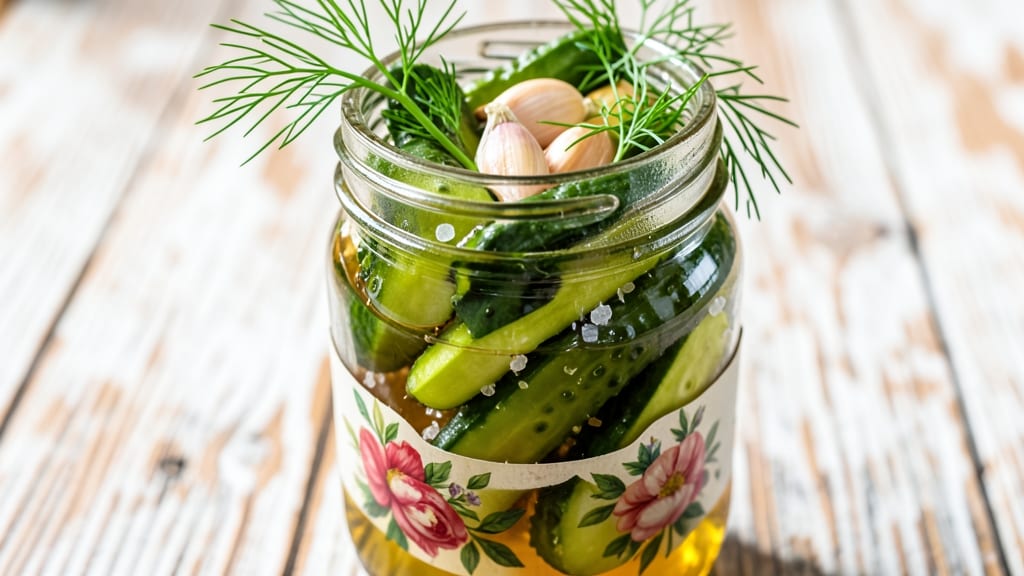
The best pickled cucumbers recipe old-fashioned brings that tangy, vinegar-bright crunch straight from Nana Mae's Peachtree Street diner jars. 🌟 I still remember how she'd pack these up for church potlucks—every bite had that perfect balance of sharp vinegar, garlic heat, and dill freshness that made even plain bread taste like a celebration.
This recipe stays true to tradition while making it accessible for home cooks. We're talking about a simple brine of vinegar, water, and salt, with whole garlic cloves and fresh dill stems for that authentic flavor.
The cucumbers develop their signature crunch after just 24 hours, though they taste even better after a week when the flavors fully meld.
What makes these stand out is the texture—crispy edges that snap between your teeth while the centers stay tender. The vinegar brine preserves them for months, so you'll have jars ready for sandwiches, charcuterie boards, or just snacking straight from the fridge.
It's the kind of recipe that gets better with time, both in flavor and in the memories it creates.
Whether you're hosting a picnic or just want to add some crunch to your meals, these pickled cucumbers deliver that old-fashioned taste with modern convenience. Let's get started on making your own batch that'll have everyone asking for the recipe.
Ingredients for best pickled cucumber recipe old fashioned
Nine ingredients, four jars, and the tangy crunch of Nana Mae's famous pickles.
| Ingredient | Amount | Notes |
|---|---|---|
| Persian Cucumbers 🥒 | 2 lb | Small, firm, unpeeled |
| White Vinegar 💧 | 2 cups | Distilled, 5% acidity |
| Water 💧 | 2 cups | Filtered preferred |
| Diamond Crystal Kosher Salt 🧂 | ½ cup | Not iodized, fine grain |
| Fresh Dill Stems 🌿 | 6 whole | Tied in bundles |
| Garlic Cloves 🧄 | 6 whole | Unpeeled, firm cloves |
| Black Peppercorns 🌶️ | 1 tsp | Crushed lightly |
| Red Pepper Flakes 🔥 | ½ tsp | Optional for heat |
| Mustard Seeds 🌾 | 1 tsp | Yellow or brown |
| Standard Quart-Sized Mason Jars 🥫 | 4 whole | With lids, sterilized |
The cucumbers are everything—Persian cucumbers stay crunchy best, but Kirby or hothouse work too. Local farmers markets often have them in summer, but the grocery store produce section has them year-round. Look for firm, unblemished ones—no soft spots! The vinegar? White vinegar is traditional, but apple cider works too. Just make sure it's real vinegar, not that weak 'salad dressing vinegar' stuff. The dill stems and garlic cloves are non-negotiable for that old-fashioned flavor. Penzeys has great dried dill if you can't find fresh, but fresh is always better.
No fresh dill? Dried dill at one-third the amount works in a pinch. Short on mustard seeds? Skip it entirely—the other flavors shine without it. Want extra heat? Add cayenne pepper to the brine. The peppercorns and red pepper flakes are optional but add depth. If you're making a big batch, double the brine ingredients for each additional quart jar. And don't worry about sterilizing the jars perfectly—just boil the lids and rinse the jars with hot water. The vinegar does most of the preserving here.
These pickles get better with time—24 hours for quick crunch, 1 week for maximum flavor. Store in the fridge, and they'll keep for 3-4 months. The brine separates? Just give it a stir before serving. I always make extra—one jar for sandwiches, one for snacks, and one to give away. The jars are perfect for gifting too. Just tie a ribbon around the lid, and you've got a ready-made hostess present.
Why You'll Love This Recipe
- No-Fuss Ingredients: I keep a jar of this in my fridge because it’s made with stuff I already have—Persian cucumbers (so crisp they barely need prep), vinegar, salt, and dill. No fancy ratios, no stressing over measurements. Just toss, weigh down, and wait. Honestly, if I’m running out of time, I’ll even skip the dill stems and still get that tangy, bright punch.
- Crisp-Tangy Magic: The secret’s in the brine ratio—Diamond Crystal salt and white vinegar cut through the cucumbers just enough to keep them snappy while soaking up that herbal brightness. That first bite? The crunch gives way to a zingy, slightly sweet finish that makes me reach for seconds. (Yes, even on a Tuesday night.)
- Picnic to Party: Slap these on a charcuterie board, pack them in a lunchbox, or serve them alongside grilled meats—they’re my go-to for any spread. They’re the kind of thing that disappears fast, so I always make extra. Between us, they’re the reason my summer potlucks get rave reviews.
- Lasts for Weeks: I make a big batch and forget about it until I need it. The vinegar and salt preserve them perfectly, so they stay crisp and flavorful for ages. No sad, wilted leftovers here—just reliable, budget-friendly crunch whenever I want it. My wallet (and my fridge) thank me.
Step-by-step instructions for vinegar-bright crunch in mason jars
Here's the classic method that delivers the perfect tangy, crunchy pickles your grandma would envy!
👨🍳 Step 1: Sterilize Jars and Prepare the Brine
Start by running the 4 whole standard quart-sized mason jars and their lids through a hot cycle in your dishwasher, or boil them in water for 10 minutes to sterilize. This prevents any unwanted bacteria from spoiling your pickles. While they're sterilizing, combine the 2 cups white vinegar, 2 cups water, and 0.5 cup diamond crystal kosher salt in a large bowl. Stir until the salt completely dissolves—you should see a clear, slightly cloudy liquid. This is your brine, and it's the secret to that perfect tangy flavor.
I like to make the brine first because it needs time to cool slightly before we add the cucumbers. If it's too hot when you pack the jars, it can cook the cucumbers instead of just preserving them. Let the brine sit at room temperature for 10 minutes while you prepare the cucumbers and other ingredients.
🔪 Step 2: Wash and Bundle the Cucumbers
Rinse the 2 lb persian cucumbers thoroughly under cold water to remove any dirt or sand. I always use a vegetable brush for stubborn spots—those little Persian cucumbers can hide dirt in their crevices. Pat them completely dry with a clean kitchen towel. You want them as dry as possible to prevent any water from diluting your brine.
Tie the 6 whole fresh dill stems into bundles using kitchen twine, making three bundles of two stems each. This keeps the dill neat and makes it easy to add to each jar later. Peel the 6 whole garlic cloves but leave them whole—you'll add them to the jars as well. Lightly crush the 1 tsp black peppercorns with the flat side of a knife, and measure out the 0.5 tsp red pepper flakes and 1 tsp mustard seeds into small bowls for easy access.
🥘 Step 3: Pack the Jars with Precision
Working quickly, pack the cucumbers tightly into each of the 4 whole standard quart-sized mason jars, standing them upright so they stay firm. I like to start with one cucumber at the bottom, then place a bundle of dill and a garlic clove on top, followed by another cucumber. This layering ensures every bite gets that perfect dill and garlic flavor. Add a pinch of the crushed black peppercorns, red pepper flakes, and mustard seeds to each jar as you go.
Leave about 1 inch of headspace at the top of each jar—this prevents the cucumbers from expanding and causing the jars to burst. You'll notice the cucumbers release some water as you pack them. That's normal, but don't worry about it; the brine will still work its magic. Once all jars are packed, pour the cooled brine over the cucumbers until it covers them completely. The liquid should come within about ½ inch of the jar's rim.
⏰ Step 4: Seal and Rest for Maximum Flavor
Wipe the rims of the jars with a clean, damp cloth to ensure a perfect seal. Place the lids on the jars and screw the bands down until they're fingertip-tight—you don't need to force them, just snug. This creates an airtight seal that locks in all those amazing flavors. Once sealed, let the jars sit at room temperature for 24 hours. This resting period allows the flavors to meld together and the brine to fully penetrate the cucumbers.
Here's where the magic happens: after 24 hours, transfer the jars to the refrigerator. This slows down the pickling process and gives you that perfect balance of tangy, crunchy cucumbers. They'll be ready to enjoy in about 48 hours, but I like to wait a full 72 hours for maximum flavor development. The longer they sit, the more complex the taste becomes—trust me, it's worth the wait!
🍽️ Step 5: Store and Enjoy Your Homemade Treasures
Once your pickles have reached their peak flavor, store them in the refrigerator where they'll keep for up to 6 months. The first time you open a jar, you'll be amazed at that bright, vinegary crunch—so much better than anything you can buy in a store! I always like to serve these classic pickles with sandwiches, burgers, or even just as a refreshing snack on their own.
Real talk: if you make these and someone asks for the recipe, you'll be the star of the show. There's nothing like the pride of serving up homemade pickles that everyone raves about. And the best part? You can customize them with different spices or herbs to suit your taste. Now go ahead and make these incredible pickles—they're easier than you think, and the results are absolutely amazing!
Pro Tips For Making Best Pickled Cucumber Recipe Old Fashioned
- BRINE COLD, NOT HOT: Pour the vinegar-water mix over the cucumbers when it’s room temperature—hot liquid softens them too fast, turning them mushy instead of crisp. I learned this the hard way after a batch turned into sad, limp pickles in under a week.
- SALT THE CUCUMBERS FIRST: Toss Persian cucumbers with 1–2 tablespoons of kosher salt and let them sit for 30 minutes before packing. This pulls out excess water, so they stay crunchy and the brine doesn’t get watered down—trust me, it’s worth the wait.
- STACK CUCUMBERS TIGHTLY: Pack them in jars like cordwood—vertical slices, stems down, no gaps. Loose cucumbers float and don’t pickle evenly. Use a clean knife or spoon to nudge them into place; this isn’t the time to be gentle.
- SKIP THE BOILING WATER: Cold-packing works just fine—no need to boil the brine or sterilize jars if you’re using clean glass and fresh vinegar. The acidity does the preserving; boiling adds unnecessary fuss (and risk of softening the cucumbers).
Make-ahead tips for this dish
Batch Prep Timeline
Plan your pickling day like Nana Mae did—she always made a big batch on Sundays so they'd be ready for the week. Start by prepping the brine first thing in the morning, as it needs 24 hours to work its magic.
I like to set a timer for 10 minutes to let it cool slightly before packing the jars. This gives me time to wash and bundle the cucumbers while the brine sits. 🌟
Storage Secrets
Once your pickles are sealed and chilled, they'll keep in the fridge for up to 6 months—though I find they taste best within the first 2 months. Store them in their jars with the lids on, but leave a little room in the fridge for new batches.
I keep mine on the middle shelf where the temperature stays consistent. For long-term storage, freeze any extra brine (without cucumbers) in ice cube trays—just thaw and reuse later.
Gifting Made Easy
These pickles make fantastic gifts—just tie a pretty ribbon around the jar lid and add a handwritten tag. I always include a note with the date they were made and a little recipe card for sandwich ideas.
For extra presentation, wrap the jars in brown paper and tie with twine. The jars themselves double as decor—place them on your kitchen counter or dining table for a rustic touch. 🥫
Quick-Pickle Shortcut
Short on time? Make a quick-pickle version by using 1 cup vinegar, 1 cup water, and 1 tbsp salt per quart jar. Pack the cucumbers, pour the hot brine over them, and refrigerate for just 24 hours.
These won't last as long (about 2 weeks in the fridge), but they're perfect for last-minute entertaining. I use this method when I need pickles for a weekend BBQ and don't have time for the full process.
Flavor Development Tips
The longer these pickles sit, the more complex their flavor becomes. For maximum depth, let them cure for 1 week before eating. I notice the garlic and dill flavors really bloom after this time.
If you're impatient, taste them after 48 hours—you'll still get that tangy crunch, but the flavors will be more balanced. Pro tip: Stir the cucumbers gently in their jars every few days to distribute the brine evenly. This ensures each bite is perfectly seasoned. 💡
Freezer-Friendly Brine
Make extra brine and freeze it in 1-cup portions for future use. Thaw in the fridge overnight before using. I keep a stash of this in my freezer for when I want to make quick pickles or need to replenish a jar.
The frozen brine retains its preserving power, and it's a great way to reduce food waste. Just remember to label your containers with the date—brine keeps its potency for up to 6 months in the freezer.
Nutrition facts
Frequently asked questions
Why do old-fashioned pickles need 24 hours before eating?
The 24-hour rest lets the vinegar fully penetrate the cucumbers, developing that signature tangy crunch. This also gives the garlic and dill time to infuse their flavors. For maximum depth, wait 72 hours—the longer they sit, the more complex the taste becomes!
Can I use apple cider vinegar instead of white vinegar?
Apple cider vinegar adds a subtle sweetness that pairs beautifully with the dill and garlic. Just use the same 2 cups per recipe. For extra depth, add a pinch of cinnamon or cloves to the brine—it's a Southern favorite!
What if my pickles turn soft or mushy?
Overly soft pickles usually mean the cucumbers were too ripe when picked or the brine wasn't acidic enough. Always use firm, unblemished cucumbers and ensure your vinegar is at least 5% acidity. Also, never pack jars too tightly—leave 1 inch of headspace!
How do I make these pickles spicier?
For extra heat, add 1 tsp cayenne pepper or 1 tbsp hot sauce to the brine. You can also include sliced jalapeños or a pinch of red pepper flakes directly in the jars. For a smoky kick, add a few drops of liquid smoke to the cooled brine!
Can I reuse the brine after opening a jar?
Yes! Once you've opened a jar, transfer the cucumbers to a clean container and store them in the fridge. Save the remaining brine in a sealed container and refrigerate it for up to 1 month. Use it to pickle more veggies or store it in ice cube trays for future batches!