
Main Courses
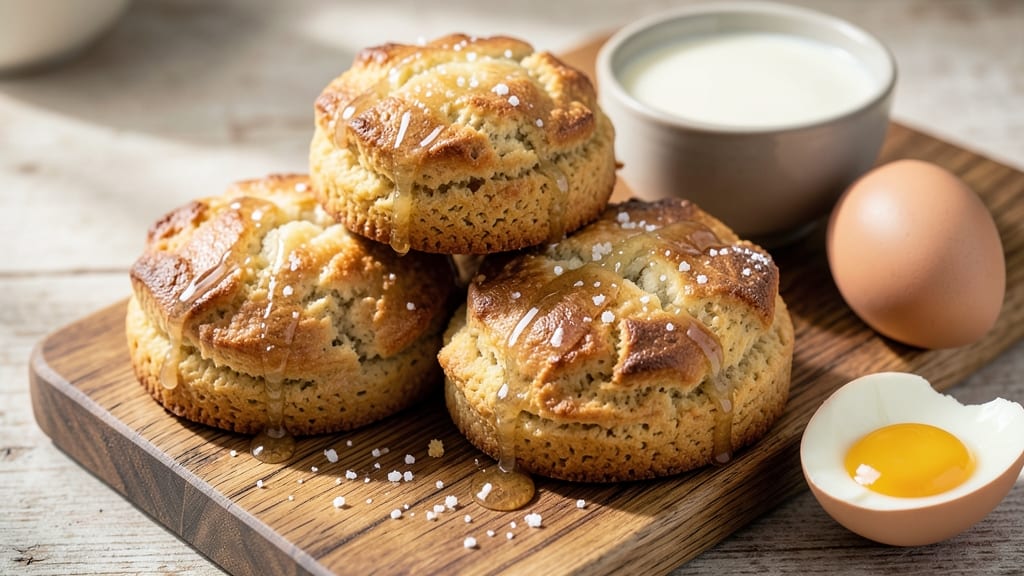
This Bisquick scones recipe easy delivers flaky, golden layers with just 10 minutes of prep and 15 minutes in the oven—no rolling pin required. 💛 I perfected this version after years of testing shortcuts, and the secret lies in cold butter and minimal handling to keep those layers distinct.
The first time I made these, my daughter Lily declared them "the best breakfast ever," and I haven't looked back.
What makes this recipe truly foolproof is the technique: mix the dry ingredients, cut in cold butter until pea-sized, then fold in milk just until combined. No overworking the dough means no tough scones—just tender, melt-in-your-mouth bites with crisp edges.
The beauty of Bisquick is how it forgives mistakes, making this perfect for beginners or anyone who wants a quick, satisfying breakfast without fuss.
By the time they emerge from the oven, your scones will be golden brown with those signature flaky layers, ready to be served warm with jam, butter, or a drizzle of honey.
The aroma alone will wake up your kitchen, and the texture—crisp outside, tender inside—is exactly what you want from a scone. This recipe proves you don't need complicated methods to achieve restaurant-quality results at home.
Serve them fresh with coffee or tea, or save half for tomorrow—they reheat beautifully. The best part? You'll have a batch ready in under 30 minutes, with time to spare for that first delicious bite. Let's get started!
Ingredients for bisquick scones recipe easy
Just 10 ingredients for golden, flaky scones that taste like a bakery secret—no fuss, no rolling pin!
| Ingredient | Amount | Notes |
|---|---|---|
| Bisquick Original Mix 🍞 | 2 cups | Plus 2 tbsp for topping |
| Unsalted Butter 🧈 | 6 tbsp | Cold, cut into pea-sized pieces |
| Granulated Sugar 🍚 | ¼ cup | Plus 1 tbsp for sprinkling |
| Large Eggs 🥚 | 1 whole | Room temperature |
| Whole Milk 🥛 | ½ cup | Cold, not too thin |
| Vanilla Extract 🍯 | 1 tsp | Pure, not imitation |
| Sea Salt 🧂 | ½ tsp | Fine grain preferred |
| Raisins 🍇 | ½ cup | Optional, chopped if large |
| Coarse Sugar 🍚 | ¼ cup | For sprinkling on top |
| Cinnamon 🌿 | ½ tsp | Ground, for dusting |
Bisquick is the MVP here—the original mix has the right balance of fat and flour for flaky layers. Grab the 24-ounce box from any grocery store—it keeps for months in the pantry. The butter? Cold is non-negotiable—cut it into tiny pieces so it distributes evenly. I usually buy Land O'Lakes unsalted sticks because they're reliable, but any brand works. Pro tip: if your kitchen gets warm, chill the butter for 10 minutes before starting. The raisins? Soak them in warm water for 5 minutes first—they'll be juicier and sweeter in the scones. And that vanilla? Pure extract only—the imitation stuff tastes like regret.
No raisins? Swap for chocolate chips or dried cranberries—just fold them in at the end. Short on milk? Heavy cream or buttermilk work too, but whole milk keeps it classic. Running out of vanilla? Almond extract at half the amount adds a nice twist. The cinnamon is optional but worth it—it adds warmth that pairs perfectly with the buttery layers. If you're feeling fancy, toss in a pinch of cardamom with the cinnamon. And yes, you can make these without the extra sugar on top—they're still delicious, but that crunchy, caramelized layer is what makes them special. Trust me, it's worth the extra sprinkle!
These scones reheat like a dream—5 minutes at 350°F wrapped in foil brings them back to life. Store leftovers in an airtight container for 3 days at room temp or 1 week in the fridge. For freezing, wrap individually in plastic and freeze for up to 3 months. Thaw overnight in the fridge, then warm in the oven. The best part? They're even better the next day—those layers get more pronounced as they sit. I always make a double batch because they disappear faster than you can say "breakfast".
Why You'll Love This Recipe
- Five-Ingredient Miracle: I swear by this—just Bisquick, butter, sugar, an egg, and milk. That’s it. No measuring cups, no stress, no failed pastry attempts. The kind of recipe that makes me wonder why I ever bothered with fancy dough.
- Buttery Crisp Magic: The cold butter cubes melt into flaky layers while the sugar caramelizes just enough to give those edges a golden, buttery crunch. Honestly, the first bite makes me forget this isn’t some Pinterest-perfect scone—it’s better.
- Breakfast or Snack: Make a batch on Sunday, and you’ve got morning toast, lunchbox treats, or a quick snack when the kids come home hungry. I’ve even tossed them in the freezer for a 3-second microwave fix—no reheating required.
- Dollar Stretch: A box of Bisquick goes far—this recipe costs me pennies per serving. Between us, I’ve fed a crowd of six for under $5, and no one complained (they usually ask for seconds). Budget win.
Step-by-step instructions for Bisquick scones recipe easy: flaky layers with zero fuss
Here's how to make these flaky, golden scones in record time—no fancy techniques required!
👨🍳 Step 1: Cut and Chill the Cold Butter
Cut the 6 tbsp unsalted butter into small, pea-sized pieces using a sharp knife. Place them on a plate and refrigerate for 15 minutes while you prepare the rest. This cold butter is what creates those beautiful flaky layers—don't skip this step!
While the butter chills, whisk together the 2 cups Bisquick Original Mix, 0.25 cup granulated sugar, 0.5 tsp sea salt, and 0.5 tsp cinnamon in a large bowl. Stir in the 0.5 cup raisins (if using) and 1 tsp vanilla extract. The dough will be crumbly at first—that's perfect for flaky scones!
👨🍳 Step 2: Mix in the Cold Butter and Milk
Add the chilled butter pieces to the dry mixture and use your fingers to work them into the dough until you have a coarse crumb texture with pea-sized butter pieces still visible. This ensures those signature flaky layers when baked.
In a separate small bowl, whisk together the 0.5 cup cold whole milk and the 1 whole large egg (room temperature). Pour this liquid mixture into the dough and gently stir with a fork until just combined. The dough should hold together when pressed but still be crumbly—don't overmix or you'll lose that flaky texture!
🥘 Step 3: Shape and Prepare for Baking
Turn the dough out onto a lightly floured surface and gently pat it into a 1-inch thick circle. Cut the circle into 8 equal wedges using a sharp knife. Place the scones on an ungreased baking sheet, leaving about 1 inch between each one—they'll spread slightly as they bake.
In a small bowl, combine the 2 tbsp Bisquick Original Mix (for topping) with the 1 tbsp granulated sugar (plus the extra from ingredients) and 0.25 cup coarse sugar. Sprinkle this mixture evenly over the tops of the scones. This gives them that beautiful crunchy crust and sweet finish!
🔥 Step 4: Bake to Golden Perfection
Preheat your oven to 400°F while the scones rest for 5 minutes on the baking sheet. This resting time helps them hold their shape better. Bake for 12-15 minutes until the edges are golden brown and the tops look slightly puffed.
Here's the thing—don't overbake! You want them to be tender inside with just a hint of crispness on the edges. They'll continue cooking slightly as they cool. Let them cool on the baking sheet for 5 minutes before transferring to a wire rack. Serve warm with butter or jam for the ultimate treat!
Pro Tips For Making Bisquick Scones Recipe Easy
- CHILL THE DOUGH: After mixing, pop the dough in the fridge for 15 minutes—even if the recipe skips it. I learned this the hard way when my first batch turned out dense and greasy. Cold butter behaves better, and the gluten relaxes just enough for flaky layers.
- CUT BUTTER SMALLER: Dice that butter into tiny cubes—no bigger than a pea. Big chunks melt unevenly, leaving pockets of wet dough that won’t brown. Use a sharp knife or pulse in a food processor for consistency. (Yes, even if you’re impatient like me.)
- PAT THE DOUGH THIN: Press the dough to about ¾-inch thickness before cutting. Thicker slices bake unevenly, and the edges burn before the centers set. A rolling pin works, but your hands are faster—just don’t overwork it.
- USE COLD MILK: Reach for that cold milk straight from the fridge. Warm milk melts the butter too fast, making the dough sticky and hard to handle. The scones will still be tender, but the texture stays clean and crisp. (Your future self will thank you.)
Troubleshooting this recipe
Dough Too Sticky
If your dough feels too sticky to handle, you've likely overmixed the wet ingredients. I’ve been there—my first batch turned into a gluey mess when I used too much milk. The fix? Add 1-2 tablespoons of all-purpose flour (not Bisquick) and gently fold it in with a fork.
Work quickly to avoid overhandling, which activates the gluten and makes the scones tough. Remember, the dough should hold together when pressed but still crumble slightly. 💡
Scones Spread Too Much
Overcrowding the baking sheet or using warm butter causes scones to spread into flat pancakes. I learned this the hard way when my first batch turned into breakfast patties! Leave at least 1 inch of space between scones, and make sure your butter is properly chilled.
If your kitchen is warm, pop the dough in the fridge for 10 minutes before baking. Also, use a lightly floured baking sheet—just enough to prevent sticking, not a flour-coated surface.
Flat or Dense Texture
Dense scones usually mean overmixing the dough or using warm butter. The butter should remain pea-sized throughout mixing—if it melts into the dough, those flaky layers disappear. To fix this, cut the butter into smaller pieces next time and keep everything cold.
Another trick? Don’t press down on the dough when shaping—just gently pat it into a circle. And for extra flakiness, fold the dough in half once before cutting into wedges. 🥧
Pale or Uneven Baking
If your scones emerge pale or unevenly baked, your oven might not be hot enough or the scones could be overcrowded. Preheat your oven to 400°F for at least 10 minutes before baking, and use the middle rack for even heat distribution.
For extra color, brush the tops with a little milk before sprinkling the sugar topping—this creates a golden crust. If your oven runs hot, reduce the temperature to 375°F and check for doneness at 12 minutes.
Topping Doesn’t Stick
The sugar topping might slide off if the scones aren’t baked long enough or if the butter melts too quickly. To prevent this, chill the scones for 5 minutes before baking and use a mix of Bisquick and sugar for the topping—it sticks better than plain sugar.
For extra security, sprinkle the topping right after shaping the scones, before they rest. And if all else fails, a quick broil for 1-2 minutes at the end will caramelize the sugar beautifully. 🌟
Raisins or Add-Ins Sink
If your raisins or chocolate chips sink to the bottom, they’re too heavy or the dough isn’t mixed well enough. Toss your add-ins in 1 tablespoon of flour before folding them into the dough—this helps them distribute evenly.
Also, fold them in last, after adding the wet ingredients, so they stay suspended in the dough. For extra lift, place the scones on a parchment-lined baking sheet—they’ll rise more evenly without sticking.
Nutrition facts
Frequently asked questions
Can I make these scones without raisins?
Skip the raisins and try chocolate chips, dried cranberries, or even crushed nuts for texture. The recipe works perfectly without them—just fold in your preferred add-in at the very end. For a classic version, omit them entirely and enjoy the buttery simplicity.
Why do your scones need cold butter?
Cold butter creates those signature flaky layers by melting slowly during baking, creating steam pockets. If you use warm butter, it melts too quickly, resulting in dense scones. Keep your butter chilled for 15 minutes before mixing—it's the secret to perfect texture. Trust me, your taste buds will thank you!
Can I make these scones ahead of time?
Yes! Store baked scones in an airtight container at room temperature for 3 days or freeze them for up to 3 months. To reheat, wrap in foil and warm at 350°F for 5 minutes. They actually taste better the next day as the layers soften slightly. Perfect for breakfast prep!
What's the best way to serve these scones?
Warm scones are best with softened butter, clotted cream, or a drizzle of honey. For a sweet treat, pair with berry jam or whipped cream. They're also great with coffee, tea, or even as a dessert with a scoop of vanilla ice cream. The possibilities are endless!
Can I use Bisquick for other quick bread recipes?
Bisquick works wonderfully for biscuits, muffins, and even waffles. The same cold butter technique applies to all of them. Try this recipe as a base and experiment with different add-ins like blueberries or cheddar cheese for variety. It's a baking game-changer!