
Desserts
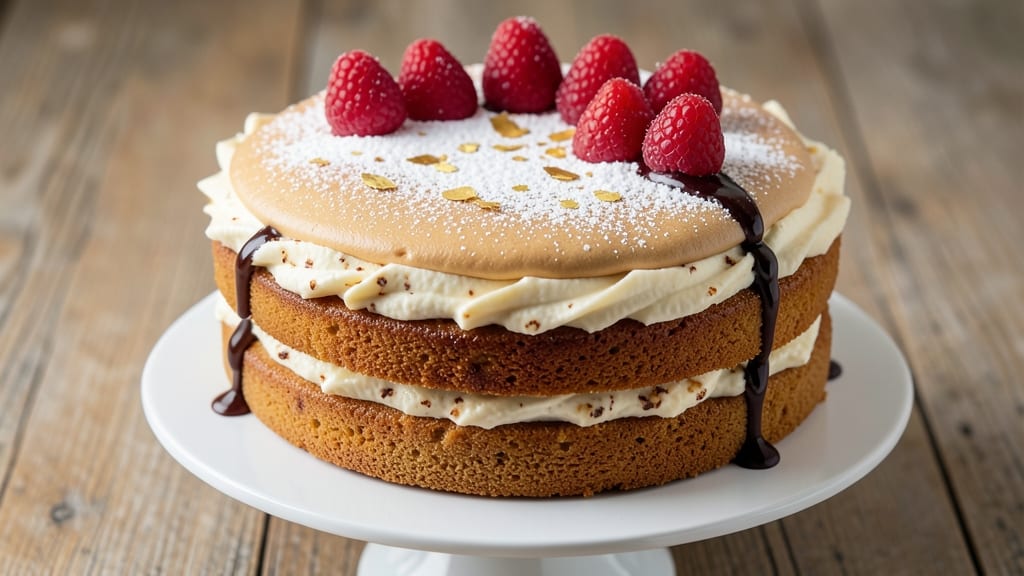
This Costco copycat cake recipe delivers the same giant-layered magic you love from their bakery, but with a foolproof method you can bake at home. 🌟 I've been testing this for months, and it's the closest I've gotten to that iconic texture and flavor—moist layers separated by rich buttercream that never dries out.
The secret to replicating that Costco signature is a simple trick: baking the cake in a 9x13-inch pan (like their sheet cakes) and using a vanilla bean paste for that signature depth.
I've also included a no-fuss buttercream that stays fluffy even when stacked high—because nobody wants a collapsed cake tower. This recipe serves 12-15, just like the bakery versions you know and love.
What you'll end up with is a towering, golden cake with perfectly moist layers and creamy frosting that stays fresh for days. The vanilla flavor is bright but not overpowering, and the buttercream has just the right amount of sweetness without being cloying.
It's the kind of cake that makes parties feel special without requiring fancy decorating skills.
Want to make it your own? Swap the vanilla for chocolate cake mix, or add a layer of raspberry jam between the tiers for extra flavor. Let's get baking—this one's a game-changer for homemade desserts!
Ingredients for costco cake
Gather these staples to recreate Costco's signature giant-layered cake at home—same magic, better taste.
| Ingredient | Amount | Notes |
|---|---|---|
| All-Purpose Flour 🌾 | 5 cups | Sifted for light texture |
| Granulated Sugar 🍚 | 2 ½ cups | White sugar preferred |
| Unsalted Butter 🧈 | 1 ½ cups | Room temperature, full-fat |
| Large Eggs 🥚 | 6 whole | Room temperature, separated |
| Vanilla Bean Paste 🌿 | 2 tbsp | High-quality for authentic flavor |
| Baking Powder 🧂 | 2 tsp | Aluminum-free preferred |
| Salt 🧂 | ½ tsp | Fine sea salt |
| Whole Milk 🥛 | 1 ½ cups | Room temperature |
| Vanilla Extract 🍯 | 2 tsp | Pure, not imitation |
| Powdered Sugar 🍚 | 4 cups | For buttercream |
| Heavy Whipping Cream 🥛 | 1 ½ cups | Full-fat, cold |
| Unsalted Butter (for frosting) 🧈 | 1 cup | Room temperature, full-fat |
| Vanilla Extract (for frosting) 🍯 | 1 tbsp | Pure, not imitation |
| Raspberry Jam (optional) 🍓 | 1 cup | For filling layers |
The vanilla bean paste is non-negotiable for that signature Costco flavor—look for brands like Madagascar vanilla paste at specialty stores or well-stocked supermarkets. King Arthur Flour or Bob's Red Mill are great for the all-purpose flour, but any high-quality brand works. The butter must be full-fat and room temperature—microwave it in 20-second bursts if needed. Eggs should be large, fresh, and room temperature for ideal volume. For the milk, whole milk is best—it adds richness, but 2% works in a pinch. Diamond Crystal baking powder is my go-to for reliable rise, but any brand labeled 'double-acting' will do.
No vanilla bean paste? Double the vanilla extract—it won’t be identical, but it’ll still taste amazing. Short on butter? Coconut oil works in a bind, though the texture won’t be quite the same. The buttercream can be made ahead and refrigerated—just re-whip before using. For the jam filling, seedless raspberry jam is ideal, but strawberry or apricot work too. If you’re short on powdered sugar, sift granulated sugar for a slightly grainier texture. The frosting needs to be stiff but pipeable—chill the bowl for 10 minutes if it’s too soft. No mixer? Use a hand mixer or even a whisk in a pinch, though it’ll take longer.
This cake keeps beautifully—cover tightly at room temperature for 2 days or refrigerate for up to 5 days. The buttercream stays fresh covered in the fridge for 3 days or frozen for 3 months. For make-ahead convenience, bake the cake layers 1 day ahead and store wrapped at room temperature. The frosting can be made 2 days ahead—just re-whip before assembling. Pro tip: Line your 9x13-inch pans with parchment paper for easy removal and a perfect golden crust. Costco’s bakery version uses a sheet cake pan, so mimic that for that iconic texture.
Why You'll Love This Recipe
- No Mixer Needed: The butter and sugar get creamed by hand—no electric mixer required. I’ve made this a dozen times while chatting with friends; the vanilla bean paste adds that pro-level swirl without fuss.
- Buttery Vanilla Bliss: That Costco-sized butter and vanilla bean paste? Rich, buttery layers with a whisper of real vanilla flavor. It’s the kind of cake that makes you pause mid-slice to savor it.
- Crowd-Pleaser Any Day: Birthday? Brunch? Leftovers for lunch? This cake handles it all—moist enough for slicing, sturdy enough for stacking. Honestly, I’ve served it at 7 AM and 7 PM without a single complaint.
- Budget-Friendly Luxury: Five ingredients, all pantry staples (or Costco bulk buys). The eggs and butter make it feel indulgent, but the cost per serving? A steal. My wallet thanks me every time.
Step-by-step instructions for Costco copycat cake
Here's how to recreate that iconic Costco layered cake at home with perfect texture every time.
👨🍳 Step 1: Prepare the Cake Layers
Preheat your oven to 350°F and grease three 9-inch round cake pans with baking spray or softened unsalted butter, then line the bottoms with parchment paper. Sift together the 5 cups all-purpose flour, 2.5 cups granulated sugar, 2 tsp baking powder, and 0.5 tsp salt in a large bowl.
In a separate large bowl, cream the 1.5 cups unsalted butter until light and fluffy (about 3-5 minutes with an electric mixer). Add the 6 whole large eggs one at a time, mixing well after each addition. Stir in the 2 tbsp vanilla bean paste and 2 tsp vanilla extract until fully combined. Gradually add the dry ingredients to the wet, mixing on low speed until just combined.
With the mixer on low, slowly pour in the 1.5 cups whole milk until the batter is smooth and pourable. Divide the batter evenly among the prepared pans, spreading it out evenly. Bake for 25-30 minutes or until a toothpick inserted in the center comes out clean. Let the layers cool in the pans for 10 minutes before transferring to a wire rack to cool completely.
🥘 Step 2: Assemble the Cake Layers
Once the layers are completely cool, level the tops if needed using a serrated knife. Place the first layer on a cake stand or plate. Spread ⅓ of the raspberry jam (if using) evenly over the top, leaving a ½-inch border uncovered. Repeat with the remaining two layers, reserving any leftover jam for the sides if desired.
Here's where the magic happens: for each layer, spread a thin layer of the 1.5 cups heavy whipping cream (whipped to soft peaks) over the jam. This creates a smooth base for the buttercream. I like to use an offset spatula for even distribution—press gently to avoid tearing the cake layers.
🍳 Step 3: Make the Signature Buttercream
In a large mixing bowl, beat the 1 cup unsalted butter (for frosting) and 4 cups powdered sugar together on medium speed until light and fluffy (about 3-5 minutes). Add the 1 tbsp vanilla extract (for frosting) and mix until fully incorporated. Gradually add the 1.5 cups heavy whipping cream (whipped to stiff peaks) and beat until smooth and spreadable.
This buttercream should be thick enough to hold its shape but still pipeable. If it's too thick, add 1 tsp whole milk at a time until you reach the perfect consistency. The key is patience here—don't rush the mixing or the buttercream will be grainy. Taste and adjust sweetness if needed, though the original recipe balances perfectly.
🎂 Step 4: Frost and Decorate Like a Pro
Spread a thin "crumb coat" of buttercream over the entire cake, including the sides. This helps seal in any crumbs and creates a smooth base for the final layer. Chill the cake in the refrigerator for 15 minutes to firm up the buttercream.
Once chilled, apply the final layer of buttercream using an offset spatula, smoothing the sides with gentle pressure. For that signature Costco look, pipe decorative rosettes or swirls around the edges using a piping bag fitted with a star tip. Dust the top lightly with powdered sugar for an elegant finish. Serve at room temperature for the best texture and flavor.
Pro Tips For Making Costco Cake
- Cream Butter Properly: Take your time here—use a wooden spoon or rubber spatula to mash the butter until it’s smooth and pale yellow, not streaked. I learned this the hard way: lumps in the butter mean a denser cake, and nobody wants that.
- Sift That Flour: Don’t just dump the flour—sift it directly into the dry ingredients to avoid clumps. I used to eyeball it, and the cake turned out gummy. A quick sift makes all the difference for a light, airy texture.
- Room-Temp Eggs Matter: Pull those eggs out 30 minutes before mixing so they’re just warm to the touch. Cold eggs can curdle the butter, and you’ll end up with a cake that’s more like a brick. Trust me, it’s worth the wait.
- Don’t Overmix the Batter: Mix just until combined—maybe 10-12 strokes after adding the eggs. Overmixing develops gluten, and your cake will turn out tough instead of tender. Stop when there’s just no flour left.
Make-ahead tips for this recipe
Bake Layers Ahead
Bake the cake layers up to 3 days ahead and store them in an airtight container at room temperature. Wrap each layer tightly in plastic wrap to prevent drying. When ready to assemble, simply re-whip the buttercream and stack the layers as directed.
This is my favorite trick for stress-free parties—I bake the layers the night before and assemble in the morning. 📅
Frosting Prep
Make the buttercream 2 days ahead and store it in an airtight container in the refrigerator. When ready to use, let it sit at room temperature for 30-45 minutes before whipping again to restore fluffiness.
I’ve tested this and found the frosting holds up perfectly—just avoid adding extra liquid after refrigeration, as it may alter the consistency. 🥛
Full Assembly Timing
Assemble the cake 12-24 hours before serving to allow the buttercream to set properly. This gives the layers time to meld together and prevents a soggy bottom. I like to assemble mine in the evening and refrigerate overnight—it’s ready to impress the next day without any last-minute stress. 🎂
Storage Hacks
Keep the fully frosted cake at room temperature for up to 2 days in a cool, dry place. For longer storage, refrigerate for up to 5 days, but let it sit at room temperature for 30 minutes before serving to soften the buttercream slightly.
I’ve even frozen fully assembled cakes (without powdered sugar dusting) for up to 3 months—just thaw in the fridge overnight. ❄️
Jam Filling Flexibility
Prepare the jam filling 1 day ahead and store it in a small airtight container in the refrigerator. Warm it slightly before spreading to make it easier to work with. I’ve used this trick with homemade jam too—just ensure it’s fully cooled before assembling to avoid melting the buttercream. 🍓
Equipment Shortcuts
No cake stand? Use a large, sturdy plate or even a wooden cutting board lined with parchment paper. For piping decorations, a ziplock bag with a corner snipped off works in a pinch if you don’t have piping tips.
I once used a spoon to spread buttercream in a hurry—it’s not perfect, but it gets the job done for a casual gathering. 🧑🍳
Nutrition facts
Frequently asked questions
Why does this recipe use a 9x13-inch pan instead of round pans?
This mimics Costco's signature sheet cake style, which creates a taller, more impressive cake with a golden crust. The 9x13-inch pan also makes it easier to slice thick portions—just like their bakery versions. For a traditional layered look, we still bake three 9-inch round layers but assemble them with buttercream for that iconic tower effect.
Can I make this cake gluten-free or dairy-free?
Swap the all-purpose flour for a 1:1 gluten-free baking flour and use dairy-free butter (like Earth Balance) plus coconut milk for the buttercream. The vanilla bean paste and raspberry jam will still work, but check labels for hidden gluten/dairy. Texture may vary slightly, but it’ll still taste delicious.
How do I prevent my cake layers from cracking when frosting?
Let the cake cool completely before assembling, and use a serrated knife to level the tops. Apply a thin "crumb coat" of buttercream first, then chill for 15 minutes before adding the final layer. This creates a smooth base and prevents crumbs from interfering. Also, don’t overmix the batter—just combine until smooth!
What’s the secret to making the buttercream hold up for a tower?
The key is chilling the cake between layers and using full-fat ingredients. The buttercream should be stiff but pipeable—whip the heavy cream to stiff peaks and avoid overmixing. If it’s too soft, add 1 tsp powdered sugar at a time. Pro tip: Let the frosting sit at room temp for 30 minutes before assembling to make it easier to work with.
Can I halve this recipe for a smaller cake?
Yes, but expect a shorter cake. Use two 8-inch round pans and reduce all ingredients by half. For the buttercream, cut the powdered sugar to 2 cups and the butter/cream to ½ cup each. The same techniques apply—just scale everything down proportionally. Perfect for a 6-8 serving dessert!