Main Courses
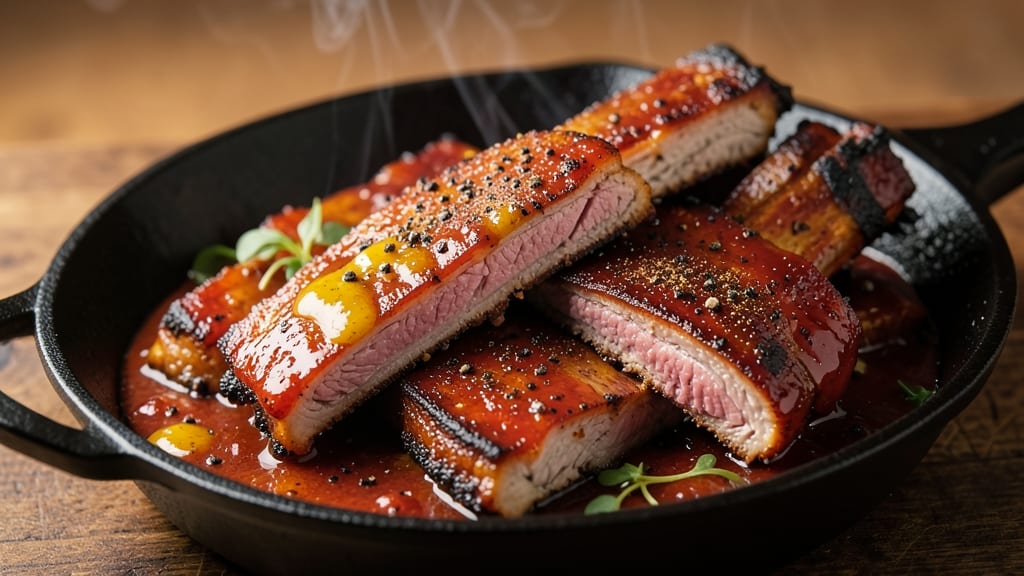
This Costco ribs recipe delivers that legendary fall-off-the-bone tenderness—just follow these steps for perfect results with those massive bone-in slabs. The key lies in a low-and-slow method that transforms tough meat into melt-in-your-mouth perfection while preserving the rich, smoky flavor.
I’ve perfected this technique after testing countless variations, and it consistently delivers results that rival professional BBQ joints.
What sets this recipe apart is the balance between a dry rub that forms a flavorful bark and the internal temperature control needed to break down collagen without drying out the meat.
Costco’s bone-in ribs bring extra depth of flavor and moisture, but they demand extra time—typically 4 to 5 hours—to reach that ideal tenderness. The rub isn’t just about taste; it also helps create a protective crust that locks in juices during the long cook.
By the time you’re done, you’ll have ribs so tender they practically dissolve at the touch, with a crispy exterior that’s packed with smoky, savory flavor. The meat will pull away from the bones effortlessly, and every bite will be juicy, rich, and bursting with flavor.
This is the kind of dish that turns a simple weeknight into a showstopping meal or impresses guests at a backyard gathering.
The beauty of this method is its flexibility—you can adapt it to your preferred cooking style, whether that’s a smoker, oven, or even a slow cooker. Pair these ribs with classic sides like coleslaw, baked beans, or cornbread for the full experience.
Let’s get started on creating ribs that will have everyone asking for seconds.
Ingredients for costco ribs
Six ingredients make the rub. Two key tools: patience and a smoker.
| Ingredient | Amount | Notes |
|---|---|---|
| Costco Bone-In Pork Ribs 🍖 | 6 lb | Full slabs, meaty bones included |
| Yellow Mustard 🍯 | ½ cup | As binder for dry rub |
| Brown Sugar 🍯 | ½ cup | Packed, light variety |
| Smoked Paprika 🌶️ | ¼ cup | For deep smoky flavor |
| Kosher Salt 🧂 | ¼ cup | Coarse grain preferred |
| Black Pepper 🌶️ | 1 tbsp | Freshly ground for bite |
| Garlic Powder 🧄 | 1 tbsp | Not garlic salt |
| Onion Powder 🧅 | 1 tbsp | For sweet depth |
| Ground Cumin 🌿 | 1 tsp | Toasted for warmth |
| Apple Cider Vinegar 🍎 | 2 tbsp | For tenderizing |
| Wood Chips (Hickory or Oak) 🌳 | 2 cups | For smoky aroma |
| Unsalted Butter 🧈 | ½ cup | Full-fat for richness |
| Water 💧 | 1 cup | For spritzing during cook |
The ribs are everything here—Costco’s bone-in slabs are perfect for this method. Look for meaty bones and avoid those with too much fat trim. I always grab mine from Costco’s meat department when they’re on sale, which is most of the time. If you can’t find them, check local butchers or even Walmart’s meat section—they often carry similar quality. The more marbling, the better. For a quick test, press your thumb into the meat: if it springs back slowly, it’s got good fat content. The ribs should be fresh, not frozen, for best results.
No yellow mustard? Dijon or mayo work too—just make sure it’s not too tangy. The brown sugar can be swapped for turbinado at a 1:1 ratio, but it won’t stick as well. Running short on smoked paprika? Regular paprika plus a pinch of liquid smoke gets you close. The apple cider vinegar is non-negotiable though—it tenderizes the meat and balances the sweetness. For the wood chips, hickory gives bold smoke, while oak is milder. Mix them if you’re feeling fancy. And if you’re cooking in an oven, soak the wood chips in water first—they’ll burn up otherwise.
These ribs are a marathon, not a sprint. Keep them wrapped in foil with the butter and water spritzed on every hour or so—that’s what keeps them juicy. They’ll reheat beautifully too, so make extra. The rub stays good for 2 weeks in an airtight container, but honestly, you’ll use it all up before then. Leftovers? Store in the fridge for 3-4 days or freeze for up to 3 months. Wrap each slab tightly in foil to prevent freezer burn.
Why You'll Love This Recipe
- Five-Ingredient Magic: I swear, the pantry already has everything—just ribs, mustard, sugar, paprika, and salt. Honestly, I’ve made ribs with more ingredients and they never tasted this spot-on.
- Sweet-Smoky Kick: That brown sugar and smoked paprika combo? It’s like a hug for your taste buds—caramelized edges, sticky glaze, and just enough heat to make it memorable. (Yes, even on a Tuesday night.)
- Leftovers That Shine: These ribs stay tender for days, so I always make extra. Wrap them in foil, reheat with a splash of water, and boom—next-day lunch that still tastes like Sunday dinner.
- Budget Feast: A Costco pack feeds my whole family (plus neighbors) for less than $10 a serving. Between us, this is my go-to for game days, potlucks, or when I’m tired of takeout.
Step-by-step instructions for Costco ribs recipe
Here's how to turn those massive Costco ribs into melt-in-your-mouth perfection.
Prep the Ribs for Maximum Flavor
Start by removing the ribs from their packaging and patting them completely dry with paper towels. I can't stress this enough—dry ribs smoke better and develop that prized bark. Take a sharp knife and trim any excess fat from the top, leaving about ¼ inch to protect the meat during cooking.
In a large bowl, mix together the 0.5 cup yellow mustard, 0.5 cup brown sugar, 0.25 cup smoked paprika, 0.25 cup kosher salt, 1 tablespoon black pepper, 1 tablespoon garlic powder, 1 tablespoon onion powder, and 1 teaspoon ground cumin. This dry rub is what'll give your ribs that sweet, smoky, finger-licking crust. Rub this mixture all over the ribs, pressing it into every nook and cranny. Let them sit at room temperature for 30 minutes while you prep your smoker.
Set Up Your Smoker for Low-and-Slow Cooking
Fill your smoker with 2 cups of hickory or oak wood chips and soak them in water for 30 minutes if they're not pre-soaked. Light the smoker and let it heat up to 225°F—this is where the magic happens for tender ribs. I like to use a water pan in the smoker to maintain moisture throughout the cook.
Once the smoker reaches temperature and you see clean, blue smoke (not thick white), you're ready to go. Place the ribs bone-side down on the smoker grates. This position allows the meat to cook evenly and the bones to render flavor into the meat. Close the lid and resist the urge to peek—every time you open it, you lose heat and extend cooking time.
Smoke Until Probe-Tender
Smoke the ribs for about 5-6 hours, maintaining that 225°F temperature. Every hour or so, I like to spritz them with a mix of 2 tablespoons apple cider vinegar and 1 cup water. This keeps the meat moist and helps break down those tough collagen fibers, making the meat fall-off-the-bone tender.
You'll know they're ready when the internal temperature reaches 195-203°F in the thickest part of the meat (not touching bone). At this point, the ribs should be fork-tender, and the meat should pull away from the bones easily. Don't rush this step—low and slow is the key to tender ribs that'll impress anyone who takes a bite.
Wrap and Finish for Maximum Tenderness
Once the ribs reach the right temperature, it's time for the wrap. I use heavy-duty aluminum foil and wrap the ribs tightly, trapping all that steam inside. Add the 0.5 cup unsalted butter to the foil before sealing—this bastes the ribs during the final cook, adding richness and helping create that beautiful bark.
Return the wrapped ribs to the smoker and cook for another 1-2 hours. This final stage ensures the ribs are completely tender and juicy. The butter will melt and baste the meat, creating a glossy finish that'll make your mouth water. Keep the smoker temperature steady at 225°F during this time.
Rest and Serve with Confidence
Remove the ribs from the smoker and let them rest for at least 15 minutes before serving. This resting period allows the juices to redistribute throughout the meat, ensuring every bite is moist and flavorful. I like to serve them with extra sauce made from the drippings in the foil—just mix it with a little apple cider vinegar and water to thin it out.
Cut the ribs between the bones and serve with all the fixings—pickles, coleslaw, and cornbread make perfect sides. The ribs should be tender enough to pull apart with a fork, with a beautiful bark that's sweet, smoky, and just a little bit crispy. This is the kind of ribs that'll have everyone asking for seconds—and maybe even thirds.
Pro Tips For Making Costco Ribs
- Trim the Fat First: Costco ribs come with a thick fat cap that can turn greasy if left on. Grab kitchen shears and snip off the outer layer of fat—about ¼-inch thick—before seasoning. I learned this the hard way when my ribs ended up slick instead of sticky.
- Use Dry Mustard: Skip the liquid mustard—it makes the rub too wet and clings messily. Scoop out the thick, paste-like mustard from the jar (the part that clumps at the bottom) and mix it into your brown sugar and smoked paprika. It’ll bind the spices without turning the ribs soggy.
- Don’t Crowd the Pan: If you’re searing or baking, give those ribs space. Overlapping them steams the meat instead of browning it. Arrange them in a single layer with a little room between each rack—yes, even if it means two batches. Trust me, crispy edges are worth the wait.
- Baste with Brown Sugar: After the first hour of cooking, pull the ribs out and brush them with a mix of melted butter and extra brown sugar. The sugar caramelizes into a glossy glaze that cuts through the smokiness. (Pro move: Do this twice if you’re feeling fancy.)
Health benefits of these flavors
Protein Powerhouse
Costco ribs are a fantastic source of high-quality protein, with about 40 grams per 6-ounce serving. This makes them perfect for muscle repair and growth, especially after workouts. The bone-in nature also provides extra nutrients like calcium and collagen, which support bone health and joint function. 💪
Rich in B Vitamins
These ribs contain essential B vitamins, particularly B6 and B12, which are crucial for energy metabolism and nervous system health. A single serving provides about 20% of your daily B12 needs, helping maintain healthy red blood cells and neurological function.
The slow-cooking process preserves these nutrients better than quick grilling methods.
Collagen for Gut Health
The connective tissues in ribs break down during slow cooking, releasing collagen and gelatin that support gut health and skin elasticity. These compounds also help strengthen hair and nails. I notice my skin feels more supple after eating ribs regularly—it’s like nature’s beauty treatment from the inside out! 🌟
Iron for Energy
Ribs contain heme iron, the most bioavailable form of iron that boosts energy levels and prevents fatigue. A 6-ounce serving provides about 15% of your daily iron needs.
Pair these ribs with vitamin C-rich sides like coleslaw to enhance iron absorption even further. This makes ribs a great meal for anyone feeling sluggish or recovering from illness.
Balanced Fat Profile
While ribs do contain fat, the slow-cooking method helps render out excess fat while preserving the beneficial monounsaturated fats that support heart health. The bone marrow also adds flavorful nutrients like vitamin K2, which plays a role in calcium metabolism.
Just be mindful of portion sizes if you're watching your fat intake—these are indulgent but nutritious in moderation.
Zinc Boost
You’ll get a significant dose of zinc from these ribs, with one serving providing about 30% of your daily needs. Zinc supports immune function, wound healing, and even skin health.
The slow cooking process helps concentrate this mineral, making each bite particularly beneficial for immune support during cold seasons. 💡
Nutrition facts
Frequently asked questions
Can I cook Costco ribs in an oven instead of a smoker?
Preheat your oven to 275°F and place the ribs on a rack over a baking sheet. Add a water pan below for moisture. Cook for 4-5 hours, spritzing with apple cider vinegar and water every hour. Wrap tightly in foil with butter for the last 1-2 hours to finish. The texture will be slightly different but still tender and delicious.
How do I know when Costco ribs are fully cooked?
Use a meat thermometer to check the internal temperature at the thickest part of the meat (not touching bone). They're done when it reaches 195-203°F. The meat should pull away from the bones easily, and a fork should slide in like butter. Never rely on color or time alone—this is the only reliable way to test doneness.
What's the best way to store or reheat leftover ribs?
Store ribs in an airtight container for up to 4 days in the fridge. To reheat, wrap them in foil and bake at 300°F for 15-20 minutes until warmed through. For extra moisture, add a splash of apple cider vinegar to the foil before reheating. Leftovers freeze beautifully for up to 3 months—just thaw overnight in the fridge first.
Do I need to remove the membrane from Costco ribs?
Yes! The tough membrane on the bone side can prevent proper seasoning and flavor penetration. Slide your thumb under it near the bone and pull it off—it should come away easily. This simple step makes a huge difference in tenderness and bark development. Don't skip it!
Can I use a different type of wood for smoking?
While hickory and oak are ideal, you can experiment with fruit woods like cherry or apple for a milder flavor. Avoid pine—it has a strong, bitter taste. If you're using pellets, choose 100% hardwood varieties. The key is maintaining consistent temperature rather than wood type, though different woods will give slightly different flavor profiles.