
Sauces & Condiments
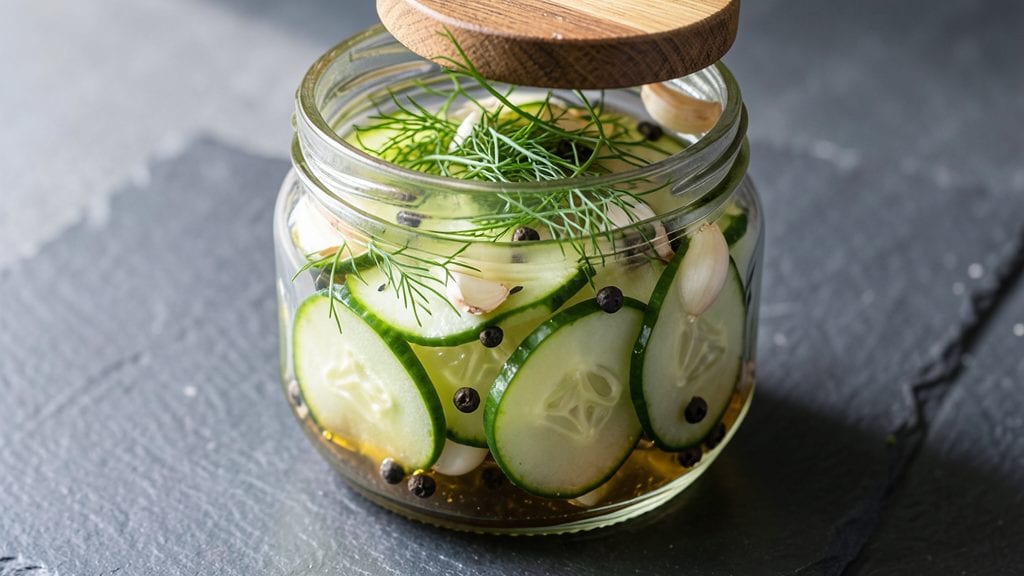
This dill pickle recipe without vinegar transforms simple cucumbers into a tangy, crunchy condiment through the magic of lacto-fermentation—a process that preserves flavor without harsh preservatives.
The result is a bright, herbaceous brine packed with garlic and dill, perfect for adding zing to sandwiches, salads, or enjoying straight from the jar. I developed this method after craving pickles with deeper flavor and natural tang, and it delivers every time.
The beauty of fermentation lies in its simplicity: just salt, water, garlic, and fresh dill create a probiotic-rich brine that develops complexity over time. Unlike vinegar-based pickles, these fermented cucumbers stay crisp and develop a subtle sourness that grows more pronounced with each week.
The process is beginner-friendly—no special equipment needed beyond a clean jar and patience for flavor development.
What you’ll end up with is a jar of vibrant, crunchy pickles with a bright, herbal tang that’s far more nuanced than store-bought versions. The garlic-infused brine adds depth, while the dill keeps the flavor fresh and vibrant.
Best of all, this method is vegan, preservative-free, and packed with gut-friendly probiotics—making it a healthier choice without sacrificing taste.
Ferment for at least 5 days (up to 3 weeks) for optimal flavor, then store in the refrigerator to slow fermentation and preserve freshness. Use these pickles as a tangy topping, a crunchy snack, or a flavor booster in any dish where you’d normally reach for vinegar pickles.
Here’s how to make them perfectly every time.
Ingredients for dill pickle recipe without vinegar
Eight simple ingredients transform cucumbers into probiotic-rich, vinegar-free pickles with vibrant herbal notes.
| Ingredient | Amount | Notes |
|---|---|---|
| Fresh Dill Weeds 🌿 | ½ cup | Finely chopped, stems removed |
| Cucumber Slices 🥒 | 2 lbs | Kirby or Persian variety preferred |
| Garlic Cloves 🧄 | 6 whole | Smashed lightly for infusion |
| Non-Iodized Sea Salt 🧂 | 2 tbsp | Diamond Crystal preferred |
| Filtered Water 💧 | 3 cups | Room temperature preferred |
| Black Peppercorns 🌶️ | 1 tsp | Crushed for subtle heat |
| Fresh Juniper Berries 🌲 | 2 whole | Optional, for earthy depth |
| Lemon Peel Strips 🍋 | 2 tbsp | Unwaxed organic preferred |
The quality of your cucumbers and dill makes all the difference. Kirby or Persian cucumbers hold their crunch best, while farmers' market dill delivers the most aromatic punch. For the salt, Diamond Crystal kosher dissolves cleanly without leaving grit—critical for proper fermentation. The water should be filtered or spring water to avoid chlorine interference. If you can't find fresh dill, dried dill at one-third the amount works, though flavor will be milder. The garlic cloves should be organic when possible, as conventional varieties can carry stronger pesticide residues that may affect fermentation.
No fresh dill? Dried dill or even fresh parsley can substitute, though flavor will differ. Short on cucumbers? Radishes or cauliflower florets ferment beautifully too. The lemon peel adds subtle brightness—organic, unwaxed lemons are ideal. If you can't find juniper berries, a pinch of black peppercorns will still provide depth. For a spicier kick, add a few red pepper flakes. The sea salt must be non-iodized—iodine can inhibit fermentation. If you accidentally use iodized, reduce by half and add a pinch of citric acid to counteract it.
This fermented brine develops complexity over time—5 days minimum for tangy crunch, up to 3 weeks for deeper flavor. Store in the refrigerator after 5 days to slow fermentation and preserve freshness. The pickles will keep for up to 6 months in the fridge, though flavor peaks at 2-3 weeks. For best results, use glass jars with airtight lids—avoid metal or plastic, which can react with the brine. The brine itself can be used as a flavorful salad dressing or marinade once strained, and keeps for 3 months refrigerated.
Why You'll Love This Recipe
- No-Fuss Fermentation: I swear by this method—just cucumbers, dill, and salt. No fancy equipment, no waiting days for vinegar to work its magic. Honestly, I’ve made it in a mason jar while chatting on the phone.
- Herb Bomb Flavor: That fresh dill and crushed garlic? It’s like summer in a jar. The salt draws out all the crispness while the herbs infuse just enough to make your taste buds dance—no sour tang, just bright, clean flavor.
- Weeknight Meal Sidekick: Slap these on burgers, toss them into salads, or serve them straight up with chips. I keep a jar in the fridge for when I’m too tired to cook but still want something that tastes like I did. (Yes, even on a Tuesday night.)
- Budget-Friendly Pantry Staple: Five ingredients, all cheap and reusable. The cucumbers last longer than store-bought pickles, and I’ve stretched one batch into three meals. Between us, this is how I feed my family without breaking the bank.
Step-by-step instructions for fermented dill pickles
This method delivers bright, crunchy pickles with vibrant dill flavor—no vinegar required.
Prepare the Cucumber Slices
Select firm, unblemished cucumbers—Kirby or Persian varieties work best. Cut them into ½-inch thick slices, ensuring each piece is uniform for even fermentation. Arrange the slices in a single layer on a clean cutting board and sprinkle lightly with the 2 tablespoons non-iodized sea salt from the ingredients list. Let them sit for 30 minutes while you prepare the brine.
This salting step draws out excess moisture and begins the fermentation process. The slices should soften slightly at the edges but maintain their shape. Avoid overcrowding them—they need space to absorb the brine evenly. I like to use a glass or ceramic plate for this step as it allows me to monitor the cucumbers' condition easily.
Create the Fermentation Brine
In a non-reactive container—such as a glass jar or ceramic crock—combine the 3 cups filtered water with the remaining 1 tablespoon non-iodized sea salt. Stir until fully dissolved, then add the 0.5 cup finely chopped fresh dill weeds, 6 smashed garlic cloves, 1 teaspoon crushed black peppercorns, 2 whole fresh juniper berries, and 2 tablespoons lemon peel strips. Mix gently to distribute the aromatics.
The brine should be slightly cloudy from the salt dissolution. This mixture creates the ideal environment for lactic acid fermentation, which preserves the cucumbers and develops their tangy flavor. If using juniper berries, pierce them lightly with a skewer before adding to release their essential oils. The lemon peel strips add a bright citrus note that complements the dill beautifully.
Pack and Ferment the Cucumbers
Carefully transfer the salted cucumber slices to a clean, airtight fermentation vessel—such as a quart-sized mason jar or dedicated fermentation crock. Pour the prepared brine over the cucumbers until they are completely submerged, leaving at least 1 inch of headspace at the top. Use a fermentation weight or a small plate to keep the cucumbers submerged if needed.
Seal the container and store it at room temperature, away from direct sunlight. Ferment for 3-5 days, checking daily. The cucumbers are ready when they develop a slight tang and maintain their crisp texture when bitten. The brine should bubble slightly—this indicates active fermentation. If mold appears, discard the batch immediately, as it indicates contamination.
Test for Doneness and Store
After 3 days, taste a cucumber slice to check for tanginess. If it's still mild, continue fermenting for another 1-2 days. Once properly fermented, transfer the pickles to the refrigerator, where they will continue to develop flavor without further fermentation. They will keep for up to 3 months in the fridge, with flavor intensifying over time.
The pickles should have a bright green color, crisp texture, and vibrant dill aroma. If the brine becomes cloudy or develops an off odor, discard it immediately. For best results, use within 2 months for peak flavor and texture. This method yields approximately 4 servings, with each serving consisting of about ½ pound of pickles and ¼ cup of fermented brine.
Pro Tips For Making Dill Pickle Recipe Without Vinegar
- BRINE COLD FIRST: I learned this the hard way—dumping ice-cold filtered water into your jar after adding salt guarantees even dissolution. Stir the salt into the water before pouring, and let it sit for 5 minutes. This prevents clumpy brine that hides in your cucumbers, leaving them unevenly pickled.
- CHOP DILL ROUGH: Skip the food processor for fresh dill—tear it by hand into 1-inch pieces. Whole sprigs make pretty jars, but chopped dill releases flavor faster and sticks to cucumbers better. (Yes, even if you’re impatient like me, this actually changes the outcome.)
- WEIGHT DOWN HARD: Use a fermentation weight or a ziplock bag filled with water—not just a plate. Cucumbers float, and submerged slices pickle evenly. If you’re improvising, press down with a clean rock or a heavy can, but check daily to adjust.
- GARLIC SLICES, NOT MINCED: Thinly slice garlic cloves instead of mincing them. Whole slices infuse flavor without overpowering, and they’re easier to fish out later. (Your future self will thank you when you’re not picking garlic bits out of every bite.)
Essential equipment for great dill pickle recipe without vinegar
Fermentation Vessel
Start with a quart-sized mason jar or dedicated fermentation crock—both are non-reactive and ideal for lacto-fermentation. I recommend Ball mason jars with airtight lids for their durability and ease of use.
If you're fermenting larger batches, a glass fermentation crock (like those from Le Parfait) keeps everything contained while allowing easy access. Avoid metal containers—they can react with the acidity and ruin your brine. 🥫
Fermentation Weights
To keep your cucumber slices fully submerged, use a fermentation weight or improvise with a small glass plate or clean stone. The Kontrol Craft Fermentation Weight is my top pick—it’s food-safe and adjustable. If you don’t have one, a small glass bowl or heavy-duty plastic lid works too.
The goal is to prevent mold growth by ensuring the veggies stay below the brine surface. Never use metal weights—they can introduce harmful bacteria.
Air-Lock Lids
For extended fermentation (beyond 5 days), an air-lock lid is a game-changer. These lids allow gases to escape while keeping oxygen out, which prevents mold. The Fermentaholics Air Lock is a budget-friendly option, while Kanz Air Lock Lids are more premium.
If you don’t have one, a regular mason jar lid with a rubber band and a small hole (covered with cheesecloth) can work in a pinch. This setup still lets gases escape while reducing oxygen exposure. 🔒
Thermometer
Fermentation works best between 65-75°F—too hot or cold can slow or halt the process. A digital kitchen thermometer (like the Thermoworks Thermapen) ensures your fermentation space stays in the ideal range. Place it near your jars but not in direct sunlight.
If your kitchen runs hot, ferment in a cool basement or garage instead. Avoid refrigerating during active fermentation—it stops the process and can lead to mold.
Bottle Brush
A bottle brush with a long handle (like the OXO Good Grips) is essential for cleaning jars and removing any scum or mold that forms on the brine surface. I use mine to scrub jars before and after fermentation to keep everything sanitary.
For stubborn residue, a mix of hot water and baking soda works wonders. Never use soap—it can leave residues that affect flavor and safety. 🧼
Storage Containers
Once fermented, transfer your pickles to airtight glass containers for long-term storage in the fridge. I prefer Pyrex storage jars with snap-on lids—they’re durable and easy to stack. Label each jar with the date to track freshness.
The fermented brine itself can be stored separately in a small glass bottle (like a Le Parfait fermenting bottle) for up to 3 months. Avoid plastic—it can absorb odors and flavors over time. ❄️
Nutrition facts
Frequently asked questions
Why do these fermented pickles taste different from vinegar pickles?
Fermented pickles develop their tang through natural lactic acid bacteria rather than vinegar. This creates a more complex, probiotic-rich flavor with subtle sourness that evolves over time. The garlic and dill infuse deeper into the brine, giving a brighter, herby profile instead of the sharpness from vinegar. Think of it like the difference between fresh lemon juice and bottled lemonade—more nuanced and alive!
Can I use other vegetables besides cucumbers for this fermentation?
Try radishes, cauliflower florets, or even green beans—they all ferment beautifully with the same brine. The key is cutting them into uniform sizes so they ferment evenly. For best texture, stick to firm vegetables that hold their shape, like Kirby cucumbers or radishes. Just remember to adjust fermentation time based on the vegetable's density.
How do I know if my fermented pickles are spoiled?
Watch for these red flags: foul odors (like rotten eggs or putrid smells), visible mold (especially fuzzy spots), or slime on the brine surface. If the pickles taste bitter or overly sour, they've likely gone bad. When in doubt, toss it—fermentation safety is critical. The good news? Properly submerged veggies in a clean jar rarely spoil if kept at 65-75°F.
Can I reuse the fermented brine after opening the jar?
Yes! Strain the brine into a clean bottle and store it in the fridge for up to 3 months. Use it as a tangy dressing for salads, a marinade for proteins, or even a base for homemade hot sauce. The flavor will be milder than fresh brine but still packed with probiotics. Just heat it gently before using in cooking to kill any remaining bacteria.
What's the best way to speed up fermentation without compromising safety?
Keep your jars in the warmest safe spot in your kitchen (typically 70-75°F) and use a fermentation weight to ensure full submersion. Avoid adding extra salt or sugar—these can disrupt the natural bacterial balance. For faster results, ferment for 3-4 days instead of 5, then refrigerate. The pickles will still develop flavor but at a slower pace in the fridge.