
Snacks
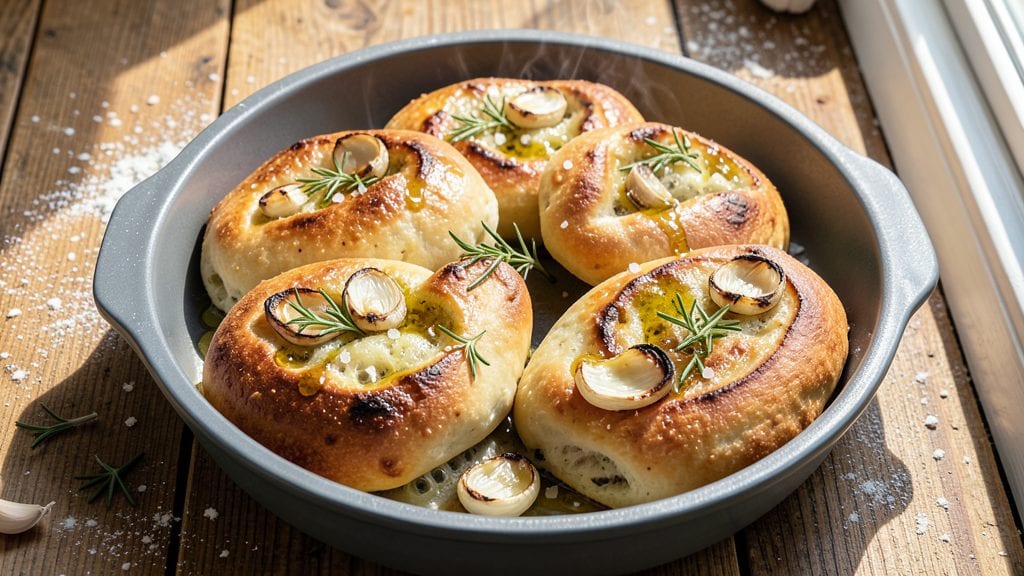
This focaccia rolls recipe transforms simple ingredients into golden, aromatic rolls that taste like a trip to Italy without the plane ticket. The secret lies in that first brush of olive oil—rich, fragrant, and impossible to resist.
I’ve perfected this method over years of weekend baking, ensuring every roll has a crispy crust and tender interior that holds up to any meal.
What makes these rolls special is the no-knead dough, which develops deep flavor as it rises overnight. You’ll need just five basic ingredients—flour, yeast, water, olive oil, and salt—plus optional toppings like garlic, rosemary, or cherry tomatoes for extra flair.
The process is straightforward, but the results are anything but ordinary.
By the time they emerge from the oven, your focaccia rolls will be golden brown with those coveted dimples and a crisp exterior that gives way to soft, airy centers.
The aroma alone will have everyone gathering around the table. These rolls work perfectly as appetizers, sandwich bases, or even a side for soups and salads.
Ready in about two hours (including rise time), this recipe delivers restaurant-quality bread with minimal effort. The key is patience—letting the dough rise slowly creates that signature texture and flavor. Once you try homemade, store-bought focaccia won’t compare.
Ingredients for focaccia rolls
Five core ingredients plus aromatic toppings transform simple flour into golden, fragrant focaccia rolls.
| Ingredient | Amount | Notes |
|---|---|---|
| All-Purpose Flour 🌾 | 3 ½ cups | Sifted for even texture |
| Active Dry Yeast 🍞 | ¼ tsp | Ensure freshness with test |
| Warm Water 💧 | 1 ¼ cups | 110°F for optimal activation |
| Extra-Virgin Olive Oil 🫒 | ½ cup | High quality for flavor |
| Fine Sea Salt 🧂 | 1 tsp | Adjust to taste |
| Garlic Cloves 🧄 | 4 cloves | Minced for aroma |
| Fresh Rosemary 🌿 | ¼ cup | Chopped, stems removed |
| Cherry Tomatoes 🍅 | ½ lb | Halved for topping |
| Large Egg 🥚 | 1 whole | Beaten for brushing |
| Coarse Kosher Salt 🧂 | 1 tbsp | For final sprinkle |
The flour is your foundation—King Arthur or Caputo bread flour if you want to splurge, but all-purpose works perfectly for home baking. Yeast is non-negotiable here; grab fresh packets from the refrigerated section at Whole Foods or Trader Joe's for maximum potency. Warm water should feel like bathwater—110°F—to activate the yeast properly. The olive oil? Use only extra-virgin—the fruity, peppery notes shine through in the final product. I always buy California Olive Ranch for its consistent quality and affordability. For the garlic and rosemary, fresh is essential—dried herbs won’t give that authentic Italian aroma. If you’re in a pinch, Trader Joe’s carries pre-minced garlic in a jar that works in a bind.
No extra-virgin olive oil? Light olive oil will work, but the flavor won’t be as rich. Swap rosemary for fresh thyme or oregano if that’s what you have—just halve the amount. Cherry tomatoes can be omitted entirely, but if you’re using them, Roma or vine-ripened varieties hold up best to baking. The egg is optional but highly recommended for that golden sheen when brushing. For a nut-free version, skip the toppings entirely or use sunflower seeds instead. If your yeast doesn’t foam within 5 minutes of mixing, start over—it’s a sure sign it’s expired. The dough should be sticky but manageable; flour your hands as needed when shaping.
This dough is best made the night before—cover and refrigerate for 8-12 hours to develop maximum flavor. Once shaped, let it sit at room temperature for 1 hour before baking to ensure proper rise. The rolls keep well for 3 days at room temperature, wrapped in a clean kitchen towel. For longer storage, freeze unbaked rolls on a tray first, then transfer to a bag—bake straight from frozen with 10 extra minutes. Reheat in a 350°F oven for 5-10 minutes to restore crispiness. The aroma alone will bring everyone to the table—trust the process
Why You'll Love This Recipe
- No-Knead Magic: The dough comes together in five minutes—just mix, let it rest, and forget it. Honestly, I’ve made this while watching TV, and it’s still fluffy perfection.
- Golden Crust, Soft Heart: That olive oil bath? It turns every bite into a crispy, salty hug with a pillowy center. The salt cuts through the richness like it’s meant to—simple, but ridiculously good.
- Weeknight Wonder: Freeze half the batch for lazy mornings or pop them straight from the fridge into a hot oven. My kids grab them for lunchboxes, and I sneak one at my desk.
- Pantry Staple Power: Five ingredients, zero guilt. The yeast and flour are cheap, and that olive oil stretches further than you’d think. Leftovers? Toast them for breakfast—game over.
Step-by-step instructions for focaccia rolls with olive oil magic
Here's how to transform simple ingredients into golden, aromatic focaccia rolls with crispy crusts and tender interiors.
Activate the Yeast for Maximum Rise
In a small bowl, combine the 1.25 cups warm water (about 110°F) with the 0.25 tsp active dry yeast. Let it sit for 5-10 minutes until it becomes frothy and bubbly. The water should feel pleasantly warm to your wrist—not too hot or too cold. If it doesn't activate, your yeast may be old, and you'll need to start fresh.
While waiting, sift the 3.5 cups all-purpose flour into a large mixing bowl. This aerates the flour and helps create a lighter dough. The sifting also removes any lumps that could affect texture. Keep the bowl ready for the next step—your yeast mixture should be bubbly by now.
Mix the Dough to Perfect Elasticity
Pour the yeast mixture into the sifted flour and add the 0.5 cup extra-virgin olive oil and 1 tsp fine sea salt. Using a wooden spoon or dough whisk, stir until a shaggy dough forms. The olive oil will begin to coat the flour, creating a rich, aromatic base for your rolls.
Transfer the dough to a lightly floured surface and knead for 8-10 minutes until smooth and elastic. You'll know it's ready when it springs back slowly when poked. If the dough feels too sticky, add flour 1 tablespoon at a time—but don't overdo it, or your rolls will be dense. The dough should be soft but not wet.
First Rise for Flavor Development
Shape the dough into a ball and place it in a lightly oiled bowl. Cover with a clean kitchen towel and let rise in a warm place for 1-1.5 hours, or until doubled in size. A warm oven with the light on works perfectly for this. The dough should feel light and airy, with a slight jiggle when shaken gently.
While the dough rises, prepare your toppings: mince the 4 cloves garlic and chop the 0.25 cup fresh rosemary, removing any woody stems. Halve the 0.5 lb cherry tomatoes and beat the 1 whole large egg in a small bowl for brushing. These will add vibrant flavors and textures to your focaccia rolls.
Shape and Second Rise for Height
Punch down the risen dough to release air, then divide it into 4 equal portions. Roll each portion into a 12-inch circle on a parchment-lined baking sheet, leaving space between them. Press your fingers into the dough to create dimples—this will give your rolls that classic focaccia texture.
Lightly brush the tops with the beaten egg, then sprinkle generously with the minced garlic, chopped rosemary, and 1 tbsp coarse kosher salt. Cover loosely with a towel and let rise again for 30-45 minutes until puffy. The dough should expand noticeably, and the aromas should fill your kitchen—this is where the magic happens.
Bake to Golden Perfection
Preheat your oven to 400°F with a baking stone or inverted baking sheet inside for 15 minutes. This creates steam that helps develop that signature crispy crust. Arrange the cherry tomato halves on top of the risen dough, pressing them slightly into the surface.
Bake for 20-25 minutes until the rolls are deep golden brown and the edges are crisp. The kitchen should smell incredible—like fresh bread with hints of garlic and rosemary. If the tops brown too quickly, tent with foil for the last 5 minutes to prevent over-browning.
Remove from the oven and let cool for 5 minutes before slicing. The rolls should be light, airy, and slightly chewy with a crisp exterior. Serve warm with your favorite dips or as a side to soups and salads—each bite will be a testament to the power of simple ingredients and patience.
Pro Tips For Making Focaccia Rolls
- Measure Oil by Weight: Focaccia rolls live or die by olive oil—literally. Use a kitchen scale for ¼ cup (60g) instead of eyeballing it. I used to pour "about a cup" and ended up with greasy, dense rolls. The right amount makes them tender without being soggy.
- Proof Until Bubbly: Don’t rush the first rise—wait until the dough doubles and has visible bubbles when poked. Cold weather slows yeast? Give it 1–2 extra hours. Skipping this step means your rolls won’t puff properly, no matter how long you bake them.
- Salt the Dough Twice: Sprinkle half the salt into the flour first, then add the rest to the water. This ensures even distribution, not just salt pockets. I learned this after biting into a roll that tasted like a science experiment—uneven salt ruins everything.
- Dimple with Your Fingers: Skip the dimpling tool—wet your fingers and press dimples into the dough before baking. The oil sticks better, and the rolls get that classic dimpled texture without tearing. (Yes, it looks messy, but it works.)
Troubleshooting great focaccia rolls
Dough Too Sticky
If your focaccia dough feels like glue, resist the urge to add too much extra flour—this can make your rolls dense. Instead, wet your hands slightly with water and use that to handle the dough.
The olive oil in the recipe already creates a silky texture, so 1 tablespoon flour increments are all you need. I’ve found that King Arthur all-purpose flour absorbs moisture better than some brands, so if you’re using it, you might need just a pinch less flour than called for.
Uneven Rise
Uneven rise often happens when the kitchen is too cold or the yeast isn’t active. First, ensure your yeast is fresh—test it by mixing ½ tsp yeast with 2 tbsp warm water and waiting 5 minutes for bubbles.
If your kitchen is chilly, place the dough bowl near a warm oven (turned off) with the light on. For extra insurance, I cover my dough with a damp kitchen towel—this traps heat and humidity, encouraging even expansion.
If the dough rises too quickly, it’ll collapse when punched down—patience is key here.
Pale or Dense Rolls
Pale, dense focaccia usually means the dough didn’t rise enough or the oven wasn’t hot enough. Double-check your yeast activation—if it didn’t foam, start over. Preheat your oven with a baking stone or steel for 30 minutes before baking to ensure even heat distribution.
I also recommend brushing the rolls with extra olive oil right before baking—this helps create that golden crust. If your rolls still look flat, try baking them on a lower oven rack for the first 10 minutes to encourage browning.
Topping Burns Quickly
Fresh herbs and tomatoes can burn faster than the dough bakes through. To prevent this, bake your rolls for 15 minutes, then carefully add toppings and finish baking. For tomatoes, I recommend Roma or vine-ripened varieties—they hold up better to heat.
If your toppings still brown too fast, tent the baking sheet with aluminum foil for the last 5-10 minutes of baking. This keeps the aromatics vibrant while the dough finishes cooking.
Dough Collapses After Punching
This happens when the dough is overproofed or the yeast is exhausted. If your dough collapses when you punch it down, it’s a sign it’s ready to be shaped—don’t wait for it to double again. For future batches, reduce rise time by 15-20 minutes if your kitchen is warm.
I also keep an eye on the dough’s texture: if it feels springy when poked, it’s perfect for shaping. If it’s sticky and doesn’t bounce back, it’s overproofed—shape it immediately and proceed with baking.
Rolls Stick to Pan
Even with parchment paper, focaccia can stick if the dough isn’t fully risen or the pan isn’t hot enough. Always use high-quality parchment paper (like Reynolds Unbleached) and ensure it’s lightly greased with olive oil.
Before baking, I also poke holes in the dough with a fork to release any trapped air—this helps steam escape and prevents sticking. If rolls still stick, let them cool on the pan for 2 minutes before transferring to a wire rack.
Nutrition facts
Frequently asked questions
Can I make focaccia rolls without yeast?
No, yeast is essential for creating that signature airy texture. However, you can use instant yeast instead of active dry yeast—just reduce the amount by half (use 1/4 tsp instead of 1/2 tsp). For a quick version, try a 1-hour rise in a warm oven with the light on, but overnight cold fermentation yields the best flavor.
How do I store focaccia rolls for maximum freshness?
Keep them wrapped in a clean kitchen towel at room temperature for 2-3 days. For longer storage, freeze unbaked rolls on a tray first, then transfer to a bag. Bake straight from frozen with 10 extra minutes at 400°F. To revive stale rolls, warm them in a 350°F oven for 5 minutes with a splash of water in the pan.
What if I don't have cherry tomatoes for topping?
Use sun-dried tomatoes (chopped), fresh basil leaves, or even olives for a Mediterranean twist. Skip them entirely for a classic olive oil and herb version—just double the garlic and rosemary. The key is balancing flavors: 1 tsp extra olive oil before baking enhances the crust regardless of toppings.
Why did my focaccia rolls turn out dense instead of light?
Dense rolls usually mean the dough didn't rise enough or the yeast was inactive. Double-check your yeast by mixing 1/2 tsp with 2 tbsp warm water—it should foam in 5 minutes. Also, ensure your oven is fully preheated with a baking stone for 30 minutes before baking. Bake on the lower rack for the first 10 minutes to encourage browning.
Can I make focaccia rolls in a stand mixer?
Yes! Use the dough hook attachment to mix for 5 minutes on medium speed after adding all ingredients. The dough will be sticky, so scrape it down occasionally. Let it rest for 10 minutes before shaping to relax the gluten. For best results, use a lightly oiled bowl for the first rise to prevent sticking.