Appetizers
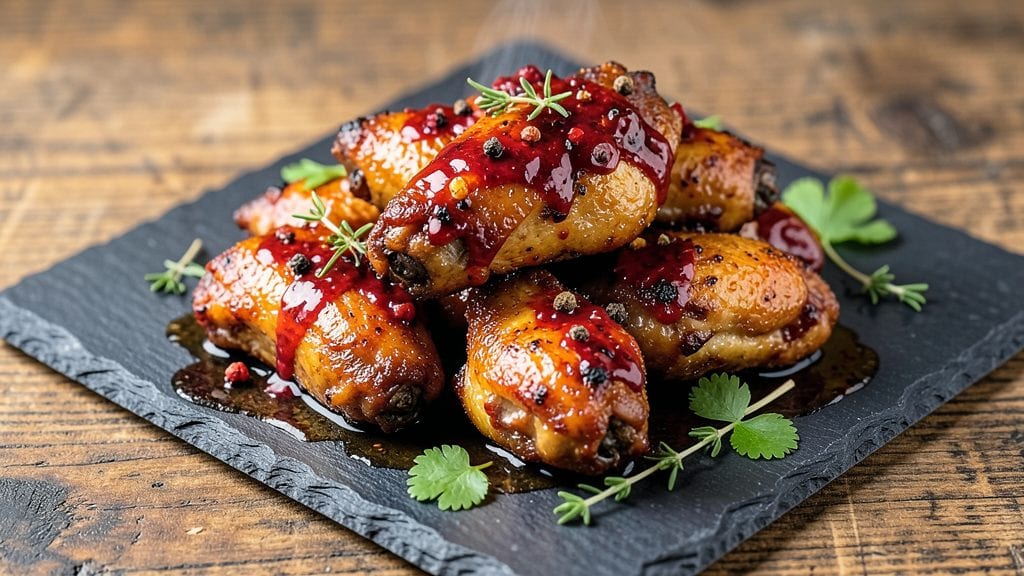
This fried jerk wings recipe delivers the perfect balance of fiery heat and sweet, aromatic spices in a crispy crust that clings to every bite. After years of perfecting the technique, I've cracked the code for restaurant-quality jerk wings at home—no shortcuts, just bold flavors and a foolproof frying method.
The secret lies in the marinade, where allspice, Scotch bonnet peppers, and thyme create that signature jerk profile, then a double-frying process for maximum crispiness.
The process starts with a dry rub that develops deep, complex flavors as the wings marinate overnight, then transitions to a wet jerk marinade that infuses every surface. Frying at 375°F ensures a golden, shatteringly crisp exterior while keeping the meat juicy inside.
This isn't just another spicy wing recipe—it's a full sensory experience with smoky, sweet, and fiery notes that dance together in perfect harmony.
What you'll end up with is a platter of wings that look as impressive as they taste: deep mahogany color from the caramelized spices, a crackling crust that gives way to tender meat, and a heat level that builds gradually.
The sauce doesn't just coat the wings—it becomes part of them, creating that signature jerk crust that sticks even when you bite in. Serve with cool, creamy garlic sauce or tangy mango salsa to balance the heat.
This recipe serves 6-8 people and takes about 2 hours from marinating to serving, with just 20 minutes of active cooking time. The prep work is worth it—once you taste these wings, you'll never go back to store-bought. Let's get cooking!
Ingredients for fried jerk wings
Bold spices, tender wings, and a double-fry for that signature jerk crust.
| Ingredient | Amount | Notes |
|---|---|---|
| Wing Sections 🍗 | 3 ½ lb | Split into drumettes and flats, skinless |
| Scotch Bonnet Peppers 🌶️ | 4 whole | Seeds removed for less heat |
| Allspice Berries 🌿 | 2 tbsp | Ground or whole, toasted for depth |
| Ground Cumin 🌿 | 1 ½ tbsp | Toasted for richer flavor |
| Garlic Cloves 🧄 | 8 cloves | Minced for marinade |
| Fresh Thyme Leaves 🌿 | ½ cup | Stems removed, finely chopped |
| Brown Sugar 🍬 | ½ cup | Light or dark, packed |
| Soy Sauce 🍶 | ¼ cup | For umami depth |
| Apple Cider Vinegar 🍏 | ¼ cup | For tangy balance |
| Vegetable Oil 🫒 | 4 cups | High smoke point for frying |
| Kosher Salt 🧂 | 1 ½ tbsp | For seasoning and preservation |
| Ground Black Pepper 🌶️ | 1 tbsp | Freshly cracked |
| Fresh Ginger Root 🧄 | ½ cup | Grated for marinade |
| Vegetable Oil (for frying) 🫒 | 3 cups | Additional for second fry |
The Scotch bonnet peppers are non-negotiable for that signature jerk heat—Caribbean or Latin markets carry the freshest, but Trader Joe's often stocks them too. If you can't find them, habanero works in a pinch, but halve the amount. Allspice berries are worth toasting whole in a dry pan for 2 minutes before grinding—they develop a deeper, almost cinnamon-like warmth. For the wings, split drumettes and flats for even cooking, and pat them dry with paper towels after marinating to ensure maximum crispiness. The ginger and garlic should be freshly grated and minced, not pre-packaged, for the most vibrant flavor.
No Scotch bonnet? Red pepper flakes at half the amount will give you heat, though it won't be the same fruity, smoky depth. Substitute ground allspice for whole if you're in a hurry, but the texture will be less complex. For the soy sauce, low-sodium works best to avoid over-salting the marinade. The apple cider vinegar can be swapped for white vinegar or lime juice, but the tang will be slightly different. If you're short on time, marinate for at least 4 hours instead of overnight—the flavor will still develop, just not as deeply. The double-fry is key: the first fry cooks the wings through, while the second creates that signature crackling crust.
Marinated wings keep up to 2 days in the fridge, covered and in an airtight container. For longer storage, freeze them uncooked for up to 3 months—thaw overnight in the fridge before frying. Once fried, serve immediately for the best texture, but they reheat well in a 250°F oven for 10-15 minutes. The leftover marinade can be reduced by half and used as a sauce for tacos or bowls. Store any extra marinade in the fridge for up to 1 week or freeze for 3 months. The double-fried wings are best eaten within 2 days for peak crispiness, but the flavor holds up well.
Why You'll Love This Recipe
- One-Pot Magic: I swear by this—just wings, a few peppers, and the spices. No marinating overnight, no messy bowls. Toss everything in one pan, fry, and you’re done. My kids think it’s a party every time.
- Smoky Heat Fix: That Scotch bonnet and allspice? It’s the kind of flavor that lingers. The garlic cloves caramelize just enough to make each bite taste like a tiny, crispy explosion. (Yes, even on a Tuesday night.)
- Party in a Box: Make a double batch and store the leftovers—they’re perfect for game day, potlucks, or when you just need a snack that feels fancy. Honestly, I’ve reheated these wings three times this week and no one’s complained.
- Budget Crunch-Saver: Wings are cheap, and these spices stretch far. A single Scotch bonnet and a handful of allspice turn a simple fry into something restaurant-worthy. My wallet thanks me every time.
Step-by-step instructions for fried jerk wings recipe
Here's how to create perfectly crispy jerk wings with a spice crust that clings to every bite.
Prepare the Jerk Marinade
In a food processor, combine the 4 whole Scotch bonnet peppers (seeds removed), 2 tablespoons allspice berries, 1.5 tablespoons ground cumin, 8 cloves garlic, 0.5 cup fresh thyme leaves, 0.5 cup brown sugar, 0.25 cup soy sauce, and 0.25 cup apple cider vinegar. Process until you achieve a smooth, thick paste—this will be your jerk marinade. The mixture should coat the back of a spoon with a vibrant red color and intense aroma.
Transfer the marinade to a bowl and stir in the 0.5 cup grated fresh ginger root and 1 tablespoon ground black pepper. Let the marinade sit at room temperature for 10 minutes to allow the flavors to meld together. This resting period ensures the spices develop their full complexity before coating the wings.
Coat the Wings Thoroughly
Pat the 3.5 pounds of wing sections completely dry with paper towels—this is crucial for creating a crispy crust. Working in batches, submerge each wing in the marinade, making sure every surface is well coated. Use your hands to press the marinade into the meat, especially around the joints where the drumettes meet the flats. This ensures the spice crust will adhere perfectly during frying.
Transfer the coated wings to a large bowl and sprinkle with 1.5 tablespoons kosher salt. Toss gently to distribute evenly. Cover and refrigerate for at least 2 hours, or up to 12 hours if you prefer more intense flavor development. The longer they marinate, the deeper the flavor penetration, but even 2 hours will give you excellent results.
First Fry for Maximum Crispiness
In a large, heavy-bottomed pot, heat 4 cups vegetable oil to 350°F using a deep-fry thermometer for precise temperature control. The oil should be shimmering but not smoking—this is your target temperature for the first fry. Working in batches of 4-5 wings at a time (don't overcrowd), carefully lower the wings into the hot oil using tongs.
Fry for 8-10 minutes, turning occasionally, until the wings reach an internal temperature of 165°F and develop a deep golden-brown color. You'll know they're ready when the spice crust becomes crisp and the meat is fully cooked through. Remove the wings and drain on a wire rack set over a baking sheet lined with paper towels. This racking allows air to circulate and prevents the wings from steaming, which keeps them crispy.
Second Fry for Extra Crunch
Increase the oil temperature to 375°F for the second fry. This higher heat creates that signature extra-crispy texture that makes these wings irresistible. Return the wings to the hot oil and fry for an additional 2-3 minutes, just until they're blistering and deeply golden. The high heat at this stage caramelizes the sugar in the marinade, creating a glossy, crackly crust that sticks to every bite.
Remove the wings once more and drain on the wire rack. Let them rest for 5 minutes before serving—this brief resting period allows the juices to redistribute slightly, ensuring each bite is perfectly tender and flavorful. Serve immediately with your favorite dipping sauce or extra jerk marinade for dipping.
Pro Tips For Making Fried Jerk Wings
- Double-Fry for Crisp: Fry the wings once at 350°F (175°C) until just cooked—about 8-10 minutes—then crank the oil to 375°F (190°C) for a second fry. This second hit locks in that shatteringly crisp crust without burning the jerk marinade. (Yes, it’s extra work, but the difference is night and day.)
- Toast the Allspice: Dry-toast the whole allspice berries in a skillet for 30 seconds until fragrant before grinding. This step deepens their flavor—like the difference between coffee beans and instant. Skip it, and you’re missing the soul of the dish.
- Don’t Rush the Scotch Bonnet: Seed and finely mince the Scotch bonnet after removing the stem and veins—this keeps the heat balanced and prevents bitter, fibrous chunks. I learned this the hard way when my first batch tasted like a ghost pepper had a grudge.
- Salt the Wings First: Toss the raw wings with 1 tsp salt before marinating—this seasoning penetrates deeper than if you wait. Trust me, your taste buds will notice the difference, especially after frying. (And no, you can’t skip this.)
Essential equipment for perfect results
Deep Fryer Essentials
For perfect jerk wings, a deep fryer is your best friend—consistent temperature control is everything. I swear by the Presto 02400 2.5-Quart Oil-Less Fryer for its even heating and easy cleanup.
If you prefer a stovetop approach, a large, heavy-bottomed Dutch oven like the Lodge 5.5-Quart prevents hot spots and maintains stable oil temperatures. Both options give you the precision needed for that signature double-fry technique. 🔥
Thermometer Precision
Never guess your oil temperature—accuracy is key for crispy wings. The ThermoWorks Smoke digital thermometer is my go-to for its instant readings and durable probe. For budget-friendly options, the Taylor Precision Products analog thermometer works well.
Insert the probe into the oil between batches to monitor temps—350°F for the first fry and 375°F for the second. Even a 10°F variation can ruin your crust!
Wire Rack Setup
Draining wings properly is just as important as frying them. I use a wire cooling rack placed over a baking sheet lined with paper towels to maximize airflow. The OXO Good Grips rack is my favorite—its sturdy design holds heavy batches without bending.
This setup prevents soggy wings by letting excess oil drip away while keeping the crust crisp. Pro tip: Angle the rack slightly to speed up draining. ⚡
Oil Selection Matters
Use vegetable oil or peanut oil for their high smoke points and neutral flavors. I avoid canola oil—it can develop off-flavors at high heat. For a 3.5 lb batch, you'll need about 7 cups total (4 cups for first fry, 3 cups for second).
Keep a fine-mesh strainer handy to filter out food particles between batches. Fresh oil tastes better and reduces grease splatter during the second fry.
Batch Control Tools
Tongs are non-negotiable for handling hot wings safely. The OXO Good Grips stainless steel tongs have a comfortable grip and long reach. For larger batches, a slotted spoon helps lift wings without overcrowding the fryer.
I also keep a small bowl of ice water nearby to cool down any accidental splashes—safety first! Never overcrowd the fryer, or your wings will steam instead of crisp up.
Cleanup Must-Haves
Frying creates a mess, so stock up on paper towels and a long-handled spatula for scraping oil residue. I use Dawn Procter & Gamble dish soap—it cuts through grease effortlessly. For deep cleaning, a bottle brush helps scrub the Dutch oven's interior.
Keep a trash bag nearby for used paper towels and food scraps. A well-organized workspace makes the process smoother and safer. 💪
Nutrition facts
Frequently asked questions
Why do I need to marinate the wings overnight?
Overnight marinating is key for developing deep, complex flavors. The spices and acids in the jerk marinade need time—at least 2 hours, but ideally 12 hours—to fully penetrate the meat. This creates that signature jerk taste that's both smoky and sweet, with layers of heat from the Scotch bonnet peppers. Skipping this step results in a more superficial flavor that fades quickly.
Can I bake these wings instead of frying?
While you can bake them, you'll lose that signature crispy crust that makes these wings special. For baking, coat the wings in marinade, bake at 400°F for 35-40 minutes, then broil for 2-3 minutes to crisp the edges. The texture will be more tender than crispy, but the flavors will still shine. For the best results, stick with frying—especially the double-fry technique for that restaurant-quality crunch.
How do I adjust the heat level for kids or sensitive eaters?
Start by reducing the Scotch bonnet peppers to 2 whole peppers (seeds removed) instead of 4. For milder heat, substitute with 1 habanero or 2 jalapeños (seeds removed). You can also set aside some unmarinated wings to cook separately with just half the spice mix. Always taste the marinade first—adjust the spice level before applying it to the wings.
What's the best way to reheat leftover fried jerk wings?
Reheat in a 250°F oven for 10-15 minutes on a wire rack to maintain crispiness. Avoid microwaving—they'll turn soggy. For extra crunch, broil for 1-2 minutes at the end. Store cooked wings in an airtight container for up to 2 days in the fridge. The double-fried texture holds up best when reheated gently.
Can I use frozen wings for this recipe?
Yes, but thaw them completely first in the fridge for 24 hours before marinating. Pat them very dry with paper towels—frozen wings retain moisture, which can prevent proper crisping. For best results, let them air-dry on a wire rack for 15-20 minutes after thawing to remove excess surface moisture. This extra step makes all the difference in achieving that perfect jerk crust.