
Breakfast & Brunch
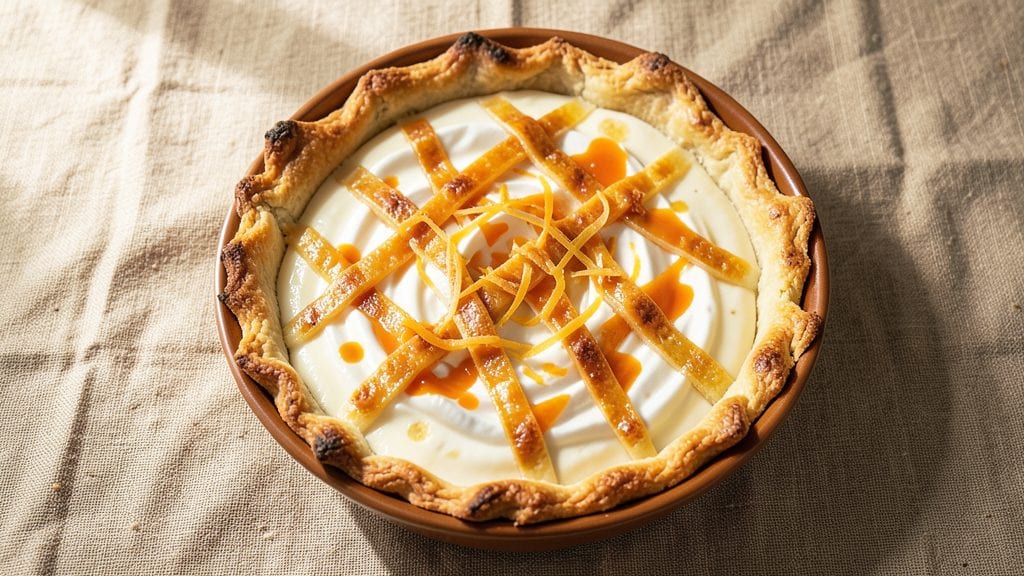
This gluten-free Bisquick quiche recipe delivers the perfect balance of flaky crust and creamy filling without sacrificing texture or flavor—something I perfected after years of testing gluten-free alternatives.
The secret lies in using gluten-free Bisquick mixed with cold butter, which creates layers that bake up tender yet sturdy enough to hold the filling. Most gluten-free quiches either turn dense or crumble, but this method ensures a crust that holds its shape while still feeling light and buttery.
What makes this recipe truly stand out is how it transforms a simple boxed mix into a restaurant-quality breakfast dish in just 30 minutes. The gluten-free Bisquick forms a delicate lattice when cut, while the egg and cheese filling stays rich and custardy—no grainy or rubbery texture here.
I’ve included a few key adjustments, like adding an extra egg to bind the crust better, so you won’t miss the traditional version. The result? A quiche with a golden, flaky crust that flakes apart easily and a creamy center that’s impossible to resist.
This quiche is quick enough for a weeknight breakfast but impressive enough for brunch guests—no one will guess it’s gluten-free. The crust stays crisp around the edges while remaining tender in the middle, and the filling sets just enough to hold its shape when sliced.
Serve it warm with a side of fresh berries or a simple green salad for a complete meal. The best part? You’ll have dinner on the table faster than you could order takeout, without sacrificing flavor or texture.
For those with dietary restrictions, this recipe proves gluten-free baking doesn’t mean compromising on taste or texture. The gluten-free Bisquick handles the heat and moisture of the filling without falling apart, making it a game-changer for anyone who loves quiche but needs to avoid gluten.
Once you try this version, you’ll never go back to the traditional mix again—it’s that good.
Ingredients for gluten free bisquick quiche
Six ingredients transform gluten-free Bisquick into a golden, flaky crust—no one will guess it's gluten-free.
| Ingredient | Amount | Notes |
|---|---|---|
| Gluten-Free Bisquick Mix 🍞 | 1 ½ cups | Ensure it contains xanthan gum |
| Unsalted Butter 🧈 | ½ cup | Cold, cubed for flakiness |
| Large Eggs 🥚 | 5 whole | Room temperature for even baking |
| Shredded Sharp Cheddar Cheese 🧀 | 2 cups | Freshly shredded for best melt |
| Heavy Whipping Cream 🥛 | 1 cup | Full-fat for creaminess |
| Milk 🥛 | ½ cup | Whole milk preferred |
| Salt 🧂 | ½ tsp | Kosher or sea salt |
| Black Pepper 🌶️ | ½ tsp | Freshly ground preferred |
| Garlic Powder 🧄 | ½ tsp | For subtle depth of flavor |
| Fresh Spinach 🍃 | 2 cups | Chopped, for added nutrients |
| Red Bell Pepper 🌶️ | ½ cup | Diced, for color and crunch |
| All-Purpose Flour 🌾 | 2 tbsp | For dusting crust edges |
| Olive Oil 🫒 | 1 tbsp | For greasing pie dish |
The gluten-free Bisquick is the MVP here. King Arthur or Betty Crocker gluten-free mixes work best—they contain xanthan gum, which mimics gluten's binding properties. Grab the coldest butter you can find (the fridge door works) and cut it into 1/2-inch cubes. That cold butter is what creates those delicate layers. If your mix doesn't have xanthan gum, add 1/2 teaspoon separately. The cheese matters too—sharp cheddar melts better than pre-shredded (those anti-caking agents make it grainy). For the spinach, I use baby spinach because it's easier to chop and less bitter than the big leaves.
No sharp cheddar? Gruyère or Monterey Jack work beautifully too. Short on spinach? Frozen works in a pinch—just thaw and drain it well. The red bell pepper can be swapped for mushrooms or zucchini if you prefer. For the crust, if you don't have xanthan gum, add 1/2 teaspoon guar gum instead. The extra egg in the crust mix (compared to regular quiche) is non-negotiable—it's what keeps the gluten-free crust from falling apart. Trust me on this one. And if you're worried about the crust getting soggy, blind-bake it for 5 minutes before adding the filling.
This quiche reheats beautifully—just 10 minutes at 350°F until the center is set. Keeps 4 days in the fridge, fully covered, and freezes for 3 months. I always make a double batch because it's perfect for meal prep. Store the filling separately if you want to assemble it fresh before baking. The crust stays crispy for 2 days if you keep it wrapped in foil at room temperature—great for quick breakfasts.
Why You'll Love This Recipe
- No-Fuss Assembly: The gluten-free Bisquick does all the work—just mix, press, and bake. No rolling dough, no waiting for crusts to chill, just hands-off simplicity while the filling cooks.
- Sharp Cheese Magic: That shredded cheddar gets melty and salty in all the right ways, cutting through the creamy egg mixture. Honestly, the first bite makes me want to skip breakfast.
- Weeknight or Brunch Hero: Same recipe works for a lazy Sunday morning or a quick dinner when the kids are starving. (Yes, even on a Tuesday night.) Just swap in veggies or ham if you’re feeling fancy.
- Leftovers That Don’t Suck: Cut into squares, reheat in the microwave—still warm, still delicious. Between us, this is my go-to for lunches all week, and it’s cheaper than takeout.
Step-by-step instructions for gluten free Bisquick quiche
Here's how to assemble a quiche with a surprisingly crisp crust and velvety filling.
Prepare the Crust Mixture
In a medium bowl, combine the 1.5 cups gluten-free bisquick mix with the 0.5 cup unsalted butter, cold and cubed. Use a pastry cutter or your fingers to work the butter into the mix until it resembles coarse crumbs with pea-sized butter pieces remaining. This texture is crucial for that flaky, layered crust we're after.
Next, stir in the 0.5 cup milk until the mixture comes together. The dough should hold when pressed gently but not be sticky. If it feels too dry, add 1 teaspoon more milk; if too wet, sprinkle in 1 tablespoon more gluten-free bisquick mix. Press the dough into a greased 9-inch pie dish, using your fingers to create a slight rim around the edges. Chill in the refrigerator for 20 minutes while you prepare the filling.
Cook the Crust
Preheat your oven to 375°F. Line the chilled crust with a sheet of parchment paper and fill it with pie weights or dried beans. Bake for 10 minutes until the edges begin to set and the bottom looks lightly golden. Remove the weights and bake for another 5 minutes to ensure the crust is fully cooked but not browned. This pre-baking step prevents a soggy bottom when we add the wet filling later.
Here's the thing - don't overbake the crust. You want it firm enough to hold the filling but still tender enough to create that flaky texture when the quiche finishes baking. The crust should be set but not dark golden.
Prepare the Filling
In a large bowl, whisk together the 5 whole large eggs, 1 cup heavy whipping cream, 0.5 cup milk, 0.5 teaspoon salt, 0.5 teaspoon black pepper, and 0.5 teaspoon garlic powder until completely combined. In a separate bowl, combine the 2 cups shredded sharp cheddar cheese, 2 cups fresh spinach, and 0.5 cup diced red bell pepper. Gently fold these ingredients into the egg mixture until just incorporated.
I like to add the spinach and bell pepper last so they don't wilt too much before baking. The cheese should be evenly distributed throughout the mixture, creating pockets of melted goodness in every bite. This is where that creamy texture comes from - the combination of eggs, cream, and cheese creates a rich, velvety filling.
Assemble and Bake
Pour the egg mixture evenly into the pre-baked crust. Sprinkle the 2 tablespoons all-purpose flour evenly over the top - this creates a beautiful golden crust on top while adding a subtle crunch. Bake at 375°F for 35-40 minutes until the center is set and the top is golden brown.
To test doneness, gently jiggle the quiche - it should move slightly but not wobble. The edges should be golden brown, and the center should be just set with no visible liquid. If the top browns too quickly, tent it loosely with aluminum foil after 20 minutes. The quiche will continue cooking after you remove it from the oven, so it's better to pull it out when it's slightly underdone.
Rest and Serve
Let the quiche rest for 10 minutes before slicing. This resting period allows the filling to set completely and makes it easier to cut clean slices. The quiche should have a golden, slightly crisp top with a creamy, cheesy center that's just set but still tender.
Serve warm or at room temperature. Each slice should have that perfect combination of flaky crust, creamy filling, and colorful vegetables. The spinach adds freshness, the bell pepper provides a slight crunch, and the sharp cheddar gives it that rich, cheesy flavor we all love in a quiche.
Pro Tips For Making Gluten Free Bisquick Quiche
- Preheat Like It’s Serious: DESCRIPTION: Your oven needs to hit 425°F and sit for 10 full minutes before the crust goes in—no exceptions. Gluten-free crusts burn faster than regular ones, and I’ve learned this the hard way after pulling out a sad, flat biscuit base. Trust me, the extra wait guarantees a golden, flaky texture instead of a sad, gray one.
- Whisk Eggs Until They Fight Back: DESCRIPTION: Beat those eggs and cream until the mixture leaves visible streaks when you lift the whisk. I used to stop when it looked "mixed enough," but that’s how you end up with a dense, rubbery quiche. A few extra seconds of vigorous whisking means a silky, custardy filling—worth the arm workout.
- Skip the Overmixing: DESCRIPTION: Once you fold in the cheese, stop stirring the second it’s just combined. Gluten-free Bisquick is delicate, and overworking it turns the crust into a tough, chewy mess. Think "marble swirl" of cheese, not "cheese paste." Your future self will thank you when the crust stays tender.
- Butter the Crust Again: DESCRIPTION: After pressing the Bisquick into the pan, dot it with extra butter—about 1 tablespoon total—before adding the filling. This isn’t just for flavor; it creates steam during baking, which keeps the crust from drying out. (Yes, even if you already greased the pan.) It’s the difference between a quiche and a quiche that’s actually worth serving.
Perfect pairings for this gluten free bisquick quiche
Side Dish Pairings
A vibrant berry compote made with fresh strawberries, blueberries, and a touch of honey balances the richness beautifully. Simmer 2 cups mixed berries with 1 tbsp lemon juice and 1 tbsp honey> for 10 minutes—the tartness cuts through the creamy quiche filling. 🍓
For a savory contrast, serve with a crisp arugula salad tossed in 2 tbsp olive oil, 1 tbsp balsamic vinegar, and a pinch of flaky sea salt.
The peppery greens complement the cheesy filling without overpowering it. Alternatively, roasted sweet potatoes with a sprinkle of smoked paprika add warmth and texture.
Beverage Matchups
A bold black coffee with a splash of heavy cream enhances the quiche’s richness—especially if you prefer a strong brew. For a lighter option, chai tea (spiced with cinnamon and cardamom) complements the garlic powder in the filling. The warm spices echo the savory notes without competing. ☕
For brunch gatherings, a crisp Sauvignon Blanc from New Zealand offers bright acidity that cleanses the palate between bites. If you prefer beer, a Belgian witbier with its citrus and coriander notes provides a refreshing contrast to the cheesy filling. 🍷
Topping Enhancements
Add a dollop of sour cream or crème fraîche to each slice for a cooling contrast. Stir in 1 tsp fresh dill and a pinch of smoked salt for an extra layer of flavor. The tangy cream balances the sharp cheddar perfectly. 🥄
For a pop of color and crunch, sprinkle toasted pumpkin seeds or crumbled bacon on top before serving. The seeds add a nutty crunch, while the bacon brings smoky depth—ideal for heartier breakfasts. Both toppings elevate the dish to restaurant-quality without extra effort.
Nutrition facts
Frequently asked questions
Can I use regular Bisquick instead of gluten-free?
The recipe is specifically designed with gluten-free Bisquick to ensure the crust stays tender and flaky without gluten. Regular Bisquick would contain gluten, so it wouldn't meet dietary restrictions. However, if you're not avoiding gluten, you could try a 1:1 substitution—but the texture might be slightly denser.
Why does my gluten-free crust turn out crumbly?
Crumbly crusts usually happen when the butter melts too quickly during mixing or if the dough isn't chilled long enough. Always use cold butter and work quickly to keep it cold. Also, ensure your gluten-free mix contains xanthan gum (or add 1/2 teaspoon separately) to help bind the crust. Chill the dough for the full 20 minutes before baking.
Can I make this quiche ahead of time?
This quiche actually tastes better the next day. Assemble it, bake as directed, then let it cool completely. Store it in an airtight container in the fridge for up to 4 days. Reheat slices at 350°F for 10 minutes to restore crispiness. The flavors meld beautifully overnight!
What are good fillings for this gluten-free quiche?
This crust works wonderfully with any quiche filling! Try sausage and peppers, ham and Swiss, or mushroom and thyme for a vegetarian option. For extra richness, add 1/2 cup sour cream to the egg mixture. The gluten-free crust holds up perfectly to all these variations.
How do I prevent a soggy bottom in the crust?
Pre-baking the crust is key! Blind-bake it with pie weights for 15 minutes before adding the filling. This creates a sturdy base that won't absorb moisture. Also, sprinkle 2 tablespoons flour on top of the filling before baking—it creates a protective barrier. The crust should be set but not browned before adding the filling.